
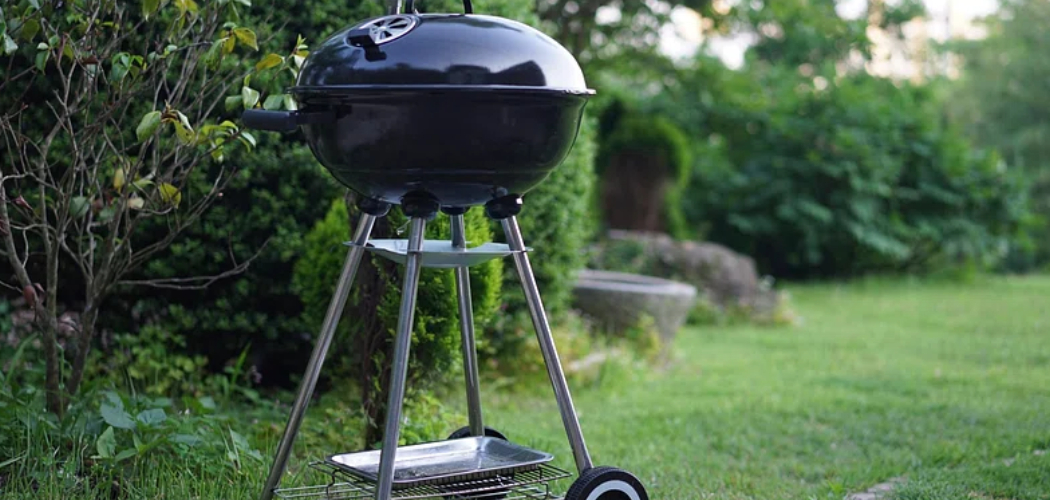
Few things beat the smoky, charred flavor of food cooked on a Weber kettle. But after a few good cookouts, that trusty charcoal grill picks up greasy soot, ash buildup, and a sticky layer of smoke residue that dulls its performance and your appetite.
The good news? You don’t need a pro or pricey supplies to get it gleaming again. With a few basics from your kitchen and a little elbow grease, you can bring your grill back to life right in the backyard.
If you’ve wondered how to clean a weber kettle without making it a weekend-long chore, you’re in the right place. This guide walks you through every step, from clearing out ash to drying the lid, so your grill cooks hotter, cleaner, and tastes better every single time.

Why Cleaning a Weber Kettle Matters
A clean grill does more than look sharp. Built-up grease and charcoal residue clog the airflow your charcoal grill depends on, which means weaker heat, longer cook times, and uneven results. Clearing it out improves airflow, sharpens flavor, and prevents flare-ups that can ruin a meal or singe your dinner.
Regular grill maintenance also fights rust, the silent enemy that eats away at the bowl and grates and shortens your equipment’s life. A well-kept kettle simply lasts longer.
This skill shines outdoors too. Campers and outdoor beginners quickly learn that clean cooking gear is half the battle when you’re away from home. Knowing how to care for your grill builds self-reliance, keeps your equipment usable trip after trip, and gives you the confidence to cook great food anywhere, even far from your own kitchen.
Tools and Materials You’ll Need
You probably have most of what you need already tucked in a cupboard. Start with a sturdy nylon brush for scrubbing the cooking grate, since it lifts charred bits without scratching the surface. A bucket of warm soapy water and a few drops of dish soap handle the greasy soot on the bowl and lid beautifully.
Keep a stack of paper towels and a soft damp cloth nearby for wiping down surfaces and the porcelain-enameled lid. You’ll also want a metal scoop or small shovel for clearing ash, plus a stainless steel bowl to collect the mess as you work. A pair of rubber gloves keeps your hands clean during the dirty parts.
One optional convenience item worth grabbing is a shop vacuum, which makes clearing fine ash buildup from the bowl and ash catcher quick and nearly mess-free.
Step-by-Step Guide on How To Clean A Weber Kettle
Step 1 – Make Sure the Grill Is Completely Cool
Safety comes first, always. Never start cleaning while coals are still warm, because hidden embers can stay hot for hours and cause nasty burns or even reignite.
After your last cookout, give the grill a full day to cool, or at least several hours until the bowl feels cold to the touch. Lift the lid and check the charcoal grate for any lingering glow before you reach in.
While you wait, gather your supplies and pull on your gloves. This pause isn’t wasted time. It protects you and lets the leftover charcoal residue settle, making the ash easier to scoop out cleanly. Patience here sets you up for a smooth, safe cleaning session from start to finish.
Step 2 – Remove the Cooking Grates and Charcoal Grate
Once everything’s cool, lift out the cooking grate and the charcoal grate beneath it. Set them aside on an old towel or some newspaper to catch the falling soot and crumbs.
You’ll notice the grates feel gritty and coated in blackened, greasy buildup. That’s normal. Knocking off the loose debris now means less scrubbing later.
Give each grate a firm tap against the inside of your stainless steel bowl to shake free the bigger flakes of charcoal and ash. Take a quick look at both grates for any heavy rust spots while you’re at it. Getting these pieces out of the way opens up full access to the bowl, where most of the real grime hides.
Step 3 – Clear Out the Ash Buildup
Now tackle the ash. Use the one-touch cleaning system by sweeping the blades back and forth a few times, which pushes the ash buildup down into the ash catcher below.
You’ll hear that gentle, gritty whoosh as the fine gray powder drops through. Remove the ash catcher, tip it into a trash bag or your stainless steel bowl, and empty it completely.
For the stubborn ash clinging to the bottom of the bowl, a metal scoop or your optional shop vacuum makes short work of it. Clearing every bit matters, since leftover ash holds moisture and speeds up rust. A clean, dry bowl also restores the airflow your charcoal needs to burn hot and even next time.
Step 4 – Scrub the Cooking Grates
Time to revive those grates. Dip your nylon brush into the warm soapy water and scrub each grate in firm, steady strokes, working along the bars and into the corners.
You’ll watch the greasy smoke residue and charred crust lift away, revealing clean metal underneath. The bristles cut through the gunk without gouging the surface, which is exactly what you want.
For really stubborn spots, let the grates soak in the soapy water for ten minutes first, then scrub again. Rinse them well with clean water until no soap or grime remains. Run your fingers along the bars to confirm they’re smooth. Clean grates mean better grill marks, truer flavor, and no old burnt taste sneaking into tonight’s dinner.

Step 5 – Wash the Bowl and Interior
With the grates drying, turn to the bowl itself. Knowing how to clean a weber kettle properly means giving this inner surface real attention, since this is where built-up grease collects the most.
Dunk a cloth or sponge in your warm soapy water and wipe down the interior walls. You’ll feel the slick, greasy film give way as you work in small circles.
For caked-on charcoal residue, a little extra soap and a soft scrub do the trick. Avoid harsh metal scrapers that could chip the enamel. Rinse the bowl with clean water and wipe it out. A fresh, grease-free interior burns cleaner, cuts down on flare-ups, and keeps that smoky flavor pure and pleasant.
Step 6 – Clean the Lid Inside and Out
The lid deserves love too. Inside, you’ll often find a flaky, dark coating that looks like peeling paint but is actually carbonized smoke residue, totally normal and harmless.
Brush the loose flakes away with your nylon brush, then wipe the interior with a damp cloth. Don’t scrub too hard here, since that dark layer actually helps season the grill.
For the porcelain-enameled lid outside, use warm soapy water and a soft cloth to lift the greasy soot and fingerprints. Buff it gently until that glossy finish shines again. Wipe down the handle and any vents while you’re there. A clean lid seals better, holds heat evenly, and looks great sitting proudly on your patio.
Step 7 – Check and Clear the Vents
Your grill breathes through its vents, so keep them clear. Both the top vent on the lid and the bottom vents on the bowl control the airflow that fuels your fire.
Look closely and you’ll likely spot ash and greasy gunk packed into the openings. Use your brush or a damp cloth to work the debris loose, then wipe everything clean.
Open and close each vent a few times to make sure it moves freely without sticking. Smooth-moving, debris-free vents let you control your cooking temperature with ease. Clogged ones choke the fire and leave you fighting weak, uneven heat. This quick step makes a real difference in how well your next cookout turns out.
Step 8 – Dry Everything Thoroughly
Drying is the step too many folks skip, and it matters for rust prevention. Take a clean, dry cloth and wipe down the bowl, lid, and grates until no moisture remains.
Pay special attention to seams, corners, and the bottom of the bowl where water loves to pool. Even a little trapped dampness invites rust over time.
If it’s a sunny day, let the parts air-dry in the open for an hour as a backup. Then reassemble the grill, sliding the charcoal grate and cooking grate back into place. Pop the lid on top, and your kettle is ready for action. A fully dry grill stays solid and reliable for many seasons to come.

Critical Mistakes When Cleaning a Weber Kettle
Even a simple cleaning routine can backfire if you fall into a few common traps, so let’s cover the ones that cause the most trouble.
The biggest mistake is cleaning while the grill is still hot. Hidden embers stay live far longer than you’d expect, and reaching into a warm bowl risks serious burns. Always wait until everything is cold to the touch.
Another frequent error is leaving ash sitting in the bowl for weeks. Ash absorbs moisture like a sponge, and that trapped dampness accelerates rust, eating through the metal and shortening your grill’s life. Empty it after every few cookouts.
Many people also scrub the porcelain-enameled lid and bowl with harsh metal scrapers or steel wool. These scratch and chip the enamel coating, leaving bare spots that rust quickly. Stick to a nylon brush and soft cloth instead.
Skipping the drying step is another costly slip. Putting the grill away wet practically guarantees rust at the seams. Finally, some folks scrub away the dark layer inside the lid, not realizing it actually protects and seasons the grill. Leave that coating alone and your kettle will thank you.
Expert Tips
A few smart habits keep your kettle in top shape with hardly any extra effort.
Give the cooking grate a quick brush while it’s still slightly warm right after eating, since fresh grease lifts off far more easily than residue that’s had time to harden overnight.
Empty the ash catcher regularly rather than letting it pile up, especially before rainy weather. Dry ash is harmless, but wet ash invites rust fast.
Store your kettle under a cover or in a sheltered spot to shield it from rain and snow. Less moisture means far less corrosion. And once a season, do a deep clean of the bowl and vents to keep airflow strong. These small routines protect your investment and keep every cookout tasting its best.
Frequently Asked Questions
How often should I clean my Weber kettle?
Give the cooking grate a quick brush before or after each cookout to keep it fresh. Empty the ash catcher every two or three uses so moisture doesn’t build up. Then plan a deeper clean of the bowl, lid, and vents once a month during grilling season, or whenever you notice heavy greasy soot and charcoal residue slowing things down.
Can I use water inside the bowl of my Weber kettle?
Yes, warm soapy water is perfectly safe for cleaning the bowl and grates. Just make sure you dry everything thoroughly afterward, since trapped moisture is what causes rust. Wipe down the interior with a clean cloth, reach into the seams and corners, and let the parts air-dry before reassembling. A dry bowl burns cleaner and lasts much longer.
Should I scrub the black layer inside the lid?
No, leave it alone. That dark, flaky coating is carbonized smoke residue, and it actually helps season your grill and protect the metal. Just brush away the loose flakes that could drop onto your food, then wipe the surface with a damp cloth. Scrubbing it off only exposes bare metal and offers no real benefit to your cooking.
What’s the best way to prevent rust on my grill?
Rust prevention comes down to keeping things dry and clean. A few simple habits help:
- Empty ash regularly, since it traps damaging moisture
- Dry every part fully after washing
- Store the grill under a cover or in a sheltered spot
- Touch up any chipped enamel promptly
Stay consistent and your kettle will resist rust for years.
Do I need special cleaners for a Weber kettle?
Not at all. Warm soapy water and a nylon brush handle nearly every cleaning job, from greasy grates to the bowl interior. Harsh chemical cleaners and abrasive scrubbers can actually damage the porcelain-enameled finish, so they do more harm than good. Stick to gentle dish soap, a soft cloth, and a little patience for safe, effective grill maintenance.
Conclusion
Bringing your charcoal grill back to its clean, hot-burning best is one of the most satisfying backyard wins around. With just a nylon brush, some warm soapy water, and a soft cloth, you’ve cleared out the ash buildup, scrubbed away greasy smoke residue, and protected the bowl and lid from rust, all without harsh chemicals or expensive help.
Keep the key moves in mind: let the grill cool completely, remove and scrub the grates, clear the ash, wash the bowl, wipe the lid, clean the vents, and dry everything thoroughly. Each step boosts airflow, sharpens flavor, and stretches your grill’s life by years.
Now that you know how to clean a weber kettle the right way, you can keep it ready for action season after season with quick, regular care. Brush the grates often, empty the ash before it sits, and store your kettle somewhere dry. Set aside a little time after your next cookout, give your hardworking grill the care it deserves, and enjoy better-tasting food at every gathering.

About
Nick Hall has spent the last seven years working at the intersection of kitchen design and home repair — first as a design assistant at a residential renovation studio, then as a freelance writer covering everything from cabinet layouts to leaky faucet fixes.
Her approach is simple: kitchens should look good and function well. That means she’s just as comfortable talking about color palettes and counter materials as she is walking readers through how to fix a wobbly cabinet hinge or troubleshoot a garbage disposal.
Nick has worked directly with homeowners on small-space kitchen makeovers, budget-conscious renovations, and the kind of everyday repairs that don’t need a contractor — just the right instructions. She writes from experience, not theory, and tests most of the fixes and tips she shares before publishing them.
When she’s not writing, Nick is usually hunting for mid-century kitchen finds at estate sales or helping friends plan their own renovations. She lives in Columbus, Ohio.