
A stuck can of beans should never ruin dinner. Yet plenty of home cooks struggle with a simple tool that opens canned food in seconds. Learning how to use a hand can opener saves you time, protects your fingers, and keeps your kitchen running smoothly when the power goes out or the electric opener dies.
You don’t need special skills. You need the right grip, the right angle, and a little practice. This guide walks you through every step, from positioning the cutting wheel to lifting the lid cleanly.
By the end, you’ll open any can with confidence — no jagged edges, no slips, no frustration. Let’s turn a frustrating chore into a five-second task you barely think about.
Why Mastering a Manual Can Opener Matters
Electric openers fail. Batteries die. Power cuts out during storms. A manual opener keeps working no matter what.
This skill matters most for campers, beginners, and anyone building a reliable kitchen. When you camp or travel, you carry a small metal tool — no cords, no outlets, no fuss. You open soup, beans, or tuna anywhere.
A manual opener also gives you more control. You decide the speed. You feel the cut. You stop the moment the lid releases. That control means fewer sharp edges and fewer cuts.
It’s cheaper too. A quality manual opener costs a few dollars and lasts years with simple care. Master this one tool and you remove your dependence on gadgets that break. You stay ready for any meal, any time, anywhere.
Tools and Materials You’ll Need
Gather a few basics before you start. You won’t need much.
- Open cans in seconds — a sturdy hand can opener with a sharp cutting wheel
- Grip securely without strain — a clean, dry kitchen towel or rubber pad
- Protect your hands — a flat, stable countertop or table surface
- Catch the lid safely — the sealed can of food you want to open
- Clean up fast — a small dish or paper towel for the cut lid
Optional but handy: a magnetic lid lifter. It grabs the loose lid so your fingers never touch the sharp edge. This small add-on costs little and removes the one risky part of the whole job.
Keep your tools clean and dry. A rusty cutting wheel slips and tears metal instead of slicing it cleanly.
Step-by-Step Guide on How to Use a Hand Can Opener
Step 1 – Set Up Your Workspace
Start with a clean, dry surface at a comfortable height. A wobbly table makes the job harder and riskier.
Place the can upright in front of you. Wipe the top with a towel to clear any dust or moisture. A dry lid grips better and keeps the cutting wheel from slipping.
Stand or sit so your shoulders stay relaxed and your elbows have room to move. You want a steady stance, not a cramped one.
Keep a small dish nearby for the lid. Push any clutter aside. The cleaner your space, the more control you have. This setup takes ten seconds and prevents most slips before they happen. A good start makes every step that follows feel easy.
Step 2 – Inspect the Opener
Check your tool before you cut. Look at the cutting wheel — it should be sharp, clean, and free of rust.
Turn the handle a few times in the air. The gears should move smoothly with a quiet, even click. If they grind or stick, add a drop of cooking oil to the joint and turn again.
Run your finger near the feed wheel, the small toothed gear that grips the can rim. It should feel firm, not loose. A worn feed wheel won’t hold the can in place.
A clean, working opener cuts in one smooth pass. A dull one tears the metal and leaves jagged edges. Thirty seconds of inspection saves you a frustrating, messy struggle later.
Step 3 – Position the Cutting Wheel
Hold the can steady with one hand. With the other, open the two arms of the hand can opener like a pair of scissors.
Set the round cutting wheel on top of the can’s rim, just inside the raised metal lip. The feed wheel should sit underneath the lip, gripping the edge from below.
Line them up so the wheel points straight down into the lid, not at an angle. You’ll feel them settle into place with a gentle bite.
Squeeze the two handles together firmly. You should hear a small pop or feel a slight crunch as the wheel pierces the metal. That sound means you’re locked in and ready to cut. Take a breath and check your grip stays tight.
Step 4 – Lock the Opener in Place
Keep squeezing the handles together until the cutting wheel breaks through the lid. You’ll feel the resistance give way as the point sinks in.
Hold that pressure. Don’t let go. The wheel and feed wheel now pinch the rim from both sides, holding the can firmly without your second hand.
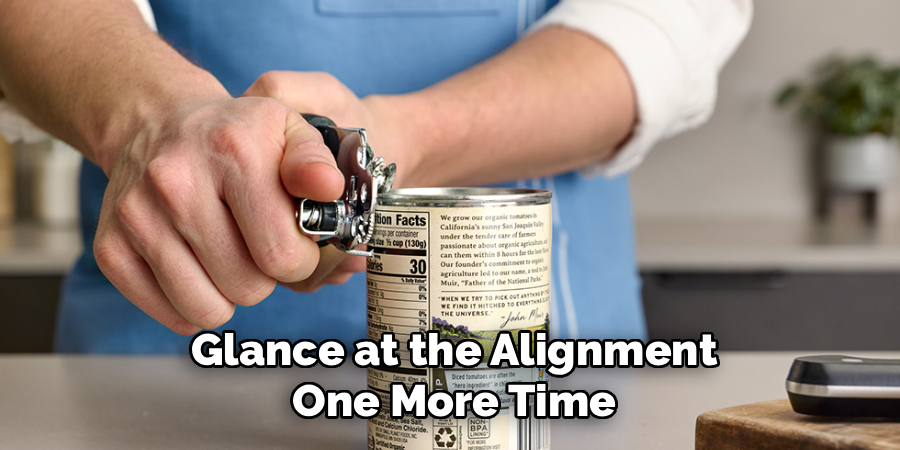
Glance at the alignment one more time. The cutting wheel should sit snug against the inside wall of the rim. The feed wheel teeth should grip the outer edge.
If the opener wobbles or slides, release, reposition, and squeeze again. A solid lock is the whole secret here. Get this right and the rest happens almost on its own. A loose start leads to a torn, uneven cut every time.
Step 5 – Turn the Handle
Now bring it to life. Turn the handle clockwise in slow, steady circles.
Keep firm pressure on the squeezed handles as you turn. The feed wheel pulls the can rim forward while the cutting wheel slices through the metal. You’ll feel a smooth, rhythmic motion and hear a soft tearing sound as the lid opens.
Turn at an even pace. Rushing makes the wheel skip and leaves rough spots. Too slow wastes effort. Find a comfortable rhythm and stick with it.
Watch the cut travel around the rim. Most cans take six to ten full turns. Keep your grip tight the entire time so the opener stays locked. Steady hands and steady turns give you a clean, even cut.
Step 6 – Complete the Full Rotation
Keep turning until the cutting wheel nears your starting point. You’ll see the lid separate from the can wall as you go.
Slow down for the last inch. Leave a tiny uncut section — about the width of a fingernail — so the lid stays attached and doesn’t drop into your food.
Stop turning. Release the pressure on the handles. Lift the opener straight up and set it aside.
The lid should now hang loose, joined by one small hinge of metal. This little trick keeps the sharp disc from falling in and saves you from fishing it out. You’ve done the hard part. The can is open and your fingers are safe. Take a moment to admire that clean, even edge.
Step 7 – Lift the Lid Safely
The lid is sharp, so handle it with care. Never push your fingers down into the can.
Use a knife tip, a fork, or a magnetic lid lifter to pry the loose lid upward. Bend it back on its small hinge until it snaps free or folds out of the way.
If you used a magnetic lifter, the lid sticks right to it — no contact, no risk. Drop the lid straight into your dish or trash.
Run your eye around the can’s rim. Most edges come out smooth, but check for any sharp burrs before you reach inside. Wipe the rim with a towel if needed. Now your canned food is ready to pour, scoop, or cook. Clean, quick, and cut-free.
Step 8 – Clean Your Opener
Finish strong by caring for your tool. Food and juice cling to the cutting wheel and feed wheel after every use.
Rinse the head under warm water right away. Use an old toothbrush to scrub between the gears where bits hide. Dried food dulls the blade and breeds rust.
Dry the opener completely with a towel. Pay special attention to the wheels and the joint. Moisture left behind causes rust within days.
Store it in a dry drawer, not a damp sink caddy. A drop of cooking oil on the gears once a month keeps everything turning smoothly. Treat your opener well and it serves you for years. Two minutes of cleaning now means a sharp, reliable tool next time.
Critical Mistakes to Avoid When Opening Cans by Hand
The most common mistake is poor alignment. People set the cutting wheel on top of the lid instead of inside the rim. The wheel skids, scratches the metal, and never breaks through. Always seat the wheel just inside the raised lip so it bites the right spot.
The second mistake is gripping too loosely. When you ease off the handles mid-turn, the opener pops free and you lose your place. The cut becomes jagged and uneven. Keep steady pressure on both handles from the first pierce to the final turn. Your second hand can rest once the lock holds.
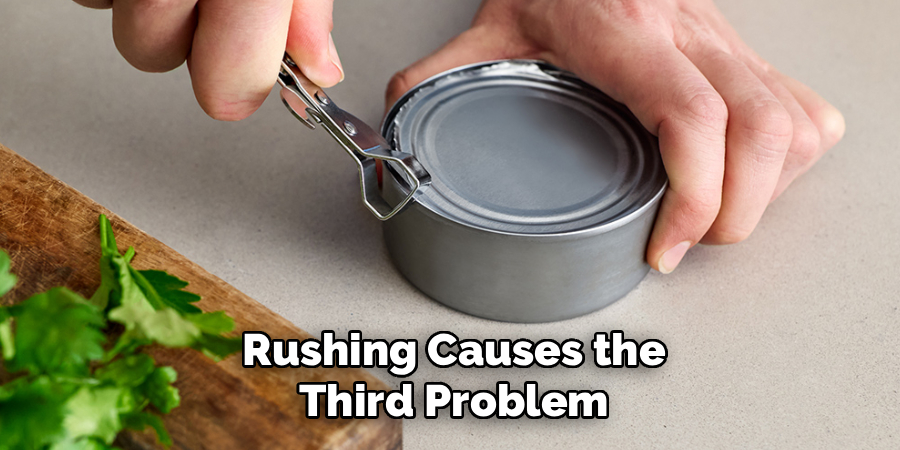
Rushing causes the third problem. Turning the handle too fast makes the wheel jump and skip, leaving sharp, torn edges. Slow, even turns cut cleaner and faster than frantic spinning ever will.
Many people also forget to leave that small uncut hinge. They cut all the way around, and the lid drops straight into the food. Then they fish out a sharp disc with their fingers. Stop just short of the start point and pry the lid up safely instead.
Finally, neglecting cleaning ruins good tools. Food residue dulls the blade and feeds rust. Rinse and dry your opener after every use.
Expert Tips
Want smoother results every time? Press down slightly on the cutting wheel during the first turn. This deepens the initial bite and stops the wheel from popping off.
Match your grip to the can size. Large cans need firmer pressure because the rim is thicker. Small cans cut with a lighter touch.
Keep your opener sharp. A drop of oil on the gears monthly prevents rust and keeps the wheel slicing cleanly. A dull wheel is the number one cause of jagged edges.
Left-handed? Flip the can toward you and turn counterclockwise — the motion works the same in reverse.
For arthritis or weak grip, choose a model with thick rubber handles and a turn key on top. These designs cut hand strain dramatically and give you far better leverage on stubborn lids.
Frequently Asked Questions
Why won’t my can opener cut through the lid?
Your cutting wheel is probably dull, rusty, or misaligned. Check these three things:
- Sharpness — a worn wheel tears instead of slicing
- Position — set the wheel just inside the rim, not on top of the lid
- Pressure — squeeze the handles firmly until you feel the metal pierce
Clean and oil the wheel. If it still fails after these fixes, the blade has worn out and the tool needs replacing.
Is a manual can opener safe to use?
Yes, a manual opener is very safe when you follow the steps. Keep firm pressure on the handles so the tool stays locked. Leave a small uncut hinge so the lid never falls into your food. Use a knife or magnetic lifter to remove the loose lid — never your bare fingers. Check the rim for sharp burrs before reaching inside.
How do I avoid sharp edges on the can?
Sharp edges come from rushing and dull blades. Turn the handle slowly and evenly for a clean cut. Keep your cutting wheel sharp and rust-free. Leave a tiny uncut section so the lid lifts off in one piece instead of tearing. A smooth, steady rotation produces the cleanest rim every time and keeps your fingers safe.
Can I open cans without any can opener at all?
Yes, but it’s harder and riskier. Rub the can’s top edge against a rough concrete surface until the seal weakens, then squeeze the sides to pop the lid. A sturdy metal spoon also works by pressing and rocking against the inner rim. Both methods take effort and leave rough edges, so a proper opener is always the safer choice.
How do I clean and store my opener properly?
Clean and dry it after every use to prevent rust. Follow these steps:
- Rinse the head under warm water right away
- Scrub between the gears with an old toothbrush
- Dry completely with a towel
- Store in a dry drawer, not a wet sink caddy
Add a drop of cooking oil to the gears monthly to keep them turning smoothly.
Conclusion
Opening a can by hand is a skill you’ll use for life. Set up a clean space, inspect your tool, position the cutting wheel inside the rim, and turn the handle in slow, steady circles. Leave that small hinge, lift the lid safely, and clean your tool when you finish.
Master these steps and you’ll never fear a stuck can again. You stay ready during power cuts, camping trips, and busy weeknight dinners. You protect your fingers from sharp edges. You save money on gadgets that break.
Practice on a few cans this week. Each one feels easier than the last until the whole process takes just seconds. Soon you’ll reach for your hand can opener without a second thought, opening canned food smoothly and safely every single time.
A simple tool, used well, makes your kitchen more reliable. Grab a can, follow these steps, and prove to yourself how easy it really is. You’ve got this.
