
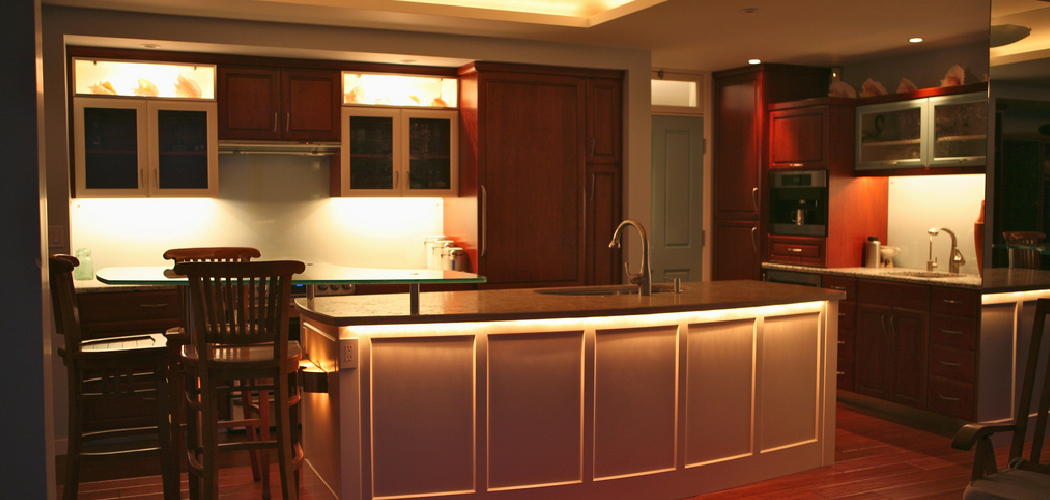
Old fluorescent kitchen lights can make a room feel dull, harsh, or dated. You may notice flickering tubes, yellowed plastic covers, buzzing sounds, or dark corners over your counters. Updating that fixture can improve light quality, reduce energy use, and make your kitchen workspace feel cleaner and easier to use.

Learning how to update fluorescent kitchen lighting does not mean you must become an electrician. Many beginner-friendly upgrades, such as replacing tubes, changing a light cover, or choosing an LED retrofit kit, are simple when you follow safe steps.
This guide explains your main options, safety checks, and installation basics so you can update your kitchen lighting with more confidence.
Why Updating Fluorescent Kitchen Lighting Matters
Better kitchen lighting helps you cook, clean, read labels, and use sharp tools safely. It also matters in RVs, cabins, tiny homes, and outdoor kitchens where light fixtures may be older, dimmer, or harder to service.
For campers and outdoor beginners, this skill is useful because portable and off-grid spaces often rely on low-energy lighting. Swapping fluorescent tubes for LED lighting can reduce power draw, extend battery life, and improve visibility after sunset.
A brighter ceiling fixture can also make a small space feel less cramped. Once you understand brightness, color temperature, wiring safety, and fixture choices, you can make smarter lighting decisions almost anywhere.
Tools and Materials You’ll Need
Gather your supplies before you start. Good preparation keeps the job safer and helps you avoid standing on a ladder while searching for parts.
- Safety glasses
- Work gloves
- Step ladder
- Non-contact voltage tester
- Screwdriver set
- Tape measure
- Replacement fluorescent tubes, LED tubes, LED retrofit kit, or replacement fixture
- Wire connectors, if your project requires wiring
- Painter’s tape and a marker for labeling wires
- Soft cloth for cleaning the fixture housing
- Optional: headlamp for hands-free light while power is off
Match your materials to your upgrade plan. Some LED tubes work with an existing ballast, while others require bypass wiring or a full fixture replacement.
Step-by-Step Guide on How to Update Fluorescent Kitchen Lighting
Step 1 – Inspect the Existing Fixture
Start by looking closely at your current ceiling fixture. Notice its size, shape, light cover, tube length, and how it mounts to the ceiling. Many kitchen fluorescent fixtures use long linear tubes behind a plastic diffuser, while others sit inside a recessed light box.
Listen for buzzing and watch for flickering when the light turns on. Those signs may point to an aging ballast, worn tubes, or loose connections. If the plastic cover looks brittle or stained, replacing it may improve the look even before you change the light source.

Before you decide how to update fluorescent kitchen lighting, write down the tube size and fixture dimensions.
Step 2 – Choose Your Upgrade Type
Next, decide whether you want a simple tube swap, an LED retrofit, or a full replacement fixture. A tube swap is the easiest option if your fixture still works and compatible LED tubes are available. This can improve energy efficiency with little change to the ceiling.
An LED retrofit may give you better brightness and longer life, but some kits require wiring changes. A full replacement fixture gives the cleanest look if you want a modern flush mount, panel light, or track-style kitchen light.
Think about your comfort level. If wiring feels confusing, choose a plug-and-play option or hire a licensed electrician.
Step 3 – Turn Off Power at the Breaker
Safety comes first. Turn off the wall switch, then shut off power at the breaker panel. Do not rely on the light switch alone because someone could flip it while you work.
Once the power is off, place a piece of tape over the switch as a reminder. If another person is nearby, tell them you are working on the fixture. The kitchen may feel oddly quiet without the hum of the fluorescent light, but that silence is a good sign.
Use a non-contact voltage tester near the fixture wires or sockets before touching anything inside. If the tester shows power, stop and recheck the breaker.
Step 4 – Remove the Light Cover and Tubes
Climb the ladder carefully and keep both feet steady. Remove the light cover by sliding, flexing, or lifting it according to the fixture design. Old plastic diffusers can crack, so use gentle pressure and keep one hand under the cover.
Take out the fluorescent tubes by rotating each tube about a quarter turn until the pins line up with the slots. Then lower the tube slowly. The glass may feel cool and fragile, and old tubes can leave a dusty film on your gloves.
Set tubes aside in a safe place. Many areas require proper recycling because fluorescent lamps contain small amounts of mercury.
Step 5 – Check the Ballast and Wiring Layout
With the tubes removed, look inside the fixture housing. You may see a rectangular ballast, wires, lamp holders, screws, and old dust near the metal channel. The ballast controls fluorescent tubes, but many LED upgrades either use it, replace its function, or bypass it.
Read the label on the ballast if it is visible. This helps you choose compatible LED tubes. If wires look burned, brittle, loose, or damaged, do not continue with a DIY repair.
For many first-time users, how to update fluorescent kitchen lighting depends on whether the existing ballast stays in place or gets removed from the circuit.
Step 6 – Install the New Tubes or Retrofit Kit
Follow the instructions that came with your LED tubes or retrofit kit. For plug-and-play LED tubes, installation may be as simple as inserting the new tubes into the existing lamp holders and rotating them until they lock.

For ballast-bypass LED tubes or retrofit panels, wiring changes may be required. This can include removing the ballast from the circuit and connecting line and neutral wires to specific lamp holders. Only do this if you understand the instructions and local electrical rules.
Work slowly. Label wires before disconnecting them, tighten wire connectors, and keep all connections inside the fixture housing.
Step 7 – Test Brightness and Color Temperature
After everything is secure, restore power at the breaker and turn on the light. Stand back and check how the kitchen feels. The new light should come on quickly without buzzing, flickering, or a slow warm-up period.
Look at your counters, sink, stove, and prep areas. A warm white light feels cozy, while a neutral or cool white color temperature can make tasks easier. Many kitchens work well around 3000K to 4000K, depending on cabinet color and natural light.
If the room feels too harsh or too dim, check the lumen rating and fixture placement before making another change.
Step 8 – Secure the Fixture and Clean the Area
Turn the power off again if you need to adjust the cover, screws, or trim. Make sure the fixture housing sits firmly against the ceiling and that no wires are pinched under metal edges. A loose ceiling fixture can rattle or shift over time.
Reinstall the light cover if your fixture uses one, or attach the new diffuser that came with the replacement fixture. Wipe away dust, fingerprints, and debris from the ceiling area.
Dispose of old tubes, ballast parts, and packaging correctly. Then turn the power back on and enjoy the cleaner, brighter look of your updated kitchen.
Common Mistakes When Updating Fluorescent Kitchen Lighting
One common mistake is buying LED tubes without checking ballast compatibility. Some LED tubes work only with certain electronic ballasts, while others need the ballast removed. If you choose the wrong product, the light may flicker, fail early, or not turn on at all.
Another mistake is skipping the power test. Turning off the wall switch is not enough. Always shut off the breaker and use a voltage tester before touching wiring, sockets, or metal fixture parts.
Many beginners also focus only on brightness and ignore color temperature. A very cool light can make food and cabinets look harsh, while a very warm light may feel dim over a busy counter. Balance comfort with task lighting.
Some people replace the fixture without measuring first. A new light may not cover the old ceiling marks, screw holes, or recessed box opening. Measure the fixture and ceiling area before you buy.
Finally, do not hide damaged wiring behind a new light. Burn marks, brittle insulation, and loose connections need proper repair before any lighting upgrade.
Expert Tips
Choose lighting based on how you use the kitchen, not just how the fixture looks in the store. If you chop vegetables, read recipes, or clean fish in a cabin kitchen, you need clear task lighting with even coverage.
Check lumens instead of watts when comparing LED products. LEDs use fewer watts, so lumens tell you more about actual brightness. Also look for a good color rendering rating if you want food, counters, and finishes to look natural.
If your old fluorescent fixture sits inside a large ceiling box, consider a flat LED panel or a wide replacement fixture. It can cover marks while giving the room a cleaner finish.
Frequently Asked Questions
Can I replace fluorescent tubes with LED tubes?
Yes, you can often replace fluorescent tubes with LED tubes, but you must choose the right type. Some LED tubes work with the existing ballast, while others require ballast bypass wiring. Check the tube label, fixture type, and ballast compatibility before buying. If the instructions mention rewiring and you are not comfortable with it, call an electrician.
Do I need to remove the ballast?
Not always. Plug-and-play LED tubes usually use the existing ballast, which makes installation easier. Direct-wire LED tubes require you to bypass or remove the ballast from the circuit. Removing a ballast can improve long-term efficiency and avoid future ballast failure, but it involves wiring work. Follow the product instructions and local electrical codes.
What color temperature is best for a kitchen?
Many kitchens look best with light between 3000K and 4000K. A 3000K light feels warm and welcoming, while 4000K gives a cleaner, brighter task-light feel. If your kitchen has dark cabinets or limited daylight, a neutral white light may help. Avoid choosing only by appearance in the package; check the Kelvin rating.
Is updating fluorescent kitchen lighting safe for beginners?
It can be safe if you choose a simple upgrade and follow electrical safety steps. Replacing tubes or a light cover is usually beginner-friendly. Any project involving fixture wiring, ballast bypass, or damaged electrical parts requires more care. Always turn off power at the breaker, test for voltage, and hire a professional if anything feels uncertain.
What should I do with old fluorescent tubes?
Do not throw fluorescent tubes into regular trash unless your local rules allow it. These tubes contain a small amount of mercury and should usually go to a recycling center, hazardous waste site, or store collection program. Keep old tubes from breaking during transport. Wrap them in cardboard or place them in the new tube packaging.
Conclusion
Updating an old fluorescent kitchen light can make your space brighter, safer, and more pleasant to use. Start by inspecting the fixture, choosing the right upgrade path, and turning off power at the breaker. Then remove the cover and tubes, check the ballast, install the correct LED retrofit or replacement fixture, and test the final light quality.
Take your time with measurements, compatibility, brightness, and color temperature. These details help you avoid flicker, poor lighting, and unnecessary returns. If the project involves wiring you do not understand, bring in a licensed electrician rather than guessing.
Now that you know how to update fluorescent kitchen lighting, you can approach the project with a clear plan and better safety habits. A thoughtful lighting upgrade can change the whole feel of your kitchen, whether it is in a home, RV, cabin, or campsite cooking space.

About
Nick Hall has spent the last seven years working at the intersection of kitchen design and home repair — first as a design assistant at a residential renovation studio, then as a freelance writer covering everything from cabinet layouts to leaky faucet fixes.
Her approach is simple: kitchens should look good and function well. That means she’s just as comfortable talking about color palettes and counter materials as she is walking readers through how to fix a wobbly cabinet hinge or troubleshoot a garbage disposal.
Nick has worked directly with homeowners on small-space kitchen makeovers, budget-conscious renovations, and the kind of everyday repairs that don’t need a contractor — just the right instructions. She writes from experience, not theory, and tests most of the fixes and tips she shares before publishing them.
When she’s not writing, Nick is usually hunting for mid-century kitchen finds at estate sales or helping friends plan their own renovations. She lives in Columbus, Ohio.