
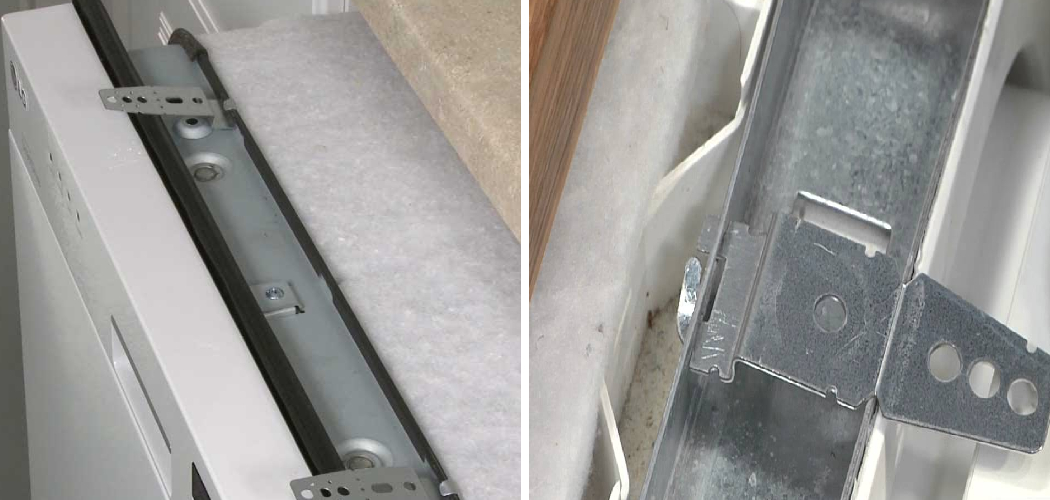
That little metal bracket might seem like an afterthought, but it’s the piece that keeps your dishwasher steady and safe. Without it, the unit can tip forward when you pull out a loaded bottom rack, and nobody wants that surprise.
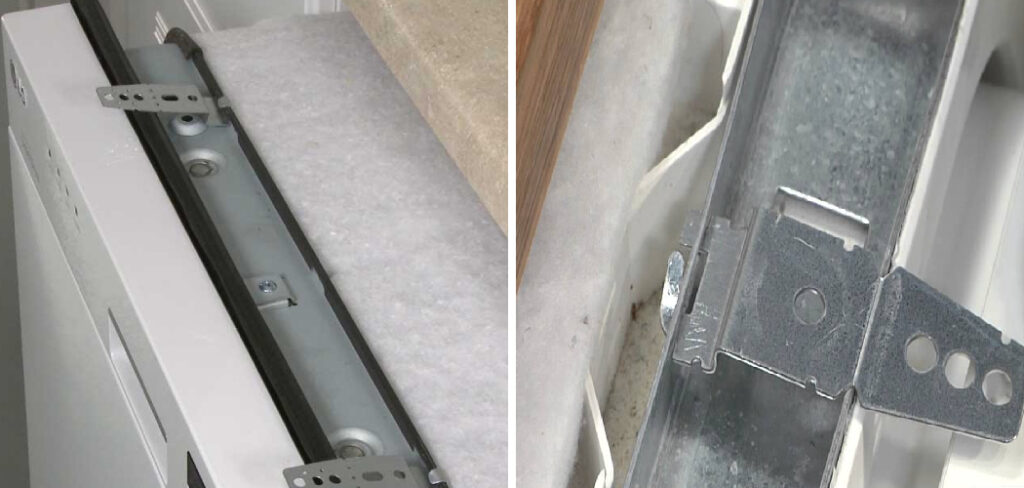
The good news? Learning how to install dishwasher mounting bracket hardware is far simpler than it looks. You don’t need a contractor or a fancy toolbox. With a screwdriver, a few minutes, and a bit of patience, you can anchor your dishwasher like a pro.
Whether you’re replacing an old unit or finishing a fresh installation, this small step makes a big difference in stability and longevity.
This guide walks you through every part of the process, from prep to the final tip-test, so your dishwasher sits firm and secure.
Why Learning to Install a Dishwasher Mounting Bracket Matters
This skill pays off in surprising places. Campers and outdoor beginners who set up portable or compact dishwashers in RVs, cabins, or tiny homes deal with the same brackets and fasteners, just on a smaller scale. Once you understand how an anti-tip bracket holds a unit steady, you can secure one almost anywhere.
For home cooks and kitchen-focused readers, the benefits hit closer to home. A properly mounted dishwasher won’t wobble, tip, or shift when you tug a heavy rack. That stability protects your flooring, your cabinets, and your family.
DIY appliance owners gain real confidence, too. You learn how your machine connects to the countertop and cabinet sides, which makes future repairs and replacements far less intimidating. Mastering this one small job saves service fees and keeps your kitchen running smoothly for years.
Tools and Materials You’ll Need
You won’t need much for this job. Most of these items are already sitting in a drawer or your garage.
- Screwdriver (Phillips usually, but check your screw heads)
- Cordless drill with the right bit for pilot holes
- The mounting bracket installation kit that came with your dishwasher
- Correct screws matched to bracket type and screw length
- A level to keep the unit straight and balanced
- Pencil or marker to mark pilot hole spots
- Flashlight to see into the dark cabinet opening
- Work gloves to protect your hands from sharp edges
- Cardboard or a towel to shield your flooring while you work
For one optional convenience item, grab a magnetic screw holder. It keeps tiny fasteners from vanishing into the gap under your counter and saves you a frustrating hunt later.
Step-by-Step Guide on How To Install Dishwasher Mounting Bracket
Step 1 – Turn Off the Power and Water
Safety always comes first. Before you touch the unit, head to your electrical panel and flip the breaker that controls the dishwasher. Confirm the power is fully off so you’re not working near live wires.
Next, look under your kitchen sink for the shutoff valve on the water supply line. Turn it clockwise until it stops. This keeps things dry while you work.
Take a second to listen for that quiet, powered-down hum to fade. A still, silent machine gives you peace of mind.
Lay down cardboard or a towel in front of the dishwasher to protect your flooring from scratches. This quick prep step sets you up for a clean, safe job with no nasty surprises.
Step 2 – Pull the Dishwasher Forward Slightly
With the power and water handled, gently ease the dishwasher forward a few inches. You only need enough room to reach the mounting points, not a full removal.
Grip the front edges and rock the unit slowly. Feed any visible hoses and wires along with it so nothing pulls tight or kinks behind the frame.
Listen for catching sounds as you go. If the unit resists hard, stop and check for connections still holding it in place.
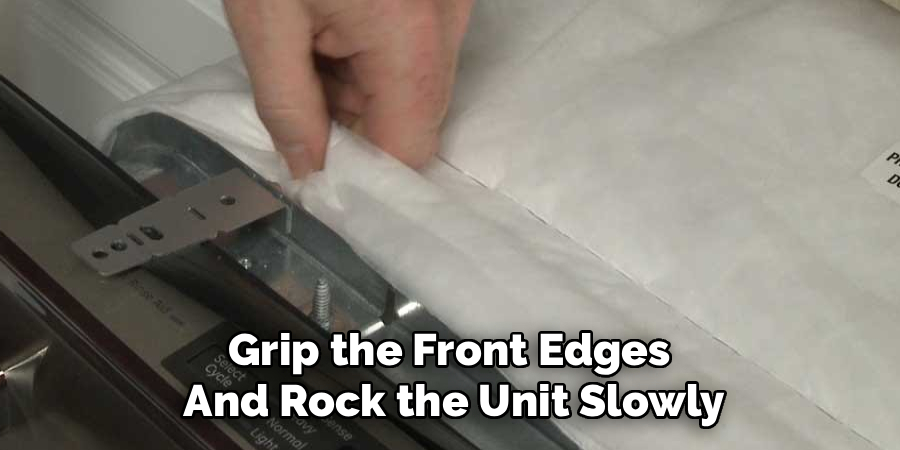
Once you’ve created a little working space, shine your flashlight into the gap. You’ll spot the toe kick panel along the bottom and the top edge where brackets usually sit. This clear view helps you plan your next moves with confidence.
Step 3 – Inspect the Cabinet Opening and Countertop
Now take a good look at where the dishwasher lives. Study the cabinet opening, the cabinet sides, and the countertop underside. This is where your brackets will anchor, so you want a clear picture first.
Run your fingers along the underside of the counter. Is it wood, laminate, or stone? This matters a lot. Wood and laminate take screws easily, but stone countertops need special handling.
Check the spacing between the dishwasher frame and the surrounding cabinets. A snug, even gap means good alignment and an easier mount.
Look for any old screw holes from a previous bracket. You can often reuse these, which saves time. A few quiet minutes of inspection here prevents headaches down the road.
Step 4 – Identify Whether You Need Top-Mount or Side-Mount Brackets
Dishwashers anchor in one of two ways, and knowing yours is half the battle. A top mount bracket attaches to the countertop underside, while a side mount bracket fastens to the cabinet sides.
Stone countertops change the game. If you have granite or quartz, you usually can’t drill into the underside, so a side mount setup is the safer choice. Forcing a top mount into stone risks cracking your expensive counter.
Check your installation kit. Most dishwashers ship with both bracket styles, so you simply pick the right one for your situation.
Hold each bracket up to its intended spot and picture the fit. Matching the bracket to your countertop material now means a secure, damage-free mount that holds for years without a single wobble.
Step 5 – Align the Bracket Holes and Mark Pilot Holes
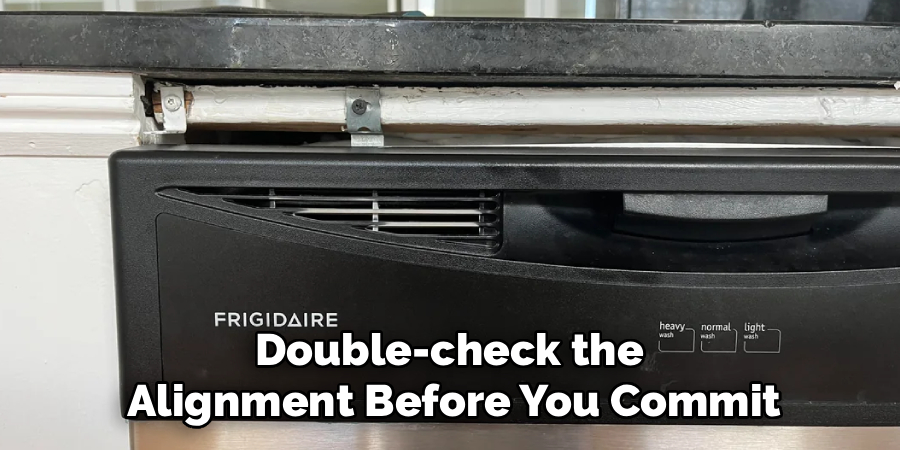
Time to get precise. Position your chosen bracket against the mounting surface, whether that’s the countertop underside or the cabinet sides. Slide it until the holes line up cleanly with the dishwasher frame.
Hold the bracket steady and grab your pencil. Mark each pilot hole spot through the bracket openings. These little marks guide your drill and keep everything straight.
Double-check the alignment before you commit. A crooked bracket leads to a crooked, wobbly dishwasher.
If your manufacturer lists spacing guidelines, follow them. They know the frame best.
For laminate or wood, drill a shallow pilot hole at each mark, matching the bit to your screw length. Go slow and steady. Skip drilling entirely on stone counters, since those brackets fasten differently.
Step 6 – Fasten the Brackets Securely
Now you’ll lock everything in place. Set the bracket back over your pilot holes and line it up one more time. Knowing how to install dishwasher mounting bracket hardware correctly really comes down to this careful, steady fastening.
Drive each screw in with your screwdriver or drill on a low setting. You want them snug and firm, not cranked down hard.
Stop the moment the screw seats fully. Overtightening strips the holes or warps the bracket, and a stripped hole won’t hold anything.
Give each fastener a gentle wiggle test once it’s in. It should feel rock solid with no give.
If a hole strips or the frame seems damaged, stop right there. Forcing more screws only makes it worse. Reposition slightly or use an anchor instead.
Step 7 – Level and Position the Dishwasher
With the brackets fastened, slide the dishwasher back into its spot. Guide it in slowly so the hoses and wires tuck behind without snagging or kinking.
Set your level on the top edge of the unit, then check it front to back and side to side. A bubble dead-center means you’re balanced.
If the dishwasher tilts, adjust the adjustable legs underneath. Turn them up or down until the unit sits perfectly straight and the brackets meet their anchor points.
A level dishwasher drains better and runs quieter, so this step is worth your patience.
Once everything lines up, the brackets should slot right against the countertop underside or cabinet sides. Snug it all into final position and admire your steady, well-set unit.
Step 8 – Check That the Unit Won’t Tip
This final test proves your work. Open the dishwasher door fully and pull out the bottom rack. Watch closely for any forward lean or tipping motion.
A properly mounted unit stays planted, even with the rack extended. If it shifts or tips, your brackets aren’t holding, so go back and tighten or reposition them.
Gently press down on the open door, mimicking the weight of loaded dishes. The dishwasher should hold firm without rocking.
Run your hand along the seams to confirm everything sits flush.
Once the unit passes the tip-test, restore the power at the breaker and reopen the water shutoff valve. Then run a quick empty cycle to make sure all your connections stayed dry and secure.
Critical Mistakes When Installing a Dishwasher Mounting Bracket
A handful of avoidable slip-ups cause most of the trouble, so let’s keep you clear of them. The biggest mistake is drilling into a stone countertop with a top-mount bracket. Granite and quartz crack under that pressure, and a repair costs far more than the bracket itself. Always switch to a side mount bracket on stone surfaces instead.
Another common error is overtightening the screws. Beginners often crank fasteners as hard as they can, thinking tighter equals safer. In reality, this strips the pilot holes or warps the frame, leaving the bracket loose and useless. Snug is the goal, not brute force.
Many folks also skip the leveling step. They rush the dishwasher back in without checking the bubble, and the unit ends up tilted. A crooked dishwasher drains poorly, runs loud, and pulls against its brackets over time.
People frequently ignore the manufacturer’s spacing guidelines, too. Eyeballing the bracket placement leads to misaligned holes and a weak hold. Take the extra minute to measure.
Finally, plenty of DIYers forget the tip-test entirely. They assume the brackets are fine and move on. Always open the door and pull the rack before you call the job done.
Expert Tips
Want this job to go even smoother? Keep your installation kit instructions open beside you. Manufacturers list exact screw length and spacing, and following their numbers takes all the guesswork out.
Snap a quick photo of the bracket placement before you slide the dishwasher back in. If something feels off later, you’ll have a clear reference instead of pulling the whole unit out again.
Use a magnetic screw holder or a small dish for your fasteners. Tiny screws love to roll into the gap under the counter, and fishing them out wastes time.
When marking pilot holes, double-check your alignment twice before drilling. You can’t un-drill a hole, so measuring carefully saves your cabinet sides from extra marks.
And always finish with that tip-test. It’s the simplest way to confirm your bracket truly holds.
Frequently Asked Questions
Can I install a mounting bracket on a granite countertop?
Not the top-mount style, no. Drilling into granite or quartz risks cracking your expensive countertop. Instead, use a side mount bracket that fastens to the cabinet sides. Most dishwashers include both bracket types in the installation kit, so you simply choose the side-mount option. This anchors the unit securely without ever touching the stone underside.
What screws should I use for the brackets?
Always use the screws that came with your installation kit first. They’re matched to the correct screw length and bracket type. If those are missing, pick screws that grip the cabinet sides or countertop underside without poking through the other side. Match the thickness of your mounting surface, and avoid screws so long they damage the cabinet or frame.
Why does my dishwasher still tip after mounting?
A few things could be off:
- The brackets aren’t tightened fully against their anchor points
- The screws stripped the holes and lost their grip
- The adjustable legs sit uneven, throwing off the balance
Recheck each fastener, confirm the unit is level, and reposition any loose bracket. The dishwasher should stay planted when you pull out the loaded bottom rack.
Do I really need a mounting bracket at all?
Yes, you do. The anti-tip bracket keeps your dishwasher from leaning forward when you open the door or load the bottom rack. Without it, a fully loaded rack can pull the whole unit down, damaging your flooring and risking injury. It’s a small, inexpensive part that delivers serious stability, so never skip installing one.
How tight should I make the bracket screws?
Snug and firm, but never cranked down hard. Drive each screw until it seats flush against the bracket, then stop. Overtightening strips the pilot holes and warps the frame, leaving the bracket loose. Give each fastener a gentle wiggle test once it’s in. A solid bracket with no give means you’ve tightened it just right.
Conclusion
Securing your dishwasher really comes down to choosing the right bracket and fastening it with care. With a screwdriver, a level, and a little patience, you can handle this job yourself and skip the service fee entirely.
Start with safety every time. Shut off the power at the breaker and close the water valve before you touch the unit. Then inspect your cabinet opening and countertop underside to decide between a top mount and a side mount bracket, especially if you have stone counters.
From there, align the bracket holes, mark and drill your pilot holes where appropriate, and fasten the screws snug without overtightening. Level the dishwasher using its adjustable legs, slide it home, and finish with the all-important tip-test.
Take your time, follow the manufacturer’s spacing, and stop if a hole strips or the frame looks damaged. Now that you know how to install dishwasher mounting bracket hardware the right way, you can keep your unit steady, safe, and rock-solid for years to come, all with the satisfaction of a job done yourself.

About
Nick Hall has spent the last seven years working at the intersection of kitchen design and home repair — first as a design assistant at a residential renovation studio, then as a freelance writer covering everything from cabinet layouts to leaky faucet fixes.
Her approach is simple: kitchens should look good and function well. That means she’s just as comfortable talking about color palettes and counter materials as she is walking readers through how to fix a wobbly cabinet hinge or troubleshoot a garbage disposal.
Nick has worked directly with homeowners on small-space kitchen makeovers, budget-conscious renovations, and the kind of everyday repairs that don’t need a contractor — just the right instructions. She writes from experience, not theory, and tests most of the fixes and tips she shares before publishing them.
When she’s not writing, Nick is usually hunting for mid-century kitchen finds at estate sales or helping friends plan their own renovations. She lives in Columbus, Ohio.