

A shiny new Kohler faucet sitting in its box feels exciting, but the under-sink part can make anyone pause. Maybe your old tap finally gave out, or you splurged on a sleek pull-down model to match your kitchen makeover. Either way, you don’t need to hire a plumber and wait around for an appointment.

Learning how to install Kohler kitchen faucet upgrades yourself saves money and gives you real pride in your home. The job happens in a tight cabinet, but Kohler designs its faucets to make the process beginner-friendly, with clear parts and smart connections. With a free afternoon and a few basic tools, you can handle it. This guide walks you through every step, from shutting off the water to running your first leak-free stream.
Why Installing a Kohler Kitchen Faucet Matters
This skill pays you back far beyond one weekend project. A properly installed faucet seals tight, runs at full water pressure, and won’t quietly leak into your under-sink cabinet and rot the wood.
The know-how travels well, too. RV owners, campers, and folks living in compact kitchens deal with faucets that wear out fast from hard water and constant movement. A travel trailer, lakeside cabin, or outdoor wash station rarely has a plumber nearby. Knowing how to fit a faucet means you handle upgrades and repairs wherever you happen to be.
It also gives you freedom to choose. Once you can install a fixture yourself, you pick the exact model you want, a filtered tap or a fancy sprayer, without paying labor fees on top. You stay in control of your own space.
Tools and Materials You’ll Need
Gather everything before you crawl into the cabinet. Half the frustration of any plumbing job comes from wriggling back out to grab one forgotten tool.
- An adjustable wrench for the supply lines and shutoff valves
- A basin wrench to reach those high, awkward mounting nuts
- A utility bucket to catch leftover water
- A flashlight or headlamp to brighten the dark under-sink cabinet
- Old towels or rags for spills
- Plumber’s putty or silicone seal, if your model needs it
- The Kohler instruction sheet and all included parts
- A putty knife to clean the old sink deck
- Optional: a pair of waterproof knee pads, which make the cramped cabinet position far easier on your back and knees
That last item seems minor, but your body will thank you after twenty minutes folded under the sink.
Step-by-Step Guide on How to Install Kohler Kitchen Faucet
Step 1 – Shut Off the Water Supply
Start by closing the two shutoff valves under your sink. They’re usually small oval handles against the back wall, one for hot and one for cold. Turn each one clockwise until it stops firmly.
Don’t force a stuck valve, or you risk snapping it. If a handle won’t budge, give it a moment and try again with gentle, steady pressure. Once both feel closed, turn on the old faucet to release any trapped water and pressure. You’ll hear the flow sputter, slow, then stop.
If your sink has no local valves, shut off your home’s main water supply instead. This step matters most of all. Skipping it turns a calm upgrade into a soaking mess in seconds, so take your time here.
Step 2 – Clear the Cabinet and Remove the Old Faucet
Empty everything from the under-sink cabinet so you can move and see freely. Pull out the sprays, soaps, and that pile of spare sponges. Lay an old towel across the cabinet floor to cushion your back and catch drips.
Slide your bucket under the connections, then loosen the supply lines from the old faucet with your adjustable wrench. Expect a little leftover water to trickle out. Once the lines are free, use your basin wrench to loosen the old mounting nuts above.
Lift the old faucet straight up and out. Scrape away any leftover plumber’s putty, silicone seal, or grime from the sink deck with a putty knife until the surface feels clean and smooth.
Step 3 – Check the Sink Hole Configuration
Before you unwrap your Kohler faucet fully, count the holes in your sink deck. Most kitchen sinks have one, three, or four holes, and your faucet model needs to match. Run your fingers along the deck to feel each opening.
A single-hole faucet fits one hole but often includes a deck plate, also called an escutcheon, to cover extra holes you no longer need. A widespread setup uses separate holes for the spout and handles. If you have spare holes after install, you’ll cover them with the deck plate or a simple hole cap.
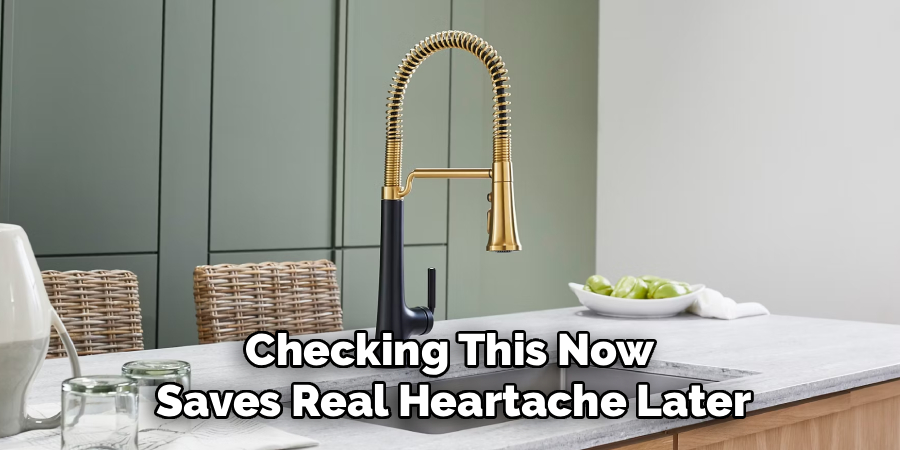
Checking this now saves real heartache later. Nothing’s worse than fitting half the faucet only to find a hole that won’t line up.
Step 4 – Read the Kohler Instructions and Fit the Deck Plate
Pull out the Kohler instruction sheet and actually read it. Each model differs slightly, and Kohler labels its parts clearly with diagrams. Lay the pieces out on a towel so you can match each one to the picture. This five-minute habit makes learning how to install Kohler kitchen faucet models far smoother.
If your faucet uses a deck plate, fit it now. Many newer Kohler models include a pre-attached gasket on the underside, so you simply press it down over the holes. For older setups, you may roll a thin rope of plumber’s putty or run a bead of silicone seal under the edge.
Set the deck plate over the holes and make sure it sits flat and centered.
Step 5 – Lower the Faucet Into Place
Now feed the faucet’s flexible lines and threaded shank down through the center hole or deck plate opening. Go slowly so the pull-down sprayer hose and weight don’t snag or kink on the way through.
From above, settle the faucet base firmly onto the deck plate or sink deck. Press down gently and check that it sits flush, with no gaps or wobble. The base should feel solid and look centered between your counter and the sink edge.
Have a helper hold the faucet straight from the top if you can, since alignment matters most right now. A faucet that goes in crooked stays crooked. Take a breath, eyeball it from a few angles, and adjust until it points exactly where you want.
Step 6 – Secure the Mounting Hardware
Crawl back under the sink and find the mounting bracket and nut that came with your faucet. Most Kohler models slide a bracket up the threaded shank, then tighten a nut by hand or with a basin wrench.
Thread the nut on and snug it up while you keep one eye on the faucet’s position above. Tighten in small turns, checking the alignment as you go, since cranking too fast can twist the faucet off-center. You’ll feel the base pull tight against the deck.
Stop once the faucet feels firm and won’t twist by hand. Don’t overtighten, or you risk cracking the base or stripping the plastic threads. A snug, steady fit is exactly what you want here.
Step 7 – Connect the Supply Lines and Spray Hose
Reconnect the water with the supply lines. Thread the hot line to the hot valve and the cold to the cold, turning each nut clockwise by hand first, then a gentle quarter-turn with your wrench. Snug, not gorilla-tight.
Next, attach the pull-down sprayer hose to its quick-connect fitting under the faucet. You’ll usually hear a satisfying click when it locks home. Give the hose a light tug to confirm it’s secure.
Finally, clip the counterweight onto the spray hose where the instructions show. This weight pulls the sprayer back into its dock smoothly after each use. Route the hose so it hangs free and won’t catch on anything stored in the cabinet. Double-check that every connection feels tight.
Step 8 – Flush the Lines, Leak Test, and Final Cleanup
Before you celebrate, flush the system. Remove the aerator from the spout tip so debris won’t clog it. Slowly open both shutoff valves and turn the faucet on. Let warm and cold water run for a full minute while you watch the connections below.
Shine your flashlight on every fitting and feel for moisture. A drip means a loose nut, so tighten it gently until the leak stops. This leak test catches problems while they’re easy to fix.
Once the lines run clear, screw the aerator back on and check the water pressure feels strong and steady. Wipe down the sink deck, return your supplies to the cabinet, and step back to admire your work. You’ve successfully completed the install.
Critical Mistakes When Installing a Kohler Kitchen Faucet
The biggest mistake is rushing past the instruction sheet. Kohler faucets vary by model, and assuming you know the layout often leads to skipped gaskets or misrouted hoses. Read it first, every time.
Another frequent error is overtightening the mounting nut. Many newer faucets use plastic threads, and cranking hard with a wrench cracks the base or strips the nut. Snug it firmly by hand or with light wrench pressure, then stop the moment it feels solid.
People also forget to flush the lines before reattaching the aerator. Loose debris from the pipes flows straight into that tiny screen and clogs it, leaving you with weak water pressure on day one. Always run the water with the aerator off first.
Crooked alignment trips up plenty of beginners too. They tighten everything fast, then notice the spout points sideways. Check the faucet’s position from above while you tighten below, adjusting in small steps.
Finally, skipping the leak test invites slow drips that rot your cabinet over months. Spend five minutes watching every connection under water pressure. A loose nut caught today saves a soggy disaster later.
Expert Tips
Snap a phone photo of your old setup before you disconnect anything. Those pictures remind you how the supply lines and hardware fit when it’s time to hook up the new one.
Keep a small dish or magnetic tray nearby to hold nuts, clips, and washers. Tiny parts vanish fast in a dark cabinet floor.
If your shutoff valves feel stiff or weep when you turn them, swap them now while everything is already apart. You’ll rarely have easier access to the under-sink plumbing.
Wipe the sink deck completely dry before setting the faucet, so any silicone seal or putty bonds properly. And keep the Kohler instruction sheet and parts bag in a drawer afterward. The model number and warranty details come in handy if you ever need a replacement cartridge or sprayer hose down the road.
Frequently Asked Questions
Do Kohler faucets come with everything I need to install them?
Mostly, yes. A Kohler kitchen faucet typically includes the faucet, supply lines, mounting hardware, a deck plate if applicable, and the spray hose with its weight. You’ll usually need to supply your own tools, though. Have these ready:
- An adjustable wrench and basin wrench
- A bucket and towels
- Plumber’s putty or silicone seal, only if your model calls for it
Always check the included parts list against the instruction sheet first.
Do I need plumber’s putty for a Kohler faucet?
It depends on the model. Many newer Kohler faucets and deck plates include a pre-attached rubber gasket, so you skip putty entirely and just press the base down. Older or single-hole designs may need a thin bead of silicone seal or a rope of plumber’s putty under the edge for a watertight fit. Your instruction sheet tells you exactly which method your faucet requires, so check there first.
Why is my new faucet’s water pressure weak?
The most common culprit is a clogged aerator. During installation, loose debris from the pipes can flow forward and lodge in that little screen at the spout tip. Unscrew the aerator, rinse it under running water, and clear out any grit. Also confirm both shutoff valves are fully open. If pressure stays low, check that the supply lines aren’t kinked behind the cabinet.
How long does it take to install a Kohler kitchen faucet?
For most beginners, plan on one to two hours. The actual connections go quickly, but removing the old faucet, cleaning the sink deck, and reading the instructions take time. Stubborn rusted nuts or a tricky sink hole configuration can add a bit more. Don’t rush. Working patiently and running a careful leak test at the end matters far more than finishing fast.
Can I install a Kohler faucet by myself, or do I need help?
You can absolutely do it solo. That said, an extra set of hands helps a lot during one moment: holding the faucet straight from above while you tighten the mounting bracket below. If you’re working alone, a roll of tape or a small clamp can steady the faucet temporarily. Everything else, from supply lines to the leak test, you can handle on your own comfortably.
Conclusion
Fitting a new faucet looks daunting from the cabinet door, but you now have a clear path to follow. Shut off the water, clear the cabinet, and check your sink hole configuration before anything else. Read the Kohler instructions, fit the deck plate, and lower the faucet into place with care. Then secure the mounting hardware, connect the supply lines and spray hose, flush the lines, and run a thorough leak test before you call it done.
The real reward is the confidence this skill builds. Once you’ve done it, you’ll never dread a worn-out tap again, whether it’s in your home kitchen, an RV, or a cozy cabin. You save money, skip the service call, and take full ownership of your space.
Now that you understand how to install Kohler kitchen faucet upgrades, grab your tools and tackle that project this weekend. Take it one step at a time, work patiently, and you’ll be amazed at what your own two hands can accomplish.

About
Nick Hall has spent the last seven years working at the intersection of kitchen design and home repair — first as a design assistant at a residential renovation studio, then as a freelance writer covering everything from cabinet layouts to leaky faucet fixes.
Her approach is simple: kitchens should look good and function well. That means she’s just as comfortable talking about color palettes and counter materials as she is walking readers through how to fix a wobbly cabinet hinge or troubleshoot a garbage disposal.
Nick has worked directly with homeowners on small-space kitchen makeovers, budget-conscious renovations, and the kind of everyday repairs that don’t need a contractor — just the right instructions. She writes from experience, not theory, and tests most of the fixes and tips she shares before publishing them.
When she’s not writing, Nick is usually hunting for mid-century kitchen finds at estate sales or helping friends plan their own renovations. She lives in Columbus, Ohio.