
That old faucet wobbling on your sink, dripping no matter how hard you crank the handle, has worn out its welcome. Maybe it leaks underneath, sprays sideways, or simply looks dated next to your fresh countertop. Whatever the reason, you don’t need to call a plumber and pay a hefty bill for a job you can handle in an afternoon.
Learning how to remove a kitchen sink faucet gives you the confidence to swap fixtures, fix leaks, or upgrade your space on your own terms. The work happens in a tight cabinet, but with the right tools and a clear plan, it’s far simpler than it looks. This guide walks you through every step, from shutting off the water to lifting the old faucet free and cleaning up after.
Why Removing a Kitchen Sink Faucet Matters
This is one of those skills that pays off again and again. A faucet that leaks under the sink quietly rots your cabinet and grows mold you can’t see. Replacing it yourself stops the damage fast and saves you a service call.
The skill travels well, too. RV owners, campers, and anyone living with a compact kitchen face faucets that take a beating from hard water and constant moving. A travel trailer, lakeside cabin, or outdoor wash station rarely has a plumber on call. Knowing how to pull a faucet means you fix problems wherever you are.
It also opens the door to upgrades. Once you can remove the old unit, installing a fancier model, a pull-down sprayer, or a filtered tap becomes easy. You control your kitchen instead of waiting on someone else.
Tools and Materials You’ll Need
Gather everything before you crawl under the sink. Nothing’s more frustrating than wriggling out halfway through to hunt for a wrench.
- A basin wrench for reaching those high, awkward mounting nuts
- An adjustable wrench for the water supply lines
- A utility bucket to catch drips and leftover water
- A flashlight or headlamp to light up the dark cabinet space
- Old towels or rags to soak up spills
- A putty knife or plastic scraper for old silicone seal and plumber’s putty
- White vinegar to dissolve stubborn mineral buildup
- Penetrating oil for any rusted, corroded hardware
- Optional: a pair of waterproof knee pads, which make the cramped under-sink position far more bearable during a longer job
That last item sounds like a small thing, but your knees will thank you after twenty minutes on a hard cabinet floor.
Step-by-Step Guide on How to Remove a Kitchen Sink Faucet
Step 1 – Clear the Cabinet Space
Start by emptying everything under the sink. Pull out the cleaning sprays, dish soap, trash bags, and that random collection of sponges. You need a clean, open workspace to move freely and see what you’re doing.
Lay an old towel across the cabinet floor to catch drips and cushion your back. Set your bucket and tools within easy reach, since you won’t want to climb out mid-task. Shine your flashlight up toward the underside of the sink deck and study the layout.
Take a moment to notice how the water supply lines run and where the mounting nuts sit. This quick scan saves confusion later. A clear, well-lit cabinet space turns an awkward job into a manageable one.
Step 2 – Shut Off the Water Supply Valves
Now find the two shutoff valves, usually small oval or football-shaped handles tucked against the back wall under the sink. One feeds hot water, the other cold. Turn each one clockwise until it stops firmly.
Don’t force a stuck valve with all your strength, or you risk snapping it. If a valve won’t budge, spray a little penetrating oil and wait a few minutes before trying again. You’ll feel the handle tighten as the water flow closes.
If your sink has no local shutoff valve, head to your home’s main water supply and turn it off there instead. Either way, this step matters most. Skipping it turns a calm repair into a soaking, stressful flood in seconds.
Step 3 – Relieve the Water Pressure
Even with the valves closed, water still sits trapped in the lines under pressure. Release it before you disconnect anything. Turn on the faucet at the sink and let both hot and cold handles run wide open.
You’ll hear the flow sputter and slow to a trickle, then stop completely. That gurgle and hiss tells you the pressure has dropped. Leave the handles open so air can move freely through the system.
This quick step prevents a surprise spray when you loosen the connections. Trapped pressure can shoot water straight into your face inside that cramped cabinet. Taking thirty seconds here keeps you dry and your tools from slipping. Once the dripping fully stops, you’re ready to start disconnecting the plumbing safely.
Step 4 – Disconnect the Water Supply Lines
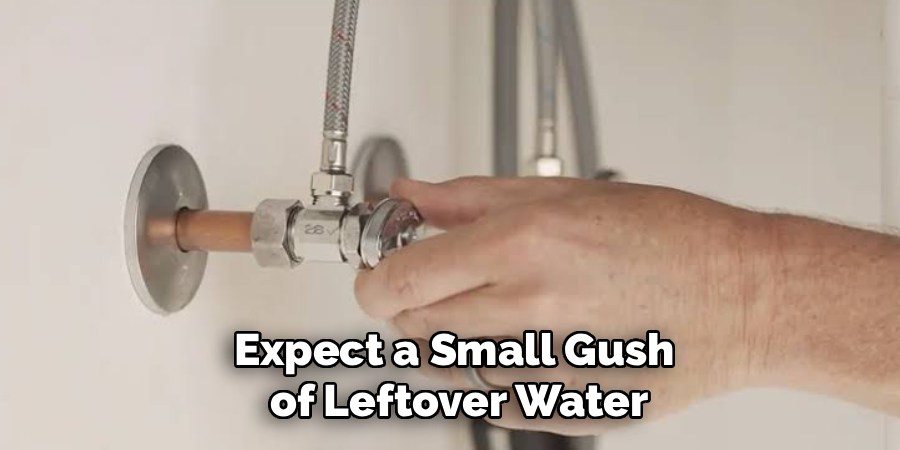
Slide your utility bucket directly under the connections to catch the water still clinging inside the lines. Grab your adjustable wrench and loosen the nuts where the water supply lines meet the shutoff valves.
Turn them counterclockwise. Expect a small gush of leftover water, so keep your towel handy. The metal may feel cold and slightly damp as you work. Once each nut spins freely, unthread it by hand and let the line drain into the bucket.
If your faucet has a spray hose, disconnect that line too, following it down from the sprayer to its quick-connect fitting. Set the lines aside neatly. With the plumbing free, the faucet now connects to the sink by only its mounting hardware above.
Step 5 – Identify the Mounting Hardware
Look up under the sink deck to find what holds the faucet in place. Most kitchen faucets anchor with a large mounting nut or a plastic locknut threaded onto the faucet’s shank. Some models use a metal bracket with a clamp instead.
Run your fingers along the threaded shank to feel how the hardware sits. Newer faucets often use hand-tightened plastic nuts, while older ones rely on metal nuts that need a wrench. Knowing which type you face shapes your next move.
Understanding how to remove a kitchen sink faucet really comes down to recognizing this connection point. Once you spot the nut and how it grips the faucet base plate, the rest of the job falls quickly into place.
Step 6 – Loosen the Tight Mounting Nuts
Here’s where the basin wrench earns its keep. Its long handle and pivoting jaw reach up into the tight space above the sink where your regular wrench can’t fit. Clamp the jaw onto the mounting nut and turn counterclockwise.
The first turn often feels stubborn, especially on older hardware crusted with corrosion. Push steadily rather than jerking hard. If the nut refuses to move, spray penetrating oil around the threads and wait ten minutes for it to soak in.
You’ll feel the nut suddenly give and start spinning loose. Keep turning until it threads off completely. Repeat for the second nut if your faucet has two. With the hardware free, only old sealant still holds the faucet down.
Step 7 – Free the Sealant or Mineral Buildup
Years of plumber’s putty, silicone seal, and hardened mineral buildup often glue the faucet base plate to the sink deck. Don’t yank blindly, or you might scratch the sink. Instead, work a putty knife or plastic scraper gently under the edge of the base.
Wiggle the blade along the seam to break the bond bit by bit. You’ll feel the suction release with a soft crackle as the old seal lets go. For thick mineral crust, dab on a little white vinegar and let it soften the deposits first.
Take your time around the spray hose opening and any seams. Patience here protects your sink surface. Once the edges feel loose all the way around, the faucet is finally ready to lift out.
Step 8 – Lift Out the Faucet and Clean the Surface
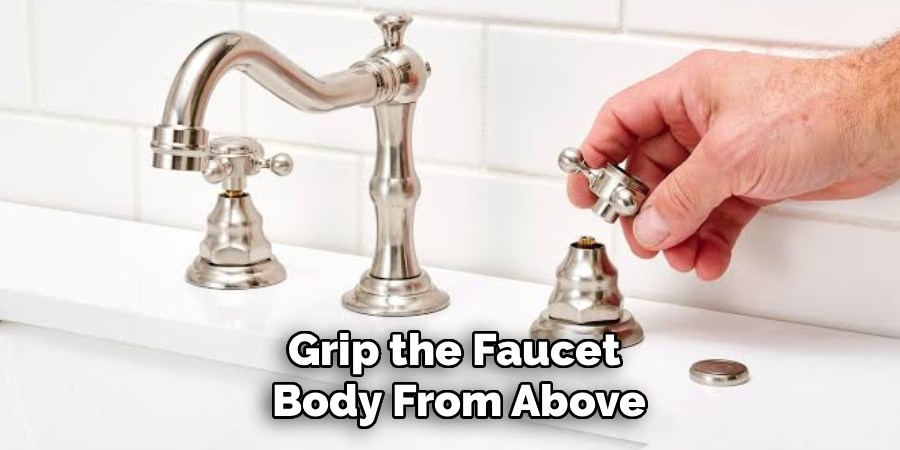
Grip the faucet body from above and lift it straight up through the mounting holes. It should rise free now, though you may need to guide the spray hose and threaded shank through as you go. Set the old faucet aside.
Look at the bare sink deck. You’ll likely find a ring of grimy residue, leftover putty, and chalky mineral buildup. Scrape away the old sealant with your putty knife, then scrub the area with vinegar and a rag until it shines.
A clean, smooth surface matters for whatever comes next, whether you install a new fixture or leave the holes capped. With the deck spotless and dry, you’ve fully completed the job.
Critical Mistakes When Removing a Kitchen Sink Faucet
The biggest mistake is skipping the water shutoff. People assume they can work fast and beat the drip, then watch in horror as a connection sprays the whole cabinet. Always close both valves and test that the water truly stopped before touching any line.
Another common error is forgetting to relieve the trapped pressure. Even with valves closed, the lines hold water under tension. Loosen a fitting without opening the faucet first, and you’ll get a face full of cold water inside that tight space.
Many beginners also reach for the wrong tool. A standard wrench simply can’t fit around the high mounting nuts, so people strain, slip, and bruise their knuckles. A basin wrench solves this instantly, and trying to skip it usually wastes an hour of frustration.
Forcing rusted hardware causes plenty of grief too. When a corroded nut won’t budge, cranking harder often snaps the shank or cracks the valve. A few minutes with penetrating oil saves a much bigger repair.
Finally, prying the faucet up too aggressively scratches or chips the sink deck. Break the sealant gently with a scraper instead of yanking, and your sink stays pristine for the new fixture.
Expert Tips
Snap a few photos with your phone before you disconnect anything. When you install the new faucet, those pictures remind you exactly how the lines and hardware fit together.
Keep a small dish nearby to hold nuts, washers, and clips as you remove them. Tiny parts vanish fast in a dark cabinet, and a magnetic tray works even better.
If your shutoff valves feel stiff or leak when you turn them, consider replacing them while everything is already apart. It’s the perfect moment, and you’ll rarely have easier access to the under-sink plumbing.
Wrap a strip of cloth around stubborn nuts before gripping them with your wrench. This protects the finish and gives the jaw extra bite. And always work with the cabinet doors fully open and well lit, since good visibility prevents almost every avoidable slip.
Frequently Asked Questions
Do I need to turn off my home’s main water to remove a faucet?
Not usually. Most kitchen sinks have two local shutoff valves under the cabinet, one for hot and one for cold. Closing those stops the water to that faucet alone. Only turn off your home’s main supply if:
- Your sink has no local shutoff valves
- The existing valves are stuck, leaking, or broken
Local valves keep the rest of your house running normally while you work.
Why won’t my faucet mounting nut loosen?
Old mounting nuts often seize from corrosion and mineral buildup over the years. The threads bind tight and resist turning. Spray penetrating oil around the nut and wait about ten minutes so it soaks into the threads. Use a basin wrench for proper leverage in the tight space. Turn steadily rather than yanking, since sudden force can snap the threaded shank or damage the valve below.
What tool makes removing a faucet easiest?
A basin wrench is the single most helpful tool for this job. Its long handle and swiveling, spring-loaded jaw reach the high, awkward mounting nuts that a standard wrench can’t touch. You’ll also want an adjustable wrench for the water supply lines below. Together, these two handle nearly every connection. Add penetrating oil for rusted hardware, and you’re equipped to tackle almost any faucet removal.
How do I remove old plumber’s putty and mineral buildup?
Start by scraping away the bulk with a plastic putty knife, working gently so you don’t scratch the sink deck. For hardened plumber’s putty or silicone seal, slide the blade under the edge and lift it free. To dissolve chalky mineral buildup, soak the area with white vinegar for several minutes, then scrub with a rag. The deposits soften and wipe away cleanly.
Can I reuse the same faucet after removing it?
Yes, if the faucet still works well and isn’t cracked or badly corroded. Many people remove a faucet just to clean it, replace worn washers, or reach a leak. Before reinstalling, inspect the threaded shank, base plate, and spray hose for damage. Always apply fresh plumber’s putty or a new silicone seal underneath, since the old sealant won’t form a watertight bond again.
Conclusion
Pulling out an old faucet looks intimidating from the cabinet door, but you now have a clear roadmap to follow. Clear the space, shut off both valves, and relieve the trapped pressure before you touch a single line. From there, disconnect the water supply lines, identify your mounting hardware, and loosen those nuts with a basin wrench. Break the old sealant gently, lift the faucet free, and scrub the sink deck clean for whatever comes next.
The real reward is the confidence this skill brings. Once you’ve done it, you’ll never dread a leaky or outdated faucet again, whether it’s in your home kitchen, an RV, or a cozy cabin. You save money, dodge service calls, and take full control of your space.
Now that you understand how to remove a kitchen sink faucet, grab your tools and tackle that wobbly fixture this weekend. Take it one step at a time, work patiently, and you’ll be amazed at what your own two hands can do.

About
Nick Hall has spent the last seven years working at the intersection of kitchen design and home repair — first as a design assistant at a residential renovation studio, then as a freelance writer covering everything from cabinet layouts to leaky faucet fixes.
Her approach is simple: kitchens should look good and function well. That means she’s just as comfortable talking about color palettes and counter materials as she is walking readers through how to fix a wobbly cabinet hinge or troubleshoot a garbage disposal.
Nick has worked directly with homeowners on small-space kitchen makeovers, budget-conscious renovations, and the kind of everyday repairs that don’t need a contractor — just the right instructions. She writes from experience, not theory, and tests most of the fixes and tips she shares before publishing them.
When she’s not writing, Nick is usually hunting for mid-century kitchen finds at estate sales or helping friends plan their own renovations. She lives in Columbus, Ohio.