
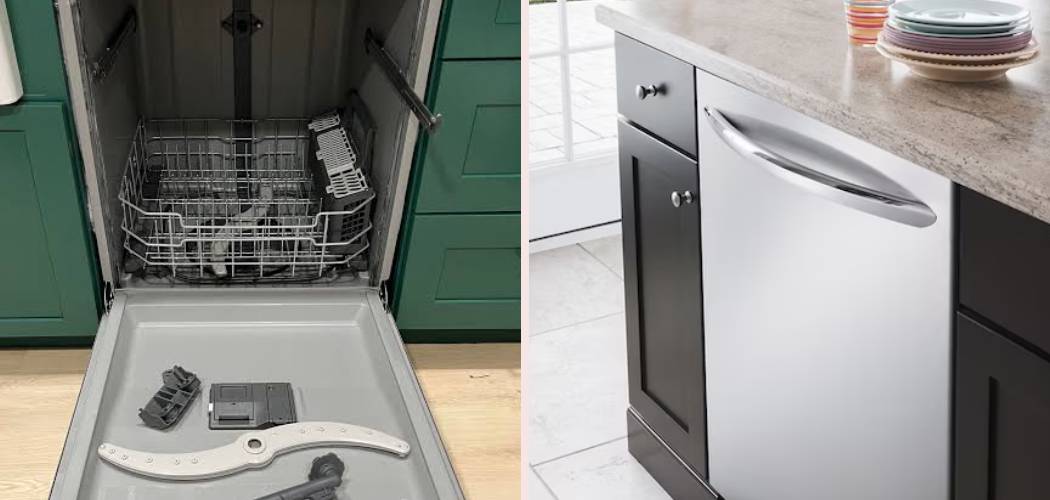
Bringing home a shiny new dishwasher feels exciting, but staring at the empty cabinet space and a tangle of hoses can make your heart race a little. Take a breath. You don’t need to be a pro to handle this job, and you definitely don’t need to pay a hefty installation fee.
With the right tools, a calm approach, and a clear plan, most folks can finish this project in an afternoon. The work breaks down into simple stages: water, drain, power, and a careful slide into place.

Learning how to install frigidaire dishwasher gives you a real sense of accomplishment and saves you money on the spot. This guide walks you through every safe step, from measuring the opening to running a leak-free test cycle.
Why Learning to Install a Frigidaire Dishwasher Matters
This skill puts you in full control of your kitchen and your budget. Instead of scheduling a technician and waiting around all day, you handle the whole job on your own time.
The knowledge stretches far beyond one appliance, too. Campers and outdoor beginners often set up portable dishwashers, RV units, and compact sinks that rely on the very same connections, a water supply line, a drain hose, and a safe power hookup. Once you understand how these parts join together, you can install or troubleshoot water-using gear almost anywhere.
For home cooks and DIY appliance owners, the payoff runs deeper. You’ll learn how your machine pulls in clean water and pushes out the dirty, where leaks tend to start, and how to spot trouble early. That awareness protects your cabinets and keeps your kitchen running smoothly for years.
Tools and Materials You’ll Need
You won’t need a workshop full of gear for this job. Most of these items already sit in your toolbox or under the sink.
- Adjustable wrench for tightening fittings and the shutoff valve
- Screwdrivers (Phillips and flathead) for mounting brackets and the toe kick
- Pliers or channel locks to grip and turn stubborn connectors
- A bubble level to set the dishwasher perfectly straight
- Teflon (plumber’s) tape to seal threaded water connections
- A bucket and old towels to catch drips and protect the floor
- A flashlight to see into the dark cabinet space
- Wire connectors and electrical tape if you’re hardwiring the unit
- A 90-degree elbow fitting for the water inlet valve
For one optional convenience item, grab a pair of furniture sliders or a flattened cardboard sheet. Either one helps the dishwasher glide across your floor without scratching it.
Step-by-Step Guide on How To Install Frigidaire Dishwasher
Step 1 – Shut Off Power and Water
Safety comes first, so cut both the power and the water before you touch anything. Flip the dishwasher’s breaker in your electrical panel, then test the circuit to confirm it’s truly dead.
Never work on a live electrical connection. Even a brief contact with charged wires can hurt you, and water nearby makes the risk worse.

Next, find the shutoff valve under your sink and turn it clockwise until it stops. This cuts the water supply line feeding the dishwasher.
Open a faucet for a moment to release any built-up pressure. You’ll hear the line hiss and settle. With both power and water off, you can work calmly and safely instead of racing against a live system.
Step 2 – Measure the Dishwasher Opening
Grab your tape measure and check the cabinet opening before you go any further. A standard dishwasher opening runs about 24 inches wide, 24 inches deep, and 34 to 35 inches tall.
Measure the width, height, and depth carefully, then compare those numbers to your new unit’s specs. A snug fit matters, since too tight means scraped cabinets and too loose leaves the machine wobbling.
Run your hand along the inside edges and clear away any old caulk, screws, or debris left from a previous appliance. Check that the floor sits level here, too.
Confirming these measurements now spares you the headache of muscling a dishwasher halfway in, only to discover it won’t slide home properly.
Step 3 – Unpack and Inspect the Dishwasher
Carefully remove your Frigidaire from its box and set it on a soft surface or your cardboard sheet. Take your time so you don’t ding the finish or strain your back.
Look the whole unit over before you start connecting anything. Run your eyes and fingers across the door, the sides, and the back, checking for dents, scratches, or shipping damage.
Open the door and peek inside. Confirm the spray arms spin freely and the racks roll smoothly on their tracks.
Now find the mounting hardware, leveling legs, and any included fittings. Lay them out where you can see them. If you spot cracked hoses, damaged wiring, or missing mounting brackets, stop and contact the seller before going further. Starting with a sound machine saves frustration later.
Step 4 – Attach the Elbow Fitting and Prepare the Water Line
Flip the dishwasher onto its back gently, resting it on the cardboard or a towel to protect the floor. You’ll see the water inlet valve near the bottom front.
Wrap the threads of your 90-degree elbow fitting with two or three layers of Teflon tape, winding it clockwise so it stays put. This simple step seals the joint and helps prevent slow drips later.
Thread the elbow into the inlet valve by hand first, then snug it with your wrench. Don’t overtighten, since cranking too hard can crack the brass or strip the threads.
You’ll connect the water supply line to this elbow shortly. For now, make sure the fitting points in the right direction for an easy hookup once the unit slides in.
Step 5 – Position the Power Cord and Connect the Drain Hose
While the unit lies on its back, handle the wiring and drain together. If your model uses a power cord, route it through the side opening toward where the outlet sits. For a hardwired setup, prepare the junction box and match wire colors carefully, capping each pair with a connector.
Keep the cord or wiring away from sharp edges and the hot water line so nothing chafes over time.

Now attach the drain hose to the dishwasher’s drain port and secure it with a clamp. Route the hose toward your sink cabinet, leaving enough slack to form a high loop or reach the air gap.
That high loop matters, because it stops dirty sink water from flowing backward into your clean dishwasher.
Step 6 – Slide the Dishwasher Into Place
Stand the unit upright and guide it toward the dishwasher opening. Feed the water supply line, drain hose, and power cord through the cabinet hole first so nothing gets pinched behind the machine.
Push slowly and watch both sides. You’ll feel the unit glide on your sliders, and you want it to track straight without snagging a hose.
Pause halfway and peek behind to confirm the lines stay free and untangled. Knowing how to install frigidaire dishwasher correctly really comes down to this patient, careful slide.
Keep nudging until the front edge sits flush with your cabinet faces and the countertop above. If it stops short, back out, check for a kink, and try again rather than forcing it.
Step 7 – Level and Secure the Unit
A level dishwasher runs quietly, drains fully, and seals tight against leaks. Set your bubble level on the bottom edge of the open door and check it side to side, then front to back.
Adjust the leveling legs by turning them with your wrench or fingers. Raise or lower each corner until the bubble sits dead center and the unit feels rock solid with no wobble.
Once it’s level, fasten the mounting brackets to the underside of the countertop or the side cabinets, depending on your model. Drive the screws firmly but gently so the dishwasher won’t tip forward when you pull out a loaded rack.
Snap the toe kick panel into place at the bottom front. A secure, level install protects both the machine and your floor.
Step 8 – Connect Water, Restore Power, and Test
Now bring everything to life. Connect the water supply line to your elbow fitting under the sink, wrapping the threads with Teflon tape and tightening with your wrench. Plug in the power cord or close up the junction box.
Open the shutoff valve slowly and watch every connection. Run your fingers along each joint, feeling for moisture, and shine your flashlight underneath for a proper leak test.
Restore power at the breaker, then start a short rinse cycle. Listen for water filling, the pump humming, and the drain emptying cleanly.
When the cycle ends, check again for drips around the fittings and beneath the unit. A dry floor and a quiet machine mean your install succeeded.
Critical Mistakes When Installing a Frigidaire Dishwasher
A handful of common slip-ups can turn a smooth afternoon into a soggy mess, so let’s help you dodge them. The biggest mistake is working on a live electrical connection or with the water still running. Reaching into charged wires near water puts you in real danger, so always kill the breaker and close the shutoff valve before you begin. Skipping this step isn’t worth the risk.
Another frequent error is overtightening the fittings. People assume more muscle means a better seal, but cranking too hard cracks the brass elbow, strips the threads, or splits a hose. Snug each connection firmly by hand, then give it just a small turn with the wrench.
Many beginners also forget the high loop on the drain hose. Without it, dirty sink water siphons back into your clean dishwasher, leaving a foul smell and standing water. Secure that loop high under the counter every time.
Finally, plenty of folks rush the leveling. An unlevel unit wobbles, drains poorly, and leaks at the door seal. Take a few extra minutes with your bubble level and the leveling legs, and stop entirely if you find damaged wiring or missing mounting hardware.
Expert Tips
Want a quiet, leak-free dishwasher that lasts for years? Always test your water connections before you push the machine fully into place. Catching a drip while you can still reach behind the unit saves you from pulling it back out later.
Keep a small dish of soapy water nearby during your leak test. Brush it over each fitting, and watch for bubbles that reveal a slow leak your eyes might miss.
Label your wires with tape before disconnecting an old unit, so matching the colors later feels effortless. This little habit prevents wiring confusion and keeps you safe.
Run hot water at your sink for a moment before the first cycle, which helps the dishwasher fill warm and clean. And if you ever feel unsure about the electrical hookup, pause and call a licensed technician rather than guessing.
Frequently Asked Questions
Do I need a plumber or electrician to install a Frigidaire dishwasher?
Not always. Many handy homeowners complete the whole job themselves with basic tools and a careful approach. That said, you should call a professional if your kitchen lacks an existing water supply line, drain connection, or dedicated circuit. Cutting into walls, running new wiring, or adding a shutoff valve goes beyond a simple swap and usually requires a licensed technician for safety and code compliance.
What is a high loop and why does it matter?
A high loop is a section of drain hose secured high under your countertop before it connects to the sink or disposal. It stops dirty sink water from flowing backward into your clean dishwasher. Without it, you risk standing water, bad odors, and even health concerns. Some areas require an air gap instead, a small fixture on the sink that serves the same protective purpose.
How do I level my dishwasher properly?
Leveling keeps your machine quiet and leak-free. Just follow these quick checks:
- Set a bubble level on the bottom edge of the open door
- Check it both side to side and front to back
- Turn the leveling legs up or down until the bubble centers
Confirm the unit feels solid with no wobble before you tighten the mounting brackets to the countertop or cabinet.
Can I reuse the old water line and drain hose?
It’s tempting, but replacing them is usually smarter. Old hoses grow brittle, and old connectors crack or leak under fresh pressure. A new braided water supply line and drain hose cost very little and offer real peace of mind. If you must reuse them, inspect every inch for cracks, kinks, or stiff spots, and replace anything that looks worn before you connect it.
How do I know if my installation has a leak?
After connecting everything, open the water slowly and watch each joint closely. Run your fingers along the fittings to feel for moisture, and shine a flashlight beneath the unit. Then run a short cycle and check again as water flows. Look under the sink, around the elbow fitting, and across the cabinet floor. A dry surface after testing means you’re in good shape.
Conclusion
Installing your own dishwasher feels far less intimidating once you break it into clear, manageable steps. With a few basic tools, a calm pace, and a little patience, you can handle the whole project yourself and skip the costly service call.
Always start by shutting off the power and water, then measure your opening and inspect the unit before you connect a thing. Attach the elbow fitting, route the power cord and drain hose with a proper high loop, and slide the machine in gently. Level it carefully, secure the mounting brackets, then connect the water supply line and run a thorough leak test with a short cycle.
The real secret is to work slowly, never overtighten a fitting, and stop the moment you spot damaged wiring, cracked hoses, or missing hardware. Knowing when to call a technician keeps both you and your kitchen safe.
This skill saves you money, protects your home, and builds genuine confidence. Now that you understand how to install frigidaire dishwasher, gather your supplies, take your time, and enjoy the satisfaction of a job well done.

About
Nick Hall has spent the last seven years working at the intersection of kitchen design and home repair — first as a design assistant at a residential renovation studio, then as a freelance writer covering everything from cabinet layouts to leaky faucet fixes.
Her approach is simple: kitchens should look good and function well. That means she’s just as comfortable talking about color palettes and counter materials as she is walking readers through how to fix a wobbly cabinet hinge or troubleshoot a garbage disposal.
Nick has worked directly with homeowners on small-space kitchen makeovers, budget-conscious renovations, and the kind of everyday repairs that don’t need a contractor — just the right instructions. She writes from experience, not theory, and tests most of the fixes and tips she shares before publishing them.
When she’s not writing, Nick is usually hunting for mid-century kitchen finds at estate sales or helping friends plan their own renovations. She lives in Columbus, Ohio.