
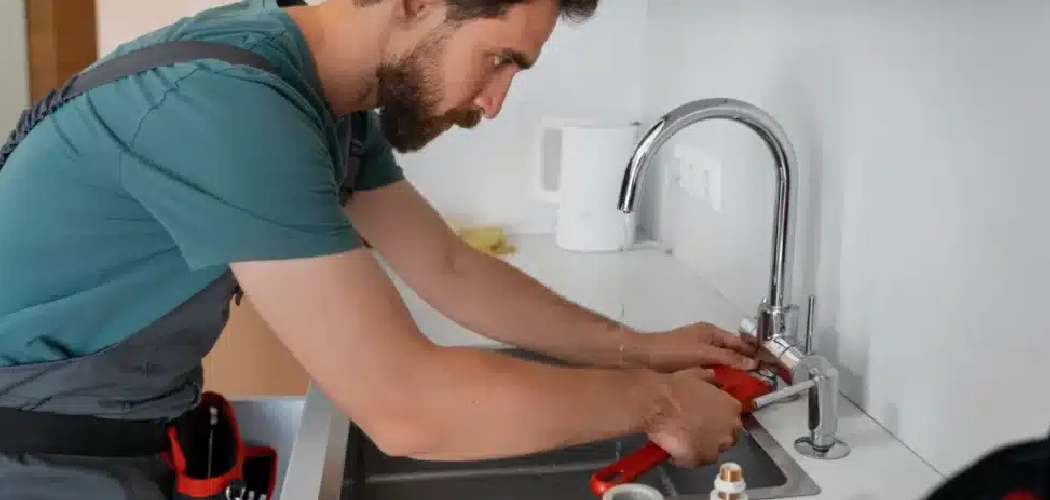

Is your kitchen faucet dripping, wobbling, or just looking tired and outdated? A worn-out faucet is one of the most annoying problems in any kitchen, and it’s also one of the easiest to fix yourself.
Here’s the good news: swapping out a faucet is a beginner-friendly job. You don’t need a plumber, a fancy workshop, or years of experience. With a few basic tools and a little patience, you can have a shiny new faucet running in an afternoon.
Learning how to install a kitchen sink faucet saves you money, builds your confidence, and gives you full control over your kitchen upgrades.
This guide walks you through every step, from shutting off the water supply to your final leak check, so you can finish the job cleanly and enjoy fresh, drip-free water with pride.
Why Installing a Kitchen Sink Faucet Matters
This skill reaches well beyond a standard home kitchen. If you own an RV or live the van life, knowing how to replace a fixture means you’re never stranded by a leaky faucet far from a repair shop. A quick swap keeps your water flowing wherever the road takes you. This relieves any trapped pressure in the water lines
Cabin users and off-grid dwellers gain real independence too. Out in remote spots, calling a plumber simply isn’t an option, so self-reliance becomes everything. A simple plumbing skill like this keeps your space functional year-round.
Outdoor kitchen builders rely on faucet know-how to set up sinks near grills and prep stations. And for beginners, this project teaches you the basics of shutoff valves, supply lines, and water-saving upgrades.
Those lessons carry over to countless other repairs. Once you’ve handled one faucet, the next fix feels easy.
Tools and Materials You’ll Need
Good news: this job needs only a handful of affordable tools, and you likely own most already.
Start with your new faucet, which usually comes with its own mounting hardware and gasket. You’ll need an adjustable wrench, a set of pliers, and a screwdriver for the basic connections. A basin wrench is the real hero here, since it reaches the tight, awkward mounting nut behind the sink that no other tool can grab comfortably.
Keep a bucket and old towels handy to catch drips inside the under-sink cabinet. Grab plumber’s putty or silicone for a watertight seal, plus plumber’s tape for the threaded fittings. You may also want new supply lines if your old ones look corroded or stiff.
One optional convenience item worth grabbing is a headlamp, which frees both hands and lights up that dark cabinet beautifully.
Step-by-Step Guide on How To Install a Kitchen Sink Faucet
Step 1 – Shut Off the Water and Clear the Space

Before you touch anything, cut off the water. Reach under the sink and turn both shutoff valves clockwise until they stop. If you can’t find them or they’re stuck, shut off your home’s main water line instead.
Now open the old faucet and let the leftover water run out. You’ll hear the flow sputter and fade as the pressure drops. This relieves any trapped pressure in the water lines.
Next, empty out the under-sink cabinet completely. Pull out the cleaning supplies, buckets, and clutter so you have room to work and see clearly. Lay down a towel to catch drips and protect the cabinet floor. A clear, dry workspace makes every step that follows far easier and far less frustrating.
Step 2 – Disconnect the Supply Lines
With the water off, place your bucket under the connections to catch any leftover water. Trust me, there’s always a little hiding in those lines.
Use your adjustable wrench to loosen the supply lines where they meet the shutoff valves. Turn counterclockwise, and you’ll feel the fitting give as it loosens. Some water will trickle out, so keep that towel close.
Then disconnect the lines from the faucet tailpieces above. If the connections feel stiff or crusty with mineral buildup, gentle, steady pressure usually breaks them free. Don’t force anything sharply, since over-yanking can damage the valves.
Once both lines are free, set them aside. If they look corroded or feel brittle, plan to replace them with fresh ones.
Step 3 – Remove the Old Faucet
Now reach up behind the basin and find the mounting nut holding the faucet in place. This is where your basin wrench earns its keep, since the space is cramped and your fingers won’t fit.
Slide the basin wrench onto the nut and turn it counterclockwise. You’ll feel resistance at first, then a satisfying loosening as it spins free. Remove any washers or brackets too.
With the hardware off, lift the old faucet straight up and out of the sink deck. It may stick from years of grime and dried sealant, so wiggle it gently to break the seal.
Set the old faucet aside. Take a moment to look at how everything was assembled, since the new one installs in much the same way.
Step 4 – Clean the Sink Deck and Check the Holes

With the old faucet gone, you’ll likely see grime, old putty, and mineral crust around the mounting area. Scrape away the old plumber’s putty and gunk with a putty knife or stiff rag.
Wipe the sink deck clean with a mild cleaner until the surface feels smooth and dry. A clean base helps your new gasket seal tightly with no leaks.
Now count your mounting holes. Standard sinks have one to four holes, and your new faucet must match. If you have extra holes, an escutcheon plate or cover plate hides them neatly. Knowing how to install a kitchen sink faucet correctly starts with confirming this fit before you go further.
Dry-fit the faucet to check alignment before sealing.
Step 5 – Set the Gasket and Position the New Faucet
Check your new faucet’s instructions for gasket placement, since designs vary. Many modern faucets include a rubber or foam gasket that sits under the base, replacing the need for plumber’s putty entirely.
If your faucet calls for putty instead, roll a thin rope of it and press it around the base. This creates a watertight barrier against splashes.
Now feed the supply hoses and spray hose down through the center hole or mounting holes. Guide them carefully so they don’t kink or tangle.
Lower the faucet onto the sink deck and press it firmly into place. Line it up straight, then peek underneath to confirm the gasket sits flat and even all the way around. A square, centered fit now saves headaches later.
Step 6 – Tighten the Mounting Hardware
Head back under the sink to lock the faucet in place. Slide the mounting bracket, washers, and mounting nut onto the threaded shank in the order shown in your instructions.
Hand-tighten the nut first to hold the faucet steady. Then reach up top and check that the faucet still sits straight and centered. It’s easy for it to twist as you tighten, so adjust now while it’s still loose.
Use your basin wrench to snug the nut firmly, but don’t overdo it. You want it tight enough to stay put, not so tight you crack the fitting or strip the threads.
Give the faucet a gentle wiggle from above. If it feels rock-solid with no rocking or spinning, you’ve nailed it.
Step 7 – Connect the Supply Hoses and Flush the Lines
Now connect your supply lines to the faucet tailpieces and the shutoff valves. Wrap a few turns of plumber’s tape clockwise around any threaded fittings for a better seal.
Hand-thread each connection first to avoid cross-threading, then snug them with your wrench. For a compression fitting, tighten firmly but gently. Match hot to the left side and cold to the right.
Before you turn the water back on, remove the aerator from the faucet tip. This lets debris flush out without clogging the screen.
Slowly open both shutoff valves and let the water run for a minute. You’ll hear sputtering as air clears, then a steady, smooth stream. Reattach the aerator once the water runs clean.
Step 8 – Check for Leaks and Test Everything
Now comes the moment of truth. With the water flowing, grab your headlamp and inspect every connection under the sink. Run your finger along each fitting and feel for moisture.
Watch the shutoff valves, the supply line connections, and the faucet base closely. Even a tiny drip means a fitting needs another quarter turn. Tighten gently until the drip stops.
Turn the faucet on full, then test the hot, cold, and spray functions. Swivel the spout side to side and pull out the spray hose to make sure it glides and retracts smoothly.
Let the water run a few minutes, then check underneath one final time. A dry cabinet and a smooth, steady stream mean you’ve done it. Wipe everything down and admire your work.
Critical Mistakes When Installing a Kitchen Sink Faucet
A few common slip-ups trip up beginners, so let’s clear them up before you start.
The biggest mistake is forgetting to fully shut off the water supply. People assume the valves are closed, then loosen a line and get sprayed across the cabinet. Always turn both shutoff valves off completely and open the old faucet to release pressure before you disconnect anything.
Another frequent error is overtightening connections. It feels safer to crank everything as hard as possible, but too much force cracks plastic fittings, strips threads, and warps gaskets. Snug each connection firmly, then stop. A good seal comes from proper alignment, not brute strength.
Many people also skip the gasket or plumber’s putty, or apply it unevenly. Without a proper seal under the base, water seeps around the faucet and pools on your sink deck over time. Follow your faucet’s instructions on whether to use the included gasket or putty.
Finally, plenty of folks forget to flush the lines and skip the final leak check. Debris can clog the aerator, and a missed drip slowly rots your under-sink cabinet. Always flush, then inspect every fitting twice.
Expert Tips
Want a smoother, cleaner install? Snap a quick photo of your old setup before you disconnect anything. That picture becomes a handy reference when you wire up the new faucet.
Keep a small magnetic dish nearby to hold tiny screws and washers. Dropping a washer into the dark cabinet abyss is a frustration you can easily avoid.
If your shutoff valves feel stiff, crusty, or refuse to fully close, consider replacing them while you’re already under there. It’s a small extra job that prevents future headaches.
Wrap plumber’s tape in the same direction the fitting threads on, so it tightens rather than bunches. And always keep a towel wrapped around connections as you loosen them. Working in good light, ideally with a headlamp, makes spotting drips and lining up fittings far easier.
Frequently Asked Questions
Do I Need to Hire a Plumber to Replace a Faucet?
Not at all. Replacing a faucet is one of the most beginner-friendly plumbing jobs out there. With basic tools and a little patience, most homeowners finish in an afternoon. You’ll only want a professional if you discover bigger problems, such as:
- Corroded or broken shutoff valves
- Damaged water lines inside the wall
- A cracked or leaking sink basin
Otherwise, this is a confident DIY win.
What Size Faucet Fits My Sink?
Your faucet must match the number of mounting holes in your sink deck. Sinks typically have one to four holes. A single-hole faucet needs just one, while widespread or sprayer models need more. Count your holes before shopping. If your new faucet uses fewer holes than your sink has, an escutcheon plate covers the extras neatly for a clean, finished look.
How Do I Stop My New Faucet From Leaking?
Most leaks come from loose connections or a poor seal. Try these quick fixes:
- Tighten each fitting a gentle quarter turn
- Wrap threaded joints with plumber’s tape
- Confirm the gasket or plumber’s putty sits flat under the base
If the faucet still drips after tightening, check that the cartridge is seated correctly inside. A proper seal solves nearly every leak.
Should I Use Plumber’s Putty or a Gasket?
It depends on your faucet’s design. Many modern faucets include a rubber or foam gasket that handles the seal perfectly, so you skip putty entirely. Older or budget faucets may rely on plumber’s putty rolled around the base instead. Always follow your faucet’s instructions. Using both when only one is needed can actually prevent a proper, even seal under the base.
Why Is My Water Pressure Low After Installing?
Low pressure after a new install usually points to a clogged aerator or a partly closed valve. Check these first:
- Make sure both shutoff valves are fully open
- Unscrew the aerator and rinse out any debris
- Confirm the supply lines aren’t kinked or pinched
Flushing the lines before reattaching the aerator prevents most of these clogs in the first place.
Conclusion
Swapping out your kitchen faucet is far more achievable than it looks, and the payoff is genuinely satisfying. With a little patience and the right tools, you can replace a tired, dripping fixture with a shiny new one in a single afternoon.
Remember the key steps. Shut off the water and clear the cabinet, disconnect the supply lines, and remove the old faucet. Clean the sink deck, check your mounting holes, then set the gasket and lower the new faucet into place. Tighten the hardware, connect the hoses, flush the lines, and finish with a careful leak check.
The real reward of knowing how to install a kitchen sink faucet is the confidence it builds. You save money, skip the service call, and gain a skill that serves you at home, in an RV, at a cabin, or in an outdoor kitchen for years.
So gather your tools, take it one step at a time, and enjoy the process. When you turn that handle and watch clean water flow with zero drips, you’ll know every careful step was worth it.

About
Nick Hall has spent the last seven years working at the intersection of kitchen design and home repair — first as a design assistant at a residential renovation studio, then as a freelance writer covering everything from cabinet layouts to leaky faucet fixes.
Her approach is simple: kitchens should look good and function well. That means she’s just as comfortable talking about color palettes and counter materials as she is walking readers through how to fix a wobbly cabinet hinge or troubleshoot a garbage disposal.
Nick has worked directly with homeowners on small-space kitchen makeovers, budget-conscious renovations, and the kind of everyday repairs that don’t need a contractor — just the right instructions. She writes from experience, not theory, and tests most of the fixes and tips she shares before publishing them.
When she’s not writing, Nick is usually hunting for mid-century kitchen finds at estate sales or helping friends plan their own renovations. She lives in Columbus, Ohio.