
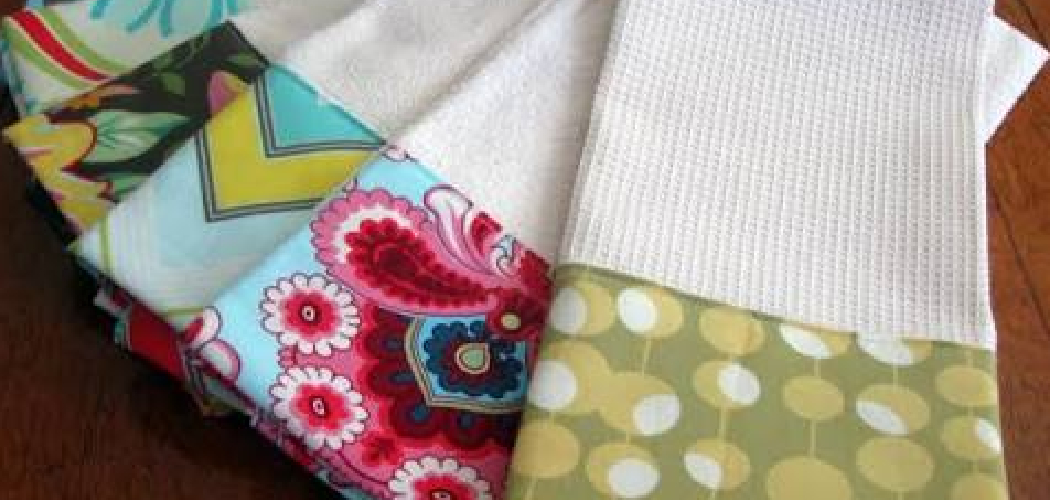

There’s something special about drying your hands on a towel you stitched yourself. Soft, sturdy, and made exactly the way you want, a handmade towel beats anything off a store shelf. And the best part? You don’t need fancy skills to make one.
If you’ve ever eyed a stack of pretty fabric and wondered what to do with it, this is your answer. Learning how to make kitchen towels is a beginner-friendly project that comes together in an afternoon. A straight stitch and a little patience are really all it takes.
These towels also make wonderful gifts, brighten up your counters, and let you match your own kitchen style. This guide walks you through every step, from choosing fabric to that final pressed hem, so you can sew towels you’ll actually love using.
Why Learning to Make Your Own Kitchen Towels Matters
Making your own towels puts you in full control. You pick the fabric, the size, and the absorbency, so each one suits your kitchen perfectly. Store-bought versions rarely hit that sweet spot of soft yet practical.
There’s a real money-saving angle too. A single yard of cotton fabric yields several towels, often for less than the cost of one premium dish towel. Sew a batch, and you’ll restock your linen drawer for months.
You’ll also build genuine confidence. Once you master a simple hem and topstitch, bigger sewing projects feel far less scary. And these towels aren’t just for home. Lightweight, washable, and quick-drying, they’re ideal for camp kitchens, RVs, and outdoor cooking setups where you need durable cloth that packs small and holds up to constant use.
Tools and Materials You’ll Need
Gather everything before you start so the process flows smoothly. Most of these items live in a basic sewing kit, and the fabric is easy to find at any craft store.
- Cotton fabric – quilting cotton, flour sack towels, or absorbent terry work beautifully
- Matching thread – all-purpose polyester or cotton thread
- Fabric scissors – sharp blades reserved for cloth only
- Sewing machine – or a needle and steady hand for hand-sewing
- Straight pins or clips – to hold your hem in place
- Measuring tape or ruler – for accurate, even cuts
- Iron and ironing board – pressing makes crisp, professional hems
- Marking pen or chalk – to draw straight cutting lines
- Rotary cutter and cutting mat (optional) – speeds up cutting and gives razor-straight edges
That rotary cutter is a small luxury, but it makes cutting multiple towels fast and clean.
Step-by-Step Guide on How To Make Kitchen Towels
Step 1 – Choose and prewash your fabric
Start by picking fabric that feels right in your hands. Quilting cotton offers crisp structure, while flour sack towels bring that classic soft, lightweight drape. For maximum absorbency, terry cloth soaks up spills like a sponge.
Once you’ve chosen, prewash everything before cutting. Toss the fabric in the wash and dry it just as you’ll launder the finished towels. This step matters because cotton shrinks, sometimes a lot, and you want that shrinking done now rather than after you’ve sewn perfect hems.

Run your fingers across the dried fabric. You’ll notice it feels slightly softer and more relaxed. Knowing how to make kitchen towels really begins here, with clean, preshrunk cloth that won’t surprise you later with warped edges or uneven sizing.
Step 2 – Press the fabric smooth
Before you measure anything, give your fabric a good pressing. Set your iron to the cotton setting and glide it across the cloth until every wrinkle disappears.
These towels also make wonderful gifts, brighten up your counters, and let you match your own kitchen style. Pressing does more than tidy things up. Smooth fabric lies flat on your cutting surface, which means straighter cuts and more accurate measurements. A wrinkled piece can shift and stretch, throwing your whole towel out of square.
Listen for that gentle hiss of steam as you work. Run your palm over the warm, flat cotton, and you’ll feel how crisp and cooperative it becomes. Pay special attention to the selvage edges, which sometimes pucker. Once your fabric lies perfectly smooth and even, you’re ready to measure and mark with confidence.
Step 3 – Measure and mark your cutting lines
Decide on your towel size before cutting. A standard kitchen towel runs about 18 by 28 inches, but you can adjust to suit your taste. Add an extra inch on each side for the hem.
Lay your pressed fabric flat and use your ruler to measure carefully. Mark your cutting lines with chalk or a fabric pen, keeping the lines parallel to the selvage for the straightest grain.
Double-check every measurement before you commit. The old saying “measure twice, cut once” exists for good reason. As you draw, press firmly enough to see the line clearly but lightly enough that it won’t show through. Crisp, accurate marks now save you from crooked, frustrating towels later, and they make the cutting step feel almost effortless.
Step 4 – Cut out your towel pieces
Now comes the satisfying part: cutting. Grab your fabric scissors or, if you have one, a rotary cutter paired with a cutting mat.
Follow your marked lines slowly and steadily. With scissors, take long, smooth strokes rather than short choppy snips, which leave jagged edges. A rotary cutter glides along in one clean pass, perfect for cutting several towels quickly.
Keep the fabric flat and still with your free hand as you cut. You’ll hear that crisp slicing sound and feel the blade move easily through the cotton. Once finished, hold up your piece and admire those clean, straight edges. Smooth, even cutting sets the stage for tidy hems, so take your time here and enjoy the process.
Step 5 – Fold and press the hems

A neat hem gives your towel that finished, professional look. Start by folding each edge over about a quarter inch toward the wrong side of the fabric, then press it flat with your iron.
Next, fold each edge over again, this time about half an inch, hiding the raw edge inside. Press firmly so the double fold stays crisp and holds its shape.
Work your way around all four sides, pinning or clipping as you go. At the corners, fold in a neat diagonal to reduce bulk and keep them tidy. Run your finger along the pressed hem and feel how flat and sharp it sits. This double-fold method tucks every raw thread away, giving you clean lines and a seam allowance that won’t fray.
Step 6 – Stitch the hems in place
Time to sew. Thread your machine with matching thread and set it to a straight stitch of medium length. Position your folded hem under the presser foot, starting near one corner.
Sew slowly along the inner edge of the fold, keeping your stitching line straight and even. Aim about an eighth of an inch from the inner fold so you catch all the fabric layers securely.
When you reach a corner, stop with the needle down, lift the foot, pivot the fabric, and continue. This keeps your corners sharp and continuous. Listen to the steady rhythm of the machine and watch the neat row of stitches appear. By now you can see how to make kitchen towels transform from flat fabric into something genuinely useful and lovely.
Step 7 – Add a decorative topstitch
A topstitch adds both strength and style. Once your main hem is sewn, run a second line of stitching just inside or alongside the first for a polished, store-bought finish.
Choose a contrasting thread if you want the stitching to pop, or stick with matching thread for a subtle, clean look. Either way, keep your line straight and parallel to the hem.
This extra row does more than decorate. It reinforces the hem, helping your towel survive countless trips through the wash. Run your thumb over the double stitching and feel that satisfying ridge of secure thread. Take your time guiding the fabric, and you’ll end up with crisp, even lines that make your finished towel look beautifully intentional and built to last.
Step 8 – Press, trim, and finish
You’re almost there. Snip away any loose thread tails with your fabric scissors for a clean, tidy result. Check both sides to catch every stray strand.
Give the whole towel one final press. The warm iron sets your stitches, flattens the hems, and leaves the cotton looking crisp and inviting. You’ll feel the fabric relax under the heat into a smooth, ready-to-use towel.
Hold it up and take a good look. Notice the even hems, the neat corners, and the soft drape of your finished piece. Fold it neatly and add it to your stack. That first homemade towel always feels like a little victory, and now you’ve got the skills to make a whole matching set.
Critical Mistakes When Making Kitchen Towels
Even simple projects come with a few traps, so it pays to know what trips up beginners.
The most common mistake is skipping the prewash. Cotton shrinks, and if you sew before washing, your crisp towels can come out of the dryer warped, puckered, and smaller than planned. Always prewash and dry your fabric first, then press it smooth.
Another frequent slip is rushing the pressing. People often fold a hem and sew it down without ironing first. Unpressed hems shift under the needle, creating wavy, uneven lines that look sloppy. A few minutes with the iron makes your stitching dramatically cleaner.
Cutting crooked edges causes endless frustration too. If you skip careful measuring and marking, your towel ends up lopsided, and no amount of hemming fixes a wonky cut. Use a ruler, draw clear lines, and cut slowly along the grain.
Finally, many beginners choose the wrong fabric. Thin, slippery, or non-absorbent material looks pretty but does a poor job drying dishes. Stick with quilting cotton, terry, or flour sack towels for the best balance of absorbency, durability, and easy stitching.
Expert Tips
A few insider tricks take your towels from good to great. First, always sew with the fabric grain rather than against it. Cutting and stitching along the straight grain keeps your towels square and prevents stretching over time.
Use a slightly longer stitch length on hems. It looks cleaner on cotton and feeds through the machine more smoothly. Test your stitch on a scrap first to dial in the tension.
When pressing hems, a little spray starch works wonders. It stiffens the fold just enough to hold its shape while you sew, giving you crisp, professional edges.
Finally, batch your work. Cut several towels at once with your rotary cutter, then press and sew them assembly-line style. You’ll save time and end up with a beautifully matched set that looks like it came from a boutique shop.
Frequently Asked Questions
What is the best fabric for making kitchen towels?
Cotton is your best friend here. Look for these reliable options:
- Flour sack towels – lightweight, soft, and highly absorbent
- Terry cloth – thick and spongy, great for soaking up spills
- Quilting cotton – sturdy and easy to sew, ideal for hand towels
All three handle washing well. Avoid synthetic blends, which repel water and dry poorly, leaving your dishes streaky and your hands still damp.
Do I need a sewing machine to make kitchen towels?
Not at all. A sewing machine speeds things up and gives even stitches, but you can absolutely hand-sew your towels. Use a simple running stitch or a backstitch for extra strength along the hems. Hand-sewing takes longer and demands a bit more patience, yet it produces lovely, sturdy results. Many crafters find the slow, meditative rhythm of hand-stitching genuinely relaxing and rewarding.
How much fabric do I need for one kitchen towel?
For a standard towel measuring around 18 by 28 inches, you’ll need roughly half a yard of fabric, including extra for hems. One full yard typically yields two towels comfortably. If you want a matching set, buy a few yards at once so the colors and patterns stay consistent. Always add an inch on each side to account for your double-fold hem and seam allowance.
Why are my towel edges fraying after washing?
Fraying usually means the raw edges weren’t fully enclosed in the hem. The double-fold method solves this by tucking every raw thread inside two folds before you stitch. If edges still fray, your stitching line may sit too close to the fold. Sew a touch further in, and consider adding a reinforcing topstitch. A serger or zigzag stitch also helps lock loose threads.
How do I make my homemade towels more absorbent?
Absorbency comes down to fabric choice and care. Pick terry cloth or flour sack cotton, which naturally soak up moisture. Prewashing also helps by removing manufacturing residues that repel water. Avoid fabric softener, since it coats fibers and reduces absorbency over time. For an extra boost, wash new towels once with a little vinegar to strip any leftover coating and open up the fibers.
Conclusion
Sewing your own towels is one of those projects that pays off every single day. You’ve now seen how a simple piece of cotton fabric turns into a soft, sturdy, useful towel through a handful of easy steps. Choose good fabric, prewash it, cut straight, fold a clean hem, and stitch it down with care.
Remember the essentials: never skip the prewash, always press before you sew, and take your time cutting along the grain. Those small habits make the difference between a wobbly first try and a towel you’re proud to display.
The real reward goes beyond the towel itself. You’ve picked up a versatile sewing skill, saved money, and created something that fits your kitchen perfectly. That confidence carries straight into your next crafting adventure.
So pick out a fabric you love and give it a go. Now that you know how to make kitchen towels, you can stitch a whole matching set, gift a few to friends, and keep your kitchen looking lovely for years to come.

About
Nick Hall has spent the last seven years working at the intersection of kitchen design and home repair — first as a design assistant at a residential renovation studio, then as a freelance writer covering everything from cabinet layouts to leaky faucet fixes.
Her approach is simple: kitchens should look good and function well. That means she’s just as comfortable talking about color palettes and counter materials as she is walking readers through how to fix a wobbly cabinet hinge or troubleshoot a garbage disposal.
Nick has worked directly with homeowners on small-space kitchen makeovers, budget-conscious renovations, and the kind of everyday repairs that don’t need a contractor — just the right instructions. She writes from experience, not theory, and tests most of the fixes and tips she shares before publishing them.
When she’s not writing, Nick is usually hunting for mid-century kitchen finds at estate sales or helping friends plan their own renovations. She lives in Columbus, Ohio.