
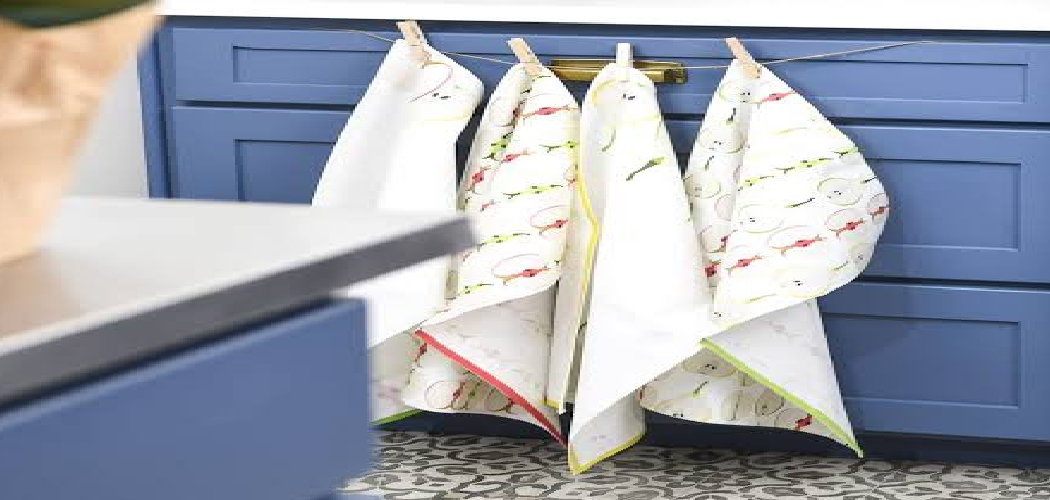

A towel that slips off your oven handle every time you reach for it gets old fast. The fix is simpler than you think: a hanging towel with a snug button or loop that stays exactly where you put it. And you can make one yourself in an afternoon.
If you’ve ever wished your dish towels would just stay put, this project is for you. Learning how to make hanging towels for kitchen use takes only basic sewing skills, a bit of fabric, and a little patience. No fancy machine or pattern required.
These towels keep your counters tidy, dry your hands fast, and add a pop of personality to your space. This guide walks you through every step, from choosing fabric to attaching the closure, so you can sew towels that actually hang where you want them.
Why Learning to Make Hanging Kitchen Towels Matters
Hanging towels solve a daily annoyance. Instead of fishing a damp cloth off the floor, you grab a towel that stays put on your cabinet handle or oven door. You control the size, the fabric, and the closure, so each one fits your kitchen perfectly.
There’s a budget bonus too. A little fabric and a single button turn into a towel that would cost a small fortune at a boutique.
This skill shines outside the home as well. Campers, RV owners, and anyone setting up a travel trailer love a towel that clings to a rail without sliding. At a camp kitchen or outdoor wash station, where space is tight and surfaces are few, a hanging tea towel earns its keep. Quick to sew and quick to pack, it goes wherever you cook.
Tools and Materials You’ll Need
Gather everything before you begin so the project flows without interruptions. Most of these items already live in a basic sewing kit.
- Cotton towel or terry cloth – a flour sack towel or thick terry works great for absorbency
- Coordinating fabric – a fat quarter for the towel topper
- Matching thread – all-purpose polyester or cotton
- Button or snap closure – one per towel
- Fabric scissors – sharp and reserved for cloth
- Sewing machine – or a needle for hand-stitching
- Straight pins or clips – to hold layers steady
- Iron and ironing board – for crisp pressing
- Measuring tape and ruler – for even cuts
- Lightweight interfacing (optional) – adds body to the fabric topper for a more polished hang
That interfacing isn’t strictly necessary, but it gives the topper a sturdy, professional feel that holds its shape wash after wash.
Step-by-Step Guide on How To Make Hanging Towels For Kitchen
Step 1 – Choose and prewash your materials
Start by picking a towel that feels good in your hands. A soft cotton towel dries dishes gently, while plush terry cloth soaks up spills like a sponge. For the topper, choose a fun quilting cotton that matches your kitchen.
Prewash both the towel and your topper fabric before cutting. Cotton shrinks, sometimes more than you’d expect, and you want that shrinking done now. Wash and dry everything just as you plan to launder the finished piece.
At a camp kitchen or outdoor wash station, where space is tight and surfaces are few, a hanging tea towel earns its keep. Run your fingers over the dried fabric and notice how it softens and relaxes. Knowing how to make hanging towels for kitchen use really starts here, with clean, preshrunk materials that won’t warp or pucker after your first wash.
Step 2 – Press everything smooth
Before you measure or cut, give both pieces a good press. Set your iron to the cotton setting and glide it across the fabric until every wrinkle disappears.

Smooth fabric lies flat on your work surface, which means straighter cuts and more accurate measurements. A wrinkled topper can shift and stretch, throwing your whole towel out of square.
Listen for that gentle hiss of steam and feel the warm cotton turn crisp and cooperative under your palm. Press the towel itself too, especially along the top edge where you’ll attach the fabric topper. Once both pieces lie perfectly flat, you’re ready to measure with confidence. This small step makes every stitch that follows look cleaner and far more professional.
Step 3 – Measure and cut the topper
Decide how wide your towel topper should be. Measure the top edge of your towel, then cut your topper fabric to match that width, adding an inch for seam allowance on each side.
For the height, cut a piece about 10 to 14 inches tall. You’ll fold this in half later, so the finished topper sits around 5 to 7 inches once gathered or pleated.
Lay your pressed fabric flat and mark your cutting lines with chalk, keeping them straight along the grain. Cut slowly with sharp fabric scissors, taking long, smooth strokes for clean edges. Hold the fabric still with your free hand. Crisp, even cuts now set you up for a topper that hangs straight and looks beautifully balanced.
Step 4 – Gather the towel top
Now prepare the towel to meet its topper. If your towel is wider than the topper, you’ll need to gather or pleat the top edge so the two match up neatly.
To gather, sew a long basting stitch across the top of the towel, then gently pull the thread to draw the fabric in. Watch the soft folds form as you tug, spacing them evenly with your fingers.
For a crisper look, fold a few simple pleats instead and pin them flat. Either method works beautifully. Aim for the gathered or pleated width to match your topper exactly. Pin everything in place and run your hand across the top to feel that the folds sit smooth, even, and ready to stitch.
Step 5 – Attach the topper to the towel
Time to join the two pieces. Fold your topper fabric in half lengthwise with the right sides facing out, then press a crisp crease along the fold.
Slip the gathered top edge of the towel between the two layers of the folded topper, like a sandwich. Pin generously so nothing shifts as you sew.
Stitch a straight line across the bottom edge of the topper, catching both fabric layers and the towel inside. Keep your seam allowance even, about a quarter inch, and sew slowly over the bulkier gathered section. You’ll feel the layers thicken under the presser foot. When you’re done, the topper should hug the towel snugly, with the soft cotton hanging cleanly below the finished band.
Step 6 – Shape the loop or band
Now create the part that loops over your handle. Fold the topper so the two short top edges meet, forming a loop wide enough to slide over a cabinet handle or oven door bar.
Hold it up and test the fit against your actual handle. Too tight and it won’t slide on easily; too loose and it’ll droop. Adjust the overlap until it feels just right.
Pin the overlapping edges together where they meet. Press the fold flat so the band keeps a clean shape. This step decides how your towel hangs, so take a moment to picture it draped over your oven door. A well-shaped band keeps the towel snug and stops it from sliding off mid-task.
Step 7 – Add the button or snap closure
A closure keeps your towel secured so it won’t slip away. Mark where the two ends of the band overlap, then stitch a button onto the outer layer.
On the inner layer, sew a small buttonhole or attach a matching snap closure. A snap is the easiest option for beginners and fastens with a satisfying click. A button adds a charming, classic touch.
Practice opening and closing the closure a few times. It should fasten securely yet release without a struggle when you want to toss the towel in the wash. Run your thumb over the finished button and feel how firmly it holds. This little detail turns a simple cloth into a towel that genuinely stays where you hang it.
Step 8 – Press, trim, and finish

You’re almost there. Snip away any loose thread tails with your fabric scissors, checking both sides for stray strands.
Give the whole towel a final press. The warm iron sets your stitching, flattens the topper, and leaves the cotton looking crisp and inviting. You’ll feel the fabric relax into a smooth, ready-to-use piece.
Hang it over your oven door or cabinet handle and step back. Notice how the topper sits straight, the closure holds firm, and the towel drapes neatly below. That first hanging towel always feels like a small win. Now that you’ve mastered how to make hanging towels for kitchen use, you can stitch a whole matching set to brighten every corner.
Critical Mistakes When Making Hanging Kitchen Towels
Even a quick project has a few traps, so it helps to know what trips up beginners.
The biggest mistake is skipping the prewash. Cotton and terry cloth both shrink, and if you sew first, your neat towel can come out of the dryer puckered and twisted, with the topper no longer matching the towel width. Always wash and dry your fabric before cutting.
Another common slip is making the loop the wrong size. If you don’t test it against your actual cabinet handle or oven door, you’ll end up with a band that’s either too tight to slide on or so loose it slips off. Measure your handle and check the fit before you stitch the closure.
Rushing the gathering step causes trouble too. Uneven gathers leave the towel lumpy and lopsided, so the fabric topper sits crooked. Take your time spacing those folds evenly across the top.
Finally, many beginners pick thin, slippery fabric that looks pretty but barely absorbs water. For real usefulness, choose absorbent cotton or terry cloth, and reserve the decorative quilting cotton for the topper alone, where it shines.
Expert Tips
A few small tricks lift your towels from homemade to boutique-quality. First, add lightweight interfacing to the fabric topper. It gives the band body, so it holds a crisp shape and hangs without flopping.
Use a slightly longer stitch length over the gathered section. It feeds through the bulky layers more smoothly and looks cleaner on cotton. Test your tension on a scrap first to avoid puckering.
Snap closures save time and frustration if buttonholes intimidate you. They fasten fast and survive endless trips through the wash.
Finally, batch your work. Cut several toppers and towels at once, then sew them assembly-line style. You’ll end up with a coordinated set that looks like it came straight off a shop shelf, and you’ll save plenty of time along the way.
Frequently Asked Questions
What fabric works best for hanging kitchen towels?
For the towel itself, choose something absorbent and washable so it actually dries your hands and dishes. Good options include:
- Terry cloth – thick, spongy, and excellent for soaking up spills
- Flour sack cotton – lightweight, soft, and quick-drying
- Standard cotton towel – sturdy and easy to work with
Use a fun quilting cotton for the topper only, since its job is decoration, not absorbency.
Do I need a sewing machine to make a hanging towel?
Not at all. A machine speeds things up and gives even stitches, but you can hand-sew the whole project. Use a backstitch along the topper seam for strength and a small running stitch for the gathers. Hand-sewing takes a bit longer, yet it produces sturdy, charming results. Many crafters find the slow, steady rhythm of stitching by hand genuinely relaxing.
How do I keep the towel from slipping off the handle?
A secure closure is the key. Add a button and buttonhole or a snap closure where the band overlaps, and the towel will stay put even when you tug on it. Also test the loop size against your actual cabinet handle or oven door before stitching. A snug band that fits your handle properly won’t slide off during busy cooking sessions.
Can I make these towels without a button closure?
Absolutely. If buttons feel fussy, you have easy alternatives. A snap closure fastens with a quick click and suits beginners perfectly. You can also stitch the band into a permanent closed loop, then simply slide it over the handle. Hook-and-loop tape works too. Choose whichever feels easiest, since the goal is just a band that holds the towel securely in place.
How much fabric do I need for one hanging towel?
You’ll need one cotton towel or a piece of terry cloth for the body, plus a fat quarter of quilting cotton for the topper. The fat quarter, roughly 18 by 22 inches, easily covers one topper with seam allowance to spare. If you’re making a matching set, buy your topper fabric in a continuous cut so the colors and patterns stay consistent across every towel.
Conclusion
Making your own hanging towels is one of those projects that rewards you every single day. You’ve seen how a simple towel and a strip of fabric turn into a tidy, useful piece that stays right where you put it. Choose absorbent fabric, prewash it, gather the top neatly, attach a sturdy topper, and finish with a button or snap closure.
Keep the key habits in mind: always prewash, test your loop against the real handle, and space your gathers evenly. Those small steps separate a wobbly first attempt from a towel you’ll proudly hang for guests to see.
The payoff goes beyond the towel itself. You’ve picked up a handy sewing skill, saved money, and created something that fits your kitchen exactly. That confidence carries straight into your next project.
So grab a fabric you love and give it a try. Now that you know how to make hanging towels for kitchen use, you can stitch a whole coordinated set, gift a few to friends, and keep your kitchen looking lovely for years to come.

About
Nick Hall has spent the last seven years working at the intersection of kitchen design and home repair — first as a design assistant at a residential renovation studio, then as a freelance writer covering everything from cabinet layouts to leaky faucet fixes.
Her approach is simple: kitchens should look good and function well. That means she’s just as comfortable talking about color palettes and counter materials as she is walking readers through how to fix a wobbly cabinet hinge or troubleshoot a garbage disposal.
Nick has worked directly with homeowners on small-space kitchen makeovers, budget-conscious renovations, and the kind of everyday repairs that don’t need a contractor — just the right instructions. She writes from experience, not theory, and tests most of the fixes and tips she shares before publishing them.
When she’s not writing, Nick is usually hunting for mid-century kitchen finds at estate sales or helping friends plan their own renovations. She lives in Columbus, Ohio.