
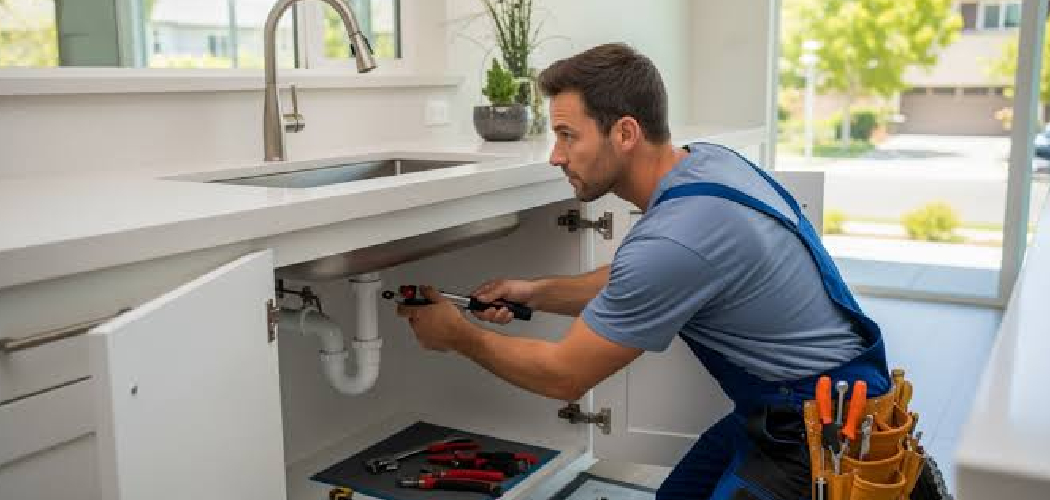

A worn-out, stained, or leaky sink can drag down the whole feel of your kitchen, no matter how clean everything else looks. The exciting part? Swapping it out is far more doable than most people think, and you don’t need a plumber’s license to pull it off.
With a handful of basic tools and a free afternoon, you can lift out the old basin and drop in a fresh one that transforms the space. It feels intimidating until you break it into simple, logical steps.
Learning how to change kitchen sink fixtures yourself saves money, builds real confidence, and gives you full control over the look and function of your kitchen. This guide walks you through every stage, from shutting off the water to running that final leak check, so you can tackle the job with steady hands and zero guesswork.
Why Learning To Change A Kitchen Sink Matters
This skill stretches well past a standard home kitchen. If you own an RV, live in a tiny home, or chase the van-life dream, your sink takes a beating from constant movement and tight plumbing, so knowing how to replace or repair it keeps you self-reliant on the road.
For campers and outdoor beginners, a cracked or leaking sink can spell water damage in a small space where every drop matters. Fixing it yourself means you’re never stranded waiting for help in a remote spot.
In compact or mobile living, space and weight count too. Choosing and fitting the right sink yourself lets you match your setup perfectly. You save on labor costs, avoid pricey callouts, and gain a practical skill that keeps your living space functional wherever you happen to park.
Tools and Materials You’ll Need
Gather your gear before you start, since nothing slows a project like hunting for a tool mid-job. You’ll want an adjustable wrench for the supply line nuts and a basin wrench for those awkward bolts hidden up behind the basin where your hand can’t reach.
Keep a screwdriver handy for mounting clips, plus a pipe wrench for stubborn drain connections. Slide a bucket under the trap to catch leftover water, and lay out a few towels to mop up spills and protect the cabinet floor.
For sealing, grab plumber’s putty or silicone caulk, and a utility knife to slice through old sealant. Pick up replacement sink clips if yours look worn. One optional convenience item worth having is a headlamp, which frees both hands and lights up that dark cabinet beautifully.
Step-by-Step Guide on How To Change Kitchen Sink
Step 1 – Shut Off the Water and Power

Start by killing the water supply so you don’t end up with a soggy surprise. Reach under the sink and turn both shutoff valves clockwise until they stop, then open the faucet to release any trapped pressure and drain the lines.
If your sink has a garbage disposal, switch off its power at the breaker or unplug it. Safety first, always.
Listen for the trickle to stop and watch the faucet run dry. That tells you the water lines are truly closed.
Place a towel and a bucket beneath the pipes now, since a little water always lingers in the trap. Taking these two minutes upfront protects your cabinet and keeps the whole job clean and stress-free.
Step 2 – Clear the Cabinet Area
Before you wrestle with any plumbing, empty the cabinet beneath your sink completely. Pull out the cleaning sprays, dish soaps, sponges, and that mystery collection of bags everyone seems to hoard down there.
A clear space gives you room to move and see what you’re doing. Crouching into a cramped cabinet half-full of clutter is a recipe for frustration and bruised knuckles.
Wipe down the base while it’s empty, since you may spot old water stains that hint at a slow leak you never noticed. Clip on your headlamp and take a good look at the supply lines, shutoff valves, and drain assembly above you.
Knowing the layout now makes every following step smoother and far less of a guessing game.
Step 3 – Disconnect the Supply Lines and Drain
Now get hands-on with the plumbing. Use your adjustable wrench to loosen the nuts connecting the supply lines to the faucet tailpiece, turning counterclockwise. Expect a few drops to escape, which is exactly why that bucket sits ready below.
Once the water lines are free, move to the drain. Loosen the slip nuts on the trap by hand or with a pipe wrench, then slide the P-trap down into the bucket to drain it.
You’ll catch a whiff of that distinct sink smell, so breathe through your mouth and keep going. Disconnect the dishwasher hose and disposal too if they’re plumbed in.
Set every part aside in order, so reassembly later feels logical rather than like a puzzle.
Step 4 – Loosen the Clips and Cut the Sealant
With the plumbing detached, the sink is held in place by mounting clips and a bead of old sealant. Reach underneath and unscrew each clip with your screwdriver, working your way around the basin.
These clips can hide in tight corners, so your basin wrench and headlamp earn their keep here. Spin them loose and set them aside, or toss them if they look corroded.
Next, run your utility knife carefully around the top edge where the sink flange meets the countertop. You’ll feel the blade slice through the hardened sealant bead with a satisfying give.
Take your time and keep the blade flat against the counter to avoid scratching the surface. Once that seal breaks free, the old sink is ready to lift out.
Step 5 – Remove the Old Sink
Time for the most satisfying part. With the clips off and the sealant cut, push gently up from underneath while lifting the rim from above. A drop-in sink usually pops free with a little pressure.
If it resists, run your knife around the edge once more to catch any sticky spots you missed. For an undermount sink, you’ll need a helper to support the weight from below as you release it.
Lift it straight up and out, then set it aside on a towel. Knowing how to change kitchen sink units cleanly means resisting the urge to yank or pry hard, which can chip the countertop cutout.
Take a breath and admire the empty hole. You’re halfway home now.
Step 6 – Clean and Prepare the Countertop
A fresh sink deserves a clean foundation. Scrape away every trace of old sealant, putty, and grime from the countertop cutout using your utility knife and a plastic scraper.
Wipe the edges down with a rag and a little rubbing alcohol so the new sealant bonds properly. Any leftover gunk creates gaps where water can sneak through later.
Run your finger along the cutout edge and feel for rough spots or old caulk ridges. Smooth them out so your new sink sits flat and even.
Check the opening size against your replacement basin while you’re here. Catching a fit problem now, before you apply sealant, saves a messy do-over. A clean, dry, level surface is the secret to a leak-free result that lasts.
Step 7 – Test-Fit and Seal the New Sink

Lower your new sink into the cutout without any sealant first, just to confirm it drops in snugly and sits flush. Mark its position, then lift it back out.
Now apply your sealant. Lay a steady bead of silicone caulk or roll a rope of plumber’s putty around the underside of the sink flange. Aim for an even line with no gaps.
Settle the sink firmly into place, pressing down so the sealant squishes out slightly all around. That ooze tells you the seal is complete.
Underneath, fasten the mounting clips snugly to lock it down, working in a crisscross pattern for even pressure. Wipe away the excess sealant with a damp cloth before it cures into a stubborn ridge.
Step 8 – Reconnect Plumbing and Check for Leaks
Almost there. Reattach the drain assembly, P-trap, and tailpiece, hand-tightening the slip nuts first, then snugging them with your wrench. Reconnect the supply lines to the faucet and the dishwasher hose if you have one.
Knowing how to change kitchen sink plumbing properly means never overtightening, since cracked fittings cause the very leaks you’re trying to prevent.
Now reopen the shutoff valves slowly and watch closely. Run the water, fill the basin, then pull the plug to test the drain under full flow.
Crouch underneath with your headlamp and feel every joint for moisture. A dry connection means success. If you spot a drip, tighten that fitting a touch more until your leak check comes back perfectly clean.
Critical Mistakes When Changing A Kitchen Sink
A few avoidable errors trip up beginners, so let’s get ahead of them.
The most common mistake is forgetting to shut off the water completely before disconnecting the supply lines. Even with the faucet closed, pressure in the water lines can spray everywhere the moment you loosen a nut, soaking your cabinet and your patience. Always close both shutoff valves and bleed the line first.
Another frequent blunder is overtightening connections. It feels safer to crank every nut hard, but too much force cracks plastic fittings and warps the trap, creating leaks rather than preventing them. Snug is the goal, not gorilla-tight.
Many people also rush the sealing stage. Applying a thin, patchy bead of silicone caulk or skipping a proper clean of the countertop cutout leaves gaps where water seeps under the sink flange for months unnoticed, rotting the cabinet below.
Finally, folks often buy a replacement sink without measuring the existing cutout. A basin that’s even slightly too big or small turns a smooth swap into a major countertop modification. Measure twice, buy once, and your project stays a simple afternoon job rather than a weekend headache.
Expert Tips
Want this to go like a pro did it? Take photos with your phone at every disconnection step. When reassembly time comes, those pictures show you exactly where each line and clip belongs.
Keep a small dish or magnetic tray for screws, clips, and slip nuts so nothing rolls into the depths of the cabinet. Losing a single mounting clip can stall the whole job.
When choosing sealant, silicone caulk outlasts plumber’s putty around most modern sinks and handles moisture better. Lay a smooth, continuous bead rather than dabs.
Finally, run a full basin of water during your leak check, not just a trickle. A loaded sink stresses the drain assembly and reveals weak joints that a gentle stream would hide. Patience here saves soggy surprises later.
Frequently Asked Questions
How Long Does It Take to Replace a Kitchen Sink?
For a confident beginner, plan on two to four hours. Your timing depends on a few things:
- Whether the old sealant releases easily or fights you
- The condition of the shutoff valves and supply lines
- Whether you’re swapping a drop-in sink or a trickier undermount sink
Give yourself extra time if you’re also replacing the faucet or trap, and never rush the leak check at the end.
Do I Need to Replace the Faucet Too?
Not always, but it’s often worth it. If your old faucet still works well and matches your new sink’s hole configuration, you can reuse it. However, since you’ll already have the plumbing disconnected, replacing both at once saves you a second teardown later. Just confirm the faucet connections and hole spacing match your new basin before you commit to reusing the old hardware.
Should I Use Plumber’s Putty or Silicone Caulk?
Both work, but they suit different spots. Use silicone caulk around the sink flange and rim, since it flexes, resists water, and bonds tightly to most countertops. Reserve plumber’s putty for drain assemblies and areas you might need to take apart later. Always check your sink manufacturer’s instructions, because some materials, like certain stone or composite sinks, react poorly to putty oils and require silicone only.
What If My New Sink Doesn’t Fit the Cutout?
This is why measuring first matters so much. If the new sink is slightly larger, you can carefully enlarge the countertop cutout with a jigsaw, though that’s more advanced. If it’s too small, the sink won’t sit properly and you’ll need a different model. Before buying, measure your existing opening’s length, width, and corner radius, then match those numbers to the replacement sink’s specifications.
How Do I Know If My Sink Has a Leak After Installation?
Run a thorough leak check before declaring victory. Fill the basin completely, then release it while watching underneath with your headlamp. Feel every joint, including the trap, tailpiece, and supply line connections, for moisture. Lay a dry paper towel under each fitting and check it after ten minutes. Any damp spot points you straight to the connection that needs a gentle extra turn.
Conclusion
Replacing your sink turns out to be one of the most rewarding upgrades you can tackle, and now you’ve got the full roadmap to do it right. With a few common tools and a careful, step-by-step approach, you can lift out a tired old basin and install a sparkling new one in a single afternoon.
Remember the flow. Shut off the water and power, clear the cabinet, then disconnect the supply lines and drain. Loosen the clips, cut the sealant, and lift the old sink free. Clean the countertop cutout, seal and set your new basin, reconnect the plumbing, and finish with a thorough leak check.
Mastering how to change kitchen sink fixtures saves you money, frees you from waiting on a plumber, and works just as well in a family kitchen, an RV, or a cozy tiny home. Best of all, you earn that quiet satisfaction of doing it yourself.
So gather your tools, measure your cutout, and start with step one. Your fresh new sink is closer than you think.

About
Nick Hall has spent the last seven years working at the intersection of kitchen design and home repair — first as a design assistant at a residential renovation studio, then as a freelance writer covering everything from cabinet layouts to leaky faucet fixes.
Her approach is simple: kitchens should look good and function well. That means she’s just as comfortable talking about color palettes and counter materials as she is walking readers through how to fix a wobbly cabinet hinge or troubleshoot a garbage disposal.
Nick has worked directly with homeowners on small-space kitchen makeovers, budget-conscious renovations, and the kind of everyday repairs that don’t need a contractor — just the right instructions. She writes from experience, not theory, and tests most of the fixes and tips she shares before publishing them.
When she’s not writing, Nick is usually hunting for mid-century kitchen finds at estate sales or helping friends plan their own renovations. She lives in Columbus, Ohio.