
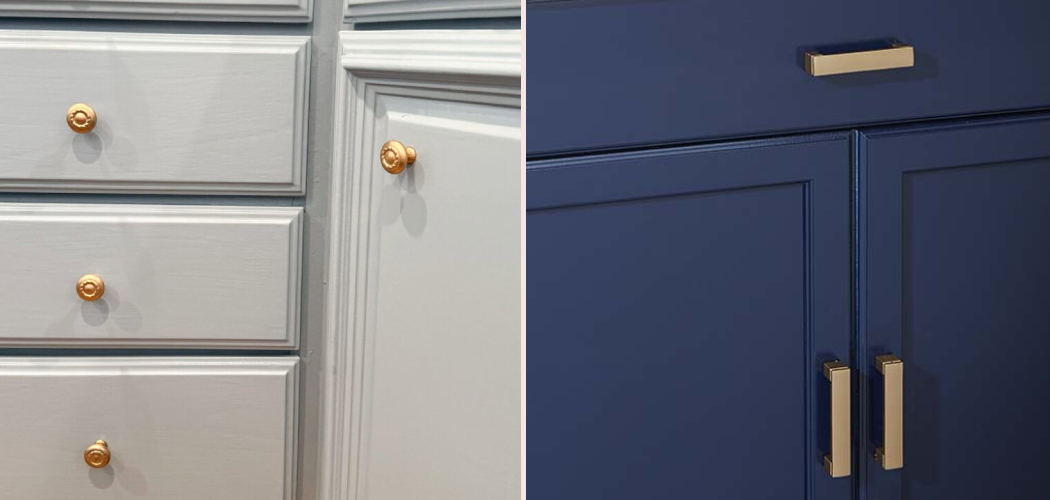
A full kitchen remodel costs a lot, but small updates can make a big visual difference. One of the easiest budget-friendly upgrades is giving your old knobs, pulls, and handles a fresh finish instead of replacing them. If you have worn brass, dated bronze, or scratched metal pieces, learning how to paint kitchen hardware can help you refresh your cabinets in a single weekend.

This project is beginner-friendly, low-cost, and satisfying because the change is easy to see right away. With the right prep, paint, and drying time, you can get a smooth finish that looks clean and intentional. This guide will show you how to prep, paint, and protect kitchen hardware so it holds up to daily use.
Why It Matters
Kitchen hardware gets touched every day. Grease from hands, cooking residue, cleaning sprays, and simple wear can make cabinet pulls and knobs look dull long before the cabinets themselves need attention. Painting them gives you a fast way to update the room without buying all new pieces.
This skill also helps when you want a custom look. Maybe your kitchen needs matte black pulls, warm brass tones, or a soft brushed-metal effect that stores do not offer at the right price. Painting lets you match your cabinet color, faucet finish, or overall style on your own terms. For first-time DIYers, it is also a smart starter project because it teaches sanding, priming, spraying, and curing on a small scale.
Tools and Materials
You do not need a full workshop to do this well, but you do need the right supplies.
- Screwdriver for removing knobs and pulls
- Small containers or zip bags for keeping screws organized
- Degreaser or dish soap for cleaning off oil and grime
- Microfiber cloths or lint-free rags
- Fine-grit sandpaper, usually 220 to 320 grit
- Tack cloth or a clean dry cloth for removing sanding dust
- Bonding primer made for metal surfaces
- Spray paint or specialty metal paint in your chosen finish
- Clear topcoat suitable for painted metal, if needed
- Cardboard, drop cloth, or a protected work surface
- Nitrile gloves to keep oils from your hands off the hardware
- Painter’s tape for labeling and setup
- Optional: a piece of foam, cardboard, or scrap wood to hold hardware upright while painting
Step-by-Step Guide on How to Paint Kitchen Hardware
Step 1 – Remove and Label the Hardware
Start by taking every piece of hardware off the cabinets and drawers. Use a screwdriver and work slowly so you do not strip the screws or scratch the cabinet fronts. As you remove each pull or knob, place the screws in a labeled bag or small container. This step saves time later, especially if some screws are different lengths.
Labeling matters more than many beginners expect. A drawer pull from one spot may fit another, but keeping everything matched makes reassembly easier. Lay the hardware out on a towel or tray and inspect each piece. Look for chipped finish, sticky residue, dents, or rust spots. When you are learning how to paint kitchen hardware, good organization keeps the project simple and lowers the chance of mistakes before painting even begins.
Step 2 – Clean Away Grease and Residue
Kitchen hardware may look clean, but it often holds a thin film of grease, soap, and skin oils. Paint will not bond well to that slick surface. Wash each piece with warm water and dish soap or a degreaser made for painted and metal surfaces. Scrub gently with a soft brush or cloth, paying attention to grooves, edges, and decorative details where grime likes to hide.
After washing, rinse the pieces well and dry them fully with a lint-free cloth. Let them air-dry for a bit longer if needed. The hardware should feel clean and dry, not slippery. If you still see shine from residue, clean again. This stage may seem basic, but it has a big effect on durability. A smooth-looking finish starts with a truly clean surface, not just one that looks clean from a distance.
Step 3 – Scuff the Surface for Better Adhesion
Most cabinet hardware has a factory finish that resists moisture and wear. That same finish can also resist paint. Light sanding helps create a surface the primer can grip. Use fine-grit sandpaper and scuff each piece gently. You do not need to remove every bit of old finish unless it is already peeling. Your goal is to dull the surface, not reshape the hardware.

Focus on curved edges, flat faces, and any glossy spots. Run your finger across the metal when you are done. It should feel slightly matte, not slick. After sanding, wipe each piece with a tack cloth or a clean dry rag to remove every trace of dust. Dust left behind can create bumps in the finish. This is one of the quiet details that separates a rough DIY result from one that looks careful and polished.
Step 4 – Set Up a Smart Painting Area
A good setup makes painting easier and cleaner. Work in a well-ventilated area, such as a garage with the door open or a covered outdoor spot on a dry day. Lay down cardboard or a drop cloth to catch overspray. If possible, place each knob or pull on foam, scrap wood, or cardboard so you can reach the edges without touching the fresh paint.
Spacing matters here. If the pieces sit too close together, overspray can build unevenly and leave thick spots. Keep them a few inches apart. Check the weather if you are using spray paint outside. High humidity, strong wind, or very cold air can ruin the finish fast. Before you open a can, read the label for drying times and ideal temperature range. A calm setup helps you move with control, which is a big part of getting a finish that looks even.
Step 5 – Apply Primer in Thin, Even Coats
Primer is the bridge between bare or scuffed metal and your paint. Use a bonding primer made for metal, and apply it in light coats rather than one heavy layer. Hold the spray can at the recommended distance, usually several inches away, and move in smooth passes. Start spraying just before the piece and stop just after it to avoid thick blobs at the ends.
Let the first coat dry as directed, then add another if the hardware still looks patchy. Thin coats dry more evenly and reduce drips. As you practice how to paint kitchen hardware, this is where patience starts to pay off. Primer may not look exciting, but it is what helps the color coat stay put when cabinets are opened and closed all day. Once dry, the surface should look even, dry to the touch, and ready for color.
Step 6 – Paint With Control, Not Speed
Now comes the part that changes the look of the hardware. Shake the paint can well and test the spray on scrap cardboard first. Then paint each piece using light, steady passes. Avoid trying to cover everything in one round. A light first coat may look almost too thin, but that is normal. It gives later coats something to bond to without creating sags.
Let each coat dry before adding the next one. Two to four light coats usually work better than one heavy coat. Watch how the paint catches the light on curved pulls and detailed knobs. If you spray too close, the finish can puddle and soften details. If you spray too far away, it can turn dusty. A smooth finish usually comes from calm, repeated passes and enough drying time between coats.
Step 7 – Add a Protective Topcoat if Needed
Some paint lines already include durability built in, but many painted hardware pieces benefit from a clear protective coat. This is especially helpful in busy kitchens where hardware gets constant contact from hands, moisture, and cleaning. Choose a compatible topcoat in the sheen you want, such as matte, satin, or gloss. Make sure the color coat has dried long enough before you add anything over it.
Apply the topcoat the same way you applied primer and paint: light coats, steady motion, and enough time between layers. The clear finish should look smooth, not cloudy or thick. If you want the hardware to keep a soft modern look, satin or matte often works well. If you want more shine, go with gloss. The goal is not to make the hardware look plastic. The goal is to protect the fresh finish from everyday wear.
Step 8 – Let the Hardware Cure Fully Before Reinstalling
Dry and cured are not the same thing. Hardware may feel dry within an hour or two, but the finish often needs much longer to harden. Follow the product instructions closely, and if the label gives a curing window, respect it. Rushing this step can leave fingerprints, dents, or screw marks in paint that seemed ready but was still soft underneath.
This is one of the hardest parts for eager beginners because the pieces already look done. Still, waiting is worth it. Set the hardware aside in a dust-free spot where it will not get bumped. If you want the best result from how to paint kitchen hardware, treat curing time like part of the job, not extra downtime. A finish that hardens fully will stand up better when you reinstall the screws and start using the cabinets again.
Step 9 – Reinstall Carefully and Check the Final Look
Once the hardware has cured, bring out your labeled screws and reinstall each piece in its original spot. Tighten screws until snug, but do not overdo it. Too much force can chip the fresh finish around the holes or leave pressure marks on the paint. Work slowly and support each pull or knob with your free hand as you tighten.
Step back every few cabinets and check the overall look. This is the satisfying moment when the project comes together. Freshly painted hardware can make old cabinets feel cleaner, sharper, and more current. If you notice a missed spot or tiny flaw, you can often fix it with a light touch-up rather than repainting everything. Once all the hardware is back in place, wipe away fingerprints and enjoy the updated look you created yourself.
Common Mistakes
The most common mistake is skipping prep because the hardware looks “good enough.” Paint needs a clean, slightly rough surface to stick well. If you paint over grease or gloss, the finish may peel, scratch, or wear off much faster than expected.
Another mistake is spraying coats that are too heavy. Thick paint feels faster in the moment, but it often leads to drips, soft edges, and a gummy finish that takes much longer to dry. Light coats give you more control and usually look more professional.

Many beginners also ignore primer, especially when the hardware already has a metal finish they think paint will grip. In most cases, primer is what helps the new finish bond and last. Without it, the paint can chip around edges and high-touch spots.
Rushing the cure time is another big problem. Hardware may seem ready when it feels dry, but reinstalling too soon can leave fingerprints and dents. Finally, some people use the wrong paint entirely. Wall paint or craft paint will not hold up well on cabinet pulls. Use products meant for metal and for surfaces that get handled often.
Expert Tips
If you want the finish to look more expensive, choose a color and sheen that match other fixed elements in the kitchen, such as the faucet, hinges, or light fixtures. That visual consistency makes painted hardware feel intentional rather than temporary.
Test your full process on one extra piece first if you can. Clean it, sand it, prime it, paint it, and topcoat it before doing the whole batch. This helps you catch compatibility issues early.
For textured or ornate hardware, spray from multiple angles using very light passes. That helps you cover creases without flooding them. If you are struggling with fingerprints during install, wear clean gloves and use a hand screwdriver instead of a drill for better control.
Frequently Asked Questions
Can you paint kitchen cabinet handles without removing them?
You can, but it usually leads to a messier result. Removing the hardware lets you clean, sand, prime, and paint every side evenly. It also prevents overspray from landing on cabinets or drawers. If you want a finish that lasts and looks smooth, taking the hardware off first is the better choice.
What kind of paint works best on metal hardware?
Spray paint made for metal usually works best because it goes on smoothly and reaches curved edges well. A bonding primer underneath helps even more. Look for products labeled for metal, durability, and indoor use. If the hardware gets touched often, a compatible clear topcoat can add extra protection against wear.
Do I need to sand hardware before painting?
Yes, in most cases you should lightly sand it. Sanding dulls the slick factory finish so primer and paint can grip the surface better. You do not need aggressive sanding or stripping unless the old finish is peeling badly. A gentle scuff with fine-grit sandpaper is often enough to improve adhesion.
How long should painted hardware dry before reinstalling?
It depends on the product, but many finishes need more than a few hours. Dry to the touch is not the same as fully cured. Some paints need a full day or longer before safe handling, and several days to harden completely. Always check the label and wait as long as recommended for the strongest finish.
Will painted kitchen hardware hold up over time?
Yes, it can hold up well if you prep the surface properly and use the right products. Cleaning, sanding, priming, and curing all matter. Hardware gets heavy daily use, so shortcuts show up fast. A well-painted piece may still wear over time, but it usually lasts much longer when each step is done with care.
Conclusion
Painting kitchen hardware is one of the simplest ways to refresh your space without spending much money. The keys are straightforward: remove and label each piece, clean off every bit of grease, scuff the surface, use a good bonding primer, build color with thin coats, and let the finish cure fully before reinstalling. Those small choices make the difference between a quick cosmetic fix and a durable update.
If you have never tried a home project like this before, this is a smart place to start. The pieces are small, the process is manageable, and the visual payoff is strong. Once you understand how to paint kitchen hardware, you can update tired knobs and pulls with more confidence and far less cost than replacing them all. Try this checklist today, start with one small batch, and let your kitchen teach you the value of careful prep and patience.

About
Nick Hall has spent the last seven years working at the intersection of kitchen design and home repair — first as a design assistant at a residential renovation studio, then as a freelance writer covering everything from cabinet layouts to leaky faucet fixes.
Her approach is simple: kitchens should look good and function well. That means she’s just as comfortable talking about color palettes and counter materials as she is walking readers through how to fix a wobbly cabinet hinge or troubleshoot a garbage disposal.
Nick has worked directly with homeowners on small-space kitchen makeovers, budget-conscious renovations, and the kind of everyday repairs that don’t need a contractor — just the right instructions. She writes from experience, not theory, and tests most of the fixes and tips she shares before publishing them.
When she’s not writing, Nick is usually hunting for mid-century kitchen finds at estate sales or helping friends plan their own renovations. She lives in Columbus, Ohio.