
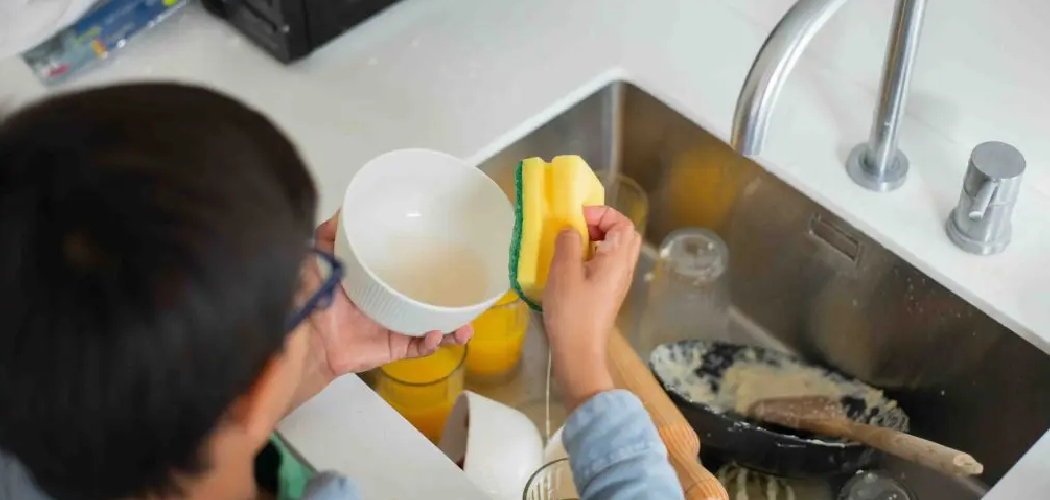
A kitchen sponge can go from clean to sour in a day if you do not handle it the right way. Warm water, food bits, grease, and poor airflow create the perfect place for odor-causing bacteria to grow. If you have ever picked up your sponge and caught that musty, rotten smell, you already know how fast the problem starts. Learning how to keep kitchen sponge from smelling is not hard, but it does take a few smart habits that fit into your daily cleanup routine.

This guide will show you simple, beginner-friendly ways to wash, dry, store, and replace your sponge so it stays fresher longer.
Why Keeping a Kitchen Sponge Fresh Matters for Campers and Outdoor Beginners
If you camp, travel in an RV, or cook outdoors, sponge care matters even more. In small spaces, one bad-smelling sponge can make your whole cooking area feel dirty. Odors also seem stronger in a tent, camper van, or cabin where airflow is limited and dishes may sit longer between washes.
Outdoor beginners often work with less running water, fewer cleaning supplies, and tighter storage. That means a damp sponge can stay wet for too long and collect food residue fast. A fresh sponge helps you keep cooking gear cleaner, avoid unpleasant smells around your campsite, and make cleanup less stressful. When your basic dishwashing tools stay sanitary, your whole kitchen setup feels easier to manage.
Tools and Materials You’ll Need
- A clean kitchen sponge in good condition
- Dish soap that cuts grease well
- Hot running water
- White vinegar
- Baking soda
- A small bowl or container for soaking
- A sponge holder, rack, or raised tray that allows airflow
- Clean dish towels or paper towels
- A disinfecting method, such as a dishwasher with a heated dry cycle
- Optional: a second sponge so you can rotate between uses
Step-by-Step Guide to Keeping Your Kitchen Sponge Fresh
Step 1 – Start with a Sponge That Is Still Worth Saving
Before you clean anything, look closely at the sponge you already have. If it is tearing, flattening out, shedding pieces, or holding a permanent greasy film, it may be past the point of rescue. A worn sponge traps more food debris in its damaged surface, and that trapped residue often causes the strongest odors.
Press it between your fingers and notice how it feels. A usable sponge should feel springy, not slimy or stiff. If the smell stays strong even after rinsing, replace it instead of trying to fix it. Good sponge care starts with a sponge that can still rinse clean and dry well. Starting fresh gives you a much better shot at keeping bad smells from returning.
Step 2 – Rinse Out Food and Grease After Every Use
The fastest way to invite odor is to leave food particles sitting in the sponge after washing dishes. Tiny scraps of egg, sauce, dairy, and grease sink deep into the fibers. Once they sit in a warm, damp sponge, they break down and start to smell sour or rotten.
Right after each use, hold the sponge under hot running water and squeeze it several times. Keep rinsing until the water runs clear and the sponge no longer feels slick. Add one drop of dish soap if needed, then work it through the surface with your fingers. This simple habit is one of the most important parts of how to keep kitchen sponge from smelling, because it removes the material that odor-causing germs feed on.

Step 3 – Wring It Out Thoroughly
A sponge that stays dripping wet will smell much faster than one that is only slightly damp. After rinsing, squeeze it hard several times from different angles. The goal is to push out as much trapped water as possible, especially from the center where moisture lingers longest.
You do not need special equipment for this step, just consistency. Pinch, press, and release until the sponge feels light rather than heavy. If it still leaves a stream of water in the sink, keep going. This matters because bacteria multiply best in moist conditions. When you remove extra water, you slow that growth. The sponge may not be fully dry yet, but you are already reducing the chance of that stale, swampy smell that shows up the next morning.
Step 4 – Let Air Reach Every Side
Where you store your sponge makes a big difference. If you toss it into the sink, leave it on a wet counter, or stuff it into a dark caddy with no airflow, moisture gets trapped. That damp, enclosed space becomes a perfect home for unpleasant smells.
Place the sponge upright in a holder or on a rack where air can move around it. If possible, keep it away from puddles and away from the bottom of the sink. Even a simple raised tray works better than a flat surface. You want both sides to start drying between uses. When a sponge dries faster, it stays fresher longer. Good airflow is easy to overlook, but it is one of the biggest daily habits that helps prevent mildew odors and bacterial buildup.
Step 5 – Deep Clean It Every Few Days
Daily rinsing helps, but it is not enough on its own. Every few days, give your sponge a deeper clean to remove hidden grime and odor. One easy method is to soak it in white vinegar for about five minutes, then rinse it well with hot water. Vinegar helps break down residue and cuts sour smells without leaving a heavy scent behind.
You can also run the sponge through the dishwasher if it is dishwasher-safe and sturdy enough to handle the cycle. Use a heated wash and dry if available. This routine supports how to keep kitchen sponge from smelling by dealing with the buildup you cannot see. A quick deep clean resets the sponge before odor has a chance to settle in and stick around.
Step 6 – Use Separate Sponges for Separate Jobs
Many bad sponge smells start because one sponge is doing too much. If you use the same sponge for greasy pans, raw meat drips, sticky counters, and everyday dishes, it will wear out fast and collect stronger residue. That mix of messes creates a deeper, harder-to-remove odor.
Try giving each sponge a clear job. Use one for dishes and another for counters or heavier cleanup. You can even pick different colors to avoid mix-ups. This simple system keeps grease and food soil from building up so heavily in one place. It also makes cleaning feel more organized. When each sponge handles less mess, it rinses cleaner, dries faster, and is less likely to develop that familiar sour kitchen smell.
Step 7 – Disinfect Without Damaging the Sponge
Some people try harsh cleaning tricks that ruin the sponge before the smell is gone. Bleach can work in some cases, but it is often more than you need for routine care and may leave a strong chemical odor behind. For most home kitchens, regular hot-water rinsing, vinegar soaks, and dishwasher cycles are enough.
If you choose a disinfecting method, make sure it is safe for the sponge material. Scrub sponges with delicate glue layers or built-in scrub pads may break down if treated too aggressively. Check the label if you still have it. A damaged sponge stays wet longer and holds more debris, which defeats the purpose. The best disinfecting routine is one you can do often without destroying the sponge’s shape or texture.
Step 8 – Replace the Sponge Before Odor Wins
Even with excellent care, a kitchen sponge does not last forever. Over time, the pores break down, the surface roughens, and trapped residue becomes harder to remove. If your sponge smells bad right after cleaning, or if it looks stained and feels slimy, it is time to let it go.
Most people should replace a frequently used kitchen sponge every one to two weeks, depending on how heavily it is used. If you cook often, wash greasy cookware, or clean up after several people, you may need a fresh one sooner. Keeping a spare on hand makes this easy. Replacing a sponge on time is not wasteful; it is a practical part of keeping your sink area cleaner, fresher, and easier to manage every day.

Common Mistakes That Make Kitchen Sponges Smell Worse
One common mistake is leaving the sponge in the sink after doing dishes. That seems harmless, but the sink stays wet and collects leftover food, soap scum, and grease. The sponge absorbs all of it, then sits in a damp pocket with almost no airflow. By the next use, the smell is stronger.
Another mistake is using too little rinsing time. Many people squeeze the sponge once and set it down, even though greasy residue is still trapped inside. If the sponge still feels slick or cloudy water comes out when you press it, it is not clean enough to store.
Some people also wait too long to replace old sponges. A sponge that is crumbling, stained, or permanently smelly will not improve much with another rinse. Holding onto it too long often spreads odor around your dishes and counters.
A final mistake is using one sponge for every mess in the kitchen. Raw food drips, oily pans, coffee spills, and countertop crumbs all leave different residues behind. When one sponge handles everything, smells build faster and become harder to remove. A little separation and routine care make a big difference.
Expert Tips
If you want your sponge to stay fresh longer, build sponge care into your cleanup routine instead of treating it as a separate chore. Rinse it well, wring it out fully, and place it where air can circulate every single time. That daily rhythm matters more than occasional heavy cleaning.
It also helps to rotate two sponges. While one dries completely, you can use the other. This reduces constant moisture and gives each sponge a longer usable life. If your kitchen is humid, choose a holder that keeps the sponge elevated rather than flat against a tray. Small changes in drying time often make the biggest difference. Freshness depends less on fancy products and more on keeping food, grease, and moisture from lingering.
Frequently Asked Questions
How often should I replace my kitchen sponge?
Most kitchen sponges should be replaced every one to two weeks with regular use. If you cook often or wash lots of greasy dishes, you may need to replace yours sooner. A strong odor, slimy feel, or worn surface is a clear sign that the sponge is no longer cleaning well and should be thrown away.
Is vinegar enough to remove sponge odor?
Vinegar is often enough for light to moderate odor because it helps loosen residue and reduce sour smells. It works best when paired with hot-water rinsing and proper drying. If the sponge still smells bad after a vinegar soak, it may have deep buildup or physical wear, which means replacement is the better choice.
Can I store my sponge under the sink?
You can, but it is usually not the best spot unless it dries there with strong airflow. Under-sink spaces are often dark, enclosed, and humid, which can make odors worse. A better option is a holder near the sink where the sponge can drain and dry between uses without sitting in standing water.
Why does my sponge smell even after I wash it?
A sponge can still smell after washing if grease and food particles remain trapped inside. Quick rinsing often cleans the surface but not the center. The sponge may also be too old, too damaged, or drying too slowly. In many cases, a deeper clean helps, but sometimes the sponge simply needs to be replaced.
Are scrub brushes better than sponges for avoiding odor?
Scrub brushes often resist odor better because they dry faster and trap less food debris. That makes them a good choice for some kitchens, especially if you deal with lots of grease or heavy cookware. Still, a sponge can stay fresh if you rinse, wring, air-dry, and replace it on a regular schedule.
Conclusion
A fresh kitchen sponge comes down to a few simple habits done well. Rinse out food and grease right away, squeeze out as much water as possible, let the sponge dry in open air, and deep clean it every few days. Just as important, do not wait too long to replace a sponge that feels slimy, damaged, or permanently smelly.
If you camp, cook in small spaces, or are just setting up your first real cleaning routine, these steps make a noticeable difference. Your sink area smells better, your cleanup feels more sanitary, and your sponge becomes a useful tool instead of a nasty surprise. Once you learn how to keep kitchen sponge from smelling, the process becomes quick and automatic. Start today with one small change: rinse better, dry better, and replace sooner when needed.

About
Nick Hall has spent the last seven years working at the intersection of kitchen design and home repair — first as a design assistant at a residential renovation studio, then as a freelance writer covering everything from cabinet layouts to leaky faucet fixes.
Her approach is simple: kitchens should look good and function well. That means she’s just as comfortable talking about color palettes and counter materials as she is walking readers through how to fix a wobbly cabinet hinge or troubleshoot a garbage disposal.
Nick has worked directly with homeowners on small-space kitchen makeovers, budget-conscious renovations, and the kind of everyday repairs that don’t need a contractor — just the right instructions. She writes from experience, not theory, and tests most of the fixes and tips she shares before publishing them.
When she’s not writing, Nick is usually hunting for mid-century kitchen finds at estate sales or helping friends plan their own renovations. She lives in Columbus, Ohio.