
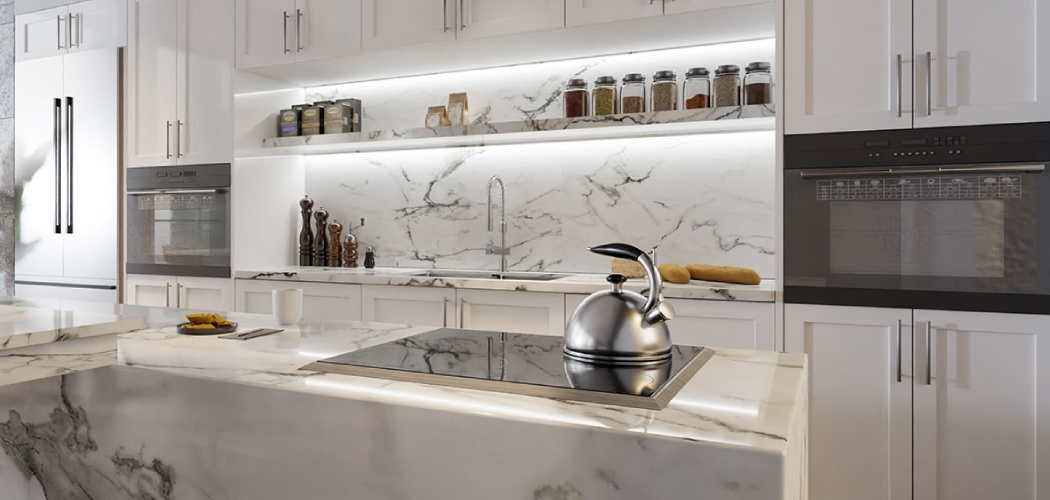
A tile countertop can give your kitchen a custom look without the cost of solid stone. It is also one of the most approachable countertop projects for a first-time DIYer, as long as you work in the right order and use the right materials. If you have basic tools, patience, and a free weekend, you can build a surface that feels sturdy, looks clean, and stands up to daily use.
If you are searching for how to make a kitchen countertop with tile, the key is to focus on a stable base, careful layout, and clean finishing work. This guide will show you how to plan the project, build the substrate, set the tile, grout it, and finish the edges with confidence.

Why Learn Tile Countertop Building for Outdoor and Camping Setups
This skill helps beyond the kitchen. If you enjoy camping, van life, or outdoor cooking, learning to tile a countertop teaches you how to build a durable work surface in small, practical spaces. The same core ideas apply to camp kitchens, outdoor prep stations, cabin counters, and portable cooking setups where you need a surface that handles heat, spills, and rough use.
Tile is also easier to repair than many slab materials. If one section chips or cracks, you can often replace a single tile instead of an entire top. For beginners who like hands-on projects, this makes tile a smart material to learn on. The measuring, cutting, leveling, and sealing skills you practice here can transfer to outdoor utility builds, DIY workbenches, and compact food prep areas.
Tools and Materials You’ll Need
Before you begin, gather everything in one place so the work moves smoothly.
- Tile of your choice, plus 10 percent extra for cuts and breakage
- Exterior-grade plywood or a solid countertop base
- Cement backer board for the substrate
- Backer board screws
- Thin-set mortar
- Notched trowel
- Tile spacers
- Tile cutter or wet saw
- Tape measure
- Straightedge or level
- Drill or driver
- Bucket and mixing paddle
- Grout
- Rubber grout float
- Large sponge
- Caulk for seams and edges
- Tile sealer, if your tile or grout requires it
- Safety glasses, gloves, and dust mask
- Optional: knee pads for comfort during long setting and grouting sessions
Step-by-Step Guide on How to Make a Kitchen Countertop with Tile
Step 1 – Measure the Countertop and Plan the Layout
Start by measuring the full countertop area, including depth, length, sink opening, and any appliance gaps. Write down each number carefully. Even a small measuring mistake can throw off your tile layout and leave you with awkward cuts at the edges.
Next, dry lay a few rows of tile on the floor or counter base. This lets you see how the pattern will land before you mix mortar. Try to avoid very thin strips along the front edge or backsplash line. A balanced layout looks better and is easier to install. You should also decide where your grout lines will fall and how you want to handle corners, trim pieces, and exposed edges.
Step 2 – Build or Inspect the Base
A tile countertop needs a stiff, solid base. If the surface flexes when you press on it, the tile and grout may crack later. Check your cabinets first to make sure they are level and firmly attached. Then inspect the countertop deck or build one from exterior-grade plywood if needed.
The base should feel stable and flat, with no soft spots or bouncing. In most cases, a plywood layer supports the tile assembly well, but it should never be the direct setting surface. Tile needs a proper substrate on top. Take your time here, because a strong base is what makes the whole countertop feel reliable when you lean on it, set down heavy pots, or wipe it clean every day.
Step 3 – Install the Backer Board Substrate
Once the plywood is secure, cut cement backer board to fit the countertop shape. This board acts as the tile substrate, giving the mortar a stable, moisture-resistant surface to bond to. Dry fit each piece first so you know the seams line up well and the sink cutout is accurate.
Spread a thin layer of thin-set between the plywood and backer board, then screw the panels down according to the manufacturer’s spacing guidelines. The mortar under the board is not for adhesion alone. It fills tiny gaps and helps create a fully supported layer. This stage matters more than many beginners expect. When people ask about how to make a kitchen countertop with tile, this is one of the most important parts to get right because it protects the finish from movement and cracks.
Step 4 – Mark Reference Lines and Dry Fit the Tile
After the backer board is in place, snap or draw reference lines across the countertop. A centerline and a line parallel to the front edge help keep the tile square as you work. If your first row drifts, every row after it will drift too, so use a straightedge and check twice.

Dry fit the full layout again on the actual counter. Place spacers between tiles and look at the cuts around the sink, walls, and front edge. This is the moment to adjust. You may find that shifting the layout by half a tile gives you cleaner cuts and a more finished look. It is far better to solve that now than while thin-set is drying and your hands are covered in mortar.
Step 5 – Spread Thin-Set and Set the Field Tile
Mix the thin-set mortar to a smooth, peanut butter-like consistency. Let it slake if the bag directions call for it, then remix. Work in small sections so it stays workable and does not skin over before the tile goes down.
Use the flat side of the trowel to press mortar onto the substrate, then comb it with the notched side. Set each tile with a slight twist to collapse the ridges and create a strong bond. Use spacers to keep grout joints even. You should hear a soft scrape as the tile settles into place and feel it grab the bed beneath it. If you are learning how to make a kitchen countertop with tile, move slowly here. Consistent spacing and full mortar coverage matter more than speed.
Step 6 – Cut and Install Edge Pieces and Trim
The front edge gives the countertop its finished look. Depending on your design, you may use bullnose tile, trim pieces, or carefully cut tile edges with a matching profile. Measure each piece one at a time, especially around corners, because small changes become very visible at the front of the counter.
Use a tile cutter for straight cuts and a wet saw for thicker tile, porcelain, or precise edge work. Test fit each piece before setting it in mortar. The goal is a front edge that looks clean and feels comfortable when you brush against it. Check that overhangs stay consistent and that trim lines up with the field tile above. A neat edge can make even a simple tile choice look custom and well made.
Step 7 – Let the Tile Cure and Check for Problems
Once all the tile is set, leave it alone long enough to cure. This part can feel slow, but it is essential. Walking away for the recommended time gives the thin-set a chance to harden fully and lock the tile in place.
Before you grout, inspect the whole surface. Look for uneven tiles, excess mortar in grout joints, or spots that feel hollow when tapped. Clean out any thin-set that squeezed up too high between tiles. Your joints should be open enough to accept grout evenly. Run your hand lightly across the surface. It should feel mostly level, with no sharp corners or loose pieces. Fixing small issues now is much easier than trying to repair them after grout and sealer are applied.
Step 8 – Grout the Joints and Clean the Surface
Mix the grout according to the package directions until it is smooth and workable. Press it into the joints with a rubber float, moving diagonally across the tile so you pack the spaces fully without digging material back out. Work in sections and make sure every joint is filled to the same depth.
After the grout begins to firm up, wipe the surface with a damp sponge. Rinse often and use light pressure so you do not pull grout from the joints. A slight haze will remain at first, which is normal. As the countertop dries, buff the tile with a soft cloth. The color in the joints will become more even as it cures, and the pattern of the countertop will start to come together clearly.
Step 9 – Seal, Caulk, and Finish the Details
The last step gives the countertop better protection and a cleaner look. If your grout or tile needs sealing, apply the sealer after the grout has cured fully. Follow the product directions and give it enough drying time. Sealing helps resist stains, cooking splashes, and moisture around the sink.
Use caulk, not grout, where the countertop meets the wall, backsplash, or sink edge. These joints move slightly over time, and caulk handles that movement better. Smooth the bead for a neat finish. Then do one final inspection. Check the corners, wipe away residue, and make sure every edge feels solid. At this point, your countertop should look finished, feel firm under your hands, and be ready for everyday use.

Common Mistakes When Building a Tile Countertop
The most common mistake is starting with a weak base. Tile is hard, but it is not forgiving. If the cabinets wobble or the plywood flexes, the grout can crack and the tile can loosen. Many beginners focus on the surface and rush past the support layer, but the support is what keeps the whole build sound.
Another mistake is poor layout planning. If you skip the dry fit, you can end up with tiny slivers of tile at the wall or crooked grout lines across the front edge. Those issues stand out every time you walk into the kitchen. Taking time to center the pattern and test the cuts makes the finished top look balanced.
Many first-time DIYers also mix thin-set or grout by feel instead of following the bag directions. Mortar that is too wet can weaken the bond, while grout that is too dry can be hard to pack into joints. Consistency matters.
The last big problem is using grout in movement joints. Where tile meets the wall, sink, or backsplash, grout often cracks. Caulk is the better choice because it flexes slightly with normal expansion and movement. Small product choices like this can have a big effect on how long your countertop lasts.
Expert Tips
Choose tile with a slight texture or a low-sheen finish if you want a countertop that hides crumbs, water spots, and light scratches better. Glossy tile can look beautiful, but it shows every smudge in bright kitchen light. For many DIY kitchens, matte porcelain is a practical choice.
Use a grout color that matches your maintenance style. Light grout looks fresh, but it may need more cleaning. Mid-tone grout often gives the best balance between appearance and upkeep. If you only follow one expert rule, let layout guide every decision. Centered lines, even cuts, and a clean front edge will make the whole countertop look more expensive than it was.
Frequently Asked Questions
Can I put tile directly on plywood?
It is not the best method for a long-lasting kitchen countertop. Plywood can expand and contract with moisture and temperature changes, which may lead to cracks. A cement backer board substrate over plywood gives the tile a more stable setting surface. That extra layer helps the mortar bond better and supports the countertop over time.
What is the best tile for a kitchen countertop?
Porcelain tile is often the best choice because it is dense, durable, and less porous than many ceramic options. It handles spills and wear well. Natural stone can also work, but it usually needs more sealing and care. For a first project, porcelain with matching trim pieces is often the easiest and most practical option.
How long does a tile countertop take to install?
Most first-time DIYers can finish the project over a weekend or a few evenings, depending on the size of the countertop and the number of cuts. The actual setting goes fairly quickly, but curing time adds to the schedule. You need time for substrate prep, tile installation, mortar curing, grouting, and sealing before the surface is fully ready.
Do tile countertops need to be sealed?
That depends on the tile and grout you use. Many porcelain tiles do not need sealing, but most grout lines benefit from it. Some grout products are pre-sealed or stain resistant, so check the label. Sealing helps reduce moisture absorption and staining, especially near sinks, cooking zones, and food prep areas where spills happen often.
Are tile countertops hard to keep clean?
They are fairly easy to clean if they are installed and sealed well. The tile surface itself usually wipes down without much trouble, but grout lines need more attention than a slab countertop. Regular wiping, quick spill cleanup, and occasional grout cleaning keep the surface looking good. Choosing narrower joints and practical grout colors can also reduce maintenance.
Conclusion
A tile countertop is a realistic DIY project when you break it into clear steps and respect the details that matter most. A strong base, a proper substrate, even tile spacing, and careful grouting all work together to create a surface that looks good and holds up well. You do not need advanced skills, but you do need patience, steady measuring, and a willingness to slow down when the work calls for it.
Now you know how to make a kitchen countertop with tile in a way that is practical, beginner-friendly, and built to last. Start with a small section if you feel unsure, follow the product directions closely, and focus on clean layout lines from the beginning. When the last coat of sealer dries and the surface feels smooth under your hand, you will have more than a new countertop. You will have a finished project you built yourself, plus skills you can use again in kitchens, outdoor prep spaces, and future DIY upgrades.

About
Nick Hall has spent the last seven years working at the intersection of kitchen design and home repair — first as a design assistant at a residential renovation studio, then as a freelance writer covering everything from cabinet layouts to leaky faucet fixes.
Her approach is simple: kitchens should look good and function well. That means she’s just as comfortable talking about color palettes and counter materials as she is walking readers through how to fix a wobbly cabinet hinge or troubleshoot a garbage disposal.
Nick has worked directly with homeowners on small-space kitchen makeovers, budget-conscious renovations, and the kind of everyday repairs that don’t need a contractor — just the right instructions. She writes from experience, not theory, and tests most of the fixes and tips she shares before publishing them.
When she’s not writing, Nick is usually hunting for mid-century kitchen finds at estate sales or helping friends plan their own renovations. She lives in Columbus, Ohio.