
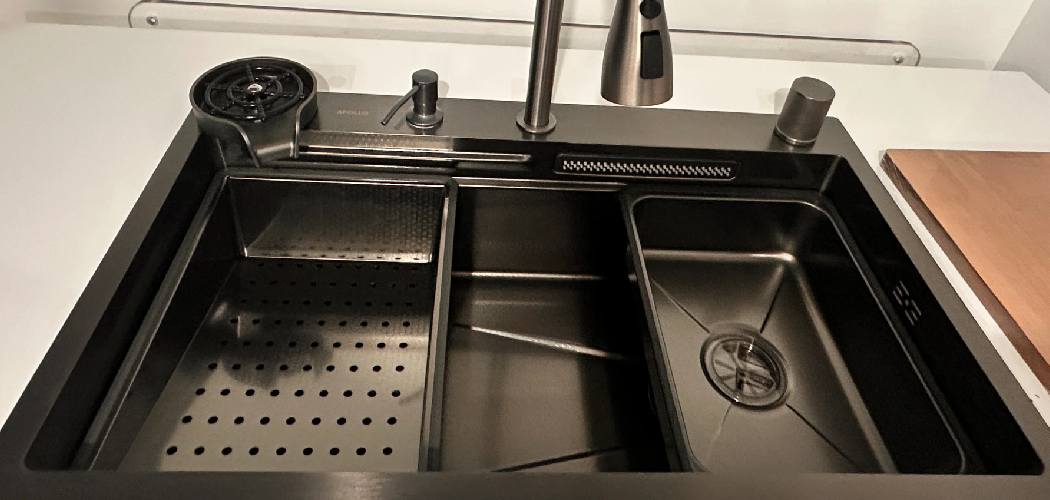
A drop-in kitchen sink is one of the most beginner-friendly sink styles to install, but the job still calls for careful measuring, clean sealing, and patient plumbing work. If you rush the process, even a small gap around the rim or a loose drain connection can lead to leaks, cabinet damage, or a sink that rocks when you press on it. The good news is that most first-time DIYers can handle this project with basic tools and a clear plan.

If you want to learn how to install drop in kitchen sink setups with confidence, start by focusing on fit, support, and watertight connections. You’ll learn how to prep the countertop, mount the sink correctly, connect the drain, and test everything before regular use. This guide will walk you through each step in a simple, practical way.
Why This Skill Matters
Learning to install a drop-in sink yourself can save money and make you more confident with other home plumbing projects. For DIY beginners, this job is a strong starting point because it combines measuring, sealing, fastening, and basic drain assembly without requiring advanced carpentry. You get hands-on practice with skills that carry over to faucet replacement, garbage disposal setup, and leak troubleshooting.
This skill also gives you more control over your kitchen upgrade. You can choose the sink size, material, and depth that fit your space instead of paying extra for full-service installation. Just as important, you’ll understand how the sink is secured and sealed, which makes future repairs much less stressful. By the end of the job, you won’t just have a new sink—you’ll know exactly how your kitchen plumbing comes together.
Tools and Materials
Before you begin, gather everything so you don’t have to stop midway through the install.
- Drop-in kitchen sink
- Faucet, if you are replacing it at the same time
- Sink drain assembly or basket strainer
- Plumber’s putty or silicone, depending on manufacturer guidance
- Silicone caulk for the sink rim if required
- Sink clips and mounting hardware
- Adjustable wrench
- Channel-lock pliers
- Screwdriver
- Utility knife
- Tape measure
- Putty knife
- Bucket or shallow pan
- Towels or rags
- Plumber’s tape
- PVC drain parts, if your old connections do not align
- Safety gloves
- Flashlight
- Optional: helper to hold the sink steady during lowering and alignment
Step-by-Step Guide on How to Install Drop In Kitchen Sink
Step 1 – Shut Off Water and Clear the Work Area
Start by removing everything stored under the sink. You need open space to move tools, disconnect plumbing, and catch any water that spills from the drain lines. Place a bucket under the P-trap, then shut off the hot and cold water supply valves. Turn on the faucet to release any remaining pressure and confirm the water is fully off.

Next, lay down towels inside the cabinet and on the floor in front of it. This keeps your workspace cleaner and helps protect the cabinet base from drips. If your kitchen has a garbage disposal, switch off power at the breaker before touching any connections. A clean, open setup makes the rest of the installation far easier and much safer.
Step 2 – Disconnect the Plumbing and Remove the Old Sink
Loosen the slip nuts on the drain trap and disconnect the drain assembly. Let any trapped water fall into the bucket. If the faucet will stay in place, work carefully around its supply lines. If you’re replacing the faucet too, now is a good time to disconnect those lines as well and remove the old fixture.
Once the plumbing is free, look underneath the sink for mounting clips. Loosen or remove them with a screwdriver. Use a utility knife to cut through old caulk or sealant around the sink rim. Push the sink up gently from below or lift it straight out from above. Old sealant can feel sticky and stubborn, so work slowly. In many cases, learning how to install drop in kitchen sink models begins with patient removal of the old one.
Step 3 – Clean and Inspect the Countertop Opening
With the old sink out, take time to clean the cutout thoroughly. Scrape away leftover caulk, plumber’s putty, grime, and mineral buildup with a putty knife. Wipe the surface until it feels smooth and dry. The rim of the new sink needs a flat, clean surface to seal properly, so this step matters more than many beginners expect.
Next, inspect the countertop opening for swelling, cracks, or soft spots, especially if the old sink leaked. Press lightly around the edge and look for damage to laminate, wood, or particleboard. If you find water damage, repair it before installing the new sink. Set the new sink into the opening without sealant to test the fit. It should sit evenly with enough support all around the edge and no major shifting.
Step 4 – Install the Faucet and Drain Parts Before Dropping in the Sink
It is usually easier to attach the faucet, sprayer, soap dispenser, and drain basket before the sink is mounted. Turn the sink upside down or rest it on a padded surface. Insert the faucet through the predrilled holes and tighten the mounting hardware according to the manufacturer’s directions. This saves your hands from cramped work later inside the cabinet.
Then install the strainer or drain assembly. Apply plumber’s putty under the strainer flange if the instructions call for it, or use silicone if specified. Tighten the locknut firmly but do not overtighten. Wipe away excess putty so the surface stays clean. This is one of the easiest ways to simplify how to install drop in kitchen sink projects, because top-side access gives you better visibility and much more room to work.
Step 5 – Apply Sealant Around the Rim Opening
Now you’re ready to create the watertight seal that protects the countertop. Run a continuous bead of silicone caulk or the recommended sealant around the edge of the sink cutout. Keep the bead even and unbroken. If there are gaps, water can seep under the rim and damage the counter over time.

Move slowly and keep the line close to the opening where the sink rim will sit. You do not need a huge amount, but you do need full coverage. Too little may leave weak spots, while too much creates a messy squeeze-out that is harder to clean. Think of this step as your moisture barrier. A neat, complete seal is what keeps splashes from turning into hidden cabinet problems later.
Step 6 – Lower the Sink Into Place and Align It
Carefully lower the sink into the countertop opening. If the sink is heavy, ask someone to help guide it so the rim lands evenly on the sealant. Once it touches down, adjust it quickly so the reveal looks balanced on all sides. Check that the faucet is facing straight and that the sink sits flat without rocking.
Press gently around the rim to help the sink settle into the sealant. From above, you may see a small line of caulk squeeze out around the edge. That is normal if the amount was right. Wipe off excess with a damp cloth before it skins over. Pause for a close look from every angle. Good alignment now saves you from crooked hardware and awkward gaps that are hard to ignore every day.
Step 7 – Secure the Sink With Mounting Clips
From underneath the counter, attach the mounting clips that came with the sink. Tighten them gradually in an alternating pattern so pressure stays even around the rim. Do not crank one side down all at once. Uneven tightening can pull the sink out of alignment or stress the rim.
As you tighten, check the top edge often. The sink should remain level and snug against the countertop with no visible openings. The goal is firm support, not brute force. Overtightening can crack some sink materials or damage the underside of the counter. Once secure, the sink should feel steady when you press on the front and sides. This is the point where the installation starts to feel solid and finished.
Step 8 – Reconnect the Drain and Water Lines
Reconnect the drain tailpiece, trap, and any disposal or branch connections. If the new sink sits at a slightly different depth than the old one, you may need to adjust or replace part of the drain assembly so everything lines up correctly. Wrap threaded fittings with plumber’s tape where needed, and hand-tighten connections before giving them a small final turn with pliers.
Next, reconnect the hot and cold water supply lines to the faucet. Make sure each line goes to the correct valve. Open the shutoff valves slowly and listen. You may hear a short rush of water and a few clicks in the pipes as pressure returns. Watch every connection point closely. If you spot a drip, shut the water off and tighten that joint before moving on.
Step 9 – Test for Leaks and Finish the Edges
With the water back on, run both hot and cold water for several minutes. Check under the sink with a flashlight and feel around the supply lines, drain basket, trap joints, and clip area. Then fill the sink halfway and drain it to test the waste line under a stronger flow. This reveals leaks that might not show up during a quick rinse.
If everything stays dry, finish cleaning the rim and remove any remaining excess sealant. Let the caulk cure for the full time listed by the manufacturer before exposing the sink to heavy use or standing water. That final waiting period matters. A sink can look done right away, but the seal needs time to set so it can protect your countertop for the long haul.
Common Mistakes
One of the most common mistakes is skipping the dry fit before applying sealant. If you assume the sink will drop into place without checking, you may discover the opening is tight, uneven, or slightly warped only after caulk is already down. That creates a mess and forces you to work too fast. Always test the fit first so you know the sink sits properly.
Another frequent problem is using too much or too little sealant. A thin, broken bead can allow water to creep under the rim, while a heavy bead squeezes out everywhere and makes cleanup harder. What you want is a continuous, moderate line that fully supports the edge. Clean application matters just as much as the product you choose.
Beginners also tend to overtighten clips and drain fittings. Tight does not always mean better. Too much force can crack parts, warp the sink position, or damage the countertop from below. Work evenly and stop when the sink feels secure.
The last big mistake is failing to test thoroughly. A connection may seem fine during a quick hand rinse but leak when the basin drains at full speed. Run water, fill the bowl, drain it, and inspect every joint with care. Ten extra minutes of testing can save you from cabinet repairs later.
Expert Tips
If you want a smoother installation, take photos of the old plumbing before disconnecting anything. That reference can help if you forget the order of washers, nuts, or drain parts during reassembly. It is a simple step, but it saves time.
Another smart move is to replace worn supply lines and old trap parts while everything is open. These pieces are inexpensive, and fresh parts reduce the chance of leaks after the new sink is in place. If your shutoff valves are stiff or corroded, consider replacing those too.
Finally, read the sink manufacturer’s instructions before opening the sealant. Some sinks call for specific clips, cure times, or approved compounds. Following those details gives you a better fit, cleaner finish, and longer-lasting result.
Frequently Asked Questions
Can I install a drop-in kitchen sink by myself?
Yes, many people can install one on their own, especially if the new sink matches the existing cutout. The hardest parts are lifting the sink into place, aligning it neatly, and tightening clips underneath the counter. If the sink is large or heavy, having a helper for a few minutes makes the job much easier and reduces the risk of smearing the sealant.
Do I need plumber’s putty or silicone for the drain?
That depends on the sink and drain manufacturer’s instructions. Many metal strainers use plumber’s putty under the flange, while some materials and modern products call for silicone instead. Always check the instructions first. Using the wrong product can affect the seal or even stain certain sink materials, especially natural stone or specialty finishes.
How long should I wait before using the sink?
You can usually test the plumbing soon after installation, but full use depends on the sealant cure time. Many silicone products need several hours, and some need a full 24 hours before regular exposure to water. Check the label on your caulk or sealant. Waiting the full time helps prevent the rim seal from shifting or weakening too soon.
What if the new sink does not fit the existing opening?
If the sink is slightly too large, you may need to enlarge the countertop cutout carefully, but that depends on the counter material. Laminate is often easier to modify than stone. If the sink is too small, you may have visible gaps that are difficult to hide. Always compare the sink template and cutout dimensions before purchase to avoid surprises.
Why is my sink leaking from the drain after installation?
A drain leak usually points to an uneven seal, a loose locknut, or a washer that shifted during assembly. Start by checking whether the strainer is seated flat and whether the slip nuts are aligned correctly. If the leak continues, take the drain apart and rebuild it carefully. Small misalignments are common, and correcting them usually fixes the problem.
Conclusion
Installing a drop-in kitchen sink is a practical DIY project that rewards careful prep more than advanced skill. If you measure the opening, clean the surface well, seal the rim properly, and test every connection, you can get a strong, leak-free result that looks professional. The key is to move in order and not rush the sealing or testing stages.
Now that you understand how to install drop in kitchen sink systems step by step, you can approach the project with a lot more confidence. Gather your tools, follow the sequence, and give yourself enough time to work neatly. A well-installed sink improves how your kitchen looks and works every day, and the experience will make your next plumbing project feel much less intimidating.

About
Nick Hall has spent the last seven years working at the intersection of kitchen design and home repair — first as a design assistant at a residential renovation studio, then as a freelance writer covering everything from cabinet layouts to leaky faucet fixes.
Her approach is simple: kitchens should look good and function well. That means she’s just as comfortable talking about color palettes and counter materials as she is walking readers through how to fix a wobbly cabinet hinge or troubleshoot a garbage disposal.
Nick has worked directly with homeowners on small-space kitchen makeovers, budget-conscious renovations, and the kind of everyday repairs that don’t need a contractor — just the right instructions. She writes from experience, not theory, and tests most of the fixes and tips she shares before publishing them.
When she’s not writing, Nick is usually hunting for mid-century kitchen finds at estate sales or helping friends plan their own renovations. She lives in Columbus, Ohio.