
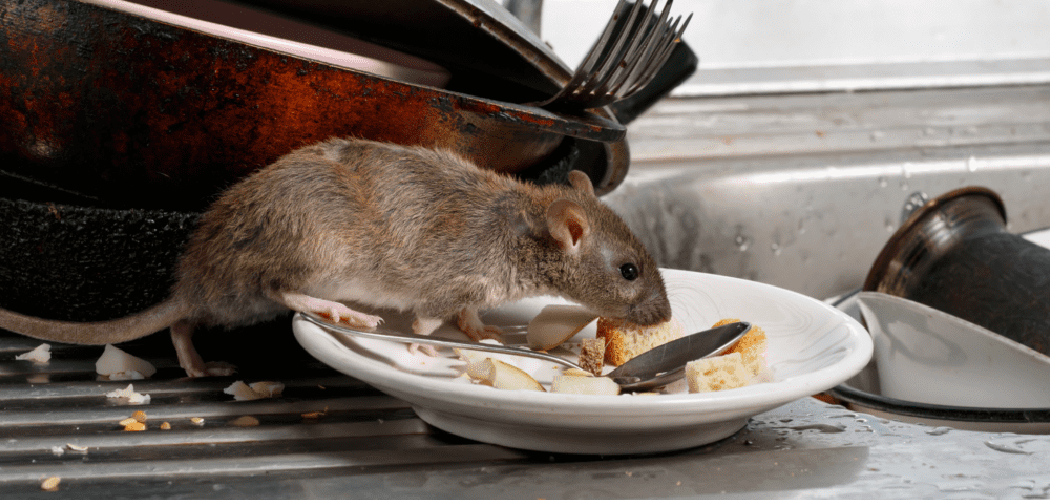
A mouse in your kitchen can turn a calm evening into a stressful one fast. You might hear scratching behind the stove, spot droppings near the pantry, or notice torn food packaging in a cabinet corner. It feels unsettling, but you can handle it with a clear plan and a few basic supplies.
If you are searching for how to get rid of mouse in kitchen, the key is to act quickly, clean carefully, and block the paths that let mice return. This guide will walk you through how to identify the problem, remove the mouse safely, and keep your kitchen protected afterward.

Why Learning Mouse Control Matters
Knowing how to deal with mice is useful far beyond a house or apartment. Campers, RV owners, cabin renters, and outdoor beginners often store dry goods, cook in tight spaces, and deal with doors, vents, and gaps that make rodent entry easier. A single mouse can chew food packs, contaminate prep areas, and create a bigger infestation if ignored.
This skill also helps you protect gear and supplies. Mice can damage paper goods, fabric bags, wiring, and even sleeping gear stored near a camp kitchen or trailer pantry. When you understand the signs of mouse activity and know what to do first, you can stay calm, act fast, and keep both your kitchen and your food safer.
Tools and Materials You’ll Need
Before you begin, gather your supplies so you do not have to stop halfway through the cleanup or trapping process.
- Disposable gloves
- Disinfectant spray or a bleach-free sanitizing cleaner
- Paper towels or cleaning cloths
- Sealable trash bags
- Snap traps or humane catch traps
- Bait such as peanut butter, oats, or a small bit of dried fruit
- Steel wool for small holes and gaps
- Caulk or expanding sealant for sealing entry points
- Flashlight for checking dark corners and spaces behind appliances
- Food storage containers with tight-fitting lids
- Optional: a small mirror on a handle for seeing behind heavy kitchen appliances
Step-by-Step Guide on How to Get Rid of Mouse in Kitchen
Step 1 – Confirm the signs of mouse activity
Start by checking for the most common signs. Mouse droppings often look like small dark grains of rice and tend to appear along baseboards, under sinks, behind the stove, or inside lower cabinets. You may also notice a stale, musky smell, greasy rub marks near walls, or gnawed food packaging.
Listen at night if you can. Light scratching in the wall, a quick rustle behind boxes, or tapping inside cabinets often points to movement after dark. In camp kitchens or RV spaces, inspect storage bins, coolers, and dry food shelves too. The goal at this stage is not to panic or start moving everything at once. You want to map where the mouse is most active so your next steps work better.
Step 2 – Remove easy food and water sources
A mouse stays where food and water are easy to reach. Clear crumbs from counters, sweep under the table, and wipe grease or sauce splatters from the backsplash and stovetop. Even small bits of cereal, pet food, or bread can keep a mouse coming back night after night.
Move dry goods into hard containers with tight lids. Check snack bags, flour sacks, oatmeal boxes, and open pet food first, since these are common targets. Fix dripping faucets and dry out wet sponges or dish trays before bed. If you are working in a camp setup, zip food into sealed bins and never leave cooking scraps in soft bags overnight. This stage matters because how to get rid of mouse in kitchen starts with making the space less rewarding for the animal.
Step 3 – Clean contaminated areas the safe way
Do not sweep droppings dry or vacuum them first. That can push tiny particles into the air, which is the last thing you want in a food area. Instead, put on gloves, spray the droppings and nearby surfaces with disinfectant, and let the area sit for several minutes.
Wipe everything up with paper towels and place the waste into a sealed trash bag right away. Then clean the surface again, especially in food prep zones, pantry shelves, and drawer corners. Wash your hands well when you finish, even if you wore gloves. If you find a nest made of shredded paper or fabric, handle it the same way: spray, wait, lift, bag, and sanitize. A careful cleanup removes odor trails that can attract the mouse back to the same route.
Step 4 – Place traps where mice naturally travel
Mice usually move along walls instead of crossing open floors. Place traps perpendicular to the wall, with the bait side facing the baseboard, so the mouse meets the trigger as it passes. Focus on tight spaces such as behind the refrigerator, beside the oven, under the sink, and near pantry corners.
Use several traps instead of one. A single mouse sighting often means there is more activity than you first noticed. Bait lightly, since too much food lets the mouse nibble without springing the trap. Peanut butter works well because it sticks and smells strong. In outdoor kitchens, enclosed trailers, or cabins, set traps near storage edges and door frames where droppings or chew marks appear. Good trap placement often makes the difference between waiting for days and catching the mouse the first night.

Step 5 – Check traps daily and reset as needed
Once traps are set, check them every day. A trapped mouse should be removed promptly so the kitchen stays sanitary and the trap can be cleaned or replaced. Wear gloves, place the mouse and any soiled material into a sealed bag, and disinfect the surrounding area before resetting the trap.
If nothing happens after a day or two, do not assume the mouse is gone. Shift trap positions slightly closer to walls, hidden corners, or the spot where you found the most droppings. Sometimes a few inches makes a big difference. If you are using humane traps, release the mouse far from living and cooking areas according to local guidance. For beginners wondering how to get rid of mouse in kitchen, patience and daily adjustment are part of the process, not a sign that you are failing.
Step 6 – Find and seal entry points
Catching a mouse solves the immediate problem, but sealing gaps prevents the next one. Use a flashlight to inspect around pipes under the sink, gaps behind the stove, spaces near utility lines, cracked vent covers, and the edges of doors. Mice can squeeze through openings that look surprisingly small.
Stuff narrow holes with steel wool, then seal around them with caulk. For wider gaps, use a rodent-resistant filler or repair the damaged area properly. Pay close attention to spots where warm air, plumbing, or food smells may draw rodents in. In cabins, campers, and RVs, check storage hatches, hose openings, and floor seams too. When you block access, you break the cycle that turns one kitchen visit into a repeat problem.
Step 7 – Reorganize the kitchen to reduce hiding spots
Clutter gives mice cover. A crowded cabinet full of paper bags, loose plastic wrap, and forgotten snacks makes it easy for a mouse to hide and nest. Start by sorting lower cabinets, pantry shelves, and the area under the sink. Throw away damaged packaging and move rarely used items into sealed bins.
Leave a little visible space around food storage when possible. That makes new droppings, chew marks, or spills easier to spot early. Cardboard is especially attractive because mice can chew it and use it for nesting material, so replace cardboard food storage with sturdy containers. In small outdoor cooking spaces, keep gear stacked neatly and off the floor. A clean, open setup removes shelter and helps you notice fresh signs before the problem grows.
Step 8 – Build habits that keep mice from returning
The final step is routine. Wipe counters each evening, sweep under appliances when you can, and take out trash before it overflows. Store grains, snacks, and baking supplies in sealed containers instead of folded bags or clipped boxes. Small daily actions matter more than one deep clean.
Make a quick weekly check part of your routine. Look behind the toaster, around the pet food area, and under the sink for droppings or gnaw marks. If you camp or travel with food gear, inspect bins before and after each trip. Mice return to places that stay warm, quiet, and easy to raid. When your kitchen stays clean, dry, and sealed, it becomes a much less inviting place for them to settle.

Common Mistakes
One common mistake is relying on strong smells alone. Peppermint oil, dryer sheets, or scented cleaners may make the kitchen smell fresh to you, but they rarely solve an active mouse problem by themselves. If food remains available and entry points stay open, the mouse usually returns.
Another mistake is placing only one trap in the middle of the room. Mice prefer edges, shadows, and narrow travel paths. A trap in an open space often gets ignored, even when baited well. Better placement along walls usually gives faster results.
Many beginners also clean the wrong way. Sweeping droppings dry can spread contaminated dust, and that creates an avoidable health risk. Wet cleaning with disinfectant is the safer method and leaves fewer scent traces behind.
A fourth mistake is forgetting about re-entry. You might catch one mouse and feel done, but if holes near pipes or vents remain open, another mouse can slip in soon after. Long-term control depends on sealing gaps.
Finally, some people leave food out overnight without realizing it. A few crackers in a lunch bag, crumbs under a microwave, or pet kibble in a bowl can be enough to keep a mouse active in your kitchen.
Expert Tips
Use more traps than you think you need, especially in the first few days. Professionals often place traps in pairs along active walls because mice tend to run the same routes. This simple move can improve your odds without adding much cost.
Keep bait small and sticky. A pea-sized dab of peanut butter is usually enough. If the bait is too large, a mouse may steal part of it without triggering the trap. Also, avoid moving traps too often unless you have no activity after a couple of days.
If the signs continue after cleanup, trapping, and sealing, widen your inspection area. Check nearby laundry rooms, utility closets, or garage walls that connect to the kitchen. Mouse activity often starts just outside the room where you notice it first.
Frequently Asked Questions
How do I know if I have one mouse or more than one?
It can be hard to tell right away. Frequent droppings in several places, repeated trap activity, or scratching from more than one area often suggest multiple mice. If signs keep appearing after you catch one, assume there is more activity nearby and continue trapping, cleaning, and sealing gaps until the kitchen stays clear for at least a couple of weeks.
Are humane traps effective in a kitchen?
Humane traps can work well if you check them often and place them along walls where mice travel. They are usually best for light activity or single-mouse situations. You still need to remove food sources and seal entry points, or the problem may continue. Release rules vary by area, so follow local guidance before using them.
What smells keep mice away from kitchen spaces?
Strong smells like peppermint, clove, or vinegar may discourage some movement for a short time, but they are not reliable solutions on their own. Think of them as minor support tools, not primary control methods. Traps, sanitation, and entry-point sealing do the real work. If a mouse has food, water, and shelter, scent alone rarely changes much.
Is it safe to clean mouse droppings myself?
Yes, if you do it carefully. Wear gloves, spray the droppings and surrounding area with disinfectant, and let it soak for several minutes before wiping. Avoid dry sweeping or vacuuming first, since that can stir particles into the air. Bag all waste securely, disinfect the surface again, and wash your hands well when you finish.
When should I call a pest control professional?
Call a professional if you keep seeing fresh droppings after a week or two of steady effort, if you hear mice inside walls often, or if the problem seems larger than one room. You should also get help if you find a nest, notice strong odor buildup, or suspect mice have chewed wiring. Bigger infestations need a broader plan.
Conclusion
A mouse in the kitchen is upsetting, but it is a problem you can tackle step by step. First, confirm the signs. Then remove food and water sources, clean safely, place traps where mice travel, and seal every gap you can find. Once you add better storage and simple daily habits, your kitchen becomes much harder for rodents to use.
If you came here to learn how to get rid of mouse in kitchen, the biggest lesson is this: quick action works best. You do not need fancy equipment to make real progress, but you do need consistency. Start with the area that shows the clearest signs tonight, set your traps with care, and follow through on cleanup and sealing. A cleaner, calmer, mouse-free kitchen is well within reach.

About
Nick Hall has spent the last seven years working at the intersection of kitchen design and home repair — first as a design assistant at a residential renovation studio, then as a freelance writer covering everything from cabinet layouts to leaky faucet fixes.
Her approach is simple: kitchens should look good and function well. That means she’s just as comfortable talking about color palettes and counter materials as she is walking readers through how to fix a wobbly cabinet hinge or troubleshoot a garbage disposal.
Nick has worked directly with homeowners on small-space kitchen makeovers, budget-conscious renovations, and the kind of everyday repairs that don’t need a contractor — just the right instructions. She writes from experience, not theory, and tests most of the fixes and tips she shares before publishing them.
When she’s not writing, Nick is usually hunting for mid-century kitchen finds at estate sales or helping friends plan their own renovations. She lives in Columbus, Ohio.