
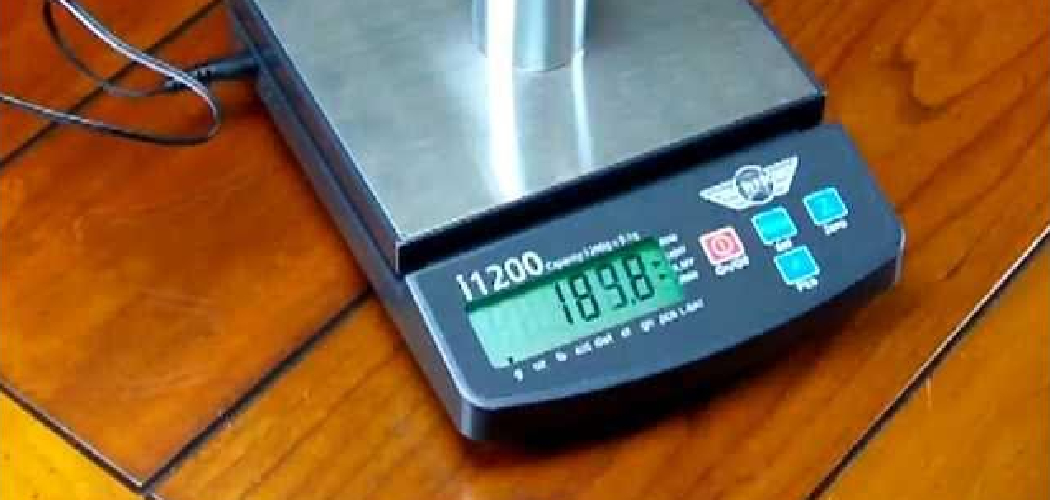

A kitchen scale can seem simple, but even a small error can throw off a recipe, waste ingredients, or make portioning less accurate. If your readings look off, drift up and down, or fail to return to zero, it may be time to learn how to calibrate a kitchen scale so it gives steady, reliable measurements again.
The good news is that calibration is usually quick and beginner-friendly. You do not need special training, and many digital scales include a built-in calibration mode. In this guide, you will learn when calibration is needed, what tools to gather, and the exact steps to get your scale back on track.
Why Calibrating Matters
Calibration matters because a kitchen scale is only useful when it is accurate. If the reading is even slightly wrong, your baking ratios can shift, coffee can taste inconsistent, and meal prep portions can miss the mark. Good calibration helps your scale measure weight the way it should, with less drift and fewer surprises.
This is especially helpful for campers and outdoor beginners. When you pack food for a trip, every ounce counts. A scale that reads too high or too low can affect trail meal planning, fuel use, and portion control. If you dehydrate food at home, mix drink powders, or prep lightweight ingredients before heading out, a properly calibrated scale helps you pack smarter and waste less space in your gear.
Tools and Materials
Before you begin, gather a few simple items. Having everything ready makes the process smoother and helps you avoid bad readings caused by a rushed setup.
- Your kitchen scale, with fresh batteries or a stable power source
- The user manual, if you still have it, for model-specific calibration steps
- A flat, solid surface such as a countertop or sturdy table
- A clean, dry cloth to wipe the scale platform
- A known calibration weight or another accurately labeled weight your scale accepts
- A small container if your scale platform is narrow and you need to balance the test weight safely
- Optional: a bubble level to confirm the surface is truly even
Step-by-Step Guide on How to Calibrate a Kitchen Scale
Step 1 – Check the manual and your scale type

Start by identifying the kind of scale you own. Most home kitchen scales are digital, and many have a hidden calibration mode that only activates when you press a specific button sequence. Some mechanical models use an adjustment dial instead. If you still have the manual, look for terms such as “cal,” “calibration mode,” or “tare reset.”
If the manual is missing, inspect the buttons and display carefully. Some scales show a small “CAL” prompt after you hold the power button for a few seconds. Others require you to press units and power together. This first check saves time and keeps you from guessing. A calm start also helps you avoid pressing random controls that could reset settings without solving the problem.
Step 2 – Place the scale on a stable, level surface
Your scale needs a firm surface before you calibrate it. A soft placemat, uneven camp table, or countertop with vibration can cause unstable readings. Set the scale on a hard, flat area where it does not wobble. If one corner lifts even slightly, the sensor may read weight unevenly.
Pause and notice the feel of the setup. The scale should sit still, with no rocking when you tap the edge gently. Nearby appliances can also affect performance if they create vibration. If your refrigerator hums against the counter or someone keeps bumping the table, move to a quieter spot. This simple step often fixes what looks like a calibration problem but is really a surface problem.
Step 3 – Clean the platform and reset the display

Dust, flour, crumbs, or sticky residue can interfere with the load cell beneath the platform. Wipe the top gently with a clean, dry cloth. If you see grease or dried food, use a slightly damp cloth and dry it fully before moving on. The platform should feel smooth and clean under your fingertips.
Next, turn the scale on and let it settle. The display should return to zero without flickering or drifting. If it does not, remove the batteries for a minute or follow the reset instructions in the manual. Before you move forward with how to calibrate a kitchen scale, make sure the scale is empty, clean, and fully zeroed. Calibration works best when the starting point is stable and clear.
Step 4 – Use the correct calibration weight
Most scales require a specific test weight, often listed in grams. Common calibration values include 100 g, 200 g, 500 g, or 1000 g depending on the scale’s capacity. Use the exact amount your model asks for whenever possible. A proper calibration weight is best because it is made to precise standards and sits evenly on the platform.
If you do not own one, check whether your scale manual allows an alternative known weight. Be careful here. Household objects may seem convenient, but their labeled weight is not always exact. A sealed item can vary slightly due to packaging or moisture. Precision matters during calibration, so the closer your test weight is to the required value, the better your final reading will be.
Step 5 – Enter calibration mode
With the scale empty and powered on, activate calibration mode. On many digital models, this means holding the mode, units, or power button until the display changes. You may see “CAL,” a blinking number, or a prompt asking for a certain weight. This is the scale telling you it is ready to compare its internal reading against a known standard.
Take your time and do not rush this part. If the display changes too quickly, turn the scale off and start over. Some models cancel calibration if you press the wrong button or place weight too early. During how to calibrate a kitchen scale, patience matters more than speed. A steady hand and careful timing will give you a better result than trying to force the process.
Step 6 – Place the calibration weight gently in the center
When the display prompts you, place the calibration weight in the center of the platform. Set it down gently instead of dropping it. A sharp impact can confuse the sensor and may even damage a sensitive scale over time. Center placement matters because off-balance weight can produce a false reading.
Watch the display after the weight lands. It may blink, count, or pause for a few seconds while the scale processes the load. This moment is often quiet and still. You may notice the numbers settle and hold steady before the scale confirms the value. If the reading jumps around, check for air movement, table shake, or a weight that is not sitting flat. Small details make a big difference here.
Step 7 – Wait for confirmation and remove the weight
Once the scale accepts the weight, it will usually show “PASS,” “END,” “0.0,” or return to weighing mode. That is your signal that calibration has finished. Remove the weight carefully and wait for the display to return to zero. If the screen shows an error, start again and make sure you used the correct weight on a level surface.
Do not assume success just because the scale exits calibration mode. Stay with it for a moment and watch the display. A good calibration should leave the reading steady at zero with no drifting. If numbers creep upward or downward on an empty platform, the scale may still need a reset, fresh batteries, or a second attempt. Calm observation here helps you catch problems before they affect your next recipe.
Step 8 – Test the scale with real-world items
The final step is to verify performance. Weigh the calibration weight again in normal mode and confirm the reading matches. Then test one or two common kitchen items, such as a bag of sugar, a measured water sample, or another known weight. The goal is to see whether the scale behaves consistently across repeated checks.
Pay attention to more than one reading. Place the same item on the platform, remove it, and weigh it again. If the number stays the same each time, your scale is likely in good shape. If the reading shifts by several grams, the problem may be worn sensors, low batteries, or an unstable surface. A quick practical test gives you confidence that the scale is ready for baking, meal prep, and outdoor food planning.
Common Mistakes
One common mistake is calibrating on the wrong surface. A kitchen scale may seem fine on a tablecloth, cutting board, or uneven camp table, but soft or shaky surfaces can distort the reading. People often blame the scale when the real issue is poor placement.
Another mistake is using the wrong calibration weight. Guessing with coins, canned goods, or random pantry items can throw the process off because those objects are not always exact. Even small weight differences matter when a scale is trying to set its internal reference point.
Many beginners also skip cleaning and zeroing the scale first. Crumbs under a container, sticky residue on the platform, or a display that does not fully return to zero can all affect the result. Calibration should begin with a clean, empty, steady scale.
Rushing the process causes trouble too. If you press buttons too fast, place the weight before the scale is ready, or remove it before confirmation appears, the scale may fail calibration without making the reason obvious. Slow, careful steps work better.
Finally, some people ignore battery issues. Weak batteries can cause dim displays, unstable readings, and failed calibration attempts. If your scale acts strange, replace the batteries before assuming the sensor is broken.
Expert Tips
If you want the most reliable results, calibrate your scale in the same place where you usually use it. A stable countertop with low vibration gives the sensor a more consistent environment. Try to avoid calibrating right after moving the scale from a cold garage or hot car, since temperature changes can affect electronics.
It also helps to check accuracy every few weeks if you bake often or use the scale for portioning. You do not need to run a full calibration each time. A quick test with a known weight is usually enough to spot early drift. If your scale travels with camping gear, store it flat, protect the platform from bumps, and recheck accuracy before your next trip.
Frequently Asked Questions
How do I know if my kitchen scale needs calibration?
A scale may need calibration if it gives different readings for the same item, does not return to zero, or seems off during recipes you know well. You might also notice drifting numbers on an empty platform. If the scale was dropped, stored unevenly, or moved often for travel or camping, checking calibration is a smart next step.
Can I calibrate a kitchen scale without a calibration weight?
Sometimes, but it depends on the model. Some scales allow other known weights, while others need a precise calibration weight to work correctly. If your manual lists an approved alternative, use that exact value. If not, it is better to buy an inexpensive calibration weight than risk setting the scale incorrectly with a household item.
Why does my scale say error during calibration?
An error message usually means the scale expected a different weight, the surface was unstable, or the weight was placed too soon. Low batteries can also cause this problem. Turn the scale off, reset it, check the required weight, and try again on a firm countertop. If the error keeps coming back, the sensor may be damaged.
How often should I calibrate my kitchen scale?
For most home cooks, occasional checks are enough. If you use the scale daily for baking, coffee, meal prep, or dehydrated camping meals, test it every few weeks and calibrate when readings seem off. If you use it only now and then, calibrating every few months or after a drop, move, or battery change is usually enough.
Can a damaged kitchen scale still be calibrated?
Not always. Calibration can fix normal drift, but it cannot repair a cracked platform, failing sensor, or serious internal damage. If the display flickers, the scale will not hold zero, or readings change wildly after repeated calibration attempts, the problem may be mechanical or electronic. In that case, replacement is often more practical than repair.
Conclusion
A well-calibrated kitchen scale gives you confidence. It helps you bake with better accuracy, portion food more consistently, and prepare camping meals with less waste and guesswork. The process is simple: use a stable surface, clean the scale, enter calibration mode, apply the correct weight, and test the result before regular use.
If you are new to this, do not overthink it. Most problems come from a shaky surface, weak batteries, or the wrong test weight, not from anything you did wrong. Once you understand how to calibrate a kitchen scale, the task becomes quick routine maintenance instead of a frustrating mystery.
Take a few minutes today to check your scale. That small step can save ingredients, improve consistency, and make every measurement more dependable the next time you cook, bake, or pack food for the trail.

About
Nick Hall has spent the last seven years working at the intersection of kitchen design and home repair — first as a design assistant at a residential renovation studio, then as a freelance writer covering everything from cabinet layouts to leaky faucet fixes.
Her approach is simple: kitchens should look good and function well. That means she’s just as comfortable talking about color palettes and counter materials as she is walking readers through how to fix a wobbly cabinet hinge or troubleshoot a garbage disposal.
Nick has worked directly with homeowners on small-space kitchen makeovers, budget-conscious renovations, and the kind of everyday repairs that don’t need a contractor — just the right instructions. She writes from experience, not theory, and tests most of the fixes and tips she shares before publishing them.
When she’s not writing, Nick is usually hunting for mid-century kitchen finds at estate sales or helping friends plan their own renovations. She lives in Columbus, Ohio.