
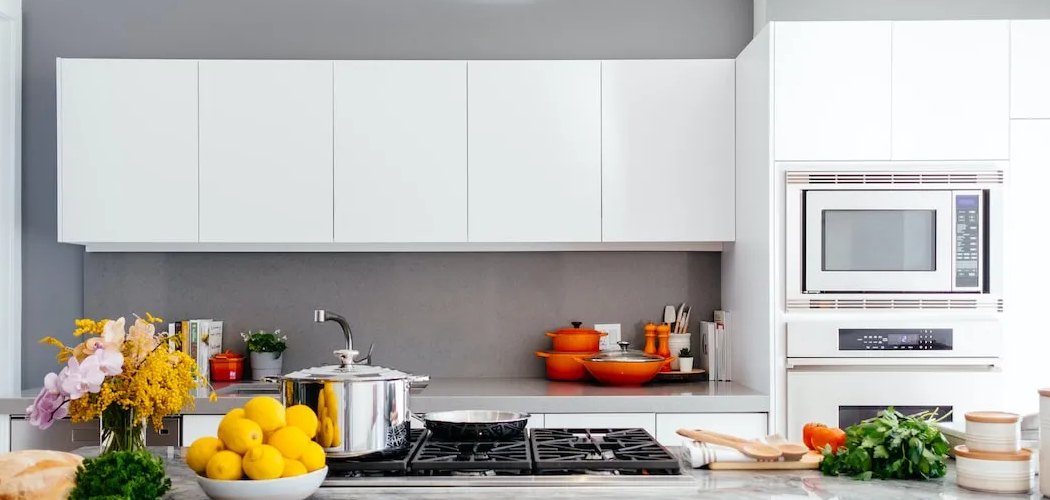
The space above kitchen cabinets can feel confusing at first. It is high, narrow, and easy to ignore, yet it can change the whole mood of your kitchen when styled well. A bare ceiling gap may look unfinished, while too many items can make the room feel dusty or crowded.
If you are learning how to decorate above your kitchen cabinets, start with simple ideas: scale, color, texture, and open space. You do not need a designer’s budget or rare decor pieces to make this area look polished.
This guide will help you choose, arrange, and maintain cabinet toppers in a way that feels balanced, practical, and true to your kitchen style.

Why Decorating Above Your Kitchen Cabinets Matters
Decorating this vertical space helps your kitchen feel more complete. It can add warmth, height, and personality without taking up counter space. For small kitchens, RV kitchens, cabins, and camp-style cooking areas, that matters because every inch has a job.
This skill also helps campers and outdoor beginners who spend time in compact spaces. Many cabins, trailers, and vacation rentals have open cabinet tops where lightweight baskets, faux greenery, or useful storage can make the space feel cleaner and more comfortable. Good kitchen styling helps you create order, even in a temporary setup.
When you understand visual balance, you can make a plain kitchen feel more welcoming without adding clutter.
Tools and Materials You’ll Need
Gather your supplies before you climb or start arranging. A calm setup helps you work safely and make better design choices.
- Step stool or small ladder
- Measuring tape
- Microfiber cloth
- Gentle cleaner
- Decorative baskets
- Vases or pitchers
- Framed art or signs
- Faux greenery or trailing plants
- Wood tones, trays, or rustic accents
- Museum putty or removable adhesive
- Optional: a small handheld vacuum for dust control
Choose lightweight pieces whenever possible. Items above cabinets sit high, so they should be easy to lift, move, and clean. Avoid heavy ceramics near edges, especially in homes with kids, pets, or frequent cabinet use.
Step-by-Step Guide on How to Decorate Above Your Kitchen Cabinets
Step 1 – Study the Space Before You Style
Start by standing back and looking at the full kitchen. Notice the height of the ceiling gap, the cabinet color, the wall color, and how much light reaches the area. This first look tells you whether the space needs warmth, height, contrast, or less visual weight.
If you want to learn how to decorate above your kitchen cabinets with confidence, do not rush into placing items. Study the lines of the room first. A modern kitchen may need clean shapes and quiet colors, while a farmhouse kitchen may welcome baskets, wood tones, and soft greenery.
Take a photo from across the room. Photos make awkward gaps and crowded spots easier to see.
Step 2 – Clean the Cabinet Tops Thoroughly
Before adding decor, clean the area well. Cabinet tops collect grease, dust, and fine cooking film, even when they look clean from below. Use a microfiber cloth, gentle cleaner, and steady pressure to wipe the surface.
If the cabinet top feels tacky, clean it twice. The first pass removes loose dust, while the second lifts sticky residue. You may notice the cloth turning gray or yellow near the stove, where cooking oils settle.
Let the surface dry before you place anything back. Clean cabinet tops help baskets, vases, and framed art sit flat. They also make future dust control much easier.
Step 3 – Choose a Simple Style Direction
Pick one main style before you shop or arrange decor. Your kitchen might lean modern, rustic, coastal, traditional, farmhouse, or minimal. You do not need to label it perfectly, but you should know the feeling you want.
A neutral palette works well for beginners because it looks calm and blends with many kitchens. Think warm wood, white ceramic, black metal, soft beige, muted green, or natural woven texture. If your kitchen already has bold tile or busy counters, keep the cabinet toppers quiet.
Collected decor can look beautiful, but it needs a common thread. Repeat one color, finish, or material so the display feels planned.
Step 4 – Measure for Scale and Proportion
Measure the height between the top of the cabinets and the ceiling. Also measure the depth of the cabinet tops. These numbers help you avoid pieces that are too short, too tall, or too deep.
Scale and proportion matter more than the price of the decor. A tiny vase can disappear in a tall ceiling gap, while an oversized basket may look squeezed and awkward. Aim for items that fill part of the space without touching the ceiling.
Leave breathing room around each piece. Open space is not wasted space. It keeps the display light, clean, and easy for the eye to understand.

Step 5 – Build Height With Anchor Pieces
Start with a few anchor pieces instead of many small objects. Good anchors include tall vases, framed art, large baskets, pitchers, wood boards, or simple sculptural pieces. Place them where the eye naturally lands, such as above the range area, near the sink wall, or at the end of a cabinet run.
Use varied heights to create movement. A tall vase beside a lower basket feels more natural than a row of items all the same size. The display should have a gentle rise and fall, like a quiet skyline.
For safety, keep heavier pieces toward the back. Secure lightweight frames or signs if they could shift.
Step 6 – Add Texture, Greenery, and Warmth
Once the anchors are in place, add texture. Woven baskets, wood tones, matte pottery, metal accents, and linen-like finishes can soften hard cabinet lines. Texture is especially useful in white kitchens, where smooth surfaces can feel flat.
Faux greenery works well above cabinets because real plants may not get enough light and can be hard to water. Choose realistic stems, small potted greens, or trailing plants that fall slightly over the edge. Keep the effect natural, not jungle-like.
If you prefer seasonal decor, change only a few pieces at a time. A simple wreath, warm autumn stems, or winter greenery can refresh the space without creating clutter.
Step 7 – Arrange in Small Groups
Group decor in odd numbers when it feels natural. A set of three items often looks relaxed and balanced: one tall piece, one medium piece, and one low piece. Leave gaps between groups so your cabinet decor does not become one long crowded line.
This is where how to decorate above your kitchen cabinets becomes more about editing than adding. Step back often and check the full view. If your eye feels tired, remove one item and look again.
Layered styling can add depth. Place framed art behind a vase, or set a small bowl in front of a basket. Keep the layers loose and easy to dust.
Step 8 – Check Safety, Light, and Maintenance
After arranging, check every item from close range. Make sure nothing wobbles, leans too far forward, blocks cabinet doors, or sits near heat and steam. Decor above the stove should handle warmth and be easy to clean.
Look at the display in daylight and at night. Under-cabinet lights, ceiling lights, and shadows can change how colors and shapes appear. A piece that looks soft during the day may look bulky after dark.
Plan for upkeep. If an item has deep grooves, rough fabric, or delicate branches, it may trap dust. Choose pieces you can lift and wipe without frustration.

Common Mistakes When Decorating Above Kitchen Cabinets
One common mistake is filling every inch of the ceiling gap. Too many objects make the kitchen feel crowded and harder to clean. The best displays use open space as part of the design, so each piece has room to stand out.
Another mistake is using items that are too small. Tiny jars, short figurines, and thin frames often look lost from below. Above-cabinet decor needs enough height and presence to match the scale of the room.
Many beginners also ignore color harmony. Bright seasonal decor, mixed metals, random signs, and clashing baskets can make the display feel messy. Choose a clear palette and repeat materials like wood, ceramic, woven fibers, or black metal.
A fourth mistake is forgetting dust control. Grease and dust settle quickly in kitchens, especially above cabinets near the stove. If you choose fragile or hard-to-clean items, the display may look dull within weeks.
Finally, avoid placing heavy pieces near the front edge. Style should never come before safety.
Expert Tips
Use fewer, larger pieces for a cleaner designer look. A large basket, a tall vase, and one framed print usually look better than ten small decorations lined up in a row. Your goal is visual balance, not storage for every extra item you own.
Repeat shapes and materials to make the display feel connected. For example, pair woven baskets with wood cutting boards, or use matte white vases with pale greenery. Repetition creates rhythm without making the space boring.
If your cabinets reach close to the ceiling, keep decor low and simple. If the gap is tall, use layered styling with height. Always leave enough open space so the kitchen can breathe.
Frequently Asked Questions
What Should I Put Above My Kitchen Cabinets?
Good options include decorative baskets, vases, framed art, faux greenery, wood boards, pitchers, and simple sculptural pieces. Choose items that match your kitchen style and are easy to clean. For a beginner-friendly look, use a neutral palette with two or three textures, such as woven fiber, ceramic, and wood.
Should Decor Above Cabinets Touch the Ceiling?
Decor usually looks better when it does not touch the ceiling. A small amount of open space keeps the arrangement from feeling squeezed. If your ceiling gap is short, use low baskets, shallow trays, or flat framed art. If the space is tall, choose larger anchor pieces that fill height without crowding the top.
How Do I Keep Above-Cabinet Decor From Looking Cluttered?
Start with fewer pieces than you think you need. Group items in small clusters and leave clear space between them. Repeat colors, textures, or materials so the display feels connected. If the area looks busy, remove small objects first. Larger, simpler pieces often create a calmer and more polished kitchen design.
Can I Use Real Plants Above Kitchen Cabinets?
You can use real plants if the area gets enough light and you can water them safely. Still, many cabinet tops are dark, warm, and hard to reach. Faux greenery is often easier because it stays fresh-looking with little care. Choose realistic leaves and avoid overly shiny plastic plants for a more natural look.
How Often Should I Clean Decor Above Kitchen Cabinets?
Plan to dust the area every few weeks and deep clean it every season. Kitchens collect grease, steam, and airborne dust faster than other rooms. Use a microfiber cloth for smooth items and a handheld vacuum for baskets or textured pieces. Regular cleaning keeps the display fresh and protects your cabinet tops from sticky buildup.
Conclusion
Decorating above kitchen cabinets becomes much easier when you treat the space with intention. Start by cleaning the surface, studying the ceiling gap, and choosing a clear style direction. Then use scale, proportion, texture, and open space to create a display that feels balanced rather than crowded.
The best kitchen decor ideas are often simple. A few decorative baskets, a vase, soft faux greenery, framed art, and warm wood tones can add charm without making the room feel busy. Keep safety in mind, avoid heavy items near edges, and choose pieces you can clean with ease.
Now that you know how to decorate above your kitchen cabinets, you can style that overlooked space with confidence. Work slowly, step back often, and edit as you go. A thoughtful display can make your kitchen feel warmer, taller, and more complete.

About
Nick Hall has spent the last seven years working at the intersection of kitchen design and home repair — first as a design assistant at a residential renovation studio, then as a freelance writer covering everything from cabinet layouts to leaky faucet fixes.
Her approach is simple: kitchens should look good and function well. That means she’s just as comfortable talking about color palettes and counter materials as she is walking readers through how to fix a wobbly cabinet hinge or troubleshoot a garbage disposal.
Nick has worked directly with homeowners on small-space kitchen makeovers, budget-conscious renovations, and the kind of everyday repairs that don’t need a contractor — just the right instructions. She writes from experience, not theory, and tests most of the fixes and tips she shares before publishing them.
When she’s not writing, Nick is usually hunting for mid-century kitchen finds at estate sales or helping friends plan their own renovations. She lives in Columbus, Ohio.