
That sticky, blackened mess on the bottom of your oven? You’re not alone. Burnt sugar happens to the best of us, whether a pie bubbled over or a tray of cookies dripped while baking. The good news is you don’t need to call a technician or buy expensive products to deal with it. Learning how to clean burnt sugar in oven surfaces is one of the most useful kitchen skills you can pick up, and it’s easier than you think.
In this guide, you’ll find simple, proven methods that use everyday items already sitting in your pantry. We’ll walk through each step together, from softening the gunk to scrubbing it away safely. By the end, you’ll know exactly how to restore your oven to a fresh, clean state without stress or frustration.
Why Cleaning Burnt Sugar in Your Oven Matters
Leaving a caramelized spill in your oven is more than just an eyesore. Every time you turn on the heat, that baked-on residue burns again, releasing smoke and a sharp odor that can taint the flavor of your food. Nobody wants their fresh bread tasting like last week’s overflowed casserole.
Beyond the smell, sugar that hardens onto your enamel surface can cause permanent stains and even damage the heating element over time. For home cooks and beginners, tackling this early keeps your oven running efficiently and your kitchen smelling clean.
It also saves you money. A little regular maintenance means you avoid costly repairs or replacements. Best of all, doing it yourself builds confidence and teaches you how your appliance really works.
Tools and Materials You’ll Need
Before you start, gather everything in one spot so you’re not searching mid-task. Most of these items are likely already in your home, which makes this an affordable fix.
- Baking soda – your main cleaning powerhouse
- White vinegar – cuts through grease and lifts residue
- Warm water – for softening and rinsing
- A non-abrasive scrubber or sponge – protects your enamel surface
- A plastic or silicone scraper – loosens hardened bits without scratching
- Clean microfiber cloths – for wiping and drying
- Rubber gloves – keeps your hands protected and comfortable
- A spray bottle – makes applying vinegar easy
- A small bowl – for mixing your baking soda paste
Optional but handy: a flashlight or headlamp. It helps you spot every hidden spot in the dark corners of your oven so nothing gets missed.
Step-by-Step Guide on How To Clean Burnt Sugar In Oven
Step 1 – Cool the oven completely
Patience comes first. Never start cleaning while your oven is even slightly warm. A hot surface can burn your skin and cause cleaning solutions to evaporate before they do their job.
Turn the oven off and let it sit for at least an hour. Touch the door and inner walls gently to confirm they feel cool. If you smell lingering smoke, open a window and let the air clear out.
Working on a fully cooled oven gives your baking soda paste time to penetrate the burnt sugar instead of drying out instantly. This single habit makes the whole process safer and far more effective, so resist the urge to rush ahead.
Step 2 – Remove the oven racks
Take out the oven racks and set them aside. Burnt sugar often splashes onto these bars, leaving sticky, darkened spots that need their own attention.
Soak the racks in a bathtub or large sink filled with hot water and a splash of vinegar. Let them sit while you work on the interior. This soak softens any caramelized spill clinging to the metal, making it easier to wipe away later.
Removing the racks also clears your workspace. You’ll have full access to the oven floor and walls without bumping your hands or knocking debris around. A clear oven means you can scrub thoroughly and reach every stubborn corner.
Step 3 – Scrape off the loose debris
Now grab your plastic or silicone scraper. Gently push against the burnt sugar to lift off the chunks that have already loosened. You’ll feel some pieces flake away with a satisfying crackle.
Work slowly and avoid digging too hard into the enamel surface. The goal here is to remove the easy stuff, not to gouge your oven floor.
Sweep the loosened bits into a dustpan or wipe them up with a damp cloth. Clearing this layer first means your cleaning paste can reach the deeper, stuck-on residue. Think of it as prepping the surface, much like sanding before you paint. This small effort sets you up for a much smoother clean.
Step 4 – Mix and apply a baking soda paste
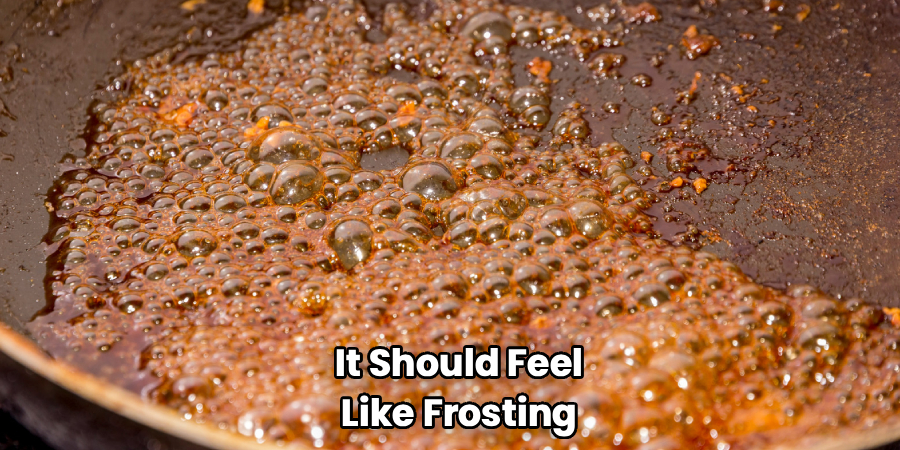
In your small bowl, combine baking soda with just enough warm water to form a thick, spreadable paste. It should feel like frosting, not soup.
Spread this baking soda paste generously over every patch of burnt sugar. Pay special attention to the darkest, crustiest spots near the oven floor. The paste clings to the residue and slowly breaks down the hardened sugar.
Knowing how to clean burnt sugar in oven surfaces often comes down to this gentle chemistry. Baking soda is mildly abrasive yet safe for your enamel. Coat the stains fully, then step back. You’ll let it work its magic in the next step, no harsh scrubbing required just yet.
Step 5 – Let the paste sit
This is the waiting game, and it’s worth it. Leave the baking soda paste on the burnt sugar for at least 30 minutes, though a few hours or overnight works even better for tough spots.
As it sits, the paste draws moisture into the residue, softening that rock-hard layer into something you can actually wipe away. You might notice the paste turning brown as it lifts the grime.
Use this time to scrub your soaking oven racks with a non-abrasive scrubber. Multitasking keeps things efficient. When you come back to the oven interior, the once-impossible mess will feel loose, crumbly, and ready to surrender without a fight.
Step 6 – Spray with vinegar
Fill your spray bottle with white vinegar and mist it over the dried baking soda paste. Watch closely. You’ll see a gentle fizz bubble up as the vinegar reacts with the baking soda.
This foaming action is exactly what you want. It loosens the bond between the burnt sugar and your oven surface, lifting away even the stubborn caramelized spill that resisted earlier.
Let the fizz settle for a few minutes. The smell will be sharp but fades quickly and won’t linger like smoke or burnt odor. This natural reaction does the heavy lifting so you don’t have to scrub aggressively, protecting both your hands and your oven’s enamel finish from unnecessary wear.
Step 7 – Wipe and scrub away the residue
Take your damp microfiber cloth and start wiping in firm, circular motions. The softened paste and dissolved sugar should glide right off, revealing the clean surface underneath.
For any spots that hold on, use your non-abrasive scrubber with a little extra pressure. Avoid steel wool, which can scratch and dull your enamel surface permanently.
Rinse your cloth often in clean water so you’re not smearing grime around. You may need two or three passes to clear everything completely. Run your fingers lightly across the surface to feel for any rough patches you missed. Once it feels smooth and looks dark-free, you’re nearly there.
Step 8 – Reassemble and do a final wipe
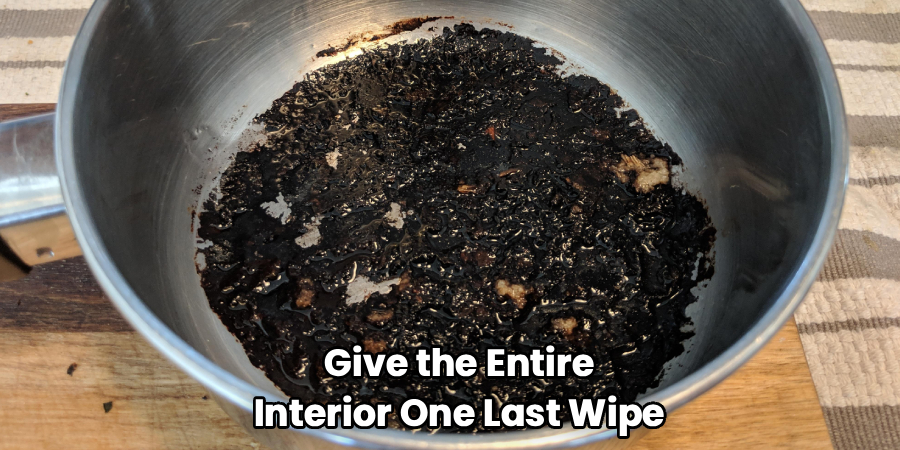
Return your now-clean oven racks to their slots. Give the entire interior one last wipe with a fresh, damp cloth to remove any leftover baking soda or vinegar residue.
Follow up with a dry microfiber cloth so no moisture lingers near the heating element. A dry surface prevents streaks and keeps everything looking polished.
Take a moment to admire your work. The oven should look noticeably brighter and smell fresh and neutral. If you want, run the oven empty at a low temperature for ten minutes to burn off any faint odor. Then you’re done, with a sparkling oven you cleaned entirely on your own.
Critical Mistakes When Cleaning Burnt Sugar in the Oven
Even with the best intentions, a few common slip-ups can make your cleaning harder or even damage your appliance. Knowing these ahead of time saves you trouble.
The biggest mistake is scrubbing while the oven is still warm. Heat dries out your cleaning paste instantly and risks painful burns. Always wait until everything is completely cool before you touch a thing.
Another error is reaching for harsh tools like steel wool or metal scrapers on the enamel surface. These scratch the finish, creating rough spots where future spills cling even harder. Stick with a non-abrasive scrubber and a plastic scraper instead.
Many beginners also skip the soaking and waiting time. They want instant results, so they scrub furiously and exhaust themselves. Patience does most of the work for you, so let the baking soda paste sit.
Finally, some people spray cleaner directly onto the heating element or oven fan. This can cause damage or sparks. Keep moisture away from those parts, and avoid commercial chemical cleaners that leave fumes behind every time you cook.
Expert Tips
A little prevention goes a long way. Place a baking sheet or piece of foil on the rack below anything likely to bubble over, like pies or saucy casseroles. This catches drips before they ever reach the oven floor.
Clean small spills as soon as your oven cools, rather than waiting for them to build up. Fresh residue wipes away in seconds, while old layers take real effort.
Keep a spray bottle of vinegar and a box of baking soda handy in your kitchen for quick touch-ups. For an extra fresh finish, add a few drops of lemon juice to your final rinse. It cuts any leftover odor and leaves a clean, bright scent behind.
Frequently Asked Questions
Can I use commercial oven cleaners instead of baking soda?
Yes, but proceed carefully. Commercial cleaners work fast, yet they often contain harsh chemicals that leave fumes and strong odors. These can linger and affect your food’s taste. If you choose one, ventilate your kitchen well and wear gloves. For most home cooks, the baking soda and vinegar method is safer, cheaper, and just as effective for everyday burnt sugar messes.
How long does burnt sugar take to soften?
It depends on how thick and old the residue is. A fresh, thin layer might soften in 30 minutes with baking soda paste. Tougher, hardened spots usually need a few hours, and the most stubborn caramelized spills benefit from sitting overnight. The longer you let the paste work, the less scrubbing you’ll do, so patience truly pays off here.
Is it safe to clean around the heating element?
You can clean near it, but keep moisture and cleaning paste off the element itself. Spraying liquid directly on the heating element can cause damage or sparks. Instead:
- Wipe gently around it with a barely damp cloth
- Avoid soaking that area
- Let everything dry fully before turning the oven on
This keeps your appliance safe and working properly.
What if the burnt sugar won’t come off?
Don’t panic, and don’t reach for steel wool. Reapply your baking soda paste to the stubborn spot, spray it with vinegar, and let it sit longer than before. Sometimes deep stains need two or three rounds of soaking and gentle scrubbing. A plastic scraper can help lift edges. With persistence, even the most baked-on residue eventually releases.
How often should I clean my oven?
For regular cooks, a deep clean every three months works well. However, wipe up spills as soon as your oven cools to prevent buildup. If you bake often or notice smoke and odor while cooking, clean sooner. Quick maintenance between deep cleans keeps your enamel surface bright and your oven running efficiently without much effort.
Conclusion
Cleaning your oven doesn’t have to feel like a dreaded chore. With a few simple pantry items and a bit of patience, you can tackle even the toughest, blackest mess on your own. You’ve learned to cool the oven first, soak your racks, apply a baking soda paste, and let vinegar do the fizzing magic before wiping everything clean.
The real secret is letting time work for you. When you give the paste room to soften that baked-on residue, you save your arms from endless scrubbing and protect your enamel surface from scratches. Avoid the common mistakes, keep moisture away from the heating element, and stay consistent with quick touch-ups.
Now that you know how to clean burnt sugar in oven surfaces yourself, you’ll never feel stuck staring at a sticky spill again. You’ve got the tools, the steps, and the confidence to handle it. So grab that sponge, trust the process, and enjoy the satisfaction of a fresh, sparkling oven you restored all on your own.

About
Nick Hall has spent the last seven years working at the intersection of kitchen design and home repair — first as a design assistant at a residential renovation studio, then as a freelance writer covering everything from cabinet layouts to leaky faucet fixes.
Her approach is simple: kitchens should look good and function well. That means she’s just as comfortable talking about color palettes and counter materials as she is walking readers through how to fix a wobbly cabinet hinge or troubleshoot a garbage disposal.
Nick has worked directly with homeowners on small-space kitchen makeovers, budget-conscious renovations, and the kind of everyday repairs that don’t need a contractor — just the right instructions. She writes from experience, not theory, and tests most of the fixes and tips she shares before publishing them.
When she’s not writing, Nick is usually hunting for mid-century kitchen finds at estate sales or helping friends plan their own renovations. She lives in Columbus, Ohio.