
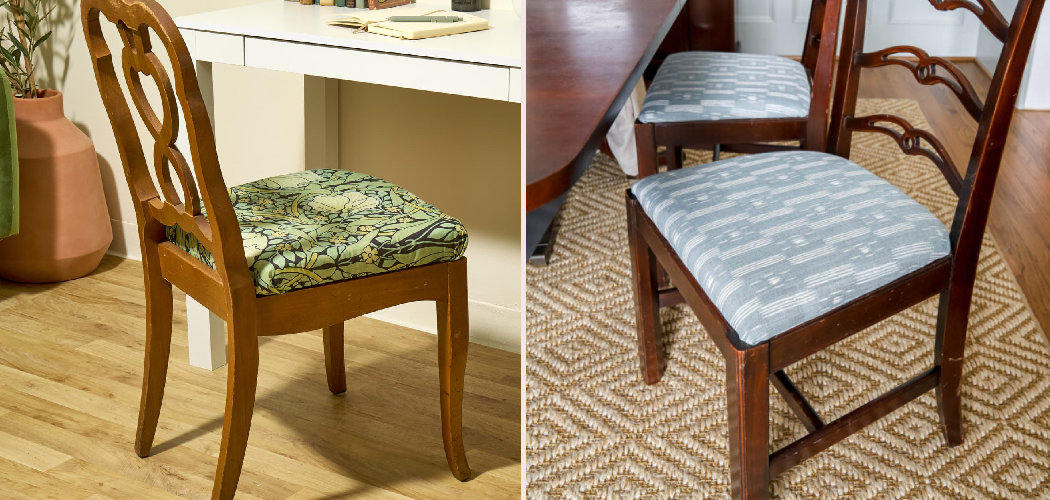
Worn, stained chair seats can drag down a whole kitchen, even when the rest of the room sparkles. Years of spilled coffee, sticky fingers, and daily sitting leave fabric faded, torn, and flattened, and no amount of scrubbing quite fixes it.

Here’s the good news: you don’t need a professional upholsterer or a big budget to fix this. Learning how to recover kitchen chairs lets you refresh your seating in an afternoon, often for the cost of a yard or two of fabric.
With a few simple tools and a little patience, you can swap that tired look for crisp, comfortable seats that feel brand new. This guide walks you through the entire process step by step, so you can recover your chairs with confidence and enjoy results you’ll be proud to show off.
Why Learning to Recover Kitchen Chairs Matters
This skill reaches well beyond a single kitchen makeover. Once you understand how to remove a seat base, replace foam padding, and stretch fresh fabric, you can refresh almost any cushioned seat in your home.
It also travels surprisingly well. Campers and outdoor beginners often deal with tight dinette areas in RVs and trailers, where worn seat pads take a beating from constant use and changing weather. Refreshing that dinette seating instantly brightens compact eating spaces without costly replacements.
That same practical self-reliance pays off at home, too. Instead of tossing a sturdy dining chair frame because its cushion looks rough, you give it new life for a fraction of the price. You’ll learn to choose durable fabric, manage fabric tension, and finish clean corners. Master this on your home chairs first, and you’ll improve any compact eating space, wherever you roam.
Tools and Materials You’ll Need
You won’t need a workshop full of gear to get great results. Most of these supplies are affordable and easy to find at any craft or hardware store.
- Flathead screwdriver: Removes the screws holding the seat base to the frame.
- Staple gun: Secures fresh fabric tight and fast.
- Staple remover or pliers: Pulls out old, stubborn staples.
- Upholstery fabric: Your new, durable covering.
- Foam padding: Replaces flattened, worn cushioning.
- Batting: Adds a soft, smooth layer over the foam.
- Scissors and a marker: For measuring and trimming.
- Dust cover fabric: Tidies up the underside.
- Spray adhesive (optional): Holds foam in place while you work.
Gather everything before you start, and the whole project will flow smoothly without frustrating mid-job runs to the store.
Step-by-Step Guide on How To Recover Kitchen Chairs
Step 1 – Remove the Seat From the Chair Frame
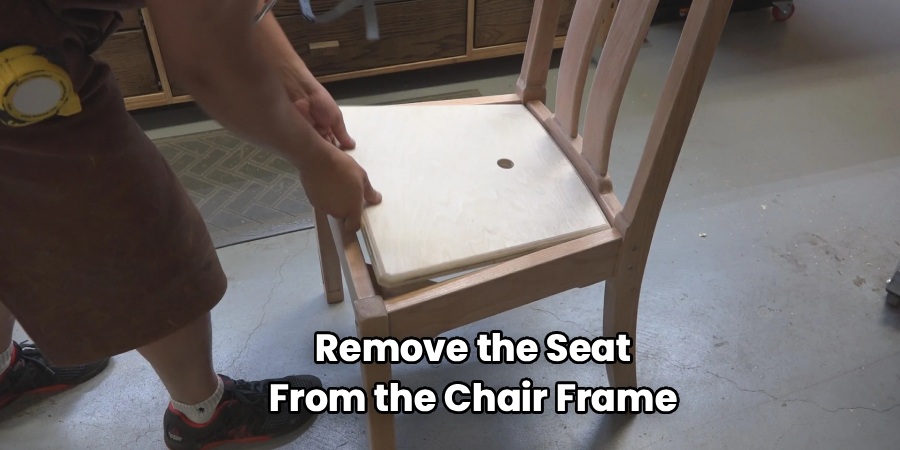
Start by flipping the chair upside down on a clean, padded surface. Look underneath, and you’ll usually spot four screws connecting the seat base to the dining chair frame.
Grab your flathead screwdriver and back each screw out slowly. Keep them safe in a small bowl or labeled bag so none roll away. As the last screw loosens, the cushioned seat lifts right off in your hands.
Set the bare frame aside for now. Run your fingers over the seat base and notice how loose or compressed the old padding feels. Most kitchen chairs come apart this easily, which is exactly why this project suits beginners. With the seat free, you’ve got a flat, workable piece and full access to every corner.
Step 2 – Strip Off the Old Fabric and Staples
Now turn the seat over and study how the old upholstery fabric was attached. You’ll see rows of staples gripping the fabric to the underside of the seat base.
Slide your staple remover or the tip of a flathead screwdriver under each staple, then lever it up. Grip stubborn ones with pliers and pull firmly. You’ll hear little pops as they release, and the old fabric peels back to reveal the padding beneath.
Take your time here so you don’t gouge the wood. Pull off the old fabric and any crumbling foam, then clear away every leftover staple. The exposed seat base should feel smooth under your palm. A clean base gives your new layers something solid to grip.
Step 3 – Inspect and Replace the Foam Padding
With the fabric gone, press your hand into the old foam padding. If it feels flat, lumpy, or crumbly, it’s time to replace it for real comfort.
Lay the seat base on your new foam and trace its outline with a marker. Cut along the line with sharp scissors, keeping the edges straight. The fresh foam should match the base shape exactly, with no overhang.
A quick spritz of spray adhesive holds the foam centered while you work, though it’s optional. Press the foam down firmly and let it settle. You’ll feel an instant difference, that soft, springy cushion that flattened seats lose over years of daily sitting. Good padding is the heart of a seat that feels as nice as it looks.
Step 4 – Add a Smooth Layer of Batting
Batting is the secret to a soft, rounded finish that hides the hard edges of foam. It wraps the cushion so your fabric lies smooth instead of bunching at the corners.
Roll out your batting and set the seat base, foam side down, in the center. Cut it a few inches larger than the seat on every side so you have plenty to fold over.
Pull the batting up and around the edges, then staple it to the underside with gentle tension. Work one side at a time, keeping it taut but not stretched thin. Smooth your hand across the top, and you’ll feel a soft, even surface with no ridges. This cushioning layer rounds everything out beautifully for the fabric ahead.
Step 5 – Cut and Position Your New Fabric
Choose a durable fabric that handles kitchen spills and daily wear. Spread it face down on your table, then place the padded seat base centered on top, foam side down.
Cut the fabric several inches larger than the seat on all sides, leaving enough to wrap and staple underneath. If your fabric has stripes or a print, take a moment with pattern alignment so the design sits straight and centered on the seat.
This is where learning how to recover kitchen chairs starts to feel rewarding, because you finally see your new look taking shape. Smooth the fabric flat and check that the pattern runs evenly front to back. A little planning now prevents crooked lines you’d notice at every meal.
Step 6 – Staple the Fabric With Even Tension
Here’s where good fabric tension makes or breaks the finish. Start at the center of one side, pull the fabric snug over the edge, and drive in a single staple underneath.
Move to the opposite side, pull taut, and staple again. This back-and-forth keeps the fabric balanced and wrinkle-free. Then do the same with the remaining two sides, adding staples every inch or so as you work outward.
Keep the tension firm and consistent, smoothing as you go. You’ll feel the fabric tighten into a clean, drum-like surface across the top. Stop short of the corners for now, leaving a few inches loose on each one. Steady, even pulling is the trick that gives your seat that crisp, professional look.
Step 7 – Fold and Finish the Corners
Corners are where beginners often struggle, but a simple fold makes them tidy. Pull the fabric at one corner straight up and staple it down in the center first.
Then fold each side inward like wrapping a gift, tucking the excess into a neat pleat. Press the fold flat and staple it securely. Repeat on all four corners, keeping each fold facing the same direction for a uniform look.
Trim away bulky excess fabric so the underside lies flat against the seat base. Run your fingers over each corner, and it should feel smooth and crisp with no lumpy bunching. Knowing how to recover kitchen chairs really shows in these corners, since clean folds separate a homemade job from a polished one.
Step 8 – Add a Dust Cover and Reattach the Seat
For a truly finished underside, cut a square of dust cover fabric slightly smaller than the seat base. Fold the raw edges under and staple it over the exposed staples and fabric.
This neat layer hides your handiwork and keeps loose threads from dropping onto the floor. It’s the touch that makes your chair look store-bought from every angle.
Now line up the seat with the screw holes on the dining chair frame. Flip the chair right side up, set the seat in place, and drive your screws back in from underneath. Tighten them snug so the seat sits firm with no wobble. Set the chair down, give it a test sit, and enjoy that satisfying, freshly cushioned bounce.
Critical Mistakes When Recovering Kitchen Chairs
A few common slip-ups trip up beginners, but knowing them ahead of time keeps your project smooth.
The biggest mistake is uneven fabric tension. Pulling too loose leaves baggy wrinkles, while yanking one side harder than the other twists the pattern off-center. Always work from the center outward, alternating opposite sides, so the fabric tightens evenly across the whole seat.
Another frequent error is skipping foam or batting replacement. People often slap new fabric over flat, crumbling padding, then wonder why the seat still feels hard and lumpy. Fresh foam and a smooth batting layer are what give your chair real comfort and a rounded shape.
Many folks also rush the corners. Bunching fabric into messy clumps creates lumpy edges you’ll feel every time you sit. Take a minute to fold each corner like a gift, and the finish looks far more professional.
Finally, beginners sometimes choose the wrong fabric. Thin, delicate material wears out fast in a busy kitchen. Pick a durable, tightly woven upholstery fabric that resists stains and handles daily use, and your hard work will last for years.
Expert Tips
A few insider habits separate a decent result from a professional-looking one. First, iron your fabric before you start. Wrinkles you staple in stay put, so a quick press gives you the cleanest possible surface.
Next, keep a staple remover within reach. Even pros misfire a staple now and then, and being able to pull and reset one keeps your tension perfect. Don’t settle for a crooked staple line.
Buy a little more fabric than you think you need, especially with patterns, since alignment eats up extra material. Test your staple gun on scrap wood first to set the right depth. Finally, snap a quick photo of the original seat before you take it apart. That reference shows you exactly how the layers and folds fit together when you reassemble.
Frequently Asked Questions
How much fabric do I need to recover a kitchen chair?
Most standard kitchen seats need about half a yard of fabric each, but always measure to be sure. Lay your seat base on the fabric and add several inches on every side for wrapping and stapling. For chairs with patterns, buy extra to allow for alignment. As a quick guide:

- One chair: roughly half a yard
- Four chairs: around two yards, plus pattern allowance
Can I recover chairs without removing the old fabric?
You can, but it’s not the best approach. Leaving the old fabric on adds bulk that may stop the seat from fitting back into the frame. It also hides worn foam that needs replacing. For the cleanest, most comfortable result, take the time to strip the old fabric and staples first, then start fresh on a clean seat base.
What type of fabric works best for kitchen chairs?
Choose a durable, tightly woven upholstery fabric built for daily use. Look for materials labeled for high traffic, since kitchens see plenty of spills and bumps. Microfiber, canvas, and performance fabrics resist stains and clean easily. Avoid delicate cottons or loose weaves that snag and fade fast. A stain-resistant finish is a smart bonus that keeps your chairs looking fresh through messy family meals.
Do I need a special staple gun for upholstery?
A heavy-duty manual staple gun works perfectly for most kitchen chairs and won’t break your budget. Use staples around a quarter to three-eighths of an inch long, which grip the wood firmly without poking through. If you plan to recover several chairs or tackle bigger projects, an electric or pneumatic staple gun saves your hand and drives staples more consistently with less effort.
How long does it take to recover a kitchen chair?
Plan on about thirty to forty-five minutes per chair once you’ve gathered your supplies. Your first one usually takes longer as you learn the steps, while later chairs go much faster. Removing the seat, stripping old fabric, replacing foam, and stapling fresh material all move quickly. A set of four chairs makes a satisfying weekend afternoon project with plenty of time to spare.
Conclusion
Recovering your kitchen chairs is one of the most rewarding upgrades you can make without spending a fortune. You’ve learned to remove the seat base, strip the old fabric and staples, replace tired foam, and add a smooth layer of batting. From there, careful fabric cutting, even tension, and tidy corner folds bring everything together, finished with a clean dust cover underneath.
The real secret is patience and even pulling. Keep your tension consistent, fold each corner with care, and choose a durable fabric that stands up to daily kitchen life. Those simple habits separate a so-so result from seats that look professionally upholstered.
Now that you know how to recover kitchen chairs, you can transform that tired dining set with confidence and skip the cost of buying new. So clear a workspace, gather your tools, and start with a single chair this weekend. You’ll be amazed at the transformation, and the skills you build will carry into your next project. Happy recovering, and enjoy your fresh, comfortable seats.

About
Nick Hall has spent the last seven years working at the intersection of kitchen design and home repair — first as a design assistant at a residential renovation studio, then as a freelance writer covering everything from cabinet layouts to leaky faucet fixes.
Her approach is simple: kitchens should look good and function well. That means she’s just as comfortable talking about color palettes and counter materials as she is walking readers through how to fix a wobbly cabinet hinge or troubleshoot a garbage disposal.
Nick has worked directly with homeowners on small-space kitchen makeovers, budget-conscious renovations, and the kind of everyday repairs that don’t need a contractor — just the right instructions. She writes from experience, not theory, and tests most of the fixes and tips she shares before publishing them.
When she’s not writing, Nick is usually hunting for mid-century kitchen finds at estate sales or helping friends plan their own renovations. She lives in Columbus, Ohio.