
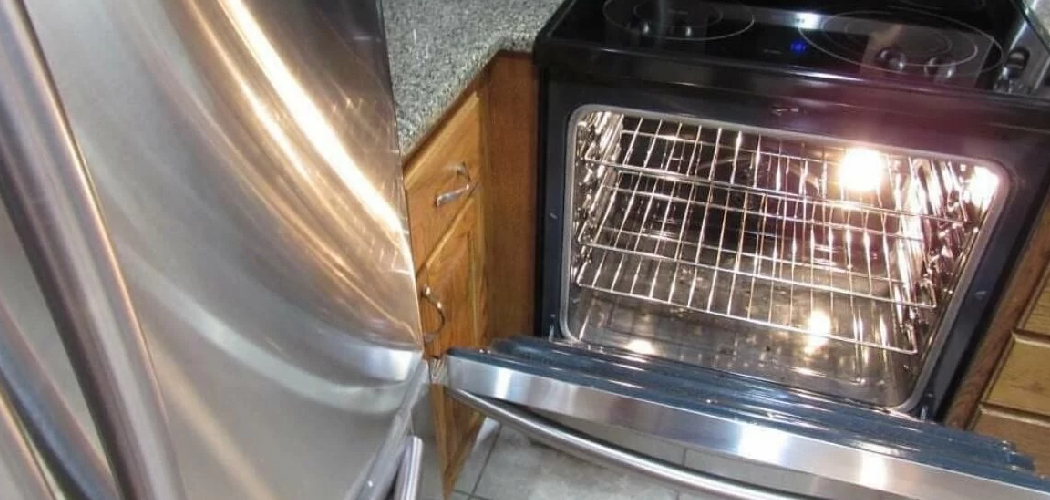
A grimy oven has a way of sneaking up on you. One day it looks fine, and the next you open the door to find baked-on grease coating the walls and smoke curling up every time you bake. The good news is that you don’t need to call a technician or spend a fortune on supplies. With a few common items and a little patience, you can get your appliance sparkling again.

If you’ve been wondering how to clean a GE oven without the hassle, you’ve landed in the right spot. GE models share a few smart features that make the job easier once you know what to look for. This guide walks you through every step, from prepping the racks to wiping down the glass door, so you can tackle it with confidence.
Why Cleaning Your GE Oven Matters
A dirty oven does more than look bad. Old residue and baked-on grease can smoke, smell, and even taint the flavor of your food. Left long enough, that buildup becomes a stubborn crust that’s far harder to remove.
Regular cleaning also helps your oven heat evenly and run efficiently. When the interior walls and heating element stay clear, your meals cook the way the recipe intended. For beginners, learning this simple skill builds real confidence around your appliances.
It pays off beyond the kitchen too. Outdoor cooks and campers know that dependable gear matters, and the same habit of caring for your equipment carries over to a camp stove or grill. Treat your oven well before and after big trips, and it’ll reward you with years of reliable service.
Tools and Materials You’ll Need
You probably have most of what you need already tucked in a cabinet. Start with baking soda and white vinegar, the two heroes of natural oven cleaning. You’ll also want a spray bottle, a soft cloth or two, and a non-scratch sponge to protect the enamel surface inside.
Grab a pair of rubber gloves to keep your hands clean and a plastic scraper for lifting stubborn residue without gouging the metal. A small bowl for mixing paste and some old towels to catch drips will round out your kit. If you prefer a store-bought option, a low-fume commercial oven cleaner works too, just follow the label.
One optional convenience item: a handheld vacuum makes clearing loose crumbs and ash quick and tidy before you start scrubbing.
Step-by-Step Guide on How To Clean A GE Oven
Step 1 – Empty and Prep the Oven
Start by making sure the oven is completely cool and switched off. Reaching into a warm cavity is a quick way to burn yourself, so give it plenty of time after your last bake.
Open the door and pull out everything inside. Take out the oven racks, any baking stones, and the broiler pan, then set them aside on old towels. You’ll likely spot loose crumbs and flaky bits of residue scattered across the bottom.
Sweep or vacuum out that loose debris first. Clearing it now keeps your cleaning paste from turning into a muddy mess later. As you peer inside, take a moment to notice where the heaviest baked-on grease sits, since those spots will need a little extra attention.
Step 2 – Soak the Oven Racks
The racks usually carry years of grease and grime, so give them their own soak while you work on the inside. Fill a bathtub or large sink with warm water, then add a generous squirt of dish soap.
Lay the oven racks in the water and let them sit for at least two hours. The longer they soak, the easier that crusty buildup loosens. If you’re short on tub space, a few drops of dish soap and a sprinkle of baking soda work well too.

You’ll know they’re ready when the residue feels soft and slippery under your fingers. A gentle scrub with a non-scratch sponge should then lift most of the grime away with little effort.
Step 3 – Mix Your Baking Soda Paste
Now for the magic mixture. In a small bowl, stir together about half a cup of baking soda with a few spoonfuls of water. Keep adding water slowly until you get a thick, spreadable paste, roughly the texture of toothpaste.
This gentle paste is the heart of learning how to clean a GE oven the natural way. Baking soda lifts grease without harsh fumes, making it safe for the enamel surface inside.
Scoop a bit onto your gloved fingers and feel how smooth it is. You’ll spread this across the interior walls, floor, and ceiling of the oven, avoiding the heating element. The paste may turn brownish as it touches grime, which is exactly the reaction you want.
Step 4 – Coat the Interior Surfaces
With your paste ready, spread it across every greasy surface inside. Use your fingers or a soft cloth to work it into the corners, along the bottom, and up the interior walls where splatters tend to cling.
Be careful to keep the paste off the heating element and any exposed vents. Those parts don’t need cleaner, and coating them can cause smoke later.
You’ll notice the paste cling nicely to vertical surfaces, which is what makes baking soda so handy. Pay extra attention to the spots with thick, baked-on grease, layering a little more paste there. Once everything’s coated in a thin, even film, you’re ready to let chemistry do the heavy lifting overnight.
Step 5 – Let It Sit Overnight
Patience is your friend here. Close the oven door and walk away, ideally for a full twelve hours or overnight. This resting time lets the baking soda break down grease and loosen even the most stubborn residue.
While you wait, this is a great moment to scrub those soaking racks. The two jobs happen side by side, so nothing feels like wasted time.
Try not to rush this stage. The longer the paste sits, the less elbow grease you’ll need later. By morning, the grime that once seemed glued in place will wipe away with a fraction of the effort. You’ll be surprised how much the overnight soak transforms a crusty oven into something far easier to wipe clean.
Step 6 – Wipe Away the Residue
The next morning, grab a damp cloth and start wiping out the dried paste. As you go, you’ll see the baking soda lift away the grease in dark, satisfying streaks.
For any spots that resist, spray a little white vinegar directly onto the leftover paste. You’ll hear a gentle fizz as the vinegar reacts with the baking soda, helping loosen the last bits of residue.
Keep rinsing and wringing your cloth until the surfaces feel smooth and clean. A plastic scraper helps lift any tough drip marks without scratching the enamel surface. Take your time on the corners, where paste likes to hide. When you’re done, the interior should look fresh and free of that old, sticky film.
Step 7 – Clean the Glass Door
The glass door deserves its own little treatment since grease and splatter cloud it over time. Spread a thin layer of baking soda paste across the inside of the glass and let it sit for about fifteen minutes.
Then wipe it away with a damp cloth, working in circles. You’ll watch the foggy film melt away to reveal clear glass beneath. For a streak-free shine, finish with a quick spritz of vinegar and a dry microfiber cloth.
Don’t forget the edges and the seal around the door, where crumbs love to gather. A clean glass door means you can watch your food bake without opening the oven and losing heat. That clear view alone makes the effort feel worth it.
Step 8 – Reassemble and Final Wipe
Once the inside is spotless, dry your soaked racks completely and slide them back into place. They should glide in smoothly along their tracks without any greasy drag.
Run a final damp cloth over the interior to catch any leftover baking soda residue. Even a little powder left behind can smoke the first time you preheat, so a quick rinse-and-wipe matters.
Give the door handle, control knobs, and outer surfaces a wipe too, since these high-touch spots collect fingerprints and grease. Step back and take in your work. A clean oven not only looks great but also smells fresh and runs better. You’ve just handled a job many folks pay good money to avoid.
Critical Mistakes When Cleaning a GE Oven

Even simple jobs can go sideways if you’re not careful, so let’s cover the slip-ups that trip people up most.
The biggest mistake is cleaning while the oven is still warm. Heat makes cleaners react too fast and can release strong fumes, plus you risk burning your hands. Always wait until everything has cooled completely.
Another common error is coating the heating element with paste or cleaner. That element needs to stay clear, and any cleaner left on it will smoke and smell the first time you bake. Keep your paste on the walls and floor, never on the exposed parts.
Many people also reach for harsh metal scrubbers, which scratch the enamel surface and leave it prone to future grime. Stick with a non-scratch sponge or a plastic scraper instead.
Mixing the wrong products causes trouble too. Combining a commercial oven cleaner with vinegar or other chemicals can create harmful fumes, so use one method at a time. Finally, don’t skip the final rinse. Leftover residue smokes during preheating, which undoes all your hard work and fills your kitchen with an unpleasant haze.
Expert Tips
A few smart habits keep your oven cleaner for longer, so deep cleans come around far less often.
Wipe up spills as soon as the oven cools after each big cooking session. Fresh drips lift away in seconds, while old ones harden into baked-on grease that takes real effort to remove.
Place a sheet pan or oven liner on the lower rack to catch drips before they hit the floor of the oven. Just keep it off the very bottom so it doesn’t block airflow or the heating element.
If your model has a self-clean cycle, use it sparingly. The intense heat works well but can wear on seals and electronics over time, so save it for the toughest jobs and stick with baking soda for routine care.
Frequently Asked Questions
Can I use the self-clean cycle instead of scrubbing?
Yes, the self-clean cycle is handy for heavy buildup. It heats the oven to a high temperature that turns residue into ash you can wipe away. Just know it produces fumes and odor, so ventilate your kitchen well. Run it sparingly, since the intense heat can stress seals and electronics over time. For routine cleaning, the baking soda method is gentler on your appliance.
Is it safe to use vinegar and baking soda together?
Absolutely, and they make a great team for an oven. Baking soda lifts grease as a paste, while a spritz of vinegar over the leftover powder creates a gentle fizz that loosens stubborn residue. The reaction is safe and produces no harmful fumes. Just avoid mixing vinegar with commercial chemical cleaners, since that combination can release irritating gases.
How often should I clean my oven?
It depends on how much you cook. A light wipe-down after big spills keeps things manageable, while a full clean every three to six months suits most home cooks. Watch for these signs that it’s time:
- Smoke when preheating
- A lingering burnt smell
- Visible baked-on grease on the walls or floor
Catching buildup early always makes the job easier.
Will oven cleaner damage the enamel surface?
A quality oven cleaner is safe for the enamel surface when you follow the directions and don’t leave it on too long. Choose a low-fume formula, wear gloves, and ventilate the room. Avoid abrasive scrubbers that scratch the finish. If you’d rather skip chemicals entirely, the baking soda paste cleans just as well and is far gentler on both your oven and your lungs.
How do I avoid smoke the first time I bake after cleaning?
Smoke usually means leftover residue or cleaner still inside. To prevent it:
- Wipe the interior with a damp cloth until no powder remains
- Keep all paste off the heating element
- Run a short empty preheat to burn off any traces
A thorough final rinse is your best defense against that smoky first bake.
Conclusion
Bringing a grimy oven back to life feels far more satisfying than you might expect. With nothing more than baking soda, a little vinegar, and some patience, you’ve cleared away baked-on grease, brightened the interior walls, and polished the glass door until it shines. No technician, no expensive gadgets, just a steady plan and your own two hands.
Remember the key moves: let the oven cool first, keep cleaner off the heating element, soak the racks while the paste does its work, and always finish with a thorough rinse to avoid smoke. These small steps protect your appliance and keep it running well for years.
Now that you know how to clean a GE oven from top to bottom, you can tackle it whenever buildup starts to creep in. Make it a habit, wipe spills early, and you’ll rarely face a tough job again. Roll up your sleeves, set aside an evening, and give your oven the fresh start it deserves. Your next batch of cookies will taste all the better for it.

About
Nick Hall has spent the last seven years working at the intersection of kitchen design and home repair — first as a design assistant at a residential renovation studio, then as a freelance writer covering everything from cabinet layouts to leaky faucet fixes.
Her approach is simple: kitchens should look good and function well. That means she’s just as comfortable talking about color palettes and counter materials as she is walking readers through how to fix a wobbly cabinet hinge or troubleshoot a garbage disposal.
Nick has worked directly with homeowners on small-space kitchen makeovers, budget-conscious renovations, and the kind of everyday repairs that don’t need a contractor — just the right instructions. She writes from experience, not theory, and tests most of the fixes and tips she shares before publishing them.
When she’s not writing, Nick is usually hunting for mid-century kitchen finds at estate sales or helping friends plan their own renovations. She lives in Columbus, Ohio.