
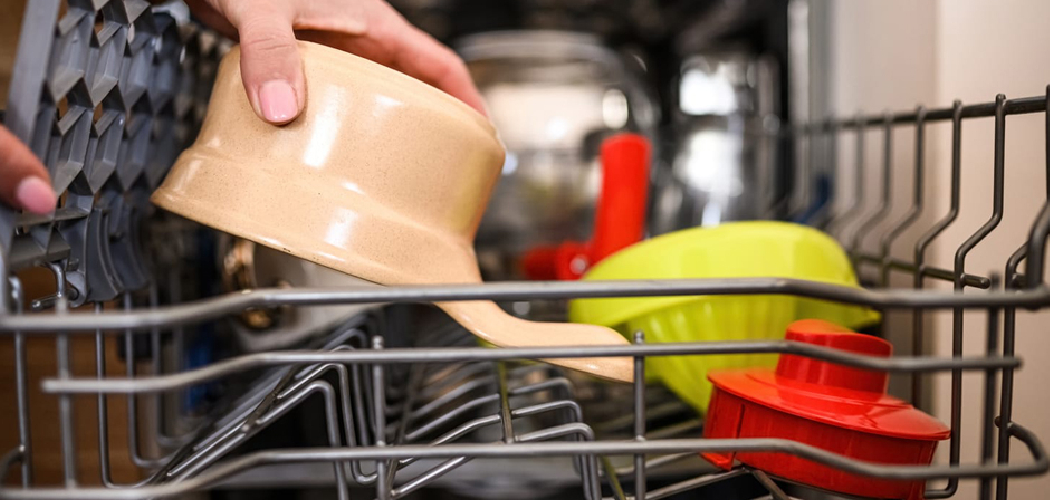
Your dishwasher does a dirty job every single day, so it’s no surprise that it needs a little care itself. Bits of food, grease, and hard water film slowly collect inside, and before long you might notice a funky smell or dishes that come out cloudy instead of sparkling.

Here’s the good news: you don’t need a technician or a service call to fix this. With a few household items and about an hour, you can refresh your machine yourself.
If you’ve been wondering how to clean a kitchenaid dishwasher the right way, you’ve come to the right place. This guide walks you through each step, from the filter to the spray arms, so your dishwasher runs cleaner, smells fresher, and washes better than it has in months.
Why Cleaning Your KitchenAid Dishwasher Matters
A clean dishwasher does far more than look tidy. Food particles and detergent residue build up over time, and that gunk breeds bacteria, traps dishwasher odor, and leaves your dishes spotted instead of clear. Regular maintenance keeps everything running smoothly and protects the parts that cost money to replace.
You’ll also save energy and water, since a clogged filter and grimy spray arm force the machine to work harder for worse results.
This habit pays off beyond your kitchen, too. Campers and RV owners know that appliance care, water efficiency, and tidy cleanup matter even more on the road. Learn to maintain your machine at home, and those same instincts carry over to portable dish systems, camp kitchens, and tight RV setups where every drop counts.
Tools and Materials You’ll Need
You likely have most of these supplies already. Start with white vinegar and baking soda, your two best friends for cutting grease and neutralizing dishwasher odor naturally. Grab a soft sponge or microfiber cloth for wiping down surfaces, plus an old toothbrush for scrubbing tight spots around the filter and spray arm holes.
You’ll want a small bowl of warm soapy water for soaking removable parts, and a dry towel for finishing up. Keep a pair of rubber gloves handy, since the drain basket can hide some unpleasant surprises. A flashlight helps you spot trapped food particles in dim corners.
One optional convenience item: a soft-bristle detail brush. It reaches into crevices a toothbrush can’t, making quick work of detergent residue and hard water buildup.
Step-by-Step Guide on How To Clean A KitchenAid Dishwasher
Step 1 – Empty the Dishwasher Completely
Before anything else, pull out every dish, glass, and utensil. You need a clear view and full access to the interior, so don’t leave that one lonely mug on the top rack.
Slide both racks out if your model allows it, or at least push them out of the way. This lets you reach the bottom, where most food debris and standing water collect.
Take a quick look around as you go. You’ll probably spot bits of food near the drain, a cloudy film on the stainless steel interior, or grime along the edges. Noticing these trouble spots now helps you focus your effort later. A fully empty machine makes the whole job faster and far less frustrating.

Step 2 – Remove and Clean the Filter
The dishwasher filter is the heart of a clean machine, and it’s often the smelliest culprit. Reach into the bottom, twist the cylindrical filter counterclockwise, and lift it out along with the flat mesh screen beneath it.
Brace yourself, because trapped food particles and a sour odor often greet you here. Rinse both pieces under warm running water to flush away the gunk.
For stubborn grease or hard water film, soak them in warm soapy water for a few minutes, then scrub gently with your old toothbrush. You’ll feel the slimy residue lift away. Rinse once more until the mesh looks clear, then set the parts aside to drip while you tackle the next step.
Step 3 – Clear the Drain Area
With the filter out, you’ve got clear access to the drain basket below. This is where the chunkiest food debris likes to settle, so put on your rubber gloves for this one.
Shine your flashlight into the drain and look for trapped scraps, broken glass, or buildup. Carefully scoop out anything you find with your fingers or a damp paper towel.
Wipe around the opening to remove any greasy film clinging to the edges. A blocked drain leads to standing water and that lingering dishwasher odor nobody wants. Clearing it now keeps water flowing freely and prevents future clogs. Once the area looks clean and feels smooth, you’re ready to move on to the spray arms above.
Step 4 – Inspect and Clean the Spray Arms
The spray arms shoot water across your dishes, but their tiny holes clog easily with hard water deposits and detergent residue. When that happens, your dishes come out streaky and unclean.
Gently lift or unclip each spray arm, following your model’s design. Hold one up to the light and check the little spray holes.
If you spot blockages, poke them clear with a toothpick or the tip of your detail brush. Rinse the arms under warm water and give them a quick wipe. You’ll often hear trapped grit rattle loose as you shake them. Spin them by hand to confirm they move freely, then snap them back into place so every jet sprays at full strength again.
Step 5 – Wipe Down the Door and Gasket
The door gasket, that rubber seal around the edge, hides more grime than almost any other part. Mold, food splatter, and sticky detergent residue love to gather in its folds.
Dampen your sponge with warm soapy water and run it along the entire seal, getting into every crease. Use your toothbrush for the tight spots where buildup hides.
Don’t forget the door’s inner edge and the detergent dispenser, which often crusts over with old soap. Wipe the control panel and handle too, since hands touch them constantly. As you clean, you’ll see the stainless steel interior start to shine again. A fresh gasket seals better and stops leaks, so give this step the attention it deserves.
Step 6 – Run a Vinegar Cycle
Now for the deep clean that ties it all together. Place a dishwasher-safe bowl filled with about one cup of white vinegar on the top rack, then close the door.
Run a hot water cycle with the machine otherwise empty. The vinegar dissolves grease, breaks down hard water film, and strips away lingering detergent residue from places your sponge can’t reach.
Knowing how to clean a kitchenaid dishwasher properly means letting this vinegar cycle do the heavy lifting inside the pipes and tub. As the hot water swirls, you’ll notice the sour smell fading and a fresher scent taking its place. When the cycle finishes, open the door and breathe in the difference.
Step 7 – Freshen With Baking Soda
To finish the deep clean and chase away any remaining dishwasher odor, reach for baking soda. Sprinkle about one cup across the bottom of the empty tub, spreading it evenly.
Run a short, hot rinse cycle. The baking soda scrubs gently, neutralizes smells, and brightens the stainless steel interior, leaving everything smelling clean and neutral.
This one-two punch of vinegar followed by baking soda is the secret to a truly fresh machine. Skipping it leaves your dishwasher only half-clean. After the rinse, you’ll find the tub looks brighter and smells far better. Leave the door cracked open afterward so the interior dries fully and stays odor-free until your next load.
Step 8 – Reassemble and Test
With every part clean and dry, it’s time to put your machine back together. Twist the filter back into place clockwise until it locks, and reattach the spray arms securely.
Slide the racks back in and give everything a final glance to confirm nothing’s loose. A wobbly spray arm or unseated filter can hurt performance, so double-check each piece.

Run a normal empty cycle to test your work and rinse away any stray baking soda or vinegar. Listen as the water flows freely without gurgling or pooling. When it finishes, open the door to a clean, fresh-smelling machine ready for your next load of dishes. Regular maintenance like this keeps it running strong for years.
Critical Mistakes When Cleaning a KitchenAid Dishwasher
Even a simple cleaning can backfire if you rush or skip the wrong step, so let’s go over the slip-ups that trip people up most.
The biggest mistake is ignoring the filter entirely. Many people don’t even realize their machine has one, so trapped food particles rot away unnoticed, causing that stubborn dishwasher odor and poor washing results. Make filter cleaning a routine habit, not an afterthought.
Another common error is using harsh chemicals like bleach inside a stainless steel interior. Bleach can damage the finish and react badly with food residue. Stick with gentle, proven cleaners like vinegar and baking soda instead.
Some folks also mix vinegar and baking soda in the same cycle. Combined, they fizz out and cancel each other’s cleaning power. Run them separately for the best effect.
Forgetting to clean the spray arms is another miss. Clogged holes mean weak water pressure and cloudy dishes, no matter how good your detergent is. Finally, don’t reassemble parts while they’re still wet and grimy. A poorly seated filter or damp gasket invites leaks and undoes all your hard work.
Expert Tips
A few smart habits keep your dishwasher fresh with far less effort between deep cleans.
Scrape plates well before loading, but skip the heavy pre-rinsing. Modern detergents need a little food residue to work against, yet large chunks clog the filter and drain fast.
Wipe the door gasket once a week with a damp cloth. This quick swipe stops mold and grime from settling into the folds.
Run a vinegar cycle once a month if you have hard water, since mineral buildup happens quickly and dulls your dishes. Soft water areas can stretch this to every two months.
Finally, leave the door slightly open after each load. That airflow dries the interior, prevents trapped moisture, and keeps odor from ever taking hold.
Frequently Asked Questions
How often should I clean my KitchenAid dishwasher?
It depends on how much you use it. Rinse the filter every week or two if you run daily loads, and do a full deep clean with vinegar and baking soda once a month. Watch for these signs that it’s time:
- A musty or sour smell when you open the door
- Cloudy dishes or visible film after a cycle
- Standing water in the bottom after draining
Catching buildup early always makes the job easier.
Can I use bleach in my KitchenAid dishwasher?
It’s best to avoid bleach, especially with a stainless steel interior, since it can damage the finish and corrode parts over time. Bleach also reacts poorly with leftover food residue. For routine cleaning and odor control, white vinegar and baking soda do the job safely and effectively. If you face stubborn mold, a diluted vinegar solution and a good scrub usually handle it.
Why does my dishwasher still smell after cleaning?
Lingering dishwasher odor usually means you missed a hidden spot. Check the filter and drain basket again for trapped food particles, since these are the most common culprits. Also wipe the door gasket folds, where mold loves to hide. Run a fresh vinegar cycle, then a baking soda rinse, and leave the door open to dry. Persistent smells often point to a clogged drain hose worth inspecting.
How do I fix cloudy dishes from hard water?
Cloudy dishes usually come from hard water minerals and detergent residue. Run a vinegar cycle to dissolve the buildup inside the machine, and consider adding a rinse aid to your routine. Clean the spray arms so water sprays freely, and use the right amount of detergent, since too much leaves a film. In very hard water areas, a water softener salt can make a big difference.
Is it safe to clean the spray arms myself?
Absolutely, and it’s one of the easiest wins for better performance. Most spray arms unclip or unscrew by hand without any tools. Once removed, rinse them and clear the tiny holes with a toothpick to restore full water pressure. Just follow your model’s design so you reattach them correctly. This simple maintenance step keeps your dishes coming out clean and spot-free.
Conclusion
Giving your dishwasher a thorough cleaning is one of the most satisfying kitchen tasks you can tackle yourself. With just vinegar, baking soda, and a little elbow grease, you’ve cleared the filter, freed up the spray arms, scrubbed the door gasket, and chased away that stubborn dishwasher odor. No technician, no service fee, just a fresh machine that washes better.
Remember the key moves: empty the machine first, clean the filter and drain, check the spray arms, wipe the gasket, then run a vinegar cycle followed by a baking soda rinse. Each step builds on the last for a truly deep clean.
Now that you know how to clean a kitchenaid dishwasher from top to bottom, you can keep it running strong with regular maintenance. Wipe the gasket weekly, scrape plates before loading, and leave the door cracked to dry. Set aside an hour this weekend, gather your supplies, and give your hardworking appliance the care it deserves. Your dishes, and your nose, will thank you.

About
Nick Hall has spent the last seven years working at the intersection of kitchen design and home repair — first as a design assistant at a residential renovation studio, then as a freelance writer covering everything from cabinet layouts to leaky faucet fixes.
Her approach is simple: kitchens should look good and function well. That means she’s just as comfortable talking about color palettes and counter materials as she is walking readers through how to fix a wobbly cabinet hinge or troubleshoot a garbage disposal.
Nick has worked directly with homeowners on small-space kitchen makeovers, budget-conscious renovations, and the kind of everyday repairs that don’t need a contractor — just the right instructions. She writes from experience, not theory, and tests most of the fixes and tips she shares before publishing them.
When she’s not writing, Nick is usually hunting for mid-century kitchen finds at estate sales or helping friends plan their own renovations. She lives in Columbus, Ohio.