
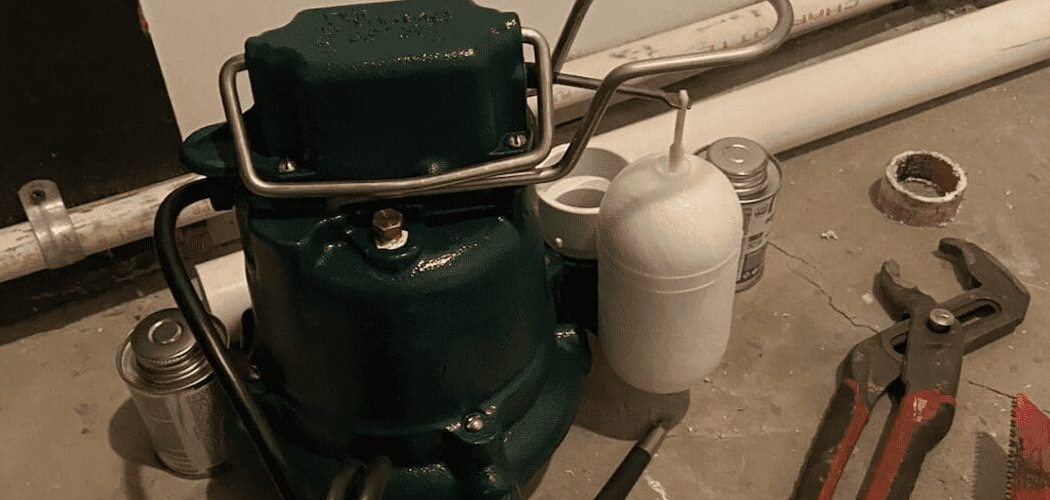
A dishwasher that won’t drain or sits full of standing water can throw off your whole kitchen routine. Before you panic and reach for the phone, here’s some encouraging news: learning how to replace dishwasher pump parts is well within reach for most home cooks. You don’t need a professional license or a garage full of specialty tools—just patience and a willingness to get a little hands-on.

A worn pump is one of the most common reasons a dishwasher stops cleaning or draining the way it should. The good news? Swapping it out is a manageable weekend project that can save you a hefty repair bill.
This guide walks you through every step, from cutting the power safely to running a final test cycle, so you can fix it yourself with confidence.
Why Replacing a Dishwasher Pump Matters
A failing pump affects everything your dishwasher does. The circulation pump pushes water through the spray arms, while the drain pump clears dirty water out. When either one struggles, you end up with cloudy dishes, standing water, or a strange grinding noise during the wash cycle.
Replacing it yourself saves real money. A technician visit alone can cost more than the part itself, and waiting days for an appointment leaves you washing dishes by hand.
There’s also the satisfaction of understanding your own appliance. Once you’ve opened the lower access panel and handled the sump assembly, other repairs start feeling far less scary.
For busy households, that independence is huge. You fix the problem on your schedule, skip the labor fee, and get back to clean dishes faster.
Tools and Materials You’ll Need
Gather everything before you begin so you’re not crawling out from under the appliance mid-job. Here’s your checklist:
- Phillips and flathead screwdrivers
- Adjustable wrench and pliers
- Nut driver or socket set
- Replacement pump (matched to your exact model number)
- Bucket and old towels for catching water
- Sponge or wet/dry vacuum for standing water
- Pliers for the hose clamp
- Voltage tester to confirm power is off
- Flashlight or headlamp for dark corners
- Work gloves to protect your hands from sharp edges
- Optional but handy: a small magnetic tray to keep screws organized so nothing rolls under the fridge
Having these within arm’s reach keeps your focus on the repair. Nothing breaks momentum like hunting for a missing screw halfway through.
Step-by-Step Guide on How to Replace Dishwasher Pump
Step 1 – Cut the power and water supply
Safety always comes first. Head to your electrical panel and switch off the breaker feeding the kitchen. Don’t just rely on the off button—flip the actual breaker.
Next, find the shut-off valve under your sink and turn off the water supply. This stops any surprise flow once you start disconnecting hoses.
Use your voltage tester on the wiring to confirm the power connection is truly dead. Touching live wires turns a simple repair into a dangerous one.

Lay your towels and bucket nearby, because leftover water usually trickles out when you open things up.
Take a slow breath and double-check both shut-offs. This calm, careful start sets the tone for the whole job and protects you from shocks or floods.
Step 2 – Remove the lower access panel
With the power and water off, find the lower access panel at the bottom front of your dishwasher. It usually attaches with two to four screws.
Grab your screwdriver and remove them, setting each one in your magnetic tray so they don’t wander off. The panel should lift or pull free easily.
Behind it, you’ll see the motor, hoses, and the wiring harness. Shine your flashlight in to get a clear view before touching anything.
Take a quick photo with your phone now. This snapshot becomes your roadmap when it’s time to reassemble everything.
Feel around gently for any dampness, since a leaking pump often leaves the cabinet floor wet. Spotting that moisture early confirms you’re working on the right culprit.
Step 3 – Clear out any standing water
Before you go further, deal with the standing water that often pools in the bottom. A failing drain pump frequently leaves this behind.
Open the dishwasher door and lift out the lower rack. Use a sponge, cup, or wet/dry vacuum to soak up every bit of water from the sump area.
Work slowly and keep your towels close. Water left behind will spill the moment you tilt or disconnect a hose, making a mess under the cabinet.
Dry the filter housing and surrounding basin as best you can. A clean, dry workspace lets you see the connections clearly and keeps your hands from slipping.
This step feels tedious, but skipping it guarantees a soggy surprise later. A few extra minutes here saves a real cleanup headache.
Step 4 – Access the pump assembly
Now you’ll reach the heart of the repair. Depending on your model, you may access the pump from the bottom by tilting the unit back, or from inside through the filter housing.
Remove the filter and any covers protecting the sump assembly. Set these parts aside in order so reassembly stays simple.
Look for the pump nestled near the base, connected to hoses and the wiring harness. Give yourself enough light and elbow room to work comfortably.
If your appliance pulls out from the cabinet, slide it forward gently and rest it on a towel to protect the floor.
Knowing how to replace dishwasher pump components starts with seeing them clearly, so don’t rush this access step. A good view now prevents fumbling later.
Step 5 – Disconnect the wiring and hoses
Time to free the old pump. Start with the wiring harness—gently squeeze the connector tabs and pull the plugs apart. Never yank the wires themselves.
Snap another photo so you remember exactly where each wire goes. Color matching matters when you reconnect.
Next, loosen the hose clamp with your pliers and slide it back along the hose. Then twist and pull the hose free from the pump fitting.
Keep your bucket directly underneath, because trapped water almost always drains out here. Expect a small splash.
Work each connection slowly and steadily. Old clamps and brittle hoses can crack if you force them, so a patient touch keeps your other parts intact and your repair on track.
Step 6 – Remove the old pump
With the wiring and hoses disconnected, you can lift out the old pump. Most models twist a quarter turn to release, while others unbolt with a few screws.
Check how yours attaches before forcing anything. If it resists, look for a hidden clip or locking tab holding it down.
Once free, set the old pump aside and inspect it. A worn impeller, cracked housing, or burnt smell confirms why your dishwasher struggled.
Take a moment to compare it side by side with your replacement. They should match in shape, size, and connection points exactly.

This comparison catches ordering mistakes before you install the wrong part. Better to spot a mismatch now than after you’ve buttoned everything back up and run a wash cycle.
Step 7 – Install the new pump
Now for the satisfying part. Position the new pump in the same spot, lining up the mounting points and connection ports.
Twist or bolt it into place using the same method you used for removal. It should seat firmly without wobbling or gaps.
Reattach the hose, then slide the hose clamp back into position and tighten it snugly with your pliers. A loose clamp invites leaks later.
Reconnect the wiring harness, matching each plug to the photo you took earlier. Listen for a soft click that tells you it’s locked in.
Give every connection a gentle tug to confirm it holds. A secure fit now means quiet, leak-free performance once you power the unit back on.
Step 8 – Reassemble and check connections
With the new pump in, work backward through your steps. Replace the filter housing, sump cover, and any protective pieces you set aside.
Slide the dishwasher back into its cabinet if you pulled it out, guiding the hoses so nothing pinches behind it.
Reattach the lower access panel and drive in those screws from your magnetic tray. Snug but don’t overtighten.
Before closing everything up fully, glance once more at your photos to confirm nothing got missed. A forgotten hose or loose clamp shows up fast during testing.
Run your fingers along each connection one final time. This last check rewards you with peace of mind and helps you avoid pulling the panel off again an hour later.
Step 9 – Restore power and run a leak check
The moment of truth has arrived. Turn the water supply back on, then flip the breaker to restore the power connection.
Start a short rinse or wash cycle and stay close. Watch and listen carefully as water begins moving through the new pump.
Shine your flashlight under and behind the unit for your leak check. Touch the hose connections and the pump base, feeling for any dampness around the seals.
Listen for smooth filling and draining sounds. Gurgles or grinding could mean a kinked hose or a clamp that needs tightening.
If everything stays dry and quiet through a full cycle, congratulations—you nailed it. Wipe down your workspace and enjoy the win of a repair you handled all on your own.
Critical Mistakes When Replacing a Dishwasher Pump
Even careful beginners stumble over a few common errors, so let’s cover them before they trip you up.
The biggest mistake is skipping the power and water shut-off. Some folks assume the off button is enough, but only the breaker guarantees safety. Working on live wires or an open water line risks shocks and floods, so always verify with your voltage tester first.
Another frequent slip-up is ordering the wrong part. Dishwasher pumps vary widely between brands and even between models from the same maker. Always match the exact model number rather than guessing, or you’ll end up with a pump that won’t connect properly.
Many people also forget to remove the standing water before disconnecting hoses. The result is a soaked cabinet and a frustrating cleanup that could’ve been avoided with five minutes of sponging.
Overtightening the hose clamp ranks high too. Cranking it too hard can crack the fitting or pinch the hose, causing the very leaks you’re trying to prevent. Snug is enough.
Finally, rushing the wiring harness reconnection causes trouble. Mismatched or loose connectors lead to a pump that won’t run, so match your photos carefully and listen for that locking click.
Expert Tips
A few small habits separate a smooth repair from a stressful one. First, lay an old blanket or towel on the floor before you start—it protects your flooring and gives you a softer surface to kneel on during those longer stretches.
Always keep your phone handy for photos. A quick snapshot of the wiring harness and hose layout saves you from guessing during reassembly.
When ordering your replacement, write down both the model and serial number. This tiny detail prevents the headache of receiving a pump that doesn’t fit.
Keep a magnetic tray or small bowl nearby for screws and clips. Lost hardware is one of the most common ways a simple job drags on. These little steps add real polish and confidence to every kitchen repair you tackle.
Frequently Asked Questions
How do I know if my dishwasher pump is failing?
Watch for a few telltale signs. The most common include:
- Standing water left in the bottom after a cycle
- A loud grinding or humming noise during the wash cycle
- Dishes that come out dirty or cloudy
- Water that won’t drain properly
If you notice one or more of these, your circulation or drain pump is likely the culprit and worth inspecting before it fails completely.
How long does this repair usually take?
Most beginners finish in about two to three hours. If it’s your first time, give yourself the full afternoon so you’re not rushing the connections. Experienced DIYers often wrap up in under ninety minutes. The biggest time savers are buying the correct part beforehand and gathering every tool first. Patience with the wiring and hoses beats speed every time.
Do I need a plumber or electrician for this?
For most standard repairs, no. If your dishwasher already has its plumbing and electrical connections in place, you’re simply swapping one component for another. You’d only call a pro if you discover damaged wiring or a problem with the home’s plumbing itself. When in doubt about the power connection, a quick consult never hurts.
How do I choose the correct replacement pump?
Match it to your exact appliance. Find the model and serial number, usually printed on a sticker along the door edge or inner frame. Order the pump that matches those numbers precisely rather than relying on appearance alone. Two pumps can look identical but have different fittings or wiring. Buying from the manufacturer or a trusted parts supplier ensures the right fit.
How can I prevent leaks after installing the new pump?
Tighten each hose clamp snugly but gently, and make sure every connection seats fully before testing. After your first cycle, check all the joints with a flashlight and your fingers. Catching a tiny drip early prevents bigger water damage later. Re-check the area after a day or two of normal use, just to be safe.
Conclusion
You’ve now got everything you need to tackle this repair with confidence. From cutting the power and clearing standing water, to swapping the pump and running a final leak check, each step builds toward a dishwasher that drains and cleans like new.
The key takeaways are simple: always shut off power and water first, order a part that matches your exact model, and take your time with the wiring harness and hose clamp connections. Don’t skip the leak check, and trust your photos during reassembly. These small habits make the difference between a frustrating do-over and a job well done.
The best part? You handled it yourself, saved the technician fee, and learned skills you’ll use again. That confidence carries straight into your next kitchen project.
So grab your tools, clear that workspace, and trust the process. Knowing how to replace dishwasher pump parts is one of those satisfying wins that makes your kitchen feel truly yours. Go enjoy those sparkling clean dishes—you earned it.

About
Nick Hall has spent the last seven years working at the intersection of kitchen design and home repair — first as a design assistant at a residential renovation studio, then as a freelance writer covering everything from cabinet layouts to leaky faucet fixes.
Her approach is simple: kitchens should look good and function well. That means she’s just as comfortable talking about color palettes and counter materials as she is walking readers through how to fix a wobbly cabinet hinge or troubleshoot a garbage disposal.
Nick has worked directly with homeowners on small-space kitchen makeovers, budget-conscious renovations, and the kind of everyday repairs that don’t need a contractor — just the right instructions. She writes from experience, not theory, and tests most of the fixes and tips she shares before publishing them.
When she’s not writing, Nick is usually hunting for mid-century kitchen finds at estate sales or helping friends plan their own renovations. She lives in Columbus, Ohio.