
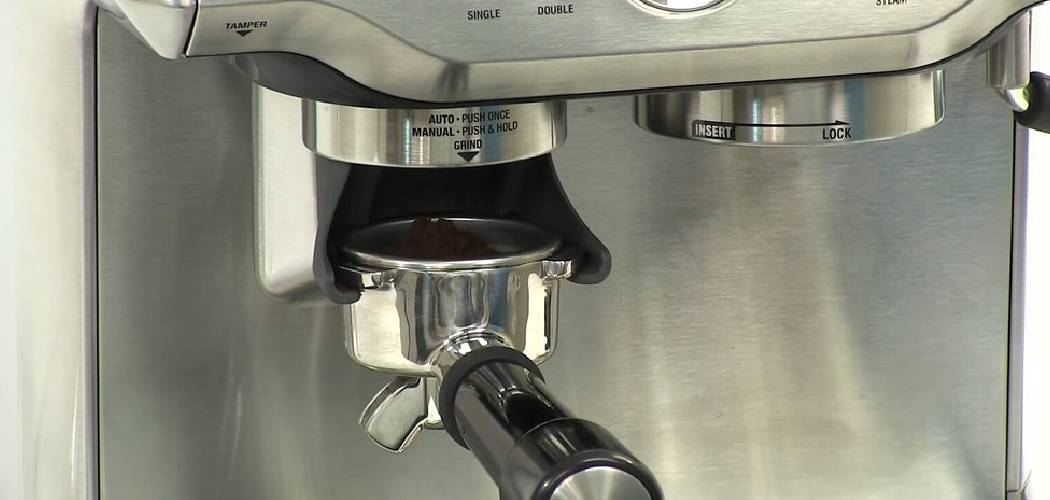
There’s something special about brewing your own coffee at home, especially when you’ve got a quality machine on the counter. But if you’ve just unboxed your shiny new Breville and feel a little unsure, you’re not alone. Many beginners feel overwhelmed by all the buttons, parts, and settings at first glance. Learning how to use Breville coffee maker properly turns that intimidation into pure confidence.

The truth is, these machines are built to be friendly. Once you understand the basics, brewing a rich, satisfying cup becomes second nature. You don’t need a barista course or a technician to figure it out.
This guide walks you through every step, from setup to your first delicious cup, so you can brew like a pro right from your own kitchen.
Why Learning to Use a Breville Coffee Maker Matters
Knowing your way around your coffee machine pays off in ways you might not expect. First, it saves you serious money. Skip the daily café run and brew cups that taste just as good, if not better, at home.
There’s also a real freedom in coffee confidence. Whether you’re hosting friends, setting up a small kitchenette, or packing a compact machine for a weekend trip, you’ll never feel stuck waiting on someone else. You become self-sufficient, and that’s a wonderful feeling for any beginner.
Plus, understanding your machine helps it last longer. When you know how the brew basket, water reservoir, and settings work together, you treat each part correctly. Fewer mistakes mean fewer repairs and better-tasting coffee every single morning. A little knowledge today protects your investment for years to come.
Tools and Materials You’ll Need
Before you start brewing, gather a few simple things. Having everything ready makes your first cup smooth and stress-free.
- Your Breville coffee machine – fully unboxed and placed on a stable counter
- Fresh, cold water – filtered water gives the cleanest taste
- Quality coffee beans or pre-ground coffee – whichever your model uses
- A clean filter – paper or reusable, depending on your machine
- A coffee scoop or kitchen scale – for measuring the right amount
- Your carafe or favorite mug – ready to catch that fresh brew
- A soft cloth – for wiping down surfaces before and after
- A burr grinder (optional) – if your beans aren’t pre-ground, freshly grinding them right before brewing makes a noticeable difference in flavor
Keep these items within easy reach near your machine. When everything has its place, your morning routine flows effortlessly.
Step-by-Step Guide on How to Use Breville Coffee Maker
Step 1 – Set Up and Position Your Machine
Find a flat, stable spot on your kitchen counter near a power outlet. You want enough clearance above and around the machine to lift the lid and access the water reservoir comfortably.
Wipe down the surface and give the machine a quick once-over. Remove any packaging, stickers, or protective film you might have missed during unboxing. Plug it in, and you’ll often hear a soft beep or see the display light up.

Take a moment to glance at the control panel. Notice the buttons, the display, and where each part connects. Getting familiar now saves confusion later. Learning how to use Breville coffee maker starts with this simple, calm setup, so don’t rush it. A solid foundation makes everything that follows easier.
Step 2 – Run an Initial Rinse Cycle
Before brewing actual coffee, give your new machine a clean water run-through. This rinses away any dust or residue left from manufacturing and packaging.
Fill the water reservoir with fresh, cold water up to the recommended line. Place the empty carafe in position, but skip the coffee grounds and filter for now. Then start a standard brew cycle with water only.
You’ll hear the machine gurgle and hiss as hot water flows through the system. Watch the clean water collect in the carafe below. Once it finishes, pour that water out and discard it.
This quick step ensures your first real cup tastes fresh and clean, not dusty or plasticky. Think of it as warming up the machine for action.
Step 3 – Fill the Water Reservoir
Now you’re ready for the real thing. Lift the lid and pour fresh, cold water into the water reservoir. Filtered water works best because it keeps mineral buildup low and flavor crisp.
Match the water level to how many cups you want. Most reservoirs have clear measurement markings, so line up your fill with the right number. Don’t overfill past the maximum line, or you risk messy overflow.
Cold, clean water makes a noticeable difference in taste. You’ll smell the freshness once it heats and brews. Avoid using warm or previously boiled water, since it can taste flat. Close the lid firmly once you’re done. This simple foundation sets the stage for a balanced, flavorful pot of drip coffee.
Step 4 – Add Your Filter and Coffee Grounds
Open the brew basket and insert your filter. If you’re using paper, seat it snugly so it doesn’t fold inward during brewing. For a reusable mesh filter, just make sure it sits properly in place.
Now measure your coffee grounds. A good starting point is one to two tablespoons per six ounces of water, but adjust to your taste. Pour the grounds into the filter and give the basket a gentle shake to level them out.
Breathe in that rich, earthy aroma. It’s a preview of the cup to come. Avoid packing the grounds down tightly, since loose grounds let water flow evenly. Slide the brew basket back into position until it clicks securely. You’re almost there.
Step 5 – Choose Your Machine Settings
Here’s where your machine’s personality shines. Look at the control panel and explore your options. Many Breville models offer adjustable strength, cup count, and even temperature controls.
If you like a bold cup, select a stronger brew setting. Prefer something mild and smooth? Dial it back. For models with programmable features, you can set a timer so coffee brews automatically before you wake up. Imagine that fresh aroma greeting you in the morning.

Take your time exploring these machine settings the first few times. Don’t worry about getting it perfect immediately. Coffee is personal, and half the fun is finding your ideal balance. Once you’ve made your selections, double-check the display to confirm everything looks right before brewing.
Step 6 – Start the Brew
This is the moment you’ve been waiting for. Make sure your carafe sits properly on the warming plate, lined up directly under the brew basket. A misaligned carafe causes drips and spills, so check it twice.
Press the brew button and listen. You’ll hear the machine spring to life with a gentle hum and the soft trickle of hot water meeting coffee grounds. Within moments, that unmistakable aroma fills your kitchen.
Watch as rich, dark coffee streams into the carafe below. Resist the urge to pull it out early, since the full cycle ensures balanced flavor. Let the machine finish completely. The whole process usually takes just a few minutes, and the payoff smells absolutely wonderful.
Step 7 – Pour and Taste
Once the brewing finishes, you’ll often hear a final beep or notice the machine settle into keep-warm mode. Now comes the best part.
Lift the carafe carefully, since it’s hot, and pour your coffee slowly into your favorite mug. Watch the steam curl upward and breathe in that deep, roasted scent. Take your first sip and pay attention.
Is it strong enough? Too weak? Too bitter? Your taste tells you exactly what to tweak next time. Maybe you’ll add more grounds, or perhaps adjust the strength setting. This tasting moment is how you learn your machine and your preferences together. With each pot, you’ll fine-tune your routine until every cup feels just right for you.
Step 8 – Clean Up After Brewing
Good coffee habits include a little cleanup. Once your machine cools slightly, remove the brew basket and toss the used grounds and paper filter into the trash or compost.
Rinse the brew basket and carafe with warm water. A quick wash now prevents stale coffee oils from building up and affecting future flavor. Wipe down the warming plate and any drips with your soft cloth.
Leave the water reservoir lid open for a bit so it can air out and stay fresh. Every few weeks, run a full cleaning cycle, and remember to descale regularly to remove mineral buildup. These small habits keep your machine humming and your coffee tasting bright. A clean machine truly is a happy machine.
Critical Mistakes When Using a Breville Coffee Maker
Even with a great machine, a few common slip-ups can ruin your cup or shorten your machine’s life. Knowing them helps you brew better from day one.
The most frequent mistake is using the wrong water-to-coffee ratio. Too few grounds give you weak, watery coffee, while too many make it bitter and overpowering. Start with the recommended measurement and adjust slowly until you find your sweet spot.
Another common error is skipping regular cleaning. Old coffee oils cling to the brew basket and carafe, leaving a stale, bitter taste behind. Rinse parts after each use and wash them thoroughly each week.
Many beginners also forget to descale. Mineral deposits from hard water build up inside, slowing the machine and harming flavor. Run a descaling cycle every month or two to keep things flowing smoothly.
Using stale or low-quality coffee is another flavor-killer. Fresh beans, stored properly in an airtight container, make a world of difference. Finally, don’t overfill the water reservoir past its maximum line, since this can cause messy overflow and uneven brewing. Avoid these, and you’re golden.
Expert Tips
Want to brew like a seasoned pro? A few small habits elevate your coffee game fast.
First, grind your beans fresh right before brewing whenever possible. Pre-ground coffee loses flavor quickly, while freshly ground beans release that bright, aromatic punch. The difference in taste is genuinely remarkable.
Next, pay attention to water quality. Filtered water not only tastes cleaner but also reduces mineral buildup inside your machine. Your taste buds and your machine will both thank you.
Warm your mug with hot water before pouring. This keeps your coffee hotter longer and enhances every sip. It’s a tiny touch that café pros swear by.
Finally, store your beans in a cool, dark, airtight container, never the fridge. Proper storage protects flavor and keeps every pot tasting fresh and lively.
Frequently Asked Questions
How often should I clean my coffee maker?
Rinse the removable parts like the brew basket and carafe after every use to prevent oily residue. For deeper care:
- Wash all removable parts thoroughly once a week
- Run a full cleaning cycle every two to four weeks
- Descale every one to three months, depending on your water hardness
Regular cleaning keeps your coffee tasting fresh and helps your machine run smoothly for years.
What kind of coffee grounds should I use?
Use medium-grind coffee for most drip-style brewing, as it balances flavor and flow nicely. Choose fresh, quality beans and grind them just before brewing for the best taste. If you buy pre-ground coffee, store it in an airtight container away from heat and light. Match your grind to your machine type, since too fine a grind can clog the filter and slow brewing.
Why does my coffee taste bitter?
Bitter coffee usually points to one of a few issues. You might be using too many grounds, brewing too long, or letting the coffee sit on the warming plate too long. Try reducing your grounds slightly, switching to a coarser grind, or pouring your coffee soon after brewing. Also, clean your machine regularly, since old coffee oils add an unpleasant bitter edge.
How do I descale my machine?
Descaling removes mineral buildup that affects flavor and performance. Most machines have a specific descaling mode or button. Fill the water reservoir with a descaling solution or a mix of water and white vinegar, then run the cycle as directed. Follow with one or two plain water cycles to rinse thoroughly. Check your manual for the exact recommended method and frequency.
Can I leave the machine on all day?
It’s best not to. Many models have an auto-off feature for safety and energy savings, but leaving coffee on the warming plate for hours makes it taste burnt and bitter. If you want coffee later, brew a fresh batch or store it in an insulated carafe. This protects both the flavor and your machine’s lifespan.
Conclusion
Brewing great coffee at home is easier than you might have feared. With the right setup, fresh ingredients, and a little practice, you’ll be pouring rich, satisfying cups in no time. The routine is simple: set up your machine, fill the water reservoir, add your filter and grounds, choose your settings, and brew.
Remember the habits that matter most. Measure your coffee carefully, use fresh beans and filtered water, and keep your machine clean with regular rinsing and descaling. These small steps make every cup taste better and help your machine last for years.
You don’t need a barista or a technician to enjoy café-quality coffee. You’ve got everything it takes to do this yourself, right in your own kitchen. Now that you understand how to use Breville coffee maker, go ahead and brew that first wonderful cup. Trust the process, tweak as you go, and savor every sip. Your perfect morning routine starts today, one delicious pour at a time.

About
Nick Hall has spent the last seven years working at the intersection of kitchen design and home repair — first as a design assistant at a residential renovation studio, then as a freelance writer covering everything from cabinet layouts to leaky faucet fixes.
Her approach is simple: kitchens should look good and function well. That means she’s just as comfortable talking about color palettes and counter materials as she is walking readers through how to fix a wobbly cabinet hinge or troubleshoot a garbage disposal.
Nick has worked directly with homeowners on small-space kitchen makeovers, budget-conscious renovations, and the kind of everyday repairs that don’t need a contractor — just the right instructions. She writes from experience, not theory, and tests most of the fixes and tips she shares before publishing them.
When she’s not writing, Nick is usually hunting for mid-century kitchen finds at estate sales or helping friends plan their own renovations. She lives in Columbus, Ohio.