
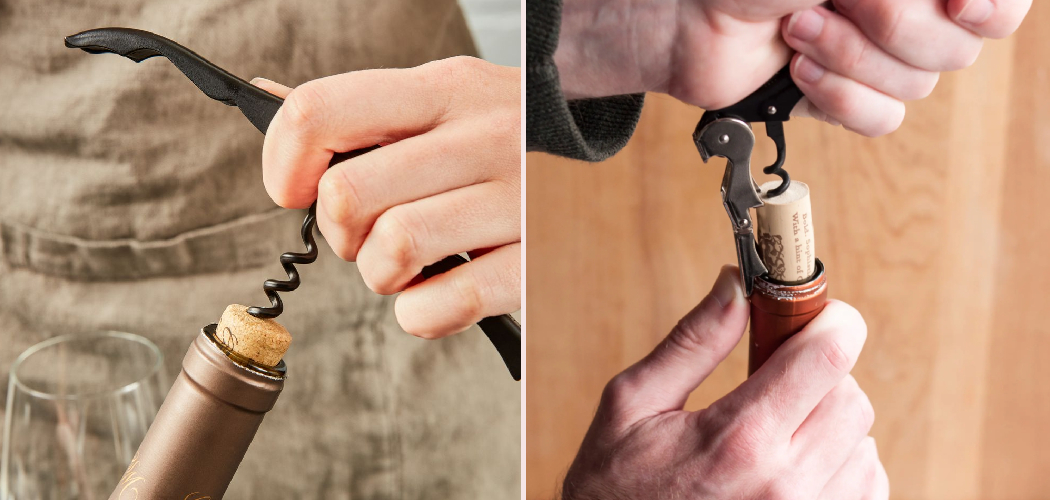
A bottle of wine you can’t open is just a sealed bottle of frustration. Plenty of beginners twist, yank, and snap corks in half before dinner even starts. Learning how to use corkscrew tools the right way turns that struggle into a five-second job you barely think about.
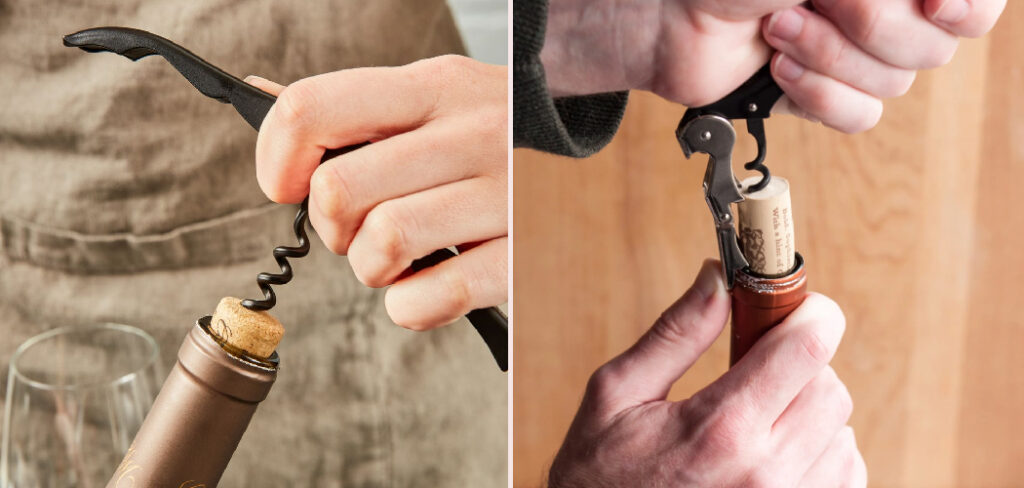
You don’t need bartender skills. You need the right grip, the right angle, and a steady pull. Once you understand how to use a corkscrew, every bottle opens clean.
This guide walks you through each step, from piercing the cork to pouring your first glass. By the end, you’ll open any bottle with confidence — no broken corks, no crumbs floating in your wine, no excuses. Let’s make opening wine the easiest part of your evening.
Why Using a Corkscrew Matters
Bottles don’t open themselves. A corkscrew is the one tool that pulls a tight cork free without snapping it or pushing it inside.
This skill matters most for campers, beginners, and anyone who entertains. On a camping trip, you carry a small folding opener — no power, no fuss. You open wine at the campsite, on a picnic blanket, or in a tiny kitchen with no gadgets.
A corkscrew also gives you control. You feel the spiral bite. You sense how tight the cork sits. You stop the moment it lifts free. That control means fewer broken corks and zero crumbs in your glass.
It’s cheap too. A solid corkscrew costs a few dollars and lasts years. Master this one tool and you’ll never stare at a sealed bottle again.
Tools and Materials You’ll Need
Gather a few basics before you start. You won’t need much.
- Pull corks clean — a sturdy corkscrew with a sharp spiral worm
- Grip the bottle securely — a clean, dry kitchen towel
- Work on a stable surface — a flat countertop or table
- Catch any drips — the sealed bottle of wine you want to open
- Tidy up fast — a small dish for the foil and cork
Optional but handy: a foil cutter. This small tool slices the bottle’s top wrap in one clean turn, so you skip the messy peeling and get straight to the cork.
Keep your spiral clean and dry. A bent or dull worm tears the cork instead of gripping it, and that’s how crumbs end up in your glass.
Step-by-Step Guide on How to Use a Corkscrew
Step 1 – Set Up Your Workspace
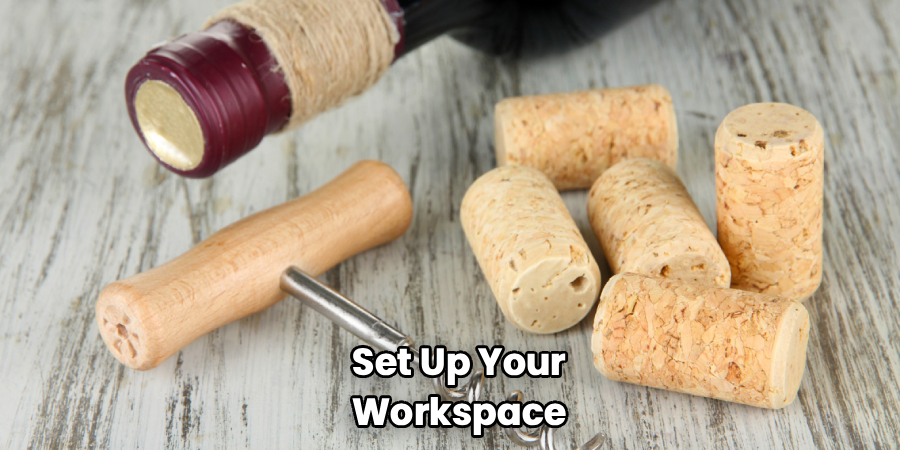
Start with a clean, dry surface at a comfortable height. A wobbly table makes the job harder and riskier.
Place the bottle upright in front of you. Wipe the neck with a towel to clear dust or moisture. A dry bottle won’t slip in your grip when you pull.
Stand or sit so your shoulders stay relaxed and your elbows have room to move. You want a steady stance, not a cramped one.
Keep a small dish nearby for the foil and cork. Push any clutter aside. The cleaner your space, the more control you have.
This setup takes ten seconds and prevents most slips before they happen. A good start makes every step that follows feel easy.
Step 2 – Remove the Foil Wrap
Look at the top of the bottle. A thin foil or plastic wrap covers the cork and the lip below it.
Find the small ridge just under the bottle’s lip. Run your knife or foil cutter around it in one steady circle. You’ll feel the blade slice through with a soft, clean cut.
Lift the loose foil cap off and drop it in your dish. The cork now sits exposed and ready.
Wipe the bottle’s rim with your towel. Sometimes a little mold or dust hides under the foil. A clean rim means a clean pour later.
This step takes seconds, but skipping it leaves wine dripping over torn foil. Cut clean, lift off, move on.
Step 3 – Position the Spiral
Hold the bottle steady on the surface with one hand. With the other, take your corkscrew and look at the pointed spiral, called the worm.
Set the tip of the worm in the center of the cork. Dead center matters — an off-center start tears the edge and weakens your grip.
Angle the tip straight down into the cork, not slanted. You’ll feel it catch the soft surface with a gentle bite.
Press down lightly to anchor the point. The spiral should stand upright on its own, ready to turn.
Take a breath and check your alignment one more time. A centered, upright start is the whole secret to a clean pull. Get this right and the rest happens almost on its own.
Step 4 – Twist the Worm In
Now turn the handle clockwise in slow, steady circles. The spiral drills down into the cork with each turn.
Keep light downward pressure as you twist. You’ll feel the worm grip the cork and pull itself deeper. The motion feels smooth and rhythmic, like winding a key.
Watch the spiral disappear into the cork. Stop when one full loop of the worm still shows above the cork’s surface. Drive it too deep and you’ll punch through the bottom, dropping crumbs into your wine.
Most corks take five or six full turns. Keep the worm straight the whole time so it doesn’t bend or tilt.
Steady hands and steady turns set you up for a clean, even pull every single time.
Step 5 – Anchor the Lever
This is where learning how to use corkscrew leverage pays off. If you own a waiter’s-style opener, fold the small metal arm down onto the bottle’s lip.
Hook the notched edge firmly against the rim. This little hinge becomes your fulcrum — the point that does the heavy lifting for you.
Hold the arm in place with one finger. Grip the bottle neck with your other hand to keep everything steady.
You’ll feel the lever lock against the glass with a small, solid click. That contact means you’re ready to pull.
For a wing-style corkscrew, the two side arms will have already risen as you twisted. Skip ahead — those arms are your levers instead. Either way, you’re set to lift.
Step 6 – Pull the Cork Up
Now lift. For a waiter’s opener, press the lever arm down against the rim while you raise the handle. The cork rises smoothly out of the neck.
For a wing corkscrew, push both raised arms down at once. The cork glides up as the arms drop.
Pull in one slow, even motion. You’ll feel resistance, then a satisfying give as the cork slides free. Listen for that soft pop — the sound of a job done right.
Don’t yank hard or jerk sideways. A steady pull keeps the cork whole and your wine crumb-free.
Stop when the cork is almost out. Most of it now stands clear of the bottle, joined by just a thin grip of glass.
Step 7 – Free the Cork
The cork hangs on the spiral, nearly out. Grip it gently with your fingers.
Wiggle it side to side with a soft twist. You’ll feel the last bit release with a quiet pop. Pull it straight up and off.
Hold the cork in your hand and check it. A whole, smooth cork means you did everything right. A torn or crumbly one tells you the worm sat off-center or drove too deep.
Twist the cork off the spiral and set it in your dish. Keep it nearby — you can use it to reseal the bottle later.
Wipe the bottle’s rim one more time with your towel. This clears any tiny crumbs before you pour. Clean rim, clean glass.
Step 8 – Pour and Clean Up
You’re almost there. Tilt the bottle slowly over your glass and pour.
Watch the wine flow smoothly down the inside of the glass. Stop and twist the bottle slightly upright at the end — this catches the last drop instead of letting it run down the label.
Set the bottle down and look at your corkscrew. Bits of cork sometimes cling to the spiral.
Wipe the worm clean with your towel. For a sticky spiral, rinse it under warm water and dry it completely. Moisture left on the metal causes rust within days.
Store your opener in a dry drawer, not a damp sink caddy. Treat it well and it serves you for years. Two minutes of cleanup now means a sharp, reliable tool next time.
Critical Mistakes to Avoid When Opening a Bottle
The most common mistake is starting off-center. People set the worm near the edge of the cork instead of dead center. The spiral tears through the side, loses its grip, and crumbles the cork into the wine. Always aim for the exact middle and drive straight down.
The second mistake is driving the worm too deep. When you twist until the spiral punches through the bottom of the cork, you push crumbs straight into your bottle. Stop while one full loop of the worm still shows above the cork. That leaves enough cork intact for a clean lift.
Rushing causes the third problem. Yanking the cork hard or jerking it sideways snaps it in half, leaving the bottom stuck in the neck. Pull slowly and straight. A steady lift beats a frantic tug every time.
Many people also skip removing the foil properly. They twist into a half-torn wrap, and wine drips over jagged foil when they pour. Cut the foil cleanly below the lip first.
Finally, neglecting your tool ruins it. Cork bits and moisture left on the spiral cause rust and dull the point. Wipe the worm after every use and store it dry.
Expert Tips
Want smoother results every time? Push down firmly on the first turn of the worm. This anchors the spiral and stops it from wandering off-center.
Count your turns. Five or six full rotations sink the worm to the right depth for most corks. Stop when one loop still shows.
Warm bottles open easier than ice-cold ones. If a cork feels stuck, let the bottle sit at room temperature for a few minutes before you pull.
Facing an old, crumbly cork? Twist in slowly and pull with extra patience. A gentle, even lift saves a fragile cork that a hard yank would shatter.

For weak grip or arthritis, choose a wing-style or lever-style corkscrew. These designs use the bottle’s lip to do the lifting, so your hands barely strain at all.
Frequently Asked Questions
Why does my cork keep breaking in half?
Your cork breaks for one of three reasons:
- Off-center start — the worm tore through the side instead of the middle
- Too shallow — the spiral didn’t grip enough cork to lift it whole
- Too fast — a hard yank snapped a dry or aged cork
Center the worm, drive it deep enough to leave one loop showing, and pull slowly. Old corks need extra patience and a gentle, steady lift.
What’s the easiest corkscrew for beginners?
A wing-style corkscrew is the easiest for beginners. You twist the worm in, and two side arms rise on their own. Push both arms down together, and the cork lifts straight out with almost no effort. It uses the bottle’s lip as leverage, so you don’t pull with raw strength. Lever-style waiter’s openers work well too once you practice the hinge motion a few times.
How do I open wine without a corkscrew?
You can open wine without a corkscrew, but expect more effort and risk. Push the cork inward with the blunt end of a wooden spoon — it drops into the bottle, and you pour around it. You can also wrap the bottle base in a towel and tap it gently against a wall to ease the cork out. Both methods are messier, so a proper corkscrew stays the safer choice.
How deep should I twist the worm?
Twist until one full loop of the spiral still shows above the cork. This sinks the worm deep enough to grip the cork firmly without punching through the bottom. Drive it all the way through and you’ll drop crumbs into your wine. Stop short, and the spiral won’t hold. Five or six full turns hits the right depth for most standard corks.
How do I clean and store my corkscrew?
Clean and dry your corkscrew after every use to prevent rust. Follow these steps:
- Wipe the spiral with a towel to remove cork bits
- Rinse a sticky worm under warm water
- Dry the metal completely
- Store in a dry drawer, not a wet sink caddy
A quick wipe keeps the point sharp and the hinge moving smoothly for years.
Conclusion
Opening a bottle of wine is a skill you’ll use for life. Set up a clean space, cut the foil, center the worm, and twist it in five or six steady turns. Anchor the lever, pull slowly, and free the cork with a gentle wiggle. Then pour, wipe the spiral clean, and store your tool dry.
Master these steps and you’ll never wrestle with a stuck cork again. You stay ready for dinner parties, camping trips, and quiet evenings at home. You keep crumbs out of your glass. You save money on gadgets that break or overcomplicate a simple job.
Practice on a few bottles this week. Each one feels easier than the last until the whole process takes just seconds. Soon you’ll know how to use corkscrew tools without a second thought, opening any bottle smoothly and cleanly.
A simple tool, used well, makes every evening easier. Grab a bottle, follow these steps, and prove to yourself how easy it really is. You’ve got this.
