
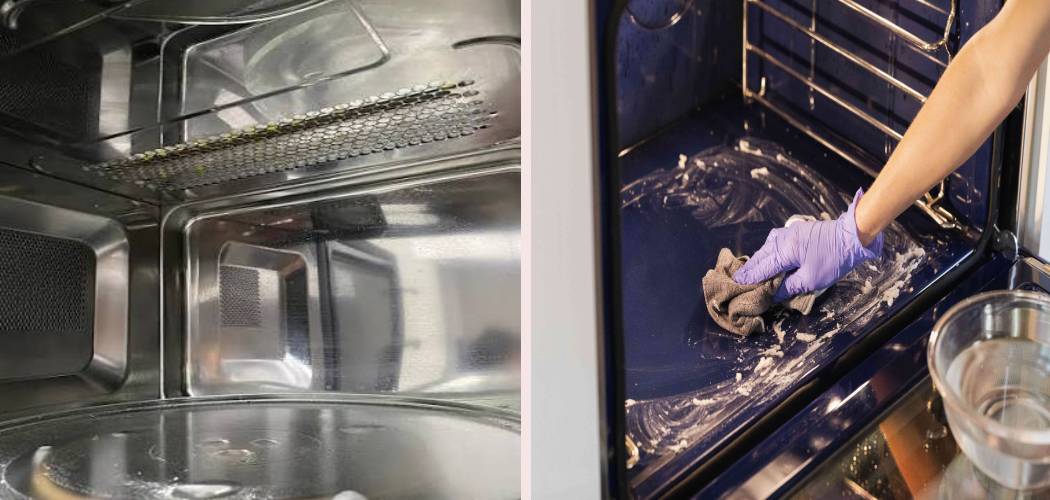
A pat of butter that slides off a baking dish and hits a hot oven floor can turn into a smoky, smelly mess in seconds. One minute you’re roasting a chicken, the next your kitchen fills with that sharp, burnt butter smell that clings to everything.
Don’t worry, though. Knowing how to clean butter from oven spills is a simple skill that saves you from smoke alarms, foul odors, and stubborn baked-on grease. You don’t need harsh chemicals or a service call.

With a few everyday supplies and a little patience, you can lift that greasy splatter and get your oven fresh again in no time. This guide walks you through every step so you can tackle butter spills safely, confidently, and without damaging your oven.
Why Cleaning Burnt Butter From an Oven Matters
Butter spills aren’t just messy. Left alone, that grease bakes onto the oven floor and walls, hardening into baked-on residue that smokes every time you turn on the heat. That lingering odor seeps into your next batch of cookies, ruining the flavor.
This skill matters even more in compact cooking spaces. Campers, RV users, cabin owners, and outdoor beginners often rely on small ovens with little ventilation, so smoke and grease splatter build up fast with nowhere to escape. Good oven care keeps the air clean and your food tasting right.
Regular cleaning also protects the interior enamel and supports smoke prevention down the line. A quick, food-safe cleaning now prevents a stubborn, smelly problem later, and it keeps your appliance working safely for years to come.
Tools and Materials You’ll Need
The best part? Most of this is already in your kitchen.
Start with a box of baking soda, your gentle workhorse for lifting grease without scratching. Keep a bowl of warm water nearby to mix a soft baking soda paste. You’ll also want a non-abrasive sponge or a soft cloth, plus a plastic scraper or an old spatula for loosening softened residue.
Grab a degreasing cloth or a few clean rags to wipe everything down, and have a dry towel ready for the final buff. A pair of rubber gloves keeps your hands clean while you work.
If you want one optional convenience item, keep a small spray bottle filled with diluted white vinegar handy. It helps cut greasy film and freshen the interior once the heavy lifting is done.
Step-by-Step Guide on How to Clean Butter From Oven
Step 1 – Turn the Oven Off and Let It Cool
Safety comes first, always. The moment you notice butter sizzling on the oven floor, switch the oven off and open a window or turn on your range hood to clear any oven smoke.
Resist the urge to wipe right away. A hot oven can burn your hands in an instant, and touching the heating element while it’s warm is dangerous. Let everything cool down completely before you reach inside.

This usually takes thirty minutes to an hour, depending on how hot you were cooking. Use that time to gather your supplies. Once the interior feels cool to the touch and the burnt butter smell starts to fade, you’re ready to begin the real cleaning safely and comfortably.
Step 2 – Remove the Oven Racks
Now clear the workspace. Slide out the oven racks and set them aside, since they only get in the way and often catch greasy splatter of their own.
Lift them carefully and check each one for sticky butter residue. If they feel greasy, soak them in warm, soapy water in your sink or bathtub while you focus on the oven interior. This soak softens grime so it wipes off easily later.
Setting the racks aside gives you full access to the oven floor and walls, where most of the butter pooled and burned. You’ll be amazed how much easier the job feels with an open, empty space to work in. A little prep here saves real frustration down the line.
Step 3 – Scrape Softened Residue Gently
Time to tackle the worst of it. Take your plastic scraper or an old spatula and gently lift away the thickest chunks of baked-on grease from the oven floor.
Work slowly and hold the scraper at a low angle so you glide under the residue rather than gouging the surface. You’ll feel the hardened butter give way and flake off in little dark curls. Scoop these into a paper towel as you go.
Never use a metal knife or anything sharp here, since it can scratch the interior enamel and leave marks that trap grease later. The goal is simply to remove loose, softened bits before you wash. Once the big pieces are gone, you’re left with a thin, greasy film that’s far easier to clean.
Step 4 – Mix a Safe Cleaning Paste
Here’s where baking soda shines. In a small bowl, stir together a few tablespoons of baking soda with just enough warm water to form a spreadable paste, about the texture of toothpaste.
This gentle baking soda paste is a wonderful food-safe cleaner that lifts grease without harsh fumes or risk to your oven’s surfaces. Learning how to clean butter from oven spills really comes down to letting this paste do the hard work for you.
Spread the paste over the greasy oven floor and any splattered walls, focusing on the darkest, stickiest spots. Let it sit for fifteen to twenty minutes. As it rests, the baking soda draws out and loosens the burnt butter, making the next steps quick and almost effortless.
Step 5 – Test in a Small Spot
Before you scrub the whole oven, play it safe. Pick a small, hidden area, like a back corner of the oven floor, and gently rub the paste with your non-abrasive sponge.
You’re checking two things here. First, make sure the paste lifts the grease without leaving scratches or dull marks on the interior enamel. Second, confirm your sponge is soft enough not to scuff the surface.

Wipe that test spot clean and look closely in good light. If the surface stays smooth and the grease lifts away nicely, you’re good to clean everywhere. This quick check takes under a minute but protects your whole oven from an accidental scratch. With delicate surfaces, a small test always beats a big regret.
Step 6 – Clean Greasy Oven Walls and Floor
Now for the satisfying part. With your paste still in place, scrub the oven floor and walls using gentle, circular motions with your non-abrasive sponge.
You’ll feel the grease loosen and the paste turn brown as it lifts the burnt butter away. Add a splash of warm water to your sponge if the paste starts to dry out, keeping everything slick and easy to move.
Be extra careful around the heating element. Never let paste or water pool on or under it, and avoid scrubbing it directly. Focus your energy on the flat oven floor and the lower walls, where most greasy splatter lands. Work one section at a time, rinsing your sponge often so you’re lifting grime away rather than smearing it around.
Step 7 – Wipe Away Residue Thoroughly
Don’t leave any paste behind. Dampen your degreasing cloth in clean, warm water, wring it out well, and wipe down every surface you scrubbed.
You’ll lift away the brown, greasy paste along with the loosened butter, revealing the clean enamel underneath. Rinse and re-wring your cloth often, since a dirty rag just spreads residue around. Keep going until your cloth comes away clean and the surface feels smooth, not gritty or sticky.
Then grab a dry towel and buff the interior completely dry. Knowing how to clean butter from oven messes the right way means never leaving moisture or baking soda film behind, which can streak or smell odd when reheated. Run your hand across the floor to check for any slick spots you missed.
Step 8 – Deodorize and Check for Lingering Smoke
Almost done. If a burnt butter smell still hangs around, place a small oven-safe bowl of warm water with a splash of white vinegar inside and run the oven on low for ten minutes to neutralize the lingering odor.
Let it cool, then wipe once more with a fresh damp cloth. Now slide your cleaned, dried racks back into place.
Before you bake again, do a quick test run. Heat the empty oven to a medium temperature and watch for any smoke after the spill. A little faint steam is normal, but real oven smoke means grease still hides somewhere, so cool it down and spot-clean that area. Once it heats clean and odor-free, you’re ready to cook with confidence.
Critical Mistakes When Cleaning Butter From an Oven
A few common slip-ups can turn a simple cleanup into a bigger headache, so let’s clear them up before you start.
The biggest mistake is cleaning the oven while it’s still hot. Reaching into a warm oven risks painful burns, and water hitting a hot surface can crack the interior enamel. Always let everything cool completely first, no exceptions.
Another frequent error is scrubbing with steel wool or harsh abrasive pads. These scratch the enamel and leave rough spots that trap grease and burn again later. A non-abrasive sponge paired with a baking soda paste does the job gently and safely.
Many people also soak the heating element or let water pool around it. This can damage the element and create a shock or short-circuit risk. Keep moisture away from it entirely and focus your cleaning on the oven floor and walls.
Reaching for strong chemical cleaners is another misstep. Harsh fumes linger inside and can taint your next meal, so stick with food-safe options like baking soda and diluted vinegar.
Finally, skipping the final test run leaves hidden grease behind, which means more smoke and that stubborn burnt smell the next time you bake.
Expert Tips
Want to avoid butter messes altogether? Always place a baking sheet or sheet of foil on the rack below buttery dishes to catch any greasy splatter before it hits the oven floor.
Wipe up small spills the same day they happen, while they’re still soft. Fresh butter lifts off in seconds, but baked-on grease fights you for ages once it hardens through repeated heating.
Keep a small box of baking soda just for oven cleaning, separate from your baking supply, so it’s always within reach. A quick dusting and damp wipe handles minor splatters in minutes.
For ongoing oven care, give the interior a light wipe-down once a month. Catching grease early means you’ll rarely face heavy smoke or that lingering odor, and your appliance will stay fresh and ready to bake.
Frequently Asked Questions
Why does my oven smoke after a butter spill?
Smoke happens because butter is pure fat, and any leftover grease burns the moment the oven heats up. Even a thin, invisible film of baked-on grease releases oven smoke and a sharp odor. The fix is simple: cool the oven, scrape and wash away every trace of residue, then run a quick test heat to confirm it burns clean before cooking again.
Can I use vinegar to clean butter from my oven?
Yes, diluted white vinegar is a great helper. It cuts greasy film and freshens the interior without harsh fumes. Mix it with warm water in a spray bottle, mist the cooled surface, and wipe with a soft cloth. For heavy, baked-on butter, pair it with a baking soda paste first, then finish with the vinegar to lift any lingering grease and neutralize odor.
How do I get rid of the lingering burnt butter smell?
To clear that stubborn odor, try a few easy tricks:
- Wipe away all grease residue first, since the smell comes from the grease itself.
- Place a bowl of warm water and vinegar inside and heat on low for ten minutes.
- Leave a small dish of baking soda in the cooled oven overnight to absorb odors.
These steps freshen the interior so your next meal tastes the way it should.
Is baking soda safe for my oven’s interior?
Absolutely. Baking soda is a gentle, food-safe cleaner that lifts grease without scratching the interior enamel or leaving toxic fumes behind. Mixed with warm water into a paste, it loosens baked-on butter beautifully. Just be sure to wipe away all the residue afterward, since dried baking soda can leave a white film or faint smell if you skip the final rinse and buff.
Should I clean the oven racks too?
Yes, if butter splattered on them. Greasy racks smoke just like the oven floor does. Soak them in warm, soapy water while you clean the interior, then scrub with a non-abrasive sponge and rinse well. Dry them completely before sliding them back in. Clean racks keep your oven smelling fresh and stop grease from dripping onto the floor during your next bake.
Conclusion
Cleaning up a butter spill is far simpler than it looks, and now you have a clear routine to follow. Cool the oven, remove the racks, scrape softened residue gently, then spread a baking soda paste, test a small spot, wash the walls and floor, wipe thoroughly, and deodorize before checking for smoke.
Hold on to the key points. Always let the oven cool first, skip steel wool and harsh chemicals, keep water away from the heating element, and run a quick test heat to catch any hidden grease.
Once you’ve mastered how to clean butter from oven spills, you’ll never panic over a smoky kitchen again. It’s a quick, low-cost fix that protects your appliance, clears that burnt smell, and keeps your food tasting fresh.
So gather your baking soda, mix a little warm water, and give your oven the fresh start it deserves today. Your kitchen will smell cleaner, your meals will taste better, and your oven will keep baking beautifully for years to come.

About
Nick Hall has spent the last seven years working at the intersection of kitchen design and home repair — first as a design assistant at a residential renovation studio, then as a freelance writer covering everything from cabinet layouts to leaky faucet fixes.
Her approach is simple: kitchens should look good and function well. That means she’s just as comfortable talking about color palettes and counter materials as she is walking readers through how to fix a wobbly cabinet hinge or troubleshoot a garbage disposal.
Nick has worked directly with homeowners on small-space kitchen makeovers, budget-conscious renovations, and the kind of everyday repairs that don’t need a contractor — just the right instructions. She writes from experience, not theory, and tests most of the fixes and tips she shares before publishing them.
When she’s not writing, Nick is usually hunting for mid-century kitchen finds at estate sales or helping friends plan their own renovations. She lives in Columbus, Ohio.