
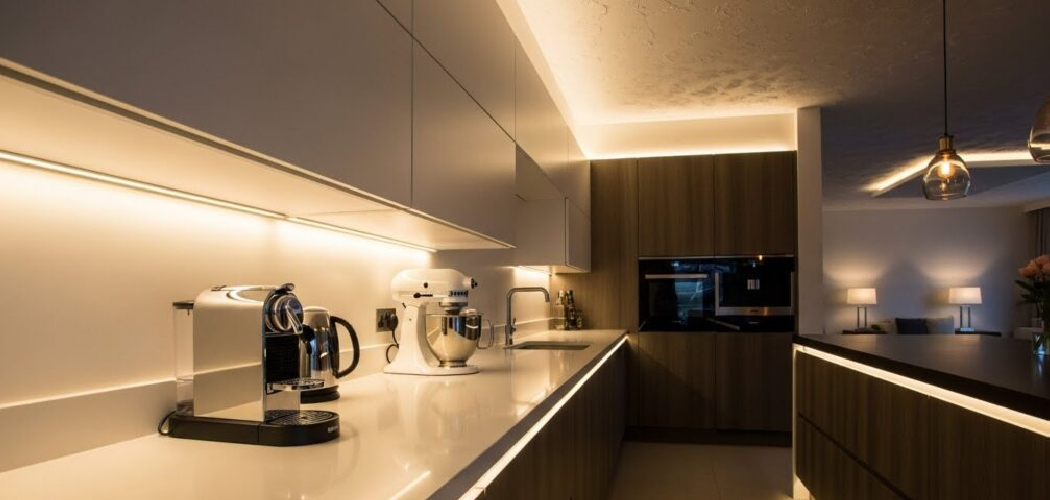
Ever chopped vegetables in your own shadow because the overhead light sits right behind your head? That dim, frustrating glare is one of the most common kitchen annoyances, and it has a surprisingly simple fix. Learning how to install under cabinet kitchen lighting brightens your counters exactly where you work, transforming both the look and the function of your space.

The best part is that you don’t need an electrician or a big budget to pull this off. With a few basic tools and an afternoon of patience, you can add warm, even task lighting that makes your backsplash glow and your prep work easier. Whether you choose LED strip lights or tidy puck lights, the process is beginner-friendly. This guide walks you through every step so you can finish with confidence and zero guesswork.
Why Installing Under Cabinet Kitchen Lighting Matters for DIY Beginners
This project teaches you skills that stretch far beyond a single kitchen upgrade. You’ll learn to measure carefully, route a power supply, and manage cables cleanly, all things you’ll use again on future home projects.
There’s also real money on the line. Hiring a pro for a small lighting job can cost a few hundred dollars in labor, while a DIY kit often runs a fraction of that. When you do the work yourself, you keep that cash in your pocket.
Beyond savings, you gain control. You decide where each light sits, how bright it shines, and whether you want a dimmer for cozy evenings. For practical homeowners, that hands-on control means a result tailored to exactly how you cook, gather, and live in your kitchen.
Tools and Materials You’ll Need
Gather everything before you begin so you’re not running to the hardware store mid-project. Most of these items are inexpensive and easy to find, and many DIYers already own the basics.
You’ll want a mix of measuring, mounting, and wiring supplies. The lights themselves come in plug-in or hardwired versions, so choose based on your comfort level and the outlets you have nearby.
Here are the essentials:
- LED strip lights or puck lights (your choice)
- Power supply or driver matched to your lights
- Tape measure and pencil
- Drill with bits
- Screwdriver
- Wire connectors and wire strippers
- Cleaning cloth and rubbing alcohol
- Mounting clips or the included adhesive backing
- Dimmer switch (if your kit supports one)
Optional but handy: a roll of adhesive cable clips. They keep your wires tucked neatly along the cabinet underside for a clean, professional finish.
Step-by-Step Guide on How to Install Under Cabinet Kitchen Lighting
Step 1 – Plan Your Layout and Measure
Start by deciding where you want light most. Stand at your counter and notice the spots that fall into shadow while you work. Those dark zones are exactly where your lights should shine.
Pull out your tape measure and record the length of each cabinet’s underside. Write these numbers down so you can buy or cut the right amount of LED strip lights. If you prefer puck lights, mark evenly spaced dots where each one will sit, usually one every 12 to 18 inches.
Take a moment to feel along the cabinet bottom for any lip or recess. Knowing your surface now saves headaches later. A clear plan keeps the whole job smooth and predictable.
Step 2 – Choose Plug-In or Hardwired Power
Now decide how your lights will get power. Plug-in kits are the friendliest for beginners since they simply connect to a nearby outlet. Hardwired setups look cleaner because the wiring hides inside the wall, but they require splicing into your home’s electrical system.
If you go hardwired, flip off the breaker first and confirm the power is dead with a tester. Touch the wires only after that light goes out. For most first-timers, plug-in lights deliver beautiful results without the extra risk.
This single choice shapes the rest of your project. Pick the option that matches your skill and your kitchen’s outlets, and you’ll set yourself up for an easier install.
Step 3 – Clean the Cabinet Underside
Adhesive needs a spotless surface to grip, so this step matters more than it seems. Dampen a cloth with rubbing alcohol and wipe the entire cabinet underside where your lights will mount.

You’ll feel the grease and dust lift away, leaving a smooth, slightly cool surface behind. Let it dry completely before moving on. Even a thin film of cooking residue can cause your LED strip lights to peel and droop weeks later.
This is one of the quiet secrets behind how to install under cabinet kitchen lighting that actually stays put. Skip it, and gravity wins. Take the extra two minutes here, and your lights will hold strong for years of daily use.
Step 4 – Test the Lights Before Mounting
Before you commit anything to the cabinet, connect your lights to the power supply and switch them on. This quick check saves you from mounting a faulty strip and peeling it back off.
Watch the glow fill your counter and notice the color. Some LEDs run warm and cozy, others cool and crisp. If the tone feels wrong or a section stays dark, now is the moment to swap or return them.
Hold the lit strip roughly where it will sit and see how the beam falls across your backsplash. This preview helps you fine-tune placement so the finished task lighting looks exactly how you pictured it. A two-minute test prevents hours of redo work.
Step 5 – Mount the Lights
Time to attach them. If your lights use adhesive backing, peel the liner slowly and press the strip firmly along your marked line, smoothing as you go. You’ll feel it bond tight against the clean surface.
For puck lights or heavier fixtures, use the included mounting clips and screws. Drill small pilot holes first so the screws drive in straight without splitting the wood. Keep the lights tucked toward the front edge of the cabinet, which throws light onto your counter rather than the wall.
Press along the whole run once more to lock the bond. Stand back and confirm the line looks straight and even. A tidy mount here makes the difference between a polished look and a sloppy one.
Step 6 – Connect and Route the Wiring
With the lights mounted, link them to your power supply using the included connectors or wire connectors and strippers. Match the wires carefully, since reversing them can stop the lights from working.
Route the cable along the cabinet underside toward your outlet or junction point. Press the wire into adhesive clips every few inches so it follows a clean, hidden path. Good cable management keeps the finished job looking professional instead of messy.
Tuck any extra slack up and out of sight near the back. Run your fingers along the route to confirm nothing dangles where you’ll bump it. When the wiring disappears neatly, your eyes go straight to the warm glow instead.
Step 7 – Add a Dimmer and Final Testing
If your kit includes a dimmer, install it now following the included diagram. A dimmer lets you dial the brightness from full task lighting down to a soft evening glow, which makes the whole kitchen feel adjustable and inviting.
Restore power, then flip the switch. Watch your counters light up evenly and check that every section shines. Slide the dimmer up and down to confirm smooth control with no flicker.
Walk the length of the counter and look for shadows or hot spots. Make small tweaks if needed. When that even, warm light spills across your backsplash and prep space, you’ll feel the satisfying payoff of a job done right.
Critical Mistakes When Installing Under Cabinet Kitchen Lighting
The biggest mistake beginners make is skipping the surface prep. Adhesive backing simply won’t hold on a greasy cabinet underside, and within weeks your LED strip lights start sagging and peeling. A quick wipe with rubbing alcohol prevents this entirely, yet so many people rush past it.
Another common error is buying the wrong power supply. Every light kit needs a driver that matches its voltage and wattage. Pair them incorrectly and your lights may flicker, run dim, or fail outright. Always check that your power supply matches your lights before you connect anything.
Poor placement trips up plenty of DIYers too. Mounting lights toward the back of the cabinet lights up the wall instead of your counter, leaving you working in shadow. Keep the lights toward the front edge for true task lighting.
Many also forget about cable management, leaving wires dangling in plain view. A few adhesive clips fix this in minutes. Finally, working on a hardwired setup without cutting the breaker is dangerous. Always confirm the power is off with a tester before touching any wires.
Expert Tips
Buy slightly more LED strip than you measured. Cabinets vary, and having extra length gives you room to adjust or replace a damaged section without another store run.
Choose your color temperature on purpose. Around 2700K to 3000K gives a warm, cozy feel, while 4000K and up reads bright and crisp for serious prep work. Test a sample if you can before committing.
Plan your outlet location early. Position your strip so the cable reaches power without an awkward stretch across the backsplash. A little forethought here keeps wiring invisible.
Finally, label your connectors as you go if you’re installing multiple zones. A few pieces of tape now save real confusion when you’re tucking everything into place and wondering which wire feeds which run.

Frequently Asked Questions
Do I need an electrician to install under cabinet lighting?
Not for most setups. Plug-in LED kits connect to an existing outlet and require no electrical work at all, making them perfect for beginners. You only need an electrician’s knowledge for hardwired installations that splice into your home’s wiring. If you choose hardwired and feel unsure, calling a pro is the safe move. Otherwise, a confident DIYer can handle a plug-in kit easily.
LED strips or puck lights, which should I choose?
It depends on the look you want:
- LED strip lights give smooth, even light across the whole counter and hide well under the cabinet lip.
- Puck lights create bright pools of light in spots, with a slightly more dramatic effect.
For continuous task lighting, most people prefer strips. For accent or budget builds, puck lights work great. Both install easily for beginners.
How do I hide the wires for a clean look?
Cable management is simpler than it sounds. Route the wire along the back edge of the cabinet underside, then press it into small adhesive clips every few inches to hold it in place. Tuck any extra slack up and behind the cabinet where it stays out of sight. Choosing an outlet close to your lights also keeps the visible run short and tidy.
Can I add a dimmer to my under cabinet lights?
Yes, as long as your lights and power supply support dimming. Check the packaging before you buy, since not every LED kit is dimmable. A dimmer lets you shift from bright task lighting while cooking to a soft, relaxed glow in the evening. Install it according to the included diagram, then test the full range to confirm smooth, flicker-free control.
How long does the whole project take?
Most beginners finish a single counter run in two to four hours. Plug-in kits go faster since there’s no wiring to splice. Measuring, cleaning, and testing take the most patience, but rushing those steps leads to peeling lights and uneven results. Set aside an unhurried afternoon, work through each step carefully, and you’ll enjoy a smooth, satisfying install.
Conclusion
Adding light exactly where you cook is one of the easiest upgrades with the biggest payoff. Once you understand how to install under cabinet kitchen lighting, you’ll wonder why you put up with those shadowy counters for so long.
Remember the essentials: plan your layout and measure carefully, choose between plug-in and hardwired power, and clean the cabinet underside before mounting anything. Test your lights early, mount them toward the front edge, and route your wiring neatly with adhesive clips. A dimmer adds a final touch of flexibility that makes the whole kitchen feel custom.
The difference between a frustrating glare and a beautifully lit counter comes down to a few careful steps and a bit of patience. You don’t need special training or expensive help to get there. Gather your tools, set aside an afternoon, and trust the process. When that warm glow spreads across your backsplash and prep space, you’ll feel the pride of a job done with your own hands. Go ahead and brighten your kitchen today.

About
Nick Hall has spent the last seven years working at the intersection of kitchen design and home repair — first as a design assistant at a residential renovation studio, then as a freelance writer covering everything from cabinet layouts to leaky faucet fixes.
Her approach is simple: kitchens should look good and function well. That means she’s just as comfortable talking about color palettes and counter materials as she is walking readers through how to fix a wobbly cabinet hinge or troubleshoot a garbage disposal.
Nick has worked directly with homeowners on small-space kitchen makeovers, budget-conscious renovations, and the kind of everyday repairs that don’t need a contractor — just the right instructions. She writes from experience, not theory, and tests most of the fixes and tips she shares before publishing them.
When she’s not writing, Nick is usually hunting for mid-century kitchen finds at estate sales or helping friends plan their own renovations. She lives in Columbus, Ohio.