
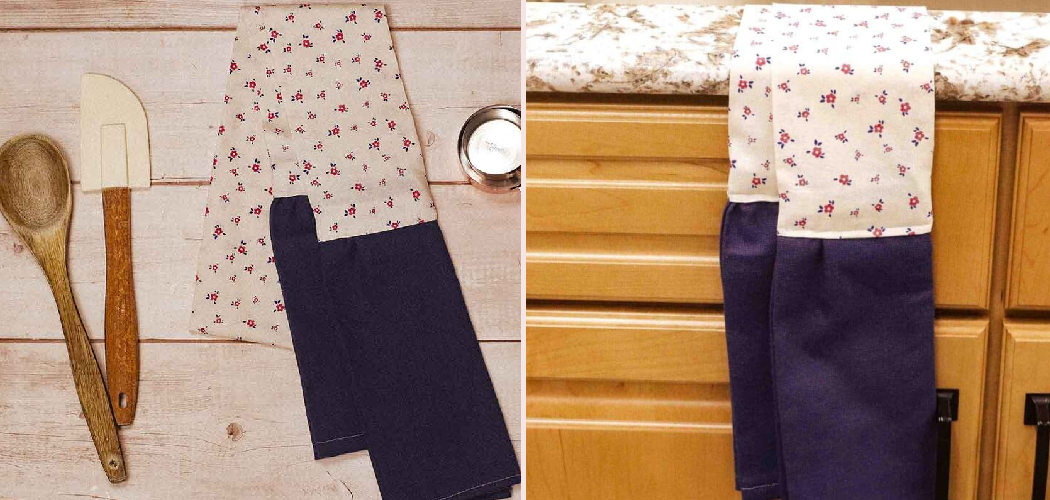
Ever wished you had a towel that stayed put while you cooked, instead of slipping off your shoulder or vanishing under a pile of dishes? A kitchen boa solves that little headache beautifully. It’s a soft, wearable towel that drapes around your neck or loops onto your oven handle, keeping a clean cloth right where you need it.
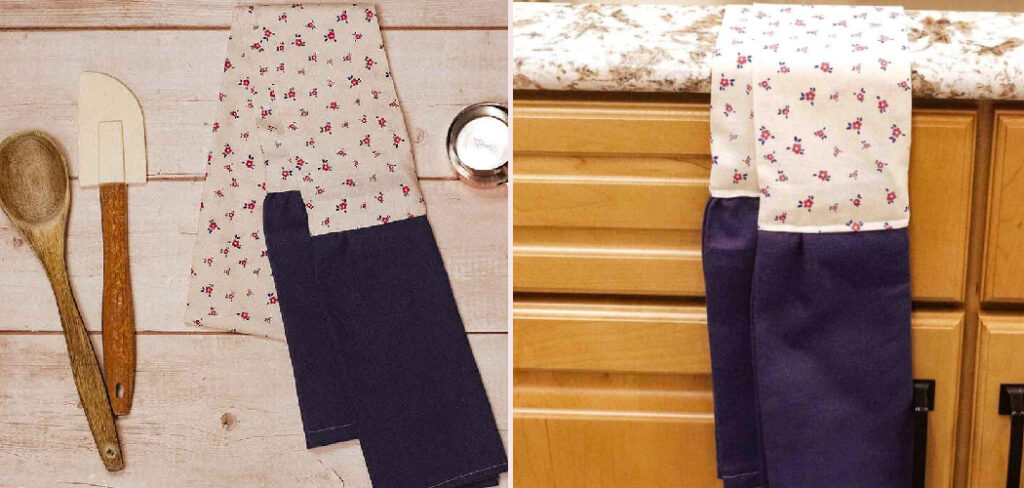
The best part? You can make one in an afternoon, even if you’ve barely touched a sewing machine. It’s a fun, forgiving project that turns a plain dish towel into something genuinely handy.
In this guide, you’ll learn how to sew a kitchen boa from start to finish, with clear steps any beginner can follow. By the end, you’ll have a charming, practical piece you’ll reach for every single day.
Why Learning To Sew A Kitchen Boa Is Useful
A kitchen boa earns its keep fast. At home, it acts as a hands-free neck towel, so you always have something absorbent within reach for wiping spills, drying hands, or grabbing a hot pan. Hang it on a cabinet and it doubles as a tidy dish towel holder.
This skill travels well, too. Campers and outdoor beginners love a wearable towel for camp kitchens and RV cooking, where counter space is tight and dropped towels land in the dirt. Drape one around your neck while grilling, and cleanup stays simple and hands-free.
Because it’s such a beginner sewing project, you also build confidence with basic machine stitching and pressing seams. Those small wins carry into bigger crafts later. Practical, portable, and easy to make, this little towel quickly becomes a favorite.
Tools and Materials You’ll Need
Gather everything before you start so your project flows without interruptions. Here’s your simple list:
- Cotton kitchen towel (an absorbent cotton towel works best)
- Fabric topper piece for the decorative middle section
- Sewing machine or a hand needle for machine or hand stitching
- Matching thread
- Scissors or rotary cutter
- Straight pins or fabric clips
- Measuring tape
- Iron for pressing crisp folds
- Ironing board or pressing mat
- Seam ripper for fixing small mistakes
- Snap closure or a button and button loop for fastening
One optional convenience item, a fabric glue pen or washable fabric marker, makes lining up edges and holding folds much easier while you sew.
Choose washable fabric for everything so your finished boa survives the laundry. Pre-wash your towel and topper to prevent shrinking surprises down the road.
Step-by-Step Guide on How To Sew A Kitchen Boa
Step 1 – Wash And Press Your Fabric
Start by tossing your cotton towel and fabric topper into the wash, then dry them fully. This pre-shrinks everything, so your finished boa keeps its shape after future washes.
Once dry, set up your iron and pressing mat. Run the warm iron across the towel, smoothing out every wrinkle until the surface feels flat and crisp under your palm.
Press the fabric topper, too. You’ll feel the cotton soften and relax as the steam works through it, making it far easier to fold and sew later.
Take your time here. A smooth, pre-washed foundation prevents puckering and uneven seams down the line. Skipping this step is tempting, but those flat, freshly pressed pieces set you up for clean, professional-looking results.
Step 2 – Measure And Cut Your Pieces
Grab your measuring tape and decide how the boa should drape. For most adults, a standard kitchen towel folded in half lengthwise gives a comfortable neck towel length. Lay it flat and smooth it with your hand.
Cut your fabric topper to wrap around the center of the folded towel. A topper roughly six to eight inches wide usually looks balanced, but trust your eye and the towel’s size.
Use sharp scissors or a rotary cutter for clean edges. Ragged cuts fray faster and make stitching trickier, so a crisp line matters more than you’d think.
Mark your cut lines lightly with a washable fabric marker first. Measure twice, cut once, and you’ll avoid wasting good fabric on a slip.
Step 3 – Fold And Press The Towel
Now shape the towel body. Fold it in half lengthwise so the long edges meet, then press firmly along the fold. You’ll hear that satisfying hiss of steam as a sharp crease forms.
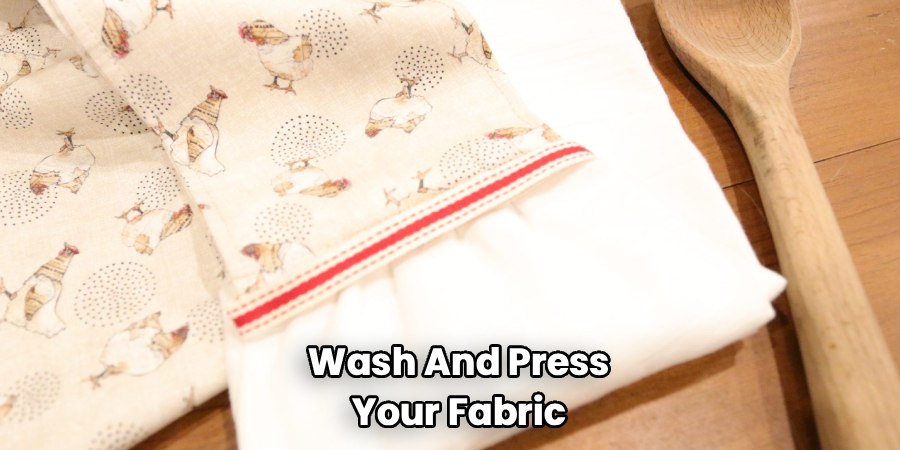
For a gathered look, run a long basting stitch across the center and gently pull the thread to bunch the fabric. This creates the soft, ruffled middle that the topper will eventually cover.
Smooth the gathers evenly with your fingers so no single spot bunches too much. Even distribution keeps the finished boa looking tidy rather than lumpy.
Pin the gathers in place to hold them steady. Take a moment to check that both towel ends hang at matching lengths, giving you a balanced, comfortable drape later on.
Step 4 – Prepare The Fabric Topper
Turn to your fabric topper, the decorative band that hides the gathered center. Fold the long raw edges under about half an inch and press them flat. This tucks the fraying threads safely inside.
Press both ends under, too, so every edge looks finished. The topper should now have clean, crisp folds on all four sides, ready to wrap snugly around the towel.
Hold the topper against the gathered section to test the fit. It should comfortably cover the bunched fabric with a little overlap to spare.
If you’re nervous about lining things up, dab a fabric glue pen along the folds to hold them temporarily. That extra grip keeps everything in place while you move to the machine.
Step 5 – Pin Or Clip Everything Together
Wrap the prepared topper around the gathered middle of the towel, centering it carefully. Line up the edges so the band sits straight and even on both the front and back.
Secure it with straight pins or fabric clips. Keep your fingers placed safely behind each pin as you push it through, well clear of where the needle will travel later.
Space your pins every inch or so. Close, even spacing stops the fabric from shifting once you start stitching, which keeps your seams nice and straight.
Flip the piece over to confirm the topper looks neat on both sides. This is the perfect moment to learning how to sew a kitchen boa with patience, since a well-pinned project practically sews itself.
Step 6 – Stitch The Topper In Place
Set up your sewing machine with matching thread and a medium straight stitch. Position the topper’s edge under the needle, lower the foot, and begin.
Listen for the steady hum of the machine as you guide the fabric slowly. Sew along one long edge of the topper, removing each pin just before the needle reaches it. Never stitch over pins.
Backstitch at the start and finish to lock your seam. Then repeat along the opposite long edge so the band sits secure on both sides.
Prefer hand stitching? A simple, tight whipstitch works wonderfully here. Either way, keep your stitches even and snug against the towel. Pressing seams flat afterward gives the topper a smooth, polished finish you’ll be proud of.
Step 7 – Add Your Closure
Time to make the boa stay put. Decide between a snap closure or a button and button loop, both of which work great for a hanging kitchen towel or a neck wrap.
For a snap, position one half on each end of the topper where they’ll meet when worn. Stitch them firmly so they survive daily tugging.
For a button, sew it onto one end, then create a small fabric loop on the other. Test that the loop slides over the button snugly without straining.
Drape the boa around your neck and check the closure. It should feel secure but not tight. A comfortable, dependable fastener turns this from a cute craft into a towel you’ll actually use.
Step 8 – Press And Final Fit Check
You’re almost done. Give the whole boa one last press, running the iron over the topper and towel to flatten any stray wrinkles or puckered seams.
Slip it around your neck and move like you would while cooking. Reach, bend, and twist. The towel should stay comfortably in place without sliding or pinching.
Next, loop it over an oven handle or cabinet door to confirm it works as a dish towel holder, too. Check the drape from both angles.
Trim any loose threads with your scissors for a clean finish. Run your hand over the fabric one final time. Now you know how to sew a kitchen boa that feels secure, looks lovely, and earns a permanent spot in your kitchen.
Critical Mistakes to Avoid When Sewing A Kitchen Boa
The most common slip-up is skipping the pre-wash. Cotton shrinks, and if you sew first and wash later, your perfectly fitted boa can pucker, twist, or pull out of shape after one trip through the laundry. Always wash and dry both the towel and topper before you cut a single piece.
Another frequent error is rushing the pressing. Beginners often think pressing seams is optional, but flat, crisp folds make the difference between a homemade look and a polished one. Cold, wrinkled fabric shifts under the needle and creates wavy, uneven seams that are hard to fix later.
Many people also stitch over their pins. It feels faster, but a needle striking a pin can bend, break, or even fly toward your face. Remove each pin just before it reaches the foot every time.
Uneven gathers cause trouble, too. If you bunch the center fabric carelessly, one side looks lumpy while the other lies flat. Smooth and pin those gathers evenly before sewing.
Finally, don’t ignore the fit. Test the drape and closure before finishing, so your boa feels secure and comfortable rather than tight or floppy.
Expert Tips
After making dozens of these, I’ve picked up a few tricks that save time and frustration. First, choose a towel with a tight, absorbent cotton weave. Loose, fuzzy fabrics fray quickly and won’t hold a crisp seam.
Keep your iron close while you sew, not tucked away in a closet. Pressing as you go, rather than all at the end, gives every fold a sharper, cleaner finish.
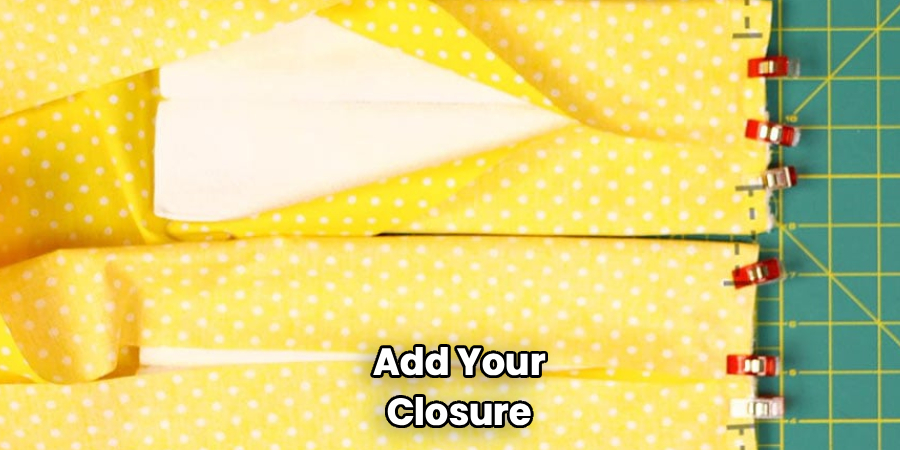
When picking a closure, snaps suit busy hands best because you can fasten them one-handed. Save buttons and loops for boas you’ll use more decoratively.
Test your stitch length on a fabric scrap first. Towel material is thicker than regular cloth, so a slightly longer stitch glides through more smoothly.
Lastly, make two at once. The setup takes the longest, so sewing a backup while everything’s out barely adds time.
Frequently Asked Questions
What Fabric Works Best For A Kitchen Boa?
A tightly woven, absorbent cotton towel works best as the body, since it dries hands well and washes easily. For the decorative topper, choose a sturdy quilting cotton in a fun print. Both should be washable fabric that holds up to frequent laundering. Avoid stretchy or slippery materials, which shift under the needle and fray faster, making your beginner sewing project trickier than it needs to be.
Can I Make A Kitchen Boa Without A Sewing Machine?
Absolutely. Hand stitching works perfectly for this small project. Use a strong needle and matching thread, then sew the topper with a tight whipstitch or backstitch along each edge. It takes a bit longer, but the results look just as neat. Many beginners actually prefer hand stitching here because it gives you more control around the gathered center and the closure.
How Do I Keep The Boa From Slipping Off My Shoulders?
The secret is a good closure and the right drape. A snap closure or button loop fastens the ends so the boa stays put while you move. To improve grip:
- Add gathers in the center for a snugger neck fit
- Position the closure where the ends meet comfortably
- Test the fit while cooking before finishing the seams
How Do I Wash My Finished Kitchen Boa?
Toss it in the washing machine with similar colors using a normal cycle. Because you pre-shrank the fabric, it should hold its shape nicely. Tumble dry on low or hang it to dry. If you used a fabric glue pen during assembly, the wash removes any residue. Press it afterward with a warm iron to restore those crisp folds and keep it looking fresh.
How Long Does It Take To Make One?
Most beginners finish in one to two hours, including washing, cutting, and sewing. The pressing and gathering take the longest, while the actual machine stitching goes quickly. If you’re brand new to sewing, give yourself a relaxed afternoon. Once you’ve made one, your second boa goes much faster, often in under an hour, since the steps feel familiar.
Conclusion
Making your own kitchen boa is one of those small projects that pays you back every day. You start with a plain dish towel and end up with a wearable, hands-free helper that’s always within reach while you cook, clean, or grill.
Remember the key steps. Pre-wash and press your fabric, measure and cut carefully, then gather the towel and wrap it with a tidy topper. Pin everything evenly, stitch with steady, locked seams, add a secure snap or button closure, and finish with a final press and fit check.
Steer clear of the common traps, too. Skip the pre-wash and you’ll regret it, sew over pins and you’ll dull your needle, and rush the gathers and your boa looks lumpy. A little patience makes all the difference.
Now you know how to sew a kitchen boa from start to finish, and you’ve got every reason to give it a try. Grab your towel, thread your needle, and enjoy the satisfying rhythm of making something useful with your own two hands.
