
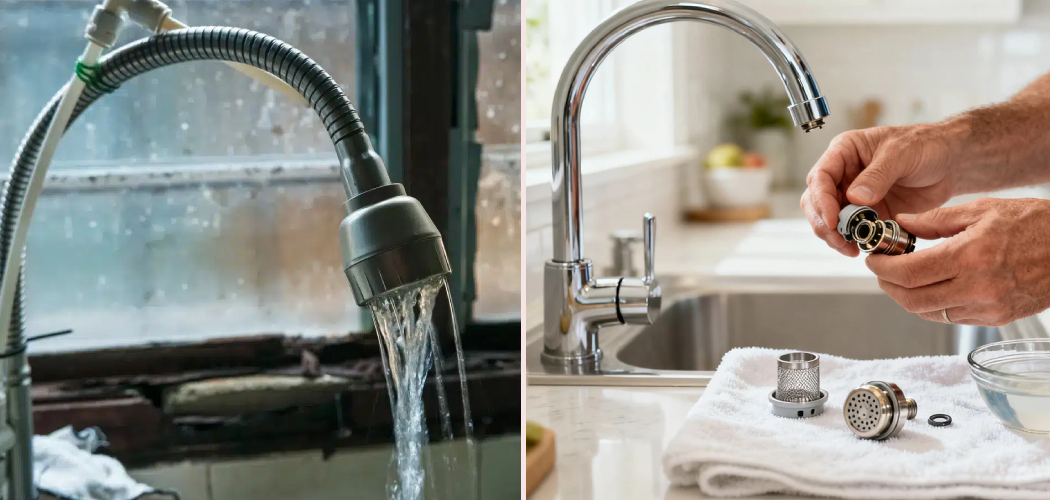
A weak kitchen faucet can turn simple tasks into a chore. Filling a pot takes too long, rinsing soap off dishes feels annoying, and cleaning produce becomes less efficient than it should be. If you have noticed a slow stream or uneven flow, the good news is that the fix is often simple and does not require advanced plumbing skills. Learning how to increase kitchen sink water pressure can help you solve the problem with a few basic checks, some cleaning, and the right replacement part when needed.

This guide will show you how to find the cause, fix common pressure problems, and restore a stronger, steadier flow at your kitchen sink.
Why This Skill Matters
Knowing how to restore better water flow is useful in any home, but it can matter even more for campers and outdoor beginners who use cabins, RV setups, or seasonal properties. In those spaces, water systems often sit unused for long periods, which can lead to mineral buildup, clogged screens, and stiff shutoff valves. A weak faucet in a small kitchen or camp sink can make cooking, cleaning, and filling water containers much harder than it needs to be.
This skill also saves time and money. You may be able to fix low pressure without calling a plumber, buying a new faucet, or guessing at the problem. Once you understand the basics, you can spot the signs of a clogged aerator, a blocked supply line, or a valve issue faster. That confidence helps you handle small plumbing problems before they grow into bigger ones.
Tools and Materials You’ll Need
Before you begin, gather a few basic items so the job goes smoothly and you do not have to stop halfway through.
- Adjustable wrench
- Channel-lock pliers
- Old towel or rag
- Small bowl or cup
- White vinegar
- Soft brush or old toothbrush
- Needle or straight pin for clearing tiny holes
- Bucket for catching water
- Flashlight for checking under the sink
- Replacement aerator or faucet cartridge if cleaning does not solve the issue
- Optional: plumber’s tape for reinstalling threaded parts neatly
Most of these items are common household tools. The towel helps protect your sink finish and catches drips, while the bucket makes under-sink work less messy. If you are working in a dim cabinet, a flashlight makes it much easier to see shutoff valves, supply hoses, and signs of corrosion.
Step-by-Step Guide on How to Increase Kitchen Sink Water Pressure
Step 1 – Check Whether the Problem Is Only at the Kitchen Sink
Start by turning on other faucets in your home. Test the bathroom sink, shower, and an outdoor spigot if you have one. If the weak flow happens only at the kitchen sink, the issue is likely in the faucet, aerator, shutoff valves, or supply lines. If the whole house has low pressure, the cause may be a pressure regulator, a main valve problem, or a local water supply issue.
Pay attention to what you feel and hear. A soft, weak stream at one faucet points to a local blockage. A low, flat flow everywhere suggests a wider plumbing problem. This first check saves time because it narrows your focus before you start taking anything apart.
Step 2 – Inspect the Aerator for Mineral Buildup
The aerator is the small screen attached to the end of the faucet spout. It is one of the most common causes of weak water flow. Unscrew it by hand if possible. If it feels stuck, wrap it with a rag and use pliers gently so you do not scratch the finish. Once removed, look for white scale, sand, rust flakes, or trapped debris inside the mesh.
Soak the aerator in white vinegar for about 30 minutes. The vinegar smell will be sharp, but it does a great job of loosening mineral deposits. After soaking, scrub it with a soft brush and rinse it well. If needed, use a pin to clear the tiny spray holes. Reinstall it and test the faucet. In many cases, this simple cleaning restores a much stronger flow.
Step 3 – Clean the Faucet Head and Spray Wand
If your kitchen faucet has a pull-down or pull-out spray head, buildup can collect inside the spray face and narrow the openings. That can make the water stream feel weak, uneven, or patchy. Remove the spray head if your model allows it. Some twist off by hand, while others need a careful turn with pliers and a cloth for grip.

This is a smart point to think about how to increase kitchen sink water pressure in the most common, least expensive way: remove the blockage before replacing any parts. Soak the spray head in vinegar, then brush around the nozzles and rinse the inside thoroughly. When you run water through it again, watch for a fuller stream and listen for a smoother sound. A clean spray head often makes the faucet feel new again.
Step 4 – Make Sure the Shutoff Valves Are Fully Open
Look under the sink for the hot and cold shutoff valves. These small valves connect the supply lines to the faucet. Sometimes they are partly closed after a repair, or they become stiff from age and mineral buildup. Turn each valve slowly counterclockwise until it stops. Do not force it hard, but make sure it is truly open.
You may notice a gritty feel as you turn the handle, especially in an older home. That can be a sign of corrosion inside the valve. Once both valves are open, run the faucet again and compare the pressure. If the stream becomes stronger right away, you found the problem. If one side is still weak, the issue may be isolated to the hot or cold supply line rather than the faucet itself.
Step 5 – Check the Supply Lines for Kinks or Blockages
Flexible supply hoses can bend sharply, especially if cleaning supplies or stored items under the sink press against them. A kinked line restricts water flow much like stepping on a garden hose. With a flashlight, trace both the hot and cold lines from the shutoff valves up to the faucet body. Look for tight bends, twisting, or signs of age like bulging or corrosion.
If a hose looks pinched, straighten it gently or reposition anything pushing against it. If the line is old, rusty, or damaged, replace it. Before disconnecting anything, shut off the valves and place a bucket underneath. When you remove a line, inspect the openings for debris. Sediment can collect inside and reduce flow. Replacing an old line is often inexpensive and can make a noticeable difference in faucet performance.
Step 6 – Flush the Faucet Lines
Sediment can get trapped inside the faucet body or supply tubing, especially after plumbing work, water main repairs, or long periods of non-use. To flush the lines, turn off both shutoff valves, remove the aerator, and place a towel over the sink area to reduce splashing. Then turn the valves back on and run the faucet for a minute or two.
Without the aerator in place, the water may come out louder and rougher. That is normal. You are trying to push out grit, flakes, or loosened mineral scale. This flushing step is a practical part of learning how to increase kitchen sink water pressure, because hidden debris often causes a drop in flow even when the faucet looks clean from the outside. Once the water runs clear and steady, reinstall the aerator and test again.
Step 7 – Inspect or Replace the Faucet Cartridge
If your sink still has low pressure after cleaning and flushing, the faucet cartridge may be worn or clogged. The cartridge controls water flow and temperature inside many modern faucets. When minerals build up inside it, the handle may feel stiff, and the stream may stay weak no matter how wide you open the faucet.
Turn off the water supply first. Then remove the faucet handle according to your faucet design. You may need a small screwdriver or hex key. Pull out the cartridge and inspect it for scale, cracks, or worn seals. Some cartridges can be cleaned, but many work best when replaced with the correct model from the manufacturer. Once installed, the handle should move more smoothly, and the flow should feel more direct and consistent.
Step 8 – Rule Out a Larger Household Pressure Issue
If none of the kitchen-specific fixes work, step back and check the home’s overall plumbing system. A partially closed main shutoff valve, a failing pressure regulator, old galvanized pipes, or municipal supply issues can all reduce water pressure. If hot water is weaker than cold water, the issue could also be in the water heater line or sediment buildup in the heater itself.
Listen for clues. Do multiple fixtures sound weak at once? Does the pressure drop at certain times of day? These patterns point to a broader problem. At that stage, it may be worth checking your home’s water pressure with a gauge or calling a plumber. A larger issue does not mean you missed something. It simply means the restriction is happening farther upstream than the kitchen faucet.
Common Mistakes When Fixing Low Kitchen Sink Pressure
One common mistake is replacing the whole faucet too early. Many people assume a weak stream means the faucet has failed, but the real problem is often a clogged aerator or dirty spray head. Starting with the simplest check saves money and avoids unnecessary work.
Another mistake is forgetting to test whether the problem affects only one fixture. If the whole house has low pressure, taking apart the kitchen faucet will not solve much. You need to know whether the cause is local or system-wide before you decide what to fix.
People also damage parts by using too much force. Pliers can scratch finishes, crack plastic pieces, or deform threaded fittings when used without care. A towel or rag between the tool and the part helps protect the surface. Slow, steady pressure works better than forcing a stuck piece.
Skipping the shutoff valves is another easy error. A valve that is only partly open can mimic a serious plumbing problem. It takes just a minute to check, and that minute can save a lot of frustration.
The last mistake is reinstalling parts without fully rinsing debris away. Loose scale, sand, or rust can move deeper into the faucet and create the same problem again. Clean every part well, flush the lines, and test the water before you decide the repair is complete.

Expert Tips
If you live in a hard water area, make aerator cleaning part of your routine maintenance. A quick soak in vinegar every few months can prevent a slow decline in faucet performance. This matters most if you notice white crusty buildup around the spout or spray head.
Take photos before removing faucet parts. That simple habit makes reassembly much easier, especially if you are new to home plumbing. It also helps when buying a replacement cartridge or aerator because you can match the shape and size more accurately.
If the faucet pressure changes suddenly after city work or a plumbing repair, flush the lines before replacing parts. Fresh debris often enters the system during disturbances. A careful flush can clear the issue fast and keep you from spending money on parts you did not need.
Frequently Asked Questions
Why is only my kitchen sink water pressure low?
If the problem is only at the kitchen sink, the most likely causes are a clogged aerator, dirty spray head, partly closed shutoff valve, blocked supply line, or worn faucet cartridge. Start with the easiest checks first. In many homes, cleaning the aerator and confirming both valves are fully open solves the issue quickly.
Can a clogged aerator really reduce water pressure that much?
Yes, it can. The aerator has a fine screen and small openings that trap debris, mineral scale, and sediment over time. Even a thin layer of buildup can restrict flow enough to make the faucet feel weak. Because it is easy to remove and clean, it should usually be your first troubleshooting step.
Should I replace the faucet if cleaning does not work?
Not right away. If cleaning the aerator and spray head does not help, check the shutoff valves, supply hoses, and faucet cartridge next. Many pressure problems come from one worn internal part rather than the entire faucet. Replacing a cartridge or hose is usually cheaper and easier than installing a new fixture.
Does low hot water pressure mean the water heater is the problem?
Sometimes, but not always. If only the hot side is weak at the kitchen sink, the issue may be a partially blocked hot shutoff valve, a clogged supply line, or sediment in the faucet cartridge. If several hot-water fixtures are weak, then the water heater or hot-water piping may be involved.
When should I call a plumber?
Call a plumber if the pressure is low throughout the house, if you suspect a failing pressure regulator, if your pipes are old and corroded, or if you are uncomfortable disconnecting water lines. You should also get help if a valve is leaking, frozen in place, or if replacing the cartridge does not improve the flow.
Conclusion
A weak kitchen faucet is frustrating, but it is often fixable with a few careful checks. In most cases, the problem comes from mineral buildup, trapped debris, a partly closed valve, or a worn cartridge rather than a major plumbing failure. When you work step by step, you can rule out simple causes first and avoid wasting time or money.
The best place to start is with the aerator and spray head, then move under the sink to inspect shutoff valves and supply lines. If the issue remains, flushing the faucet and checking the cartridge usually gives you the next clear answer. By learning how to increase kitchen sink water pressure, you gain a practical home maintenance skill that saves effort every time you wash, rinse, or fill at the sink.
Take your time, protect the finish on your faucet, and test after each step. A stronger, steadier stream may be only one small fix away.

About
Nick Hall has spent the last seven years working at the intersection of kitchen design and home repair — first as a design assistant at a residential renovation studio, then as a freelance writer covering everything from cabinet layouts to leaky faucet fixes.
Her approach is simple: kitchens should look good and function well. That means she’s just as comfortable talking about color palettes and counter materials as she is walking readers through how to fix a wobbly cabinet hinge or troubleshoot a garbage disposal.
Nick has worked directly with homeowners on small-space kitchen makeovers, budget-conscious renovations, and the kind of everyday repairs that don’t need a contractor — just the right instructions. She writes from experience, not theory, and tests most of the fixes and tips she shares before publishing them.
When she’s not writing, Nick is usually hunting for mid-century kitchen finds at estate sales or helping friends plan their own renovations. She lives in Columbus, Ohio.