
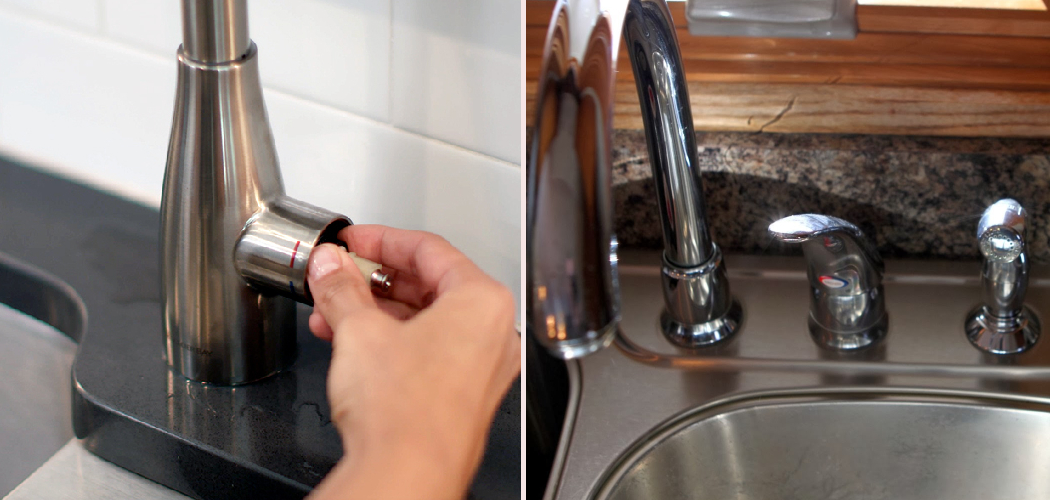
A drippy faucet is more than just annoying. That steady tap-tap into the sink wastes water, runs up your bill, and slowly drives you a little crazy. Most of the time, the culprit hiding inside your Moen faucet is a worn-out cartridge.

Here’s the reassuring part: you don’t need a plumber for this fix. Learning how to replace a cartridge on a Moen kitchen faucet is a beginner-friendly job you can finish in under an hour with a few basic tools.
Once you understand the steps, you’ll wonder why you ever put it off. A fresh cartridge restores smooth handle movement, steady water pressure, and a leak-free spout. This guide walks you through the whole process, step by step, so you can swap that worn part and get your faucet working like new again.
Why Learning to Replace a Moen Faucet Cartridge Matters
This skill stretches far beyond your kitchen sink. Once you know how a cartridge works, you can tackle similar repairs all over the house and well past your front door.
Think about campers and outdoor beginners who rely on compact RV or camper sinks. A small leak in a tight space wastes precious water and can soak storage areas fast. Knowing how to swap a cartridge means you fix that drip yourself, miles from the nearest hardware store.
That kind of practical self-reliance pays off everywhere. You conserve water, protect your gear, and handle small plumbing repairs without waiting on a pro. The same confidence carries straight back to your home kitchen, where a quick fix saves money and keeps your sink running smoothly. Master this once, and you’ll trust your own hands the next time water starts dripping where it shouldn’t.
Tools and Materials You’ll Need
You won’t need a truck full of plumbing gear for this job. Most of these items are cheap, easy to find, and probably already in your toolbox.
- Replacement cartridge: Match it to your exact Moen model number.
- Adjustable pliers: For loosening the bonnet nut and retaining clip.
- Hex key (Allen wrench): Removes the small set screw on the faucet handle.
- Flathead and Phillips screwdriver: Handles caps, screws, and prying.
- Cartridge puller: Pulls stubborn cartridges free without a fight.
- Plumber’s grease: Keeps O-rings smooth and the new part sliding easily.
- Clean rag and a bucket: Catches drips and protects the sink deck.
- White vinegar (optional): Dissolves hard water buildup around the cartridge.
Lay everything out before you start. A little prep keeps the project flowing and saves you from soggy mid-job runs to the store.
Step-by-Step Guide on How To Replace A Cartridge On A Moen Kitchen Faucet
Step 1 – Shut Off the Water Supply
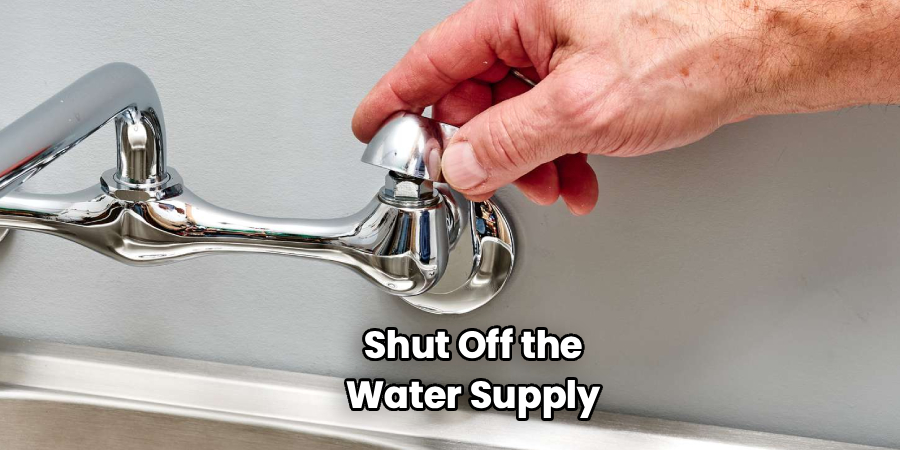
Before you touch a single screw, head under the sink and find the two shutoff valves on the supply lines. Turn both clockwise until they stop. This cuts the water flow so you don’t get an unexpected spray to the face.
Now turn the faucet handle on to release any pressure trapped in the lines. You’ll hear a short gurgle, then the last few drips fade out. That’s exactly what you want.
If your sink has no shutoff valves, close the main water supply to the house instead. Take a moment to plug the drain or lay a rag over it. Small parts love to vanish down an open drain, and this simple step saves you real heartache later.
Step 2 – Remove the Faucet Handle
Look closely at the base of the faucet handle for a small set screw, often tucked under a decorative cap. Pop the cap off gently with a flathead screwdriver, and you’ll spot the screw underneath.
Grab your hex key and turn the set screw counterclockwise. Keep it in a small dish so it doesn’t roll away. Once it’s loose, the handle lifts straight up and off.
Set the handle aside in a safe spot. You’ll feel the faucet start to come apart in your hands, which is oddly satisfying for a first-timer. Underneath, you’ll see the dome-shaped cover and the workings that hold the cartridge in place. Take a quick photo here so reassembly feels effortless later.
Step 3 – Take Off the Cover and Bonnet Nut
With the handle gone, you’ll see a decorative cover or dome sitting over the cartridge area. Unthread it by hand or twist gently with pliers wrapped in a rag to avoid scratches.
Underneath sits the bonnet nut, a ring that holds everything snug. Fit your adjustable pliers around it and turn counterclockwise. It may feel tight at first, especially with hard water buildup crusted around the threads.
Work slowly and steadily. You might hear a faint crack as the mineral crust gives way. Once the bonnet nut spins freely, lift it off and set it with your other parts. Now the top of the cartridge is fully exposed and ready for the next move, where the real repair begins.
Step 4 – Pull the Retaining Clip
Look for a small U-shaped or horseshoe-shaped retaining clip near the top of the cartridge. This little piece locks the cartridge in place, and it must come out first.
Slide the tip of a flathead screwdriver under the clip and pry gently upward. You can also grip it with pliers and pull it straight out. It pops free with a small snap.
Set this clip somewhere safe, because you’ll need it again to lock in the new part. Knowing how to replace a cartridge on a Moen kitchen faucet really comes down to small details like this clip. Miss it, and the cartridge won’t budge no matter how hard you tug. With the clip removed, the cartridge is now free to come out.
Step 5 – Remove the Old Cartridge
Now for the part that feels the most stubborn. Grip the top of the old cartridge with pliers and pull straight up. If it’s been in there for years, hard water buildup may have it stuck tight.
This is where a cartridge puller earns its keep. Slip the tool over the cartridge stem, line it up, and pull with steady force. The old part slides out with a wet, grinding sound.
Take a close look at what comes out. You’ll often see worn O-rings, mineral crust, and grime that explain your leak and weak water pressure. Wipe the inside of the faucet body clean with your rag. A clean cavity helps the new cartridge seat smoothly and seal the way it should.
Step 6 – Insert the New Cartridge
Before you install anything, compare your replacement cartridge to the old one side by side. They should match in size, shape, and notch alignment. A quick check now prevents a frustrating do-over.
Smear a thin layer of plumber’s grease on the new O-rings. This keeps them sliding smoothly and helps create a watertight seal. Then line up the cartridge so its tabs match the slots inside the faucet body.
Push it straight down with firm, even pressure until it seats fully. You’ll feel it drop into place with a satisfying snug fit. Pay attention to the alignment notch, since pointing it the wrong way can reverse your hot and cold water. Take your time and get this orientation right the first time.
Step 7 – Reattach the Clip and Reassemble
Slide that retaining clip back into its slot to lock the new cartridge down. Push it in until it clicks firmly, then give the cartridge a gentle wiggle to confirm it won’t shift.
Now work backward through your earlier steps. Thread the bonnet nut back on and tighten it snugly with your pliers, but don’t crank it so hard you crack anything. Replace the dome cover next.
Set the faucet handle back over the stem, line up the set screw, and tighten it with your hex key. Pop the decorative cap back into place. Everything should feel solid, with the handle moving smoothly through its full range. The whole assembly comes together quickly once you’ve seen how the pieces fit.
Step 8 – Turn the Water Back On and Test
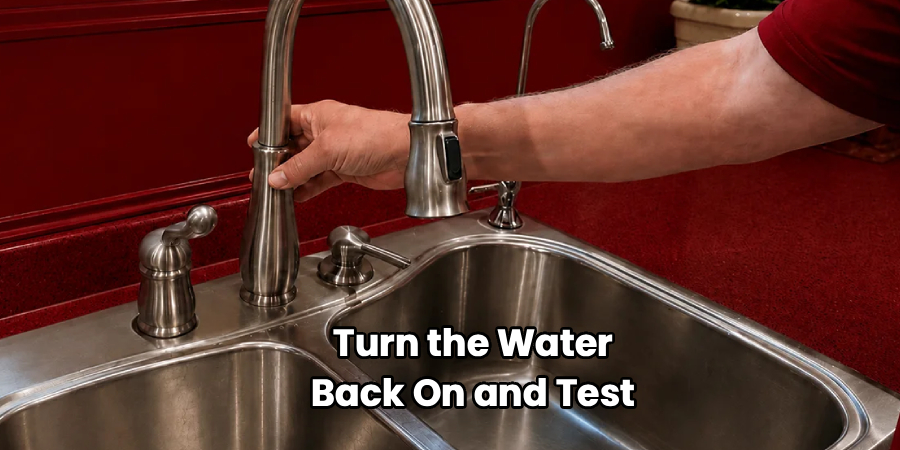
The moment of truth has arrived. Reach under the sink and slowly open both shutoff valves on the supply lines by turning them counterclockwise. Go gently so the returning water pressure doesn’t shock the system.
Leave the faucet handle in the on position at first. The water will sputter and spit air for a few seconds, then settle into a smooth, steady stream. That sputter is completely normal.
Run both hot and cold, and watch closely around the base and spout for any leak or stray drips. Wipe everything dry and check again after a minute. If it stays dry and the pressure feels strong, you’ve just learned how to replace a cartridge on a Moen kitchen faucet all by yourself.
Critical Mistakes When Replacing a Moen Faucet Cartridge
A few common slip-ups catch beginners off guard, but knowing them ahead of time keeps your repair smooth and dry.
The most frequent mistake is forgetting to shut off the water supply. It sounds obvious, yet plenty of folks skip it and end up with a soaked kitchen the moment the bonnet nut loosens. Always close those shutoff valves first and release the pressure.
Another big error is buying the wrong replacement cartridge. Moen makes several models, and they aren’t interchangeable. Bring your old cartridge to the store or check your faucet’s model number so the new part fits exactly.
People also rush the retaining clip. If you try yanking the cartridge before removing that little clip, you risk cracking the faucet body or bending the stem. Slow down and pull the clip first, every time.
Skipping plumber’s grease is another quiet mistake. Dry O-rings install rough and wear out fast, which brings the dripping right back. Finally, many beginners install the cartridge facing the wrong way and reverse their hot and cold. Always match the alignment notch before pushing it home.
Expert Tips
A few insider habits turn a decent repair into a flawless one. First, snap photos at every stage as you take the faucet apart. When it’s time to reassemble, those pictures are worth their weight in gold.
Soak crusty parts in white vinegar for ten minutes to dissolve hard water buildup. Stubborn bonnet nuts and clips come loose far more easily once the mineral crust softens.
Keep a small magnetic tray nearby for screws, clips, and caps. Losing one tiny set screw can stall your whole afternoon. Also, replace both the cartridge and its O-rings together rather than reusing old rubber that’s already worn.
Finally, never overtighten the bonnet nut. Snug is plenty. Cranking too hard can crack the plastic or make the handle stiff. A gentle, confident touch protects your faucet and keeps it working smoothly for years.
Frequently Asked Questions
How do I know if my Moen cartridge needs replacing?
Watch for a few telltale signs. A constant drip from the spout, weak or uneven water pressure, a handle that’s hard to turn, or water that won’t get fully hot or cold all point to a worn cartridge. You might also notice the handle feeling loose or wobbly. If cleaning the aerator doesn’t fix the drip, the cartridge is almost always the real problem.
Do I need to know my exact Moen model number?
Yes, and it really matters. Moen makes several cartridge styles, and they don’t swap out for one another. The easiest approach is to remove your old cartridge and take it to the hardware store to match it. You can also check for the model number stamped on the faucet, the original box, or your purchase receipt to order the correct replacement cartridge.
Will Moen replace a faulty cartridge for free?
Often, yes. Moen offers a generous limited lifetime warranty on many of its faucets, which can include free replacement parts. Call their customer service or visit their website with your model number on hand. They frequently mail out a new cartridge at no charge. You’ll still install it yourself, but the part itself can cost you nothing.
Why is my faucet still dripping after replacing the cartridge?
A few things could be at play:
- The cartridge wasn’t pushed down fully or seated correctly.
- The alignment notch faces the wrong direction.
- The O-rings weren’t greased and didn’t seal.
- Debris stayed trapped inside the faucet body.
Turn off the water, pull the cartridge, clean the cavity, regrease the O-rings, and reseat everything carefully before testing again.
How often should a Moen cartridge be replaced?
There’s no strict schedule. A quality cartridge can last five to ten years or more, depending on your water quality. Homes with hard water and heavy mineral content tend to wear cartridges out faster. If you notice dripping, stiff handles, or weak flow returning, that’s your cue. Otherwise, leave it alone and enjoy the smooth, leak-free performance.
Conclusion
Fixing a leaky faucet yourself feels genuinely rewarding, and now you’ve got the know-how to do it. You’ve learned to shut off the water supply, remove the faucet handle, pull the bonnet nut and retaining clip, and swap that worn cartridge for a fresh one. From there, a dab of plumber’s grease, careful alignment, and steady reassembly bring everything back together leak-free.
The real secrets are matching the right part and slowing down for the small details. Shut off the water first, remove that clip before pulling, and never overtighten the bonnet nut. Those simple habits separate a soggy mess from a clean, confident repair.
Now that you know how to replace a cartridge on a Moen kitchen faucet, you can silence that annoying drip without paying a plumber or waiting days for help. So gather your tools, clear some space under the sink, and tackle it this weekend. You’ll save money, conserve water, and build skills that carry into your next repair. Enjoy your smooth, steady, drip-free faucet.

About
Nick Hall has spent the last seven years working at the intersection of kitchen design and home repair — first as a design assistant at a residential renovation studio, then as a freelance writer covering everything from cabinet layouts to leaky faucet fixes.
Her approach is simple: kitchens should look good and function well. That means she’s just as comfortable talking about color palettes and counter materials as she is walking readers through how to fix a wobbly cabinet hinge or troubleshoot a garbage disposal.
Nick has worked directly with homeowners on small-space kitchen makeovers, budget-conscious renovations, and the kind of everyday repairs that don’t need a contractor — just the right instructions. She writes from experience, not theory, and tests most of the fixes and tips she shares before publishing them.
When she’s not writing, Nick is usually hunting for mid-century kitchen finds at estate sales or helping friends plan their own renovations. She lives in Columbus, Ohio.