
A stuck or sagging drawer can throw off your whole kitchen routine. Maybe the soft-close mechanism stopped working, the drawer rubs against the cabinet box, or you simply need to clean behind it. Whatever the reason, you don’t have to wrestle with it blindly or call in a pro.
Knowing how to remove soft close kitchen cabinet drawer parts is a skill that pays off again and again. Once you understand how the slides and release clips work, you can pop a drawer out in seconds and slide it right back in with confidence.
The good news? You only need a few minutes, steady hands, and a little know-how. This guide walks you through the entire process step by step, so you can remove your drawer safely and reinstall it without a hitch.
Why Learning to Remove a Soft-Close Cabinet Drawer Matters
This small repair teaches you how modern cabinetry actually works. Once you understand drawer slides, locking levers, and release clips, you can troubleshoot sticky drawers anywhere, not just in your kitchen.
That knowledge travels well, too. Campers and outdoor beginners deal with compact storage in RVs, trailers, and tiny cabins, and that cabinetry uses the very same slide mechanisms and retaining tabs. Learning the basics at home means you can fix a jammed RV drawer or reorganize a cramped camper galley without panic.
Small-space problem solving is all about self-reliance. When you know how to free a drawer, clean its tracks, and align it back into place, you handle storage hiccups quickly wherever you are. Master this on your home kitchen drawers first, and you’ll feel ready to tackle compact cabinetry on the road or at the campsite.
Tools and Materials You’ll Need
You won’t need a heavy toolbox for this job. Most of the time, your hands do the work, but a few tools make things smoother and safer.
- Flashlight or headlamp: Lights up the underside of the drawer so you can spot the release clips.
- Flathead screwdriver: Helps press stubborn locking levers and retaining tabs.
- Phillips screwdriver: Handy if you need to remove or adjust the slide mechanism.
- Clean cloth: Wipes away grime and debris from the drawer slides and tracks.
- Mild cleaner or soapy water: Cuts through grease buildup on the runners.
- Painter’s tape and a marker: Labels parts so reinstallation stays simple.
- Knee pad or folded towel (optional): Saves your knees while you crouch and work at cabinet level.
Gather these before you start, and you’ll breeze through the job without hunting for tools halfway through.
Step-by-Step Guide on How To Remove Soft Close Kitchen Cabinet Drawer
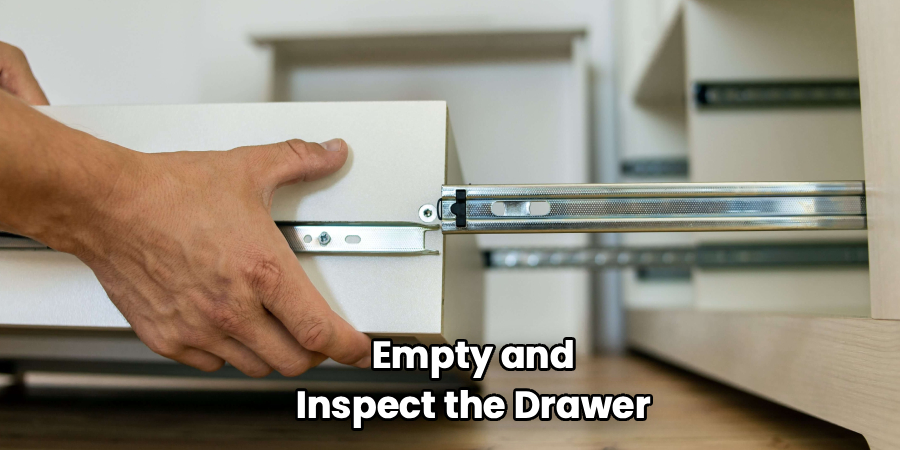
Step 1 – Empty and Inspect the Drawer
Start by clearing everything out of the drawer. Utensils, spices, and that tangle of random gadgets all add weight, and an empty drawer is far easier and safer to handle.
With it empty, pull the drawer open as far as it goes. You’ll feel the soft-close damper resist near the end of its travel. Take a good look at how the drawer sits inside the cabinet box and how the drawer front lines up with the surrounding cabinets.
Run your fingers along the sides to find the drawer slides. Notice whether they’re side-mount glides or tucked underneath as undermount runners. Knowing what you’re working with now saves confusion later. This quick inspection sets you up for a smooth, frustration-free removal.
Step 2 – Identify Your Slide Type
Before you pull anything, figure out which slide mechanism your drawer uses. The two common types are side-mount glides, which sit along the left and right of the drawer box, and undermount runners, which hide beneath the drawer.
Grab your flashlight and look closely. Side-mount ball-bearing slides usually show a metal rail on each side with a small lever or tab near the back. Undermount versions tuck their release clips underneath the front corners of the drawer.
This step matters because each type releases differently. Side-mounts often use locking levers you press up or down, while undermounts use clips you squeeze or lift. Take a moment to spot these details. Once you know your slide type, the rest of the job clicks into place quickly and easily.
Step 3 – Locate the Release Clips or Levers
Now find the exact spots that free the drawer. On side-mount slides, look for small plastic or metal locking levers near the back of each rail. They often sit where the drawer slide meets the cabinet-mounted track.
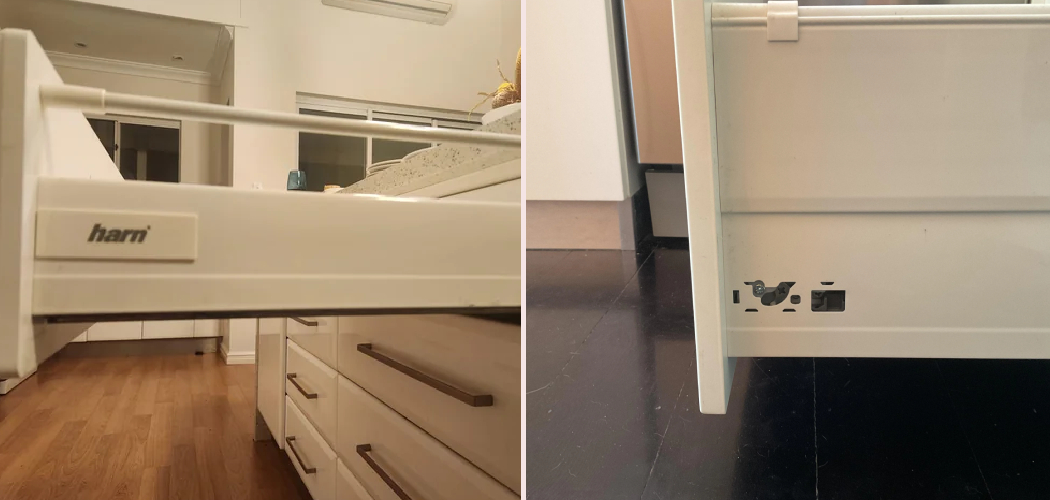
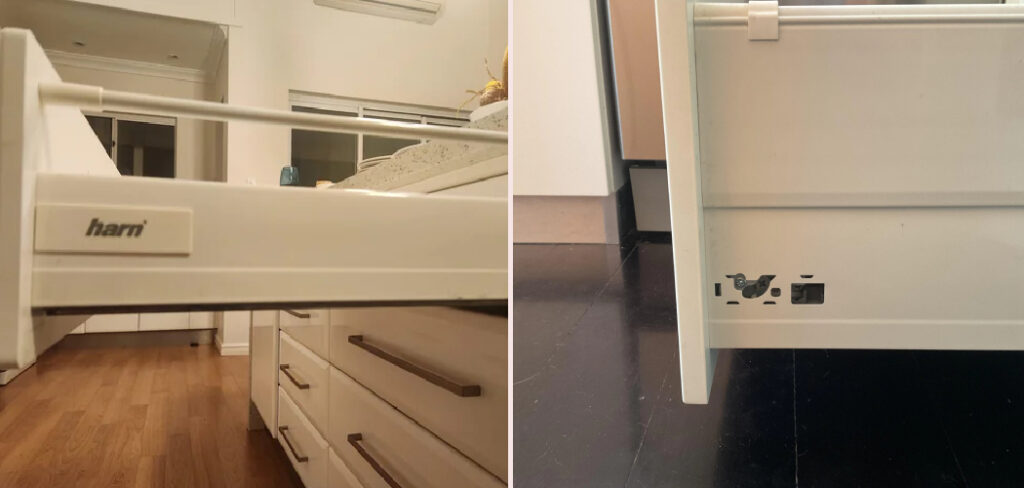
For undermount runners, reach beneath the front of the drawer and feel for two release clips, one on each side. They usually look like small tabs or paddles you can press with a fingertip.
Use your flashlight here. The lighting under a drawer is poor, and these clips hide in shadow. Press one gently to get a feel for how it moves before you commit. Understanding how the retaining tabs respond now means you won’t force anything later. This is the heart of how to remove soft close kitchen cabinet drawer hardware safely.
Step 4 – Pull the Drawer to Full Extension
Slide the drawer out until it stops at full extension. You’ll feel the slides reach their limit and the soft-close damper settle. This position exposes the release clips and gives you the room you need to work.
Hold the drawer steady with both hands. A loaded drawer can feel heavier than you expect, and you don’t want it tipping forward as you release it.
Take a peek along both slides to confirm they’re fully extended and even. If one side lags, gently jiggle the drawer until the track alignment looks balanced. Uneven extension makes releasing the clips tricky and can bind the slide mechanism. With the drawer fully out and level, you’re perfectly positioned to disengage the slides in the next step.
Step 5 – Disengage the Release Clips
Here’s the satisfying part. With both hands ready, press the release clips or locking levers on each side at the same time. On many slides, you push one lever up and the other down, so check which direction yours move.
For undermount runners, reach beneath and squeeze or lift both clips together. You’ll feel a small click as each one disengages. Keep gentle pressure so they don’t snap back before you’re ready.
If a clip resists, use a flathead screwdriver to nudge it, but never force it. These tabs are sturdy yet breakable. Once both sides release, you’ll feel the drawer loosen from the extension rails. Stay focused, since this is the moment the drawer becomes free and ready to lift away.
Step 6 – Lift and Remove the Drawer
With both clips disengaged, tilt the front of the drawer up slightly and pull it toward you. The drawer should glide off the extension rails smoothly. You’ll feel it separate from the slide mechanism with a gentle, clean release.
Keep both hands firmly on the drawer box as it comes free. Even an empty drawer has some heft, and a sudden release can catch you off guard. Lift straight out and set the drawer on a towel or countertop nearby.
Take a quick look at the rails still attached to the cabinet box. Notice their position and how the drawer’s slides matched up. Snap a photo with your phone if you want a reference. This makes reinstallation later far easier and removes any guesswork.
Step 7 – Clean the Slides and Tracks
Now that the drawer is out, take advantage of the access. Wipe down both the cabinet-mounted tracks and the slides on the drawer with a clean cloth. You’ll often find sticky grime, crumbs, and grease that cause sluggish movement.
For tougher buildup, dampen your cloth with mild soapy water and gently scrub the runners. Dry everything afterward so moisture doesn’t sit on the metal. You’ll notice the slides feel smoother right away.
Check the soft-close damper while you’re here. If it looks dirty or sticky, a careful wipe can restore its smooth action. Avoid heavy oils that attract more dust. A light, dry cleaning keeps ball-bearing slides gliding well. This quick maintenance often fixes the very problem that made you remove the drawer in the first place.
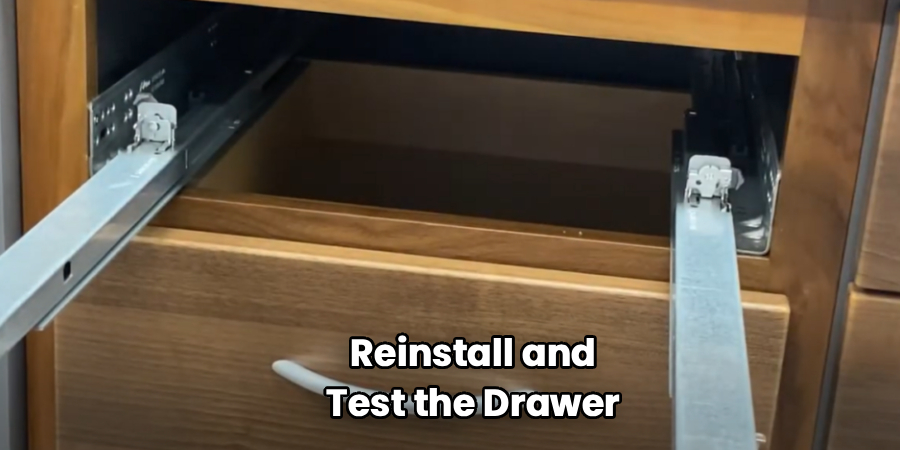
Step 8 – Reinstall and Test the Drawer
When you’re ready, line the drawer’s slides up with the extension rails on the cabinet box. Angle the front slightly upward, just as it came off, then guide both sides onto the tracks evenly.
Push the drawer in slowly. You’ll feel the release clips re-engage with a reassuring click on each side. If one side won’t seat, pull back and check the track alignment, then try again without forcing it.
Once both slides lock, open and close the drawer a few times. Watch the drawer front line up with the neighboring cabinets and feel the soft-close damper pull it shut gently. Smooth, even motion means a successful job. That confident click is your sign you’ve mastered the full removal and reinstallation process.
Critical Mistakes When Removing a Soft-Close Cabinet Drawer
Even a simple job goes sideways when you rush, so watch for these common errors.
The biggest mistake is forcing the drawer out without releasing both clips. People yank the drawer when only one side has disengaged, and that twist can snap the retaining tabs or bend the extension rails. Always release both locking levers together and let the drawer come free on its own.
Another frequent slip is releasing the clips before the drawer reaches full extension. The release points only become accessible at the end of the slide’s travel. Try to release them early, and you’ll fumble in the dark and risk damaging the slide mechanism.
Many beginners also forget how the parts fit together. Side-mount glides and undermount runners reinstall differently, and skipping a quick photo leaves you guessing later. Snap a reference shot before you lift the drawer away.
Finally, folks often slam the drawer back in too hard during reinstallation. Forcing it can knock the track alignment off or damage the soft-close damper. Guide it gently, let the clips click naturally, and test the motion before you call it done.
Expert Tips
A few insider habits make this repair feel effortless. First, label your left and right slides with painter’s tape if your drawer isn’t symmetrical. It saves confusion when you reinstall and keeps the track alignment spot-on.
Next, work with the drawer at full extension every time. That single habit prevents most broken clips, since the release points only sit exposed at the end of the slide’s travel.
When a lever feels stiff, resist the urge to muscle it. A light press with a flathead screwdriver does the job without cracking the plastic. Patience always beats force here.
Finally, make cleaning the runners a regular habit, not just a repair-day chore. A quick wipe every few months keeps ball-bearing slides smooth and your soft-close damper gliding gently. These small steps turn a fiddly task into a skill you’ll use confidently for years.
Frequently Asked Questions
How do I know if my drawer has side-mount or undermount slides?
Look at where the slides sit. Side-mount glides run along the left and right sides of the drawer box, with visible metal rails. Undermount runners hide beneath the drawer, so you’ll need to pull it out and look underneath. Side-mounts usually have levers near the back, while undermounts use release clips at the front corners.
Why won’t both release clips disengage at the same time?
This usually happens when the drawer isn’t pulled to full extension. The release points only sit exposed at the end of the slide’s travel. Pull the drawer out completely, hold it level, and press both clips together. If one still resists, check that the slides are extended evenly and gently nudge a stubborn clip with a flathead screwdriver.
Can I damage the soft-close mechanism by removing the drawer?
You won’t damage it if you follow the right steps. The soft-close damper stays attached to the slide and isn’t stressed during a proper removal. Problems only happen when you force the drawer out before releasing the clips. Release both sides gently, lift the drawer straight off, and the damper will keep working perfectly when you reinstall.
What should I do if the drawer feels sticky after reinstalling?
A sticky drawer usually means dirty or misaligned slides. Try this:
- Remove the drawer again and wipe the runners clean.
- Check that both slides sit evenly on the extension rails.
- Confirm the release clips clicked fully on each side.
Avoid heavy lubricants, since they attract dust. A clean, well-aligned slide almost always restores smooth motion.
Do I need any special tools to remove the drawer?
In most cases, no. Your hands do the bulk of the work. A flashlight helps you spot the release clips, and a flathead screwdriver helps press stubborn locking levers. Keep a clean cloth nearby to wipe the slides while the drawer is out. Anything beyond that, like a screwdriver for adjustments, is only needed for repairs, not basic removal.
Conclusion
Taking out a stuck or sagging drawer doesn’t have to be intimidating, and now you know exactly how to handle it. You’ve learned to empty and inspect the drawer, identify your slide type, locate the release clips, and pull the drawer to full extension before disengaging both sides. You also know how to clean the runners and reinstall everything so the soft-close damper glides smoothly again.
The real secret is simple: go slow, release both clips together, and never force anything. Pull to full extension, snap a quick reference photo, and let the slides do the work as you guide the drawer free.
Now that you understand how to remove soft close kitchen cabinet drawer parts, you can clean, repair, and reorganize your cabinets anytime without calling a pro. So clear out that drawer, grab your flashlight, and give it a try. Your kitchen, your wallet, and your growing DIY confidence will all thank you. Happy fixing, and enjoy those smooth-gliding drawers you fixed yourself.

About
Nick Hall has spent the last seven years working at the intersection of kitchen design and home repair — first as a design assistant at a residential renovation studio, then as a freelance writer covering everything from cabinet layouts to leaky faucet fixes.
Her approach is simple: kitchens should look good and function well. That means she’s just as comfortable talking about color palettes and counter materials as she is walking readers through how to fix a wobbly cabinet hinge or troubleshoot a garbage disposal.
Nick has worked directly with homeowners on small-space kitchen makeovers, budget-conscious renovations, and the kind of everyday repairs that don’t need a contractor — just the right instructions. She writes from experience, not theory, and tests most of the fixes and tips she shares before publishing them.
When she’s not writing, Nick is usually hunting for mid-century kitchen finds at estate sales or helping friends plan their own renovations. She lives in Columbus, Ohio.