
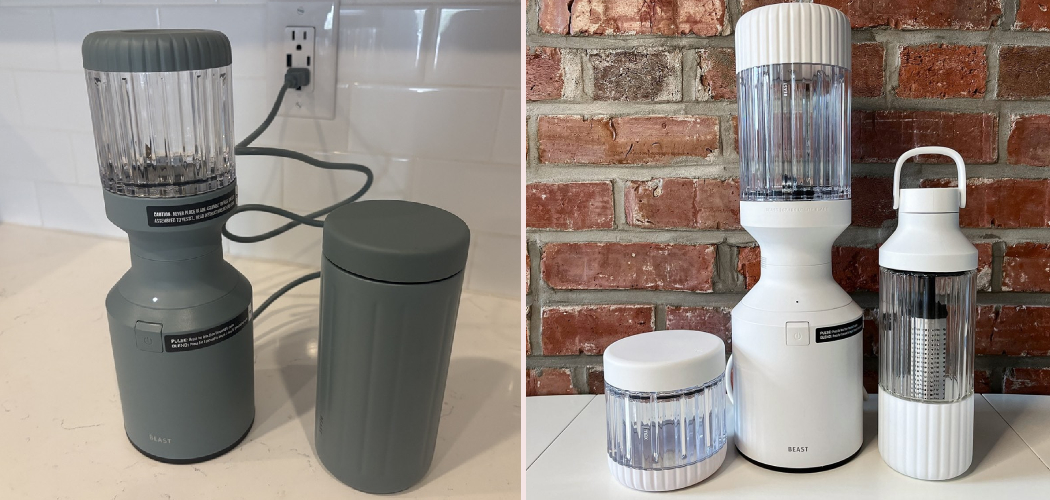
Few kitchen tools make healthy habits feel as easy as a compact, powerful blender that fits right on your counter. If you’ve just unboxed yours and feel a little unsure where to start, you’re in good company.
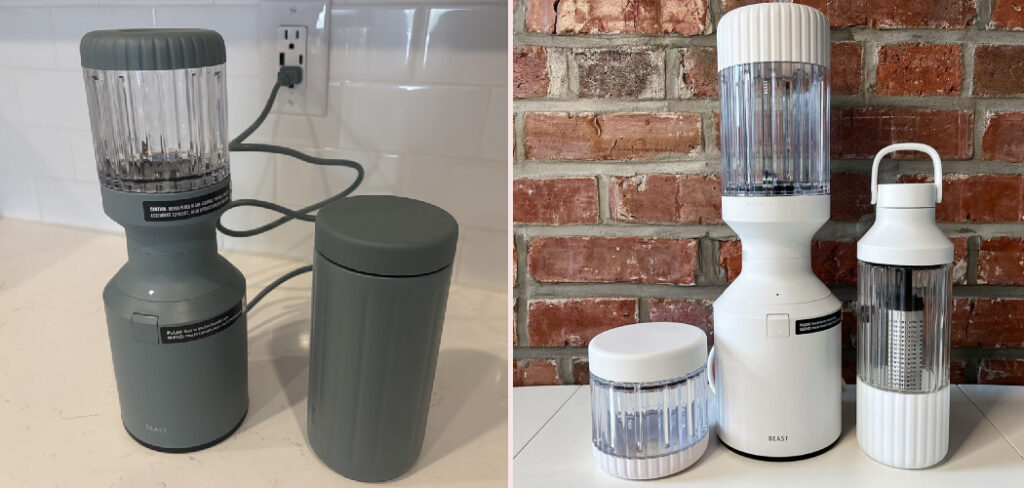
The good news? This machine is built for simplicity. With one cup, one blade lid, and one motor base, you can whip up smoothies, sauces, and dips in under a minute. No complicated settings or confusing dials to figure out.
Learning how to use Beast Blender turns morning chaos into a quick, satisfying routine. You’ll spend less time prepping and more time enjoying your drink.
This guide walks you through every step, from loading your ingredients to that final smooth pour, so you can blend with total confidence.
Why Learning to Use a Beast Blender Matters
This skill shines far beyond your home kitchen. Picture an RV trip where counter space is tight and outlets are limited. A personal blender plugs in, blends a quick smoothie, and tucks away without taking over the galley.
Cabin stays feel cozier with one too. When the kitchen is small and your gear is minimal, a compact blender handles breakfast and snacks without fuss.
Quick smoothie prep keeps your energy up during busy travel mornings. Toss in fruit, pour your liquid base, and you’re out the door in minutes.
Portable meal routines depend on simple cleanup, and this is where a personal blender really wins. You blend right in the cup, sip, then rinse. Blending small batches in temporary kitchens or travel setups becomes effortless, which makes healthy eating possible anywhere you roam.
Tools and Materials You’ll Need
You won’t need much to get started. Most of what you need comes right in the box, and the rest probably already sits in your kitchen.
Here’s what helps your first blend go smoothly:
- The motor base (the heavy unit that powers everything)
- A blending cup or smoothie cup that matches your batch size
- The blade lid with the blade assembly attached
- Fresh or frozen fruit and vegetables
- A liquid base such as water, milk, or juice
- A spatula for scooping thick mixtures
- A drinking lid for sipping on the go
Optional but handy: a small set of reusable straws. They make your finished drink easy to enjoy straight from the smoothie cup, which cuts down on extra dishes.
Gather everything before you begin. Having your tools ready makes the whole process feel calm and quick, even on a hectic morning.
Step-by-Step Guide on How to Use Beast Blender
Step 1 – Set Up the Motor Base
Start by placing the motor unit on a flat, dry section of your countertop. Give it a little room on all sides so it stays steady while it runs.
Plug it into a nearby outlet, but keep the cord clear of any water near the sink. The base is the heaviest part, and that weight helps it grip the surface during blending.
Wipe the top of the base with a dry cloth to clear any dust or crumbs. A clean, stable base prevents wobbling and keeps the blending cup seated correctly.
Take a moment to read the small markings on top. Knowing where the cup locks in saves you fumbling later when your hands are full of ingredients.
Step 2 – Add Your Liquid Base First
Pour your liquid base into the blending cup before anything else. Water, milk, or juice all work well, and starting with liquid helps the blades spin freely.
Fill to about a third of the cup, then adjust later if your drink feels too thick. Liquid at the bottom pulls the other ingredients down toward the blade assembly, which means a smoother blend with less stopping.
You’ll hear a soft slosh as you pour, a small sign you’re building the base correctly. Resist the urge to overfill, since you still need room for fruit and ice.
This simple order matters more than people expect. Knowing how to use Beast Blender starts with getting this layering right.
Step 3 – Layer in Soft Ingredients and Greens
Next, add your softer items like banana, yogurt, or leafy greens. These tuck in close to the liquid and blend down quickly without straining the motor.

Spinach and kale settle nicely here, where the spinning blades reach them first. Soft fruit follows, filling the gaps and creating a smooth foundation for heavier pieces.
Press the greens down gently with your fingers or a spatula. Packing them low means they won’t get stuck spinning at the top, dry and untouched.
You’ll notice the cup starting to fill with color and texture. This middle layer does a lot of quiet work, blending fast and helping everything else move smoothly toward that creamy, even finish you’re after.
Step 4 – Add Frozen Fruit and Ice Last
Now top your cup with frozen fruit and ice. Placing these heavier, harder items last keeps them near the lid, so they drop into the blades only once everything below is moving.
Frozen ingredients give your drink that thick, frosty chill without watering it down. Don’t pack the cup past the fill line, though, or the mixture won’t have room to circulate.
You’ll feel the cold radiating from the frozen fruit as you load it. That chill is a good sign your smoothie will turn out refreshing and rich.
Keep the layers balanced. Too much ice on top can cause a stubborn air pocket, so mix in a few softer pieces if your cup looks heavy with frozen chunks.
Step 5 – Attach the Blade Lid Securely
Take the blade lid and twist it firmly onto the blending cup. Turn until you feel and hear a clear click, the sound that tells you the seal is tight.
A loose lid leaks, so give it a gentle tug to confirm it holds. The blade assembly should sit flush against the rim with no gaps.
Check that the rubber gasket sits in place before you tighten. A missing or twisted gasket is the most common reason for drips down the side.
That satisfying click is your green light. Once you hear it, you know the smoothie cup is sealed and ready to flip onto the motor base without any messy surprises.
Step 6 – Flip and Lock onto the Motor Base
Turn the sealed cup upside down so the blade lid faces the motor unit. Line up the cup with the base, then press down and twist until it locks into position.
You’ll feel a small resistance as it clicks home. That connection tells the machine it’s safe to spin, and it keeps the cup steady through the whole blend.
Hold the cup with one hand and steady the base with the other. A firm, level fit reduces vibration and keeps the noise level lower while it runs.
If the cup feels loose or tilts, lift it off and reseat it. A snug, balanced lock is the secret to a smooth, splatter-free blend every single time.
Step 7 – Blend and Pulse for Smooth Texture
Press down to start blending. You’ll hear the motor rise to a steady hum and feel a light vibration travel up through your hand.
Let it run for short bursts of ten to fifteen seconds. Pulse a few times to break up frozen fruit, then hold for a longer blend to smooth everything out.
Watch the mixture swirl through the clear cup. When the color turns even and the texture looks creamy with no chunks, you’re nearly done.
If the blend stalls, stop and give the cup a gentle shake to release any air pocket. Patience here pays off, since over-blending warms the drink and thins that lovely frosty body you worked to build.
Step 8 – Check Consistency, Then Pour and Sip
Stop the motor and give the cup a quick look. Tilt it slightly to see if the smoothie flows smoothly or sticks in thick clumps.
Too thick? Add a splash of your liquid base and pulse again. Too thin? Drop in a little more frozen fruit and blend briefly. Small tweaks make a big difference in drink texture.
Once you’re happy, unlock the cup, flip it upright, and swap the blade lid for the drinking lid. Pour into a glass or sip straight from the cup.
Take in that first cool, fruity taste. Then rinse the cup right away while it’s still wet, since quick cleanup keeps your blender ready for tomorrow.
Critical Mistakes When Learning to Use a Beast Blender
The most common slip is loading ingredients in the wrong order. Many beginners dump frozen fruit and ice in first, then wonder why the blades jam. Always start with liquid, layer soft items in the middle, and save frozen chunks for the top. This order lets everything circulate and protects the motor from strain.
Another frequent mistake is overfilling the cup. Pour past the fill line, and the mixture has nowhere to move. You end up with a thick, uneven blend and possible leaks around the lid. Leave room for the ingredients to swirl freely.
People also run the motor too long. A continuous, lengthy blend overheats the drink, thins the texture, and stresses the unit. Short bursts and a few pulses give you a creamier result while keeping the machine cool.
Skipping the gasket check causes messy leaks too. If that rubber seal sits crooked or missing, your smoothie drips down the side the moment you flip the cup. Take two seconds to confirm it’s seated.
Finally, letting residue dry inside the cup makes cleanup a chore. Rinse right after pouring, while everything is still soft and easy to remove.
Expert Tips
Chill your blending cup in the freezer for ten minutes before a hot-day smoothie. The cold cup keeps your drink frosty longer and gives every sip a refreshing edge.
Cut your fruit into smaller chunks when you can. Smaller pieces blend faster, reduce vibration, and put less strain on the blade assembly over time.
For nut butters or thick dips, scrape down the sides between pulses. This keeps ingredients moving toward the blades and saves you from a half-blended mess.
Keep a soft brush near the sink for quick cleanup around the blade lid. Those tight spots trap pulp, and a quick scrub prevents lingering odors.
Lastly, store the cup and motor base separately with the lid off. Letting everything air-dry fully stops moisture from building up and keeps your blender fresh for the next round.

Frequently Asked Questions
Can I blend hot liquids in my personal blender?
It’s best to avoid very hot liquids. Steam builds pressure inside a sealed cup, which can force the lid off or cause splatter. Let soups or sauces cool to warm before blending. If you need a warm result, blend the ingredients cold, then heat the finished mixture on the stove. This keeps both you and your machine safe.
Why does my blender leak around the lid?
Leaks usually come from a few simple causes:
- A missing or twisted rubber gasket
- A blade lid that isn’t tightened until it clicks
- An overfilled cup with no room for the mixture to move
Check the gasket first, then retighten the lid firmly. Keeping ingredients below the fill line solves most drips quickly.
How do I get a smoother texture?
Layering matters most. Add liquid first, soft ingredients next, and frozen items last so the blades catch everything in order. Use short pulses to break up ice, then a longer blend to finish. If chunks remain, stop, shake the cup gently to release air pockets, and blend again. A splash more liquid also helps the mixture circulate freely.
Is it safe to put parts in the dishwasher?
The cups and lids are usually top-rack safe, but always check your model’s guide first. Never place the motor base in water or the dishwasher, since it holds the electrical components. For the base, wipe it with a damp cloth and dry it well. Rinsing the cup right after use often makes the dishwasher unnecessary anyway.
How full can I fill the blending cup?
Stick to the marked fill line, and never pack ingredients above it. Overfilling leaves no room for the mixture to swirl, which causes uneven blending and leaks. Aim for liquid at about a third of the cup, then build your soft and frozen layers up to the line. This balance gives you smooth, mess-free results every time.
Conclusion
Getting great results comes down to a few easy habits. Set the motor base on a dry counter, layer your liquid first and frozen fruit last, and twist the blade lid until you hear that reassuring click.
From there, short pulses and a quick longer blend do the heavy lifting. Watch the texture turn creamy, check the consistency, then pour and sip. Rinsing the cup right away keeps cleanup simple and your machine ready for the next round.
Once you understand how to use Beast Blender, your mornings get faster and your snacks get healthier. You’ll reach for it daily, whether you’re at home, in an RV, or settling into a cozy cabin.
So load your cup, lock it onto the base, and enjoy that first smooth, fruity sip. Each blend builds your confidence and your skill. Before long, you’ll be creating smoothies, dips, and sauces like a pro, all without ever calling for help.

About
Nick Hall has spent the last seven years working at the intersection of kitchen design and home repair — first as a design assistant at a residential renovation studio, then as a freelance writer covering everything from cabinet layouts to leaky faucet fixes.
Her approach is simple: kitchens should look good and function well. That means she’s just as comfortable talking about color palettes and counter materials as she is walking readers through how to fix a wobbly cabinet hinge or troubleshoot a garbage disposal.
Nick has worked directly with homeowners on small-space kitchen makeovers, budget-conscious renovations, and the kind of everyday repairs that don’t need a contractor — just the right instructions. She writes from experience, not theory, and tests most of the fixes and tips she shares before publishing them.
When she’s not writing, Nick is usually hunting for mid-century kitchen finds at estate sales or helping friends plan their own renovations. She lives in Columbus, Ohio.