
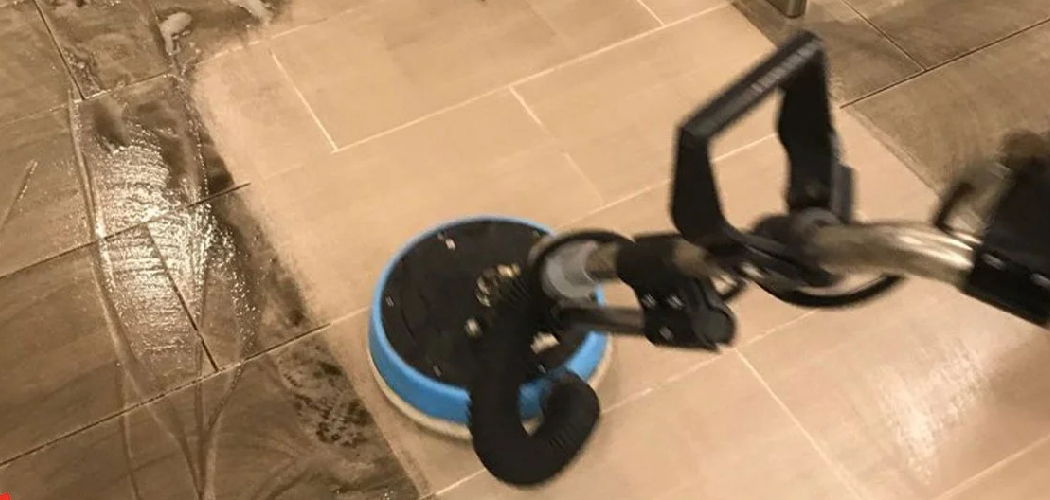

Cracked, stained, or crumbling grout can make your kitchen counter look older than it is. The good news is that you do not need to replace the tile to make the surface look fresh again. If you want to learn how to regrout kitchen counter tile, you can handle this project with basic tools, steady hands, and a little patience.
Regrouting removes the worn-out filler between tiles and replaces it with clean, durable grout that helps protect the surface from moisture and food spills. It also improves the overall look of your countertop and helps keep dirt from collecting in damaged joints. This guide will walk you through each part of the job in a clear, beginner-friendly way.
Why Regrouting Kitchen Counter Tile Matters
Learning to regrout a tiled counter is useful for any homeowner, but it can be especially helpful for campers, van-lifers, and outdoor beginners with tile surfaces in camp kitchens, outdoor prep stations, or RV spaces. These areas often deal with heat swings, moisture, dust, and heavy use, which can wear grout down faster than you expect.
When grout starts to crack or pull away, water can seep below the tile and cause bigger problems. In a small kitchen or mobile setup, even minor damage can spread fast. Regrouting helps you protect the surface, keep things sanitary, and avoid a more costly repair later. It also gives you confidence to handle simple maintenance jobs on your own, whether you are fixing a home kitchen or a compact outdoor cooking space.
Tools and Materials You’ll Need
Before you start, gather everything in one place so the work goes smoothly.
- Grout saw or carbide grout removal tool
- Utility knife for tight corners
- Vacuum or shop vac
- Soft brush or old toothbrush
- Sponge and clean microfiber cloths
- Bucket of clean water
- Tile cleaner or mild degreaser
- Painter’s tape
- Replacement grout that matches your joint width and tile type
- Rubber grout float
- Grout sponge
- Mixing container if using powdered grout
- Nitrile gloves
- Safety glasses
- Dust mask
- Grout sealer
- Small caulk tool if the counter meets a backsplash
- Optional: knee pad or folded towel for comfort during longer work sessions
Step-by-Step Guide on Regrouting Kitchen Counter Tile
Step 1 – Inspect the Counter and Plan the Repair
Start by looking closely at the countertop in bright light. Check for loose tiles, cracked grout lines, deep stains, mold, and any spots where the grout has pulled away from the edges. Run your fingertip across the joints. Sound grout feels firm and slightly grainy, while failing grout may feel soft, sandy, or uneven.

This early check tells you whether you are dealing with a simple refresh or signs of a larger issue below the tile. If a tile rocks when you press it, fix that first before you touch the grout. Planning matters because the job is cleaner and faster when you know where the trouble spots are. Take a few minutes to note corners, sink edges, and backsplash seams, since those areas often need extra care.
Step 2 – Clear, Clean, and Protect the Work Area
Remove everything from the countertop, including small appliances, cutting boards, and canisters. You want full access to the tile surface without reaching around clutter. Wipe away crumbs, grease, and dried spills with a mild degreaser. Kitchen counters often hold a thin film of oil, and that residue can interfere with the new grout if you skip cleaning.
Once the tile is dry, protect nearby surfaces with painter’s tape. Tape the edges of the sink, walls, wood trim, and any finished surfaces you do not want to scratch. Open a window if you can, because grout dust can get fine and chalky fast. Good prep makes how to regrout kitchen counter tile much less stressful, especially for first-time DIYers who want clean lines and fewer surprises.
Step 3 – Remove the Old Grout Carefully

Use a grout saw or carbide removal tool to scrape out the damaged grout between the tiles. Work slowly and keep the tool centered in the joint so you do not chip the tile edges. You do not need to dig into the base under the tile. Your goal is to remove most of the old grout, especially loose or stained sections, to create a clean space for the new material.
This part can sound gritty and rough, almost like sanding stone. That is normal. Use short, steady strokes and take breaks if your hand gets tired. In tight corners, a utility knife can help loosen stubborn bits. Vacuum often so you can see your progress. Clean joints are the foundation of a strong repair, and rushing here often leads to uneven lines later.
Step 4 – Vacuum and Wash the Joints
After the old grout is out, vacuum every line carefully. Fine dust loves to settle into narrow joints, and even a thin layer can weaken the bond of the fresh grout. Move the vacuum nozzle slowly across each seam. Then use a dry brush to lift any remaining powder from corners and edges.
Next, wipe the tile with a damp sponge and let the surface dry fully. You want the counter clean, but not soaking wet. If the joints stay damp, the grout mix can become too loose or cure unevenly. This step seems simple, but it makes a big difference in the final result. When the tile feels smooth and the joints look open and clean, you are ready for the most satisfying part of the project.
Step 5 – Mix the New Grout to the Right Texture
If you are using powdered grout, mix only as much as you can apply within the product’s working time. Follow the package directions closely. The texture should feel like thick peanut butter or smooth mashed potatoes, not runny and not crumbly. Let it rest for a few minutes if the instructions call for slaking, then remix without adding extra water unless the manufacturer says to do so.
Color and consistency matter here. A mix that is too wet can shrink or crack as it dries, while a mix that is too dry can drag and leave gaps. Stir until the grout looks creamy and even, with no dry pockets. If you are using premixed grout, stir it gently before use. A smooth batch spreads better and helps you get neat, solid joints across the whole counter.
Step 6 – Pack Grout into the Tile Joints
Use a rubber grout float to press the grout firmly into the joints at a diagonal angle. Push hard enough to fill every gap, then sweep away the extra from the tile surface. Work in a small section at a time so the grout does not begin to set before you shape and clean it. Around sinks and corners, take your time and use the edge of the float to guide the material into narrow spots.
This is where how to regrout kitchen counter tile starts to come together visually. The dull, empty lines between the tiles begin to look full and crisp again. You may notice the color deepening while the grout is wet. That is normal. Focus on full coverage rather than perfection right away, because you will refine the surface during the first wipe-down.
Step 7 – Wipe Away Excess and Shape the Lines
Wait the amount of time recommended on the grout package, then wipe the tile gently with a damp grout sponge. Rinse the sponge often and wring it out well so it stays damp, not dripping. Too much water can wash grout out of the joints or weaken the surface. Use light, smooth passes to remove haze while keeping the grout lines full and even.
As you wipe, you will start to see the finished look emerge. The tile surface becomes cleaner, and the joints take on a more defined shape. If you notice low spots, add a little more grout before it sets too much. This step takes a gentle touch. Think of it as refining rather than scrubbing. A patient wipe-down leaves the surface neat and helps the lines cure with a smooth, professional look.
Step 8 – Let the Grout Cure and Seal the Surface
Give the grout enough time to cure fully before you return the counter to normal use. Drying and curing are not the same thing. The surface may feel dry in a few hours, but the grout needs longer to harden properly. Keep the area free from water, food mess, and heavy use during this period. Follow the product directions for cure time, since it varies by grout type.
Once cured, apply a grout sealer if your product requires it. Sealer helps resist stains, grease, and moisture, which is especially important on a kitchen counter. Use a small applicator or brush and wipe off any extra from the tile face. When the sealer dries, the counter will be easier to clean and better protected from daily wear.
Common Mistakes When Regrouting Kitchen Counter Tile
One common mistake is not removing enough of the old grout before adding new grout. Fresh grout needs space to grip, and if you smear it over loose or shallow material, it often fails early. The surface may look better for a short time, but the repair will not last.
Another mistake is skipping the cleaning stage. Kitchen counters collect grease, soap film, crumbs, and fine dust. If that grime stays in the joints, the new grout may not bond evenly. The result can be patchy color, weak spots, or crumbling edges after only a few weeks.
Many beginners also mix grout too wet. It may seem easier to spread, but watery grout can shrink as it cures and leave low, cracked lines. On the other hand, grout that is too dry may not pack tightly into the joints. Following the package ratios gives you the best chance of a strong finish.
A fourth mistake is using too much water while sponging. Overwashing can pull grout from the seams and lighten the color. Finally, some people forget to seal the grout or rush the cure time. A countertop sees daily spills, heat, and wiping, so giving the grout time to harden and protecting it afterward is worth it.
Expert Tips
For the cleanest result, work in small sections rather than spreading grout across the entire counter at once. This gives you better control and keeps the material from drying before you shape it. If your tile has a textured surface, test your cleanup method on a small area first, since rough tile can trap haze more easily.
Color matching also matters more than many beginners expect. If you are not changing the look of the counter, bring a dry grout sample or a photo into good natural light before choosing a replacement. At sink edges or where the counter meets a backsplash, use caulk instead of grout if the joint is designed to flex. That small detail helps prevent future cracking where movement happens most.
Frequently Asked Questions
Can I put new grout over old grout on a kitchen counter?
It is possible in very limited cases, but it is not the best approach. New grout bonds better when you remove the old, weak material first. If you apply fresh grout over damaged grout, the repair may crack or fall out quickly. For a longer-lasting result, clear out the old joints before reapplying.
How long does regrouted kitchen counter tile need to dry?
Most grout dries enough for light contact within a day, but full cure often takes longer. The exact time depends on the product, humidity, and room temperature. Always check the label. To stay safe, keep the countertop dry and avoid heavy use until the grout has fully cured and the sealer, if used, has dried.
Do I need sanded or unsanded grout for countertop tile?
That depends on the width of the grout joints. Sanded grout usually works better for wider joints because it is stronger and resists shrinking. Unsanded grout is often better for very narrow joints and delicate tile surfaces that can scratch. Check the grout line width and the tile type before you buy your materials.
Why does my new grout look blotchy after drying?
Blotchy grout usually comes from uneven mixing, too much water during cleanup, or inconsistent drying conditions. If one area stayed wetter than another, the color can cure unevenly. Thorough mixing, careful sponging, and proper cure time help prevent this. In some cases, the color evens out as the grout finishes curing over the next few days.
Should I seal grout on a kitchen countertop?
Yes, in most cases sealing is a smart step. Kitchen counters face food spills, grease, water, and frequent wiping, all of which can stain or weaken unprotected grout. A good sealer adds a barrier that helps keep the grout cleaner and easier to maintain. Some modern grouts have built-in stain resistance, so check the product details first.
Conclusion
A worn grout line can make an otherwise solid tile counter feel tired, dirty, and older than it should. The good news is that regrouting is a practical project you can do yourself with patience, careful prep, and the right materials. When you remove failing grout, clean the joints well, apply fresh grout correctly, and protect it with sealer, you give your countertop a cleaner look and a longer life.
The key is to move slowly and pay attention to detail. Small steps like proper cleaning, correct grout texture, and gentle sponge work make a big difference in the final finish. If you have been putting off this repair because it seemed too technical, now you know that how to regrout kitchen counter tile is a skill most beginners can learn with confidence. Take your time, trust the process, and enjoy the fresh, solid look of your restored countertop.

About
Nick Hall has spent the last seven years working at the intersection of kitchen design and home repair — first as a design assistant at a residential renovation studio, then as a freelance writer covering everything from cabinet layouts to leaky faucet fixes.
Her approach is simple: kitchens should look good and function well. That means she’s just as comfortable talking about color palettes and counter materials as she is walking readers through how to fix a wobbly cabinet hinge or troubleshoot a garbage disposal.
Nick has worked directly with homeowners on small-space kitchen makeovers, budget-conscious renovations, and the kind of everyday repairs that don’t need a contractor — just the right instructions. She writes from experience, not theory, and tests most of the fixes and tips she shares before publishing them.
When she’s not writing, Nick is usually hunting for mid-century kitchen finds at estate sales or helping friends plan their own renovations. She lives in Columbus, Ohio.