
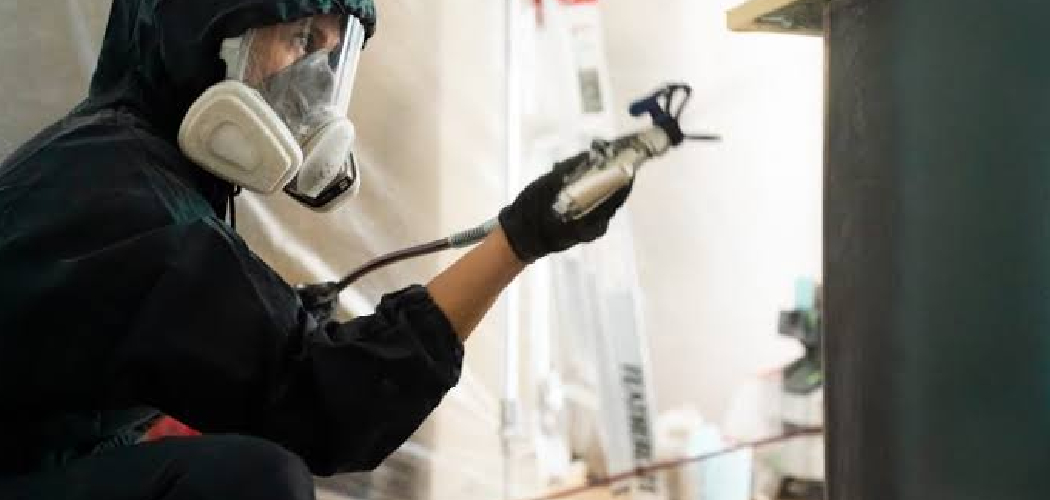

A sprayed cabinet finish can make an old kitchen look clean, bright, and almost factory-made. If you are a first-time DIY painter, the process may seem messy or technical at first. The good news is that with the right setup, careful prep, and steady spraying, you can get smooth cabinet doors and durable results without hiring out the job. Learning how to paint kitchen cabinets with a sprayer also helps you avoid heavy brush marks, save time on large kitchens, and get a more even coat on detailed door profiles.
This guide will walk you through each stage so you can paint your cabinets with confidence and get a finish that looks sharp and lasts.
Why Painting Kitchen Cabinets with a Sprayer Is Worth Learning
If you enjoy DIY home projects, this is a skill that pays off fast. Cabinet painting costs far less than a full kitchen remodel, yet it can change the whole feel of the room. A sprayer also gives you a smoother finish than most rollers or brushes, especially on shaker doors, trim edges, and cabinet frames with grooves or corners.
For DIY enthusiasts, this project builds real painting skills you can use again on built-ins, bathroom vanities, furniture, and doors. You also gain more control over color, sheen, and finish quality. Instead of settling for cabinets that look worn or dated, you can create a clean, modern look yourself. Done well, the result feels polished, bright, and custom without the price tag of replacement cabinetry.
Tools and Materials You’ll Need
- Paint sprayer suitable for cabinets, such as an HVLP or airless sprayer with a fine-finish tip
- Cabinet paint or enamel designed for durability and smooth leveling
- Bonding primer for laminate, stained wood, or previously painted surfaces
- Degreaser or cabinet cleaner to remove oil, wax, and kitchen grime
- Sandpaper in medium and fine grits or sanding sponges
- Wood filler for dents, chips, and hardware holes if needed
- Painter’s tape and masking paper or plastic sheeting
- Drop cloths or rosin paper to protect floors and counters
- Screwdriver or drill for removing doors, drawers, and hardware
- Tack cloth or lint-free cloths for dust removal
- Paint strainers and mixing sticks
- Respirator, gloves, and eye protection
- Sawhorses or a worktable for spraying doors flat
- Optional: a drying rack to save space and keep doors organized
Step-by-Step Guide on How to Paint Kitchen Cabinets with a Sprayer
Step 1 – Remove Doors, Drawers, and Hardware
Start by taking off every cabinet door, drawer front, handle, hinge, and knob. This part feels slow, but it makes the final result much cleaner. As you remove each piece, label it with painter’s tape so you know exactly where it goes later. Number the doors, mark the hinge positions, and keep the screws in separate bags.
Set up a simple system before you move on. Lay doors on a protected surface and keep drawers nearby in order. This step saves you from guessing during reassembly, which can turn a smooth project into a frustrating one. Good organization also helps you spray each part evenly without rushing or handling wet paint more than needed.
Step 2 – Clean Every Surface Thoroughly
Kitchen cabinets collect grease, food residue, hand oils, and invisible grime over time. Even cabinets that look clean can hold enough buildup to cause primer or paint to fail. Use a strong degreaser or cabinet-safe cleaner and wipe every surface carefully, including edges, corners, and areas around pulls.

As you clean, you may notice sticky spots near the stove or dark residue around handles. Do not paint over any of it. A clean surface should feel dry, smooth, and free from slick patches. If your rag still picks up dirt, clean again. When people ask why finishes peel early, poor cleaning is often the reason. Before you learn how to paint kitchen cabinets with a sprayer, you need to understand that prep work creates the finish, not the spray gun alone.
Step 3 – Repair Damage and Sand for Better Adhesion
Once the cabinets are clean and dry, inspect them closely under good light. Fill dents, chips, and old hardware holes with wood filler if needed. Let the filler dry fully, then sand it smooth so it blends into the surface. Small repairs matter because a sprayer lays paint down evenly, which means flaws can stand out if you skip this step.
Next, scuff sand all doors, drawer fronts, and cabinet boxes. You are not trying to strip them to bare wood unless the old finish is failing badly. You just want to dull the surface so primer can grip well. The texture should feel lightly chalky, not glossy. After sanding, remove every bit of dust with a vacuum and tack cloth so the finish stays smooth and clean.
Step 4 – Mask the Room and Build a Safe Spray Area
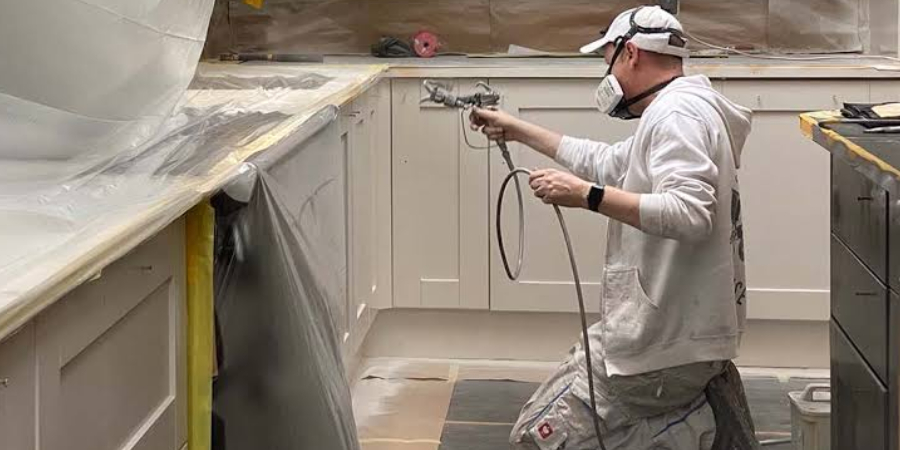
Sprayers create overspray, so careful masking is essential. Cover counters, floors, appliances, backsplashes, and nearby walls with drop cloths, plastic, and tape. If possible, set up a separate spraying area in a garage or workshop for the doors and drawer fronts. Keep that area clean, dry, and well ventilated.
Think about airflow before you spray. You want fresh air moving through the space, but not strong wind that blows dust into wet paint. Wear a respirator and protect your eyes and hands. This stage may not feel exciting, yet it gives you control. A tidy spray zone helps you move with confidence, prevents accidental paint mist on other surfaces, and makes the whole project easier to manage from start to finish.
Step 5 – Prime the Cabinets Evenly
Primer creates a bond between the old surface and the new paint, and it helps block stains, wood tannins, and uneven color. Strain the primer before adding it to the sprayer so dried bits do not clog the tip. Test the spray pattern on cardboard first. You want a soft, even fan, not heavy spits or narrow lines.
Apply thin, steady coats rather than trying to cover everything at once. Move your arm before pulling the trigger and release the trigger after each pass to avoid buildup at the ends. Overlap each pass slightly for even coverage. If you are serious about how to paint kitchen cabinets with a sprayer, this is where technique starts to matter. A well-sprayed primer coat should look smooth and consistent, with no thick ridges, drips, or dry rough patches.
Step 6 – Sand the Primer and Remove Fine Dust
After the primer dries, lightly sand it with a fine grit sanding sponge or paper. This step smooths out raised grain, tiny dust nibs, and any roughness left from spraying. Run your hand over the surface as you work. It should feel soft and even, almost like paper or eggshell, not gritty.
Do not sand aggressively or cut through the primer unless you need to fix a run. If you expose bare wood or old finish, spot-prime those areas again. Once sanding is done, vacuum everything and wipe it with a tack cloth. Fine dust can ruin a topcoat by trapping small bumps in the finish. A few calm minutes here can make the painted surface look much more refined when the light hits it later.
Step 7 – Spray the First Coat of Paint
Now it is time for color. Stir and strain your cabinet paint, then test the sprayer again before moving to the actual pieces. Start with the back sides of the doors if you are painting both sides. Spray light, even coats and keep the gun the same distance from the surface the whole time. Usually, that means about 6 to 10 inches, depending on your sprayer and tip.
Watch how the wet paint looks as it lands. It should appear slightly glossy and even, not dusty or overloaded. Detailed cabinet profiles may need a quick pass in grooves before you spray the broad flat areas. Work in a steady rhythm and resist the urge to fix every spot immediately. Paint levels best when you let thin coats build gradually instead of forcing full coverage in one pass.
Step 8 – Apply the Second Coat and Let It Cure Properly
Once the first coat dries according to the paint label, inspect the surface in clear light. Lightly sand only if you feel rough spots or see dust nibs. Then spray the second coat using the same pattern and pace as before. Consistency is what gives cabinets that smooth, professional look. Most cabinet paints reach full color and sheen after the second coat, though some shades may need a third.
After spraying, give the cabinets time to cure, not just dry to the touch. Dry paint can still be soft underneath. If you reinstall doors too early, the finish may stick, dent, or mark around hinges and bumpers. Let the room stay clean and calm while the paint hardens. Patience at this stage protects all the effort you put into prep, masking, and spraying.
Step 9 – Reassemble and Protect the New Finish
When the finish has cured enough for handling, reattach hinges, pulls, knobs, and drawer fronts using your labels as a guide. Work carefully and avoid sliding hardware across the painted surface. A soft towel on the counter helps protect doors while you position screws and align hinge plates.
Once everything is back in place, treat the cabinets gently for the next couple of weeks. Avoid harsh cleaners, slamming doors, or hanging damp towels over painted edges. Even durable enamel keeps hardening after installation. As the finish cures fully, it becomes tougher and more resistant to scratches, moisture, and daily wear. That final calm period is what helps your new cabinet color stay crisp and smooth through real kitchen use.
Common Mistakes When Painting Kitchen Cabinets with a Sprayer
One of the biggest mistakes is rushing past cleaning and sanding. Cabinets live in a greasy environment, and paint will not bond well to oil, polish, or glossy old finishes. Even expensive primer and paint cannot make up for weak prep. If the surface is slick or dirty, peeling often starts around corners, handles, and door edges.
Another common problem is spraying coats that are too heavy. Beginners often think a wetter coat will look smoother, but it usually leads to runs, sags, and uneven drying. Thin coats give you more control and a better finish. You should also watch your spray distance. Holding the gun too close floods the surface, while holding it too far away can leave a dry, rough texture.
Poor masking causes trouble too. Overspray can drift farther than you expect, especially in open kitchens. Floors, walls, and appliances need full protection. Finally, many people reassemble the cabinets too soon. Paint may feel dry after a few hours, but it still needs time to harden. If you rush this stage, you can leave fingerprints, dents, and stuck edges that are hard to fix later.
Expert Tips
Use a practice board before every major spray session. A quick test helps you confirm the fan pattern, pressure, and paint flow before you aim at your cabinet doors. It also helps you adjust for weather, temperature, and paint thickness, which can change from day to day.
Try to spray doors flat whenever possible. Horizontal spraying reduces the chance of runs and gives the paint more time to level out evenly. Keep your workspace clean, because floating dust is one of the fastest ways to ruin an otherwise smooth finish.
Choose a cabinet-specific enamel in a satin, semi-gloss, or soft gloss finish for easier cleaning and better durability. If you want the sharpest look, replace old hinges or pulls after painting. Fresh hardware can make the entire project look more finished and intentional.
Frequently Asked Questions
What type of sprayer works best for kitchen cabinets?
An HVLP sprayer is a popular choice for cabinet painting because it offers good control and a fine finish. Many DIY painters also use an airless sprayer with a fine-finish tip for faster coverage. The best option depends on your comfort level, budget, and workspace, but either can work well if you practice and use the right paint setup.
Do I need to sand cabinets before spraying them?
Yes, in most cases you do. Sanding helps remove gloss and gives primer a better surface to grip. You usually do not need to strip cabinets down to bare wood unless the old finish is damaged or peeling. A light scuff sand, followed by careful dust removal, is often enough to improve adhesion and help the paint finish look smoother.
How long should I wait before putting doors back on?
It depends on the paint, temperature, and humidity, but waiting at least 24 to 48 hours before light handling is a common starting point. Full cure can take several days or even a few weeks. If you reinstall too early, the finish may dent, stick, or mark easily, so always check the product label and give the paint extra time when possible.
What kind of paint should I use on kitchen cabinets?
Choose a durable cabinet paint or enamel made for high-touch surfaces. These paints are designed to resist moisture, stains, and daily wear better than standard wall paint. A satin or semi-gloss sheen is often a smart pick because it is easier to wipe clean. Make sure the paint is compatible with your primer and suitable for spraying.
Can I paint cabinet frames in place with a sprayer?
Yes, you can spray cabinet boxes in place, and many people do. The key is careful masking and good airflow control. Remove the doors and drawers first so you can focus on the fixed frames. Use light coats, protect nearby surfaces well, and pay attention to corners where paint can build up quickly and start to sag.
Conclusion
Painting cabinets with a sprayer takes patience, but it is one of the most rewarding kitchen upgrades you can do yourself. The real secret is not speed. It is careful prep, clean surfaces, light coats, and enough cure time between stages. When you label your doors, sand well, mask the room, and spray with a steady hand, you give yourself the best chance at a smooth, durable finish.
If this is your first cabinet project, do not let the equipment intimidate you. Start methodically, practice your spray pattern, and focus on one step at a time. That steady approach is what turns average results into cabinets that look crisp and professionally finished. Once you understand how to paint kitchen cabinets with a sprayer, you can tackle the job with much more confidence and enjoy a kitchen that feels fresh, bright, and renewed.

About
Nick Hall has spent the last seven years working at the intersection of kitchen design and home repair — first as a design assistant at a residential renovation studio, then as a freelance writer covering everything from cabinet layouts to leaky faucet fixes.
Her approach is simple: kitchens should look good and function well. That means she’s just as comfortable talking about color palettes and counter materials as she is walking readers through how to fix a wobbly cabinet hinge or troubleshoot a garbage disposal.
Nick has worked directly with homeowners on small-space kitchen makeovers, budget-conscious renovations, and the kind of everyday repairs that don’t need a contractor — just the right instructions. She writes from experience, not theory, and tests most of the fixes and tips she shares before publishing them.
When she’s not writing, Nick is usually hunting for mid-century kitchen finds at estate sales or helping friends plan their own renovations. She lives in Columbus, Ohio.