
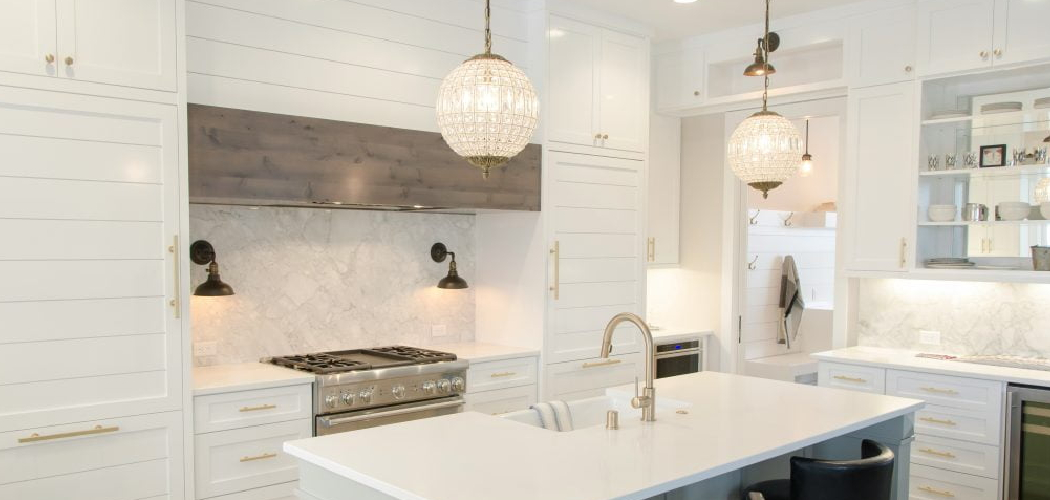
A kitchen remodel can look exciting on paper, but the electrical and lighting plan is where comfort, safety, and daily function come together. If you place outlets in the wrong spots or rely on one overhead fixture, the room may still feel dim, awkward, and hard to use after the remodel is done. Learning how to plan electrical and lighting changes in kitchen remodel projects helps you avoid those costly mistakes before walls are opened and cabinets are installed.

In this guide, you’ll learn how to map your kitchen zones, choose the right lighting layers, plan circuits and outlet locations, and work smoothly with an electrician. The goal is to help you build a kitchen that looks better, works better, and feels right every day.
Why This Matters
Your kitchen uses more electricity than almost any other room in the house. Small appliances, task lighting, refrigeration, ventilation, and charging stations all compete for space and power. If you do not plan these changes early, you can end up with dark counters, overloaded circuits, and outlets hidden behind drawers or appliances.
Good planning also makes the kitchen easier to use. You want bright light over prep areas, softer ambient light for evenings, and switches placed where they make sense the first time you reach for them. A thoughtful electrical layout supports safety, convenience, and resale value. It also helps your contractor, cabinet installer, and electrician stay coordinated, which can save time and reduce change orders during the remodel.
Tools and Materials You’ll Need
- Floor plan of your current kitchen
- New kitchen layout or cabinet plan
- Tape measure
- Pencil and eraser
- Graph paper or printed layout sheets
- Painter’s tape for marking locations on walls and floors
- Notebook or digital notes app
- Appliance specification sheets
- Lighting fixture measurements and cut sheets
- List of small appliances you use every week
- Electrical code notes from your local building department
- Budget estimate for fixtures, wiring, switches, and labor
- Flashlight for checking dark zones and shadows
- Optional: laser measure for faster room mapping
Step-by-Step Guide on How to Plan Electrical and Lighting Changes in Kitchen Remodel
Step 1 – Study How You Use the Kitchen Now
Before you pick fixtures or move a single outlet, spend a few days watching how your current kitchen works. Notice where you prep food, where shadows fall, and which appliances always fight for plug space. Pay attention to the morning rush, the warm glow at dinner, and the dim corners that make chopping or reading labels harder than it should be.
Write down what frustrates you and what already works well. Maybe the microwave blocks useful counter space, or maybe the island needs charging access for phones and laptops. This real-life review gives you a stronger plan than guessing from a pretty inspiration photo.
The best layouts grow from your habits, not just from trends.
Step 2 – Map the Kitchen Into Work Zones
A kitchen works best when you divide it into zones. Think in terms of prep, cooking, cleaning, storage, and dining or gathering. Each zone has different power and lighting needs, and that is the heart of how to plan electrical and lighting changes in kitchen remodel projects without missing something important.
For example, the prep zone needs clear task lighting and easy access to countertop outlets. The cooking zone may need dedicated power for a range, wall oven, or microwave. The cleaning zone often needs lighting over the sink and power for the dishwasher or disposal.

Mark these zones on your plan. As you look at the drawing, imagine your feet moving across the floor and your hands reaching for switches, plugs, and appliances. That mental walkthrough often reveals gaps early.
Step 3 – List Every Appliance and Power Need
Now create a full appliance list. Include the obvious items like the refrigerator, range, hood, dishwasher, and microwave. Then add the smaller things people forget, such as the coffee maker, toaster, blender, air fryer, stand mixer, charging dock, and under-cabinet lighting transformer.
Next to each item, note whether it needs a dedicated circuit, a standard receptacle, or a special voltage. You do not need to size the wiring yourself, but you do need to know what must be powered and where it will sit. Manufacturer spec sheets help here because they show electrical needs, rough-in points, and clearance details.
This step also protects your budget. It is much easier to adjust the plan before rough-in than after tile, cabinets, and paint are finished.
Step 4 – Build a Layered Lighting Plan
Great kitchen lighting is never just one ceiling fixture. You need layers. Start with ambient lighting to fill the room with general brightness. Then add task lighting for work areas like counters, the sink, and the cooktop. Finish with accent lighting if you want display shelves, glass cabinets, or toe-kick glow.
As you plan, stand in the room and picture where your body blocks light. Overhead fixtures alone can cast shadows right where you chop, stir, and clean. Under-cabinet lighting solves that problem and makes counters feel crisp and usable.
Think about color temperature too. A kitchen usually feels best with lighting that looks clean and welcoming, not harsh and blue. Dimmers add flexibility, letting the room shift from bright work mode to a softer evening mood.
Step 5 – Plan Outlet and Switch Locations Carefully
Outlet planning is about convenience, but it is also about flow. You want receptacles where real life happens, not where they look neat on a sketch. Countertop outlets should support small appliances without leaving cords stretched across prep areas. Island outlets should be easy to reach but discreet. Pantry outlets can support charging stations, small appliances, or future upgrades.
Switches matter just as much. Place them where your hand naturally reaches when you enter the room. Group controls in a way that makes sense, especially if you have recessed lights, pendants, under-cabinet lights, and accent lighting.
A smart switch layout makes the room feel intuitive. You should not have to cross a dark kitchen to light it up or guess which switch controls what.
Step 6 – Coordinate the Plan With Cabinets, Plumbing, and Venting
Electrical planning cannot happen in isolation. Cabinet dimensions, plumbing lines, ductwork, windows, and beams all affect where fixtures, switches, and receptacles can go. A beautiful pendant plan may fail if it lands off-center from the island. An outlet may become useless if a pantry pullout or deep drawer blocks access.
Review your electrical plan alongside the cabinet elevations and appliance placement. Check where upper cabinets stop and where open shelving begins. Look at sink location, faucet height, and vent hood dimensions. These details shape lighting spacing and outlet placement more than many first-time remodelers expect.

This is often where plans get sharper. Once all trades are aligned, the kitchen begins to feel cohesive instead of patched together from separate decisions.
Step 7 – Review Circuit Capacity and Safety Requirements
This is the stage where professional input becomes essential. A kitchen has strict electrical code requirements because it combines water, heat, metal surfaces, and heavy appliance use. Your electrician will confirm dedicated circuits, GFCI protection, AFCI rules, lighting loads, and local code details.
Even as a beginner, you should understand the purpose behind these checks. Safe electrical planning reduces fire risk, prevents nuisance breaker trips, and makes sure your kitchen can handle both today’s appliances and future needs. That practical mindset is a big part of how to plan electrical and lighting changes in kitchen remodel work the right way.
Ask your electrician to explain the panel impact too. In some homes, the kitchen remodel may trigger service or panel upgrades. It is better to know that early than after demolition starts.
Step 8 – Mock Up the Layout Before Rough-In
Before the electrician begins rough-in wiring, test your plan in the actual room. Use painter’s tape to mark islands, cabinet edges, pendant centers, switch boxes, and outlet locations. Stand at the sink, walk to the refrigerator, and pretend to use the coffee station. Reach for the taped switch spots and imagine carrying groceries in with your elbows full.
This simple mock-up makes abstract measurements feel real. A pendant that looked perfect on paper may feel too low or too close together once you see it in space. An outlet near the backsplash may conflict with a shelf bracket or faucet line.
Make changes now, while they are cheap and easy. Once wiring is installed and walls close up, even small tweaks can cost time and money.
Common Mistakes
One common mistake is planning lighting too late. Many homeowners choose fixtures after cabinets and wiring are already set, which limits placement and leaves dark work surfaces. Good lighting starts with the layout, not the shopping list.
Another mistake is relying only on recessed ceiling lights. Recessed fixtures help with general illumination, but they do not replace task lighting. If you skip under-cabinet lights or fail to light the sink and cooktop properly, your counters can end up full of shadows.
A third issue is poor outlet placement. People often focus on code minimums and forget daily habits. That leads to cords across walkways, hidden receptacles behind drawers, or not enough plug access near coffee stations and islands.
Many first-time remodelers also underestimate appliance needs. A new steam oven, beverage fridge, or microwave drawer changes the load and layout. If those details show up late, the electrical plan may need expensive revisions.
Finally, some homeowners ignore dimmers and control zones. A kitchen should adapt to bright prep work, casual lunches, and quieter evenings. Without layered controls, the room can feel flat, harsh, and less comfortable than it should.
Expert Tips
Plan for one or two future needs, even if you do not install them now. You might want a beverage station, upgraded range, or extra charging area later, and a little foresight can save major rework.
Choose lighting by function first and style second. A striking pendant looks great, but it still needs the right brightness, height, and beam spread for the space below. Ask for fixture specifications before you buy.
Use dimmers on more circuits than you think you need. They give you better control, improve comfort, and help expensive fixtures feel more versatile. Also, label your switches clearly on the plan so your electrician, contractor, and cabinet team all work from the same roadmap.
Frequently Asked Questions
Do I need an electrician to plan kitchen electrical changes?
Yes, especially for final circuit design, wiring, load calculations, and code compliance. You can create the layout ideas and identify your needs, but a licensed electrician should review and execute the work. Kitchens have safety rules that affect outlets, lighting, appliances, and panel capacity, so professional oversight is important.
How many types of lighting should a kitchen have?
Most kitchens need at least three layers: ambient, task, and accent lighting. Ambient lights brighten the room overall. Task lights help you work safely at counters, sinks, and cooking areas. Accent lights add style and depth. This layered approach makes the kitchen more comfortable and much easier to use at different times of day.
Where should outlets go in a remodeled kitchen?
Outlets should support the way you actually use the room. That usually means accessible locations along countertops, at the island, and in spots for key appliances. Some kitchens also benefit from outlets in pantries or appliance garages. Exact spacing and protection requirements depend on local code, so confirm your layout with a licensed electrician.
Are under-cabinet lights worth adding?
Yes. Under-cabinet lights are one of the most useful upgrades in a kitchen remodel. They brighten your work surface, reduce shadows from overhead lights, and make the room feel cleaner and more polished. They also help at night when you want a softer glow instead of full ceiling brightness.
When should I finalize the electrical and lighting plan?
Finalize it before rough-in begins and ideally before cabinet orders are locked. Electrical locations depend on appliance sizes, cabinet dimensions, island shape, and lighting choices. The earlier you coordinate those details, the fewer surprises you will face during construction. Late changes often cost more and can delay the project.
Conclusion
A successful kitchen remodel is not just about finishes and color choices. It depends on power where you need it, light where you work, and controls that feel easy to use every day. When you take time to study your habits, map zones, list appliances, layer your lighting, and coordinate with your electrician, the whole project gets smoother.
The most important thing to remember about how to plan electrical and lighting changes in kitchen remodel projects is this: good decisions happen before walls close up. A clear plan protects your budget, supports safety, and creates a kitchen that feels bright, practical, and comfortable from morning coffee to late-night cleanup.
Start with a simple sketch, your appliance list, and a walkthrough of the room. Then bring that plan to your contractor or electrician and refine it before work begins. Small planning steps now can lead to a kitchen that works beautifully for years.

About
Nick Hall has spent the last seven years working at the intersection of kitchen design and home repair — first as a design assistant at a residential renovation studio, then as a freelance writer covering everything from cabinet layouts to leaky faucet fixes.
Her approach is simple: kitchens should look good and function well. That means she’s just as comfortable talking about color palettes and counter materials as she is walking readers through how to fix a wobbly cabinet hinge or troubleshoot a garbage disposal.
Nick has worked directly with homeowners on small-space kitchen makeovers, budget-conscious renovations, and the kind of everyday repairs that don’t need a contractor — just the right instructions. She writes from experience, not theory, and tests most of the fixes and tips she shares before publishing them.
When she’s not writing, Nick is usually hunting for mid-century kitchen finds at estate sales or helping friends plan their own renovations. She lives in Columbus, Ohio.