
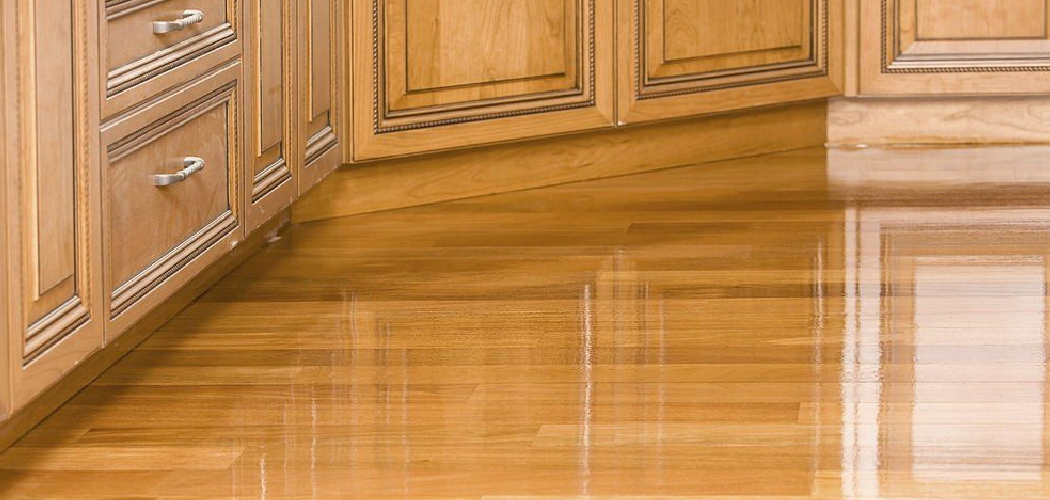
A clean tile floor makes your kitchen feel brighter, safer, and easier to enjoy. It also helps protect the surface from grease, grit, spills, and stains that can wear it down over time. If you are a first-time homeowner, the job may seem simple at first, but the wrong cleaner or too much water can leave behind haze, streaks, or even damaged grout. Learning how to clean kitchen floor tile the right way helps you build a routine that keeps the floor looking fresh without making the process harder than it needs to be.

This guide will walk you through a simple, beginner-friendly method for cleaning kitchen floor tile well and keeping it in good shape.
Why Cleaning Your Kitchen Floor Matters
Your kitchen floor deals with more than plain dust. It collects cooking oil, crumbs, muddy shoe prints, pet hair, and fine dirt that can act like sandpaper under your feet. When that buildup sits too long, tile can lose its clean finish and grout lines can start to look dark and dingy.
Regular cleaning also matters for hygiene. Food splashes and sticky spots can attract bacteria, odors, and pests if they are ignored. A clean floor lowers the chance of slips, especially when grease or wet spills spread across smooth tile. It also helps you spot small problems early, like cracked grout, loose tiles, or areas that stay damp. Good maintenance keeps your kitchen healthier, safer, and easier to care for in the long run.
Tools and Materials You’ll Need
Before you start, gather your supplies so you can move through the job without stopping.
- Broom, dust mop, or vacuum safe for hard floors
- Microfiber mop
- Bucket
- Warm water
- pH-neutral tile floor cleaner or mild dish soap
- Soft scrub brush or old toothbrush for grout lines
- Microfiber cloths or clean towels
- Spray bottle for spot cleaning
- Rubber gloves to protect your hands
- Dry mop pad or absorbent towel for drying the floor
- Optional: knee pads for comfort while cleaning edges or grout
Simple tools often work best. You do not need strong chemicals for routine tile cleaning, and a gentle approach is usually safer for both the tile surface and the grout.
Step-by-Step Guide on How to Clean Kitchen Floor Tile
Step 1 – Clear the Floor and Remove Loose Dirt
Start by moving lightweight items out of the way. Shift rugs, pet bowls, trash cans, and small chairs so you can reach the whole floor. If your kitchen table is hard to move, work around it now and clean under it later when you have help. This first step gives you a clear path and keeps you from pushing dirt into corners.
Next, sweep or vacuum the entire floor slowly. Focus on edges, under cabinets, and around the baseboards where crumbs and grit like to hide. You may hear the dry scratch of dirt moving across the tile, which is exactly what you want to remove before mopping. If you skip this step, loose debris can turn into muddy streaks once water hits the floor, and that makes the whole job take longer.

Step 2 – Spot-Treat Sticky Spills and Greasy Areas
Before you mop, deal with any obvious messes. Dried food splatters, sticky juice, cooking oil, or sauce drips need a little extra attention. Spray a small amount of cleaner or warm soapy water onto those spots and let it sit for a minute or two. This softens the residue so you do not have to scrub hard.
Use a microfiber cloth or soft sponge to wipe the area gently. For corners or grout lines near the stove, use a soft brush with light pressure. The goal is to lift the mess without scratching the tile or grinding grease deeper into the grout. In many kitchens, the area near the sink feels slightly tacky underfoot even when it looks clean. Taking care of these spots first is one of the easiest ways to improve your results when learning how to clean kitchen floor tile.
Step 3 – Mix a Gentle Cleaning Solution
Fill a bucket with warm water, then add your tile-safe cleaner according to the label. If you are using mild dish soap, only use a small amount. Too much soap can leave a film that dulls the tile and attracts more dirt later. The water should feel comfortably warm, not hot enough to be harsh on your hands or the floor.
A pH-neutral cleaner is a smart choice for most kitchen tile because it cleans well without wearing down the finish or weakening grout. Avoid mixing cleaners together, and stay away from bleach, ammonia, or acidic products unless the tile manufacturer specifically recommends them. Strong solutions may smell powerful, but they are often unnecessary for routine care. A mild cleaner, fresh water, and a microfiber mop usually do more than enough for everyday kitchen grime.
Step 4 – Mop in Small Sections
Dip your mop into the cleaning solution, then wring it out well. The mop should be damp, not dripping. Too much water can pool in grout lines, creep under tile edges, and leave the floor slow to dry. Work in small sections so you can control the moisture and see where you have cleaned.
Start at the far end of the kitchen and move toward the exit. Use smooth, overlapping strokes. On greasy areas, go over the section a second time rather than soaking it. As you mop, the tile should look lightly damp with a soft clean sheen, not flooded. If the water in your bucket starts to look cloudy or gray, replace it. Dirty water spreads grime around instead of lifting it away, and that is one reason some floors still look dull after cleaning.
Step 5 – Clean the Grout Lines Gently
Grout often holds the dirt that makes the whole floor look older than it is. Even if the tile surface is clean, dark grout can make the kitchen seem neglected. Dip a soft brush or old toothbrush into your cleaning solution and scrub the grout in short, gentle strokes. You do not need to press hard. Slow, steady passes work better and are less likely to wear down the grout.
Focus on high-traffic areas first, such as the path from the sink to the fridge and the space in front of the stove. You may notice the grout change from dull gray to a lighter, cleaner shade as the grime loosens. If a section still looks stained, let cleaner sit on it briefly, then scrub again. For many beginners, this is the step where how to clean kitchen floor tile starts to make sense, because the floor suddenly looks brighter and more even.

Step 6 – Rinse Away Residue
Once you have mopped and scrubbed, rinse the floor with clean water. This step matters more than many people think. Any leftover soap or cleaner can dry into a film that feels sticky, catches dirt, and leaves a cloudy finish. Empty your bucket, refill it with clean warm water, and use a freshly rinsed mop.
Go over the floor in the same small sections you used before. Keep the mop only lightly damp, and rinse it often. The tile should start to feel cleaner and smoother under the mop as residue lifts away. If the floor still feels slick or looks streaky when the water dries, do one more rinse. A proper rinse helps the natural color and finish of the tile show through instead of being hidden under cleaner buildup.
Step 7 – Dry the Floor Thoroughly
Do not let the floor air-dry completely on its own, especially if you used more than a light amount of water. Drying the surface helps prevent streaks, water spots, and slippery patches. Use a dry microfiber mop, clean towel, or absorbent cloth to remove leftover moisture. Start in one corner and work your way across the room.
Pay extra attention to grout lines, edges, and areas near cabinets where water can collect. The floor should feel dry under your shoes, not cool and damp. This step also gives you a final chance to inspect your work. You may notice one greasy patch or a bit of haze that needs a quick touch-up. Drying by hand takes a few extra minutes, but it leaves the tile looking cleaner and helps protect grout from staying wet too long.
Step 8 – Put Items Back and Set a Simple Routine
Once the floor is dry, return rugs, bins, and kitchen items to their places. Make sure the bottoms of trash cans, pet bowls, and chair legs are clean before setting them back down. Otherwise, you may place dirt right onto your freshly cleaned tile. If you use a rug near the sink, shake it out or wash it so it does not carry crumbs and moisture back onto the floor.
Now that the floor is clean, think about maintenance. Sweep several times a week if your kitchen gets heavy use, and mop regularly before grease and dirt build up again. Wipe spills as they happen so they do not dry into sticky patches. A simple routine keeps the floor from reaching the point where it needs deep scrubbing every time. For a beginner, consistency matters more than perfection.
Common Mistakes
One common mistake is using too much cleaner. Many first-time homeowners assume more soap means a deeper clean, but it usually leaves a sticky film that traps dust and dulls the tile. Another frequent problem is mopping before sweeping. When loose crumbs, pet hair, and grit stay on the floor, the mop pushes them around and creates a dirty layer instead of removing it.
Some people also use harsh products that are too strong for regular tile care. Vinegar, bleach, and abrasive powders may sound effective, but they can damage grout, strip finishes, or leave the floor looking uneven over time. Scrubbing too hard causes trouble as well. Aggressive brushing can wear down grout and make older lines look rough or patchy.
Too much water is another issue. A soaking wet mop can force moisture into grout lines and edges, which may lead to lingering dampness or mildew in problem spots. Finally, many people skip the rinse and dry steps. That shortcut often causes streaks, haze, and slippery patches that make the floor feel less clean than it should. Gentle products, controlled moisture, and a steady process almost always give better results than rushing through the job.
Expert Tips
Clean kitchen tile on a schedule instead of waiting until it looks dirty. Fine grease and dust build up slowly, and routine care is much easier than a deep clean after weeks of neglect. In most homes, sweeping a few times a week and mopping weekly keeps the floor in good shape.
Use two buckets if your kitchen floor gets especially dirty: one for cleaning solution and one for rinsing the mop. This helps keep dirty water off the floor. For grout that stains easily, consider sealing it after a thorough cleaning if the manufacturer allows it. A good seal can help block moisture and make future cleanup easier. Also, always test a new cleaner in a small hidden spot first so you do not risk discoloration.
Frequently Asked Questions
How often should I clean kitchen floor tile?
Most kitchens benefit from sweeping or dry mopping several times a week and wet mopping about once a week. If you cook often, have pets, or deal with a lot of foot traffic, you may need to clean more often. Quick spill cleanup also matters. Small daily habits help prevent grease, crumbs, and stains from building up.
Can I use vinegar on kitchen floor tile?
Vinegar is often suggested as a natural cleaner, but it is not the best choice for every tile floor. Its acidity can weaken grout and may harm some finishes over time. A pH-neutral cleaner or mild dish soap mixed with water is usually safer for routine cleaning. If you are unsure, check the tile manufacturer’s care instructions first.
What is the best mop for tile floors?
A microfiber mop is one of the best options for tile floors. It picks up dirt well, uses less water than a traditional string mop, and helps reduce streaks. It is also gentle on the tile surface and easy to rinse out. For beginners, microfiber mops are simple to use and make it easier to control how damp the floor gets.
How do I remove grease from kitchen tile?
Start by wiping up as much grease as you can with a cloth or paper towel. Then use warm water with a small amount of dish soap or a tile-safe degreasing cleaner. Let it sit briefly on the greasy spot, then wipe or scrub gently with a soft cloth or brush. Rinse the area well so no slippery residue stays behind.
Why does my tile floor still look dull after mopping?
A dull look usually comes from leftover residue, dirty mop water, or cleaner buildup. Using too much product is a common cause. Rinse the floor with clean water and dry it with a microfiber cloth or dry mop. If the haze remains, you may need to wash the floor again with less cleaner and change the water more often during mopping.
Conclusion
Cleaning kitchen tile does not have to be complicated. Once you break the job into simple steps, it becomes much easier to manage. Start by removing dry debris, treat sticky or greasy spots, use a gentle cleaning solution, mop in small sections, and give extra care to the grout. Then rinse and dry the floor so you do not leave behind streaks or residue.
The biggest lesson for beginners is that technique matters more than force. You do not need harsh chemicals or heavy scrubbing to get good results. A mild cleaner, the right tools, and a steady routine will keep your floor looking clean and lasting longer. If you stay consistent, the task gets faster every time. Now that you know how to clean kitchen floor tile, you can keep your kitchen fresher, safer, and easier to maintain with confidence.

About
Nick Hall has spent the last seven years working at the intersection of kitchen design and home repair — first as a design assistant at a residential renovation studio, then as a freelance writer covering everything from cabinet layouts to leaky faucet fixes.
Her approach is simple: kitchens should look good and function well. That means she’s just as comfortable talking about color palettes and counter materials as she is walking readers through how to fix a wobbly cabinet hinge or troubleshoot a garbage disposal.
Nick has worked directly with homeowners on small-space kitchen makeovers, budget-conscious renovations, and the kind of everyday repairs that don’t need a contractor — just the right instructions. She writes from experience, not theory, and tests most of the fixes and tips she shares before publishing them.
When she’s not writing, Nick is usually hunting for mid-century kitchen finds at estate sales or helping friends plan their own renovations. She lives in Columbus, Ohio.