
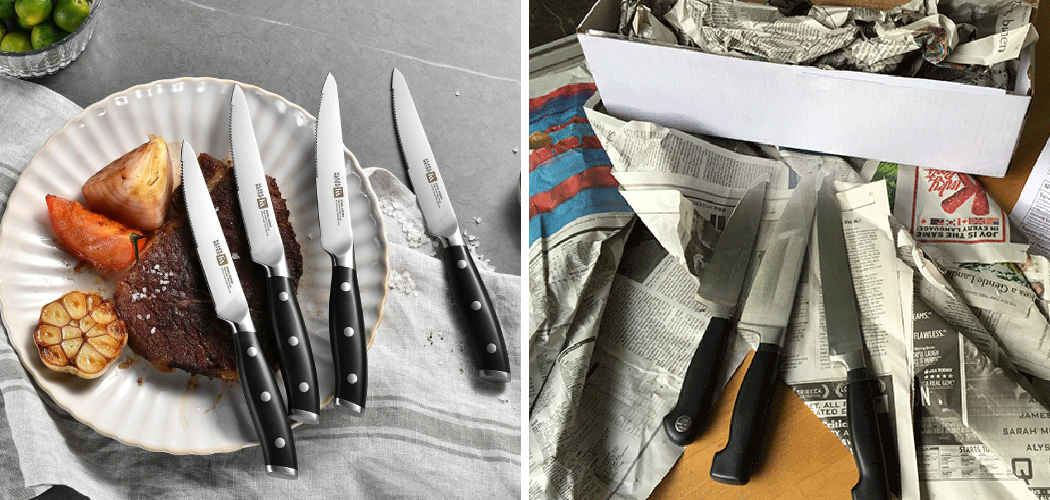
A worn-out chef’s knife or chipped paring knife may seem harmless once it stops working well, but tossing it loosely into the trash can put you, your family, and sanitation workers at risk. That is why learning how to dispose of kitchen knives matters more than most first-time users expect. A safe disposal process protects hands from cuts, keeps sharp blades from tearing through trash bags, and helps you choose the best option for recycling, donation, or disposal.

If you are dealing with old kitchen tools for the first time, the process is simple once you know the right steps. This guide will show you how to handle, wrap, label, and dispose of kitchen knives safely and responsibly.
Why Safe Knife Disposal Matters for Campers and Outdoor Beginners
Safe knife disposal is useful for more than home cooks. If you camp, hike, or spend time outdoors, you probably own utility knives, folding blades, or compact kitchen knives for food prep at camp. These tools wear down, rust, or get damaged over time, especially after exposure to moisture, dirt, and rough storage.
When you know how to retire a blade safely, you lower the risk of injury in your home, vehicle, backpack, or campsite gear bin. Outdoor beginners often store sharp tools with other supplies, which can lead to surprise cuts while packing or unpacking. Good disposal habits also help you avoid leaving unsafe metal waste in places where others may handle it later. In short, proper knife disposal supports safety, clean organization, and responsible outdoor living.
Tools and Materials You’ll Need
Before you start, gather a few simple items so you can secure the blade and handle it with confidence.
- A sturdy pair of work gloves
- Thick cardboard, such as from a shipping box or food package
- Strong tape, like packing tape or duct tape
- Heavy paper or several sheets of newspaper
- A marker for labeling the wrapped knife
- A rigid container if you are disposing of more than one knife
- A trash bag with decent tear resistance
- Optional: zip ties for bundling wrapping material more tightly
These basic materials help you cover the sharp edge, stabilize the blade, and reduce the chance of accidents during handling. Most people already have everything they need at home.
9 Step-by-Step Guide on How to Dispose of Kitchen Knives
Step 1 – Inspect the knife and decide whether disposal is necessary
Start by looking closely at the knife in good lighting. Check the edge, tip, and handle. A blade that is badly chipped, bent, cracked, heavily rusted, or loose in the handle is usually no longer safe to use. If the knife only feels dull, you may be able to sharpen it instead of throwing it away.
Run your eyes over the whole knife without touching the blade directly. Notice whether the metal looks stained, pitted, or rough. If the handle wiggles or the blade has damage that affects control, disposal is often the safer choice. This first check helps you avoid getting rid of a knife that could still be useful, while also keeping unsafe tools out of your drawer.
Step 2 – Clean and dry the knife before wrapping
Even if the knife is headed for the trash, clean it first. Wash off grease, food bits, or sticky residue with warm water and dish soap. A dirty blade can smell bad in the trash, attract pests, and make the wrapping harder to secure. Drying it well also reduces the chance of rust flakes or moisture weakening the paper and tape.

Use a towel and hold the knife carefully by the handle and the dull side of the spine. Make sure the blade is fully dry before moving on. A dry knife feels easier to grip and is much less likely to slip while you wrap it. This small step makes the rest of the job cleaner, safer, and more controlled.
Step 3 – Cover the blade with thick cardboard
Cut a piece of cardboard long enough to cover the full blade, including the tip. Fold the cardboard over the sharp edge or sandwich the blade between two pieces. The goal is to create a firm barrier that stops the metal from poking through wrapping later.
As you do this, keep the knife flat on a table instead of holding it in the air. You want the blade stable and still. The cardboard should feel thick and solid, not soft or flimsy. If you can still feel the point pressing through, add another layer. This is one of the most important parts of how to dispose of kitchen knives, because the blade cover is what protects anyone who handles the package afterward.
Step 4 – Tape the blade securely from end to end
Once the cardboard is in place, tape it firmly so it cannot slide off. Wrap tape around the covered blade several times, especially near the tip and base. Press the tape down well so there are no loose flaps. A tight seal keeps the covering from shifting if the knife moves around inside the trash.
Do not tape only the middle and assume it will hold. The point and cutting edge need full control. If the knife is long or heavy, add extra tape along the length for support. When done right, the wrapped blade should feel stable in your hand, with no rattling, slipping, or exposed metal. Take your time here. Strong wrapping matters more than speed.
Step 5 – Wrap the whole knife in paper or place it in a rigid container
After the blade is secured, add one more outer layer. You can wrap the full knife in thick paper or newspaper, or place it inside a rigid container such as an empty oatmeal canister, small box, or plastic food tub with a lid. This extra layer helps prevent punctures and makes the knife less obvious to anyone reaching into the trash.
If you are disposing of several knives, a rigid container is usually the better choice. Keep them separated if possible so the blades do not shift against each other. This part of how to dispose of kitchen knives adds a second line of protection. Think of it as backup safety for the moments you cannot control, such as heavy trash bags being lifted, compacted, or dropped.
Step 6 – Label the package clearly
Use a marker to write something simple and direct on the outer wrapping or container. “Sharp object” or “Kitchen knife inside” works well. The label warns anyone handling the item to use care, even if the blade is fully covered.
Write large enough that it is easy to spot at a glance. If the outer layer is dark, use a light label or tape a piece of paper to it first. This may feel like a small extra step, but it shows respect for other people’s safety. Trash collectors and household members should not have to guess what is inside a wrapped item. Clear labeling makes the whole process more responsible and reduces the chance of rough handling.
Step 7 – Check local disposal and recycling options
Before you place the knife in your trash bin, look up your local rules. Some towns allow wrapped knives in household garbage, while others may prefer a metal recycling drop-off, scrap metal site, or household hazardous waste event. Rules vary by area, so a quick check can save you trouble.
You may also find that a damaged knife with a metal blade can go to a recycling center if the non-metal parts are removed. In some cases, a knife that is still safe but no longer useful to you could be accepted by a tool reuse group, culinary school, or community workshop. Local guidance helps you choose the safest and most responsible method instead of guessing.
Step 8 – Place the wrapped knife carefully in the trash
If your local rules allow household disposal, place the wrapped knife gently into the center of the trash bag, not near the top or sides. This reduces the chance of the blade pressing outward if the bag shifts. Try to surround it with softer trash, such as paper towels, food packaging, or other light waste that can cushion the package.
Avoid overstuffed bags, since tight pressure can force sharp items outward. If the bag already feels stretched or heavy, start a fresh one. Once inside, tie the bag securely and carry it from the bottom. You want the package stable, padded, and far from the outer surface of the bag. A careful final placement lowers the risk of punctures and surprise injuries.
Step 9 – Dispose of multiple knives with extra caution
When you have several old knives to remove at once, do not bundle them loosely together. Wrap each blade on its own first. Then place the wrapped knives into a sturdy box or rigid container and tape that container shut. The box should not sag, split, or allow the knives to slide around inside.

Multiple blades create more weight, more points of pressure, and more chances for something to shift. A solid container keeps the load organized and easier to handle. If the collection includes large chef’s knives, serrated blades, or broken pieces, add extra cardboard between them. Think in layers and pressure points. The safer the packaging, the less likely anything inside will break through during transport or collection.
Common Mistakes When Disposing of Kitchen Knives
One common mistake is dropping a knife straight into the trash without any covering at all. Even if the blade seems dull, it can still cut skin or rip through a garbage bag. Another mistake is wrapping the blade in only a thin grocery bag or a single sheet of paper. That kind of material tears fast and gives very little real protection.
Some people also forget to dry the knife before wrapping it. Moisture can weaken paper, loosen tape, and make the knife slippery while you work. Another problem is leaving the tip exposed by using cardboard that is too short. The point is often the part most likely to poke through, so it needs full coverage.
A final mistake is assuming disposal rules are the same everywhere. Local waste systems differ, and some areas offer better options for metal recycling or safe drop-off. If you skip that step, you may miss an easier or more responsible method. Good knife disposal is not hard, but it does depend on care, strong wrapping, and attention to detail.
Expert Tips
If you want the safest results, work on a flat counter with good light and no distractions. Keep pets and children away until the knife is fully wrapped and out of reach. A calm setup helps you focus on hand placement and avoid rushed movements.
For larger kitchen knives, use double cardboard around the tip and edge. Serrated knives deserve extra care because their uneven edges can catch and tear wrapping more easily than a straight blade. If the handle is broken, hold the knife with a towel while you secure the blade rather than trying to grip it tightly.
If you replace knives often, keep a small disposal kit at home with tape, cardboard, and a marker. Having the right materials ready makes safe disposal much easier.
Frequently Asked Questions
Can I throw kitchen knives directly in the trash?
You should not throw kitchen knives directly into the trash without securing them first. Even a dull blade can cut through a bag or injure someone reaching inside. Always cover the blade with thick cardboard, tape it well, and add an outer layer or container before placing it in the garbage.
Can kitchen knives be recycled?
Some kitchen knives can be recycled as scrap metal, especially if the blade is mostly metal and your local recycling center accepts it. Rules vary by location, so check with your town or a nearby metal recycler first. If the knife has mixed materials, such as plastic or wood handles, that may affect how it needs to be processed.
Is it better to donate old kitchen knives instead of throwing them away?
If the knife is still safe and usable, donation can be a better option than disposal. A knife that only needs sharpening may still be useful to someone else. However, do not donate knives with loose handles, cracks, deep rust, or bent blades, since those defects can make them unsafe for the next user.
What should I do with a broken knife blade?
Treat a broken knife blade as especially dangerous because the fractured edges can be jagged and unpredictable. Wrap each broken piece separately in cardboard and tape, then place the parts into a rigid container. Label the outside clearly so anyone handling the package knows it contains sharp metal fragments.
How do I dispose of several knives at once?
Wrap each knife individually first, even if you plan to place them in one box. After each blade is covered and taped, put them in a strong container and fill empty space so they do not shift around. Seal the container, label it clearly, and then follow your local trash or recycling rules for final disposal.
Conclusion
Getting rid of old blades the right way is a small task that makes a big difference. When you inspect the knife, clean it, cover the blade with cardboard, tape it tightly, add a second layer, and label it clearly, you lower the risk of cuts and punctures at every stage. You also give yourself a chance to explore better options, such as scrap metal recycling or donation when a knife is still usable.
The key is to slow down and treat every blade with respect, even if it looks worn out. Sharp tools can stay dangerous long after they stop being useful in the kitchen or at camp. Once you understand how to dispose of kitchen knives, the process becomes simple, safe, and repeatable. Use these steps each time you retire an old knife, and you will protect yourself, your household, and anyone else who handles your waste.

About
Nick Hall has spent the last seven years working at the intersection of kitchen design and home repair — first as a design assistant at a residential renovation studio, then as a freelance writer covering everything from cabinet layouts to leaky faucet fixes.
Her approach is simple: kitchens should look good and function well. That means she’s just as comfortable talking about color palettes and counter materials as she is walking readers through how to fix a wobbly cabinet hinge or troubleshoot a garbage disposal.
Nick has worked directly with homeowners on small-space kitchen makeovers, budget-conscious renovations, and the kind of everyday repairs that don’t need a contractor — just the right instructions. She writes from experience, not theory, and tests most of the fixes and tips she shares before publishing them.
When she’s not writing, Nick is usually hunting for mid-century kitchen finds at estate sales or helping friends plan their own renovations. She lives in Columbus, Ohio.