
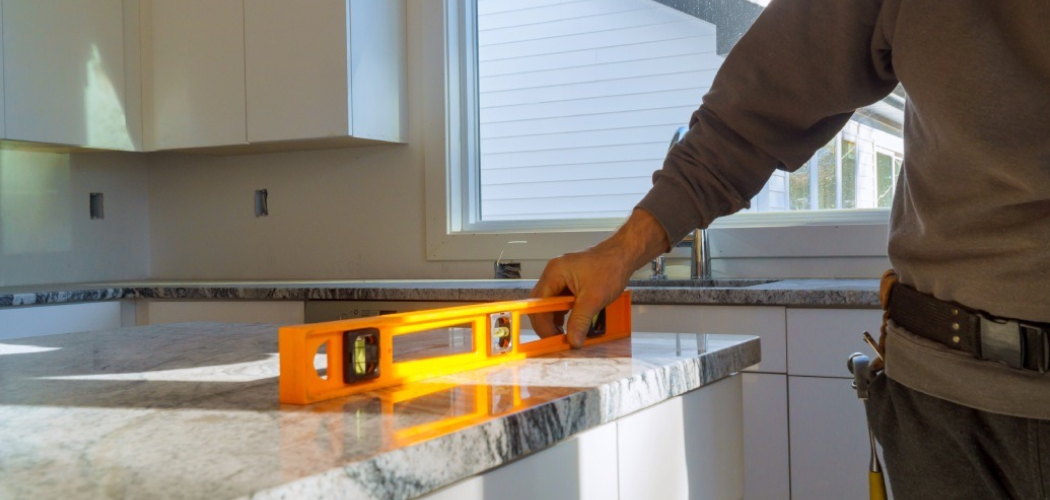
A tile countertop can look solid and permanent, but it comes apart in layers when you know what to expect. The job usually involves grout, tile, thinset mortar, cement backer board or plywood substrate, trim, caulk, and screws hidden near cabinet frames. If you want to learn how to remove kitchen tile countertop, the safest path is to work slowly, protect nearby surfaces, and remove each layer in the right order.

This project is messy, loud, and dusty, but it is very doable for a careful beginner with basic tools. You do not need to be a remodeling expert to understand the process.
This guide explains how to remove the tile surface, detach the countertop base, and prepare the area for a clean replacement.
Why Learning to Remove a Kitchen Tile Countertop Is Useful
Learning this skill gives you more control over kitchen upgrades, repairs, and budget-friendly renovations. Homeowners can remove cracked tile, damaged grout, swollen substrate, or outdated surfaces before installing laminate replacement, butcher block, stone, or a new tile system.
DIY beginners also learn how countertops connect to cabinets, backsplashes, walls, and plumbing fixtures. That knowledge helps you avoid damage during future projects.
Renters should only do this work with written permission, but the skill still helps you understand repair needs. Campers and outdoor beginners can use the same process when updating cabin kitchens, RV-style prep spaces, outdoor cooking areas, utility counters, and off-grid setups where tile tops often crack from moisture, movement, or temperature changes.
Tools and Materials You’ll Need
Gather everything before you start. Tile countertop removal creates sharp pieces, dust, and heavy debris, so safety and cleanup tools matter as much as demolition tools.
- Safety glasses
- Work gloves
- Dust mask or respirator
- Long sleeves and sturdy shoes
- Drop cloth or plastic sheeting
- Painter’s tape
- Utility knife
- Pry bar
- Hammer
- Cold chisel or masonry chisel
- Oscillating tool
- Screwdriver or drill
- Shop vacuum
- Bucket or contractor bags for demolition debris
- Putty knife or scraper
- Adjustable wrench, if plumbing needs to be disconnected
- Optional convenience item: knee pads for longer work sessions
You may also need a circular saw or reciprocating saw if the countertop substrate must be cut into smaller sections.
8 Step-by-Step Guide on How to Remove Kitchen Tile Countertop
Step 1 – Shut Off Utilities and Check Nearby Connections
Start by looking under the sink and inside nearby cabinets. If the tile countertop includes a sink, cooktop, garbage disposal switch, or outlet, shut off the water or power before touching anything. Turn water valves clockwise, then test the faucet to confirm the flow has stopped.

For electrical items, switch off the correct breaker and use a tester if you have one. Tile dust and loose tools do not mix well with live outlets.
This is also a good time to take photos. They help you remember where plumbing lines, sink clips, and countertop seams were before the mess begins.
Step 2 – Clear the Workspace and Remove Loose Items
Remove everything from the countertop, drawers, and upper cabinets near the work zone. Tile chips can bounce farther than you expect, and dust will settle on dishes, small appliances, and food containers.
Set up a clear path to carry debris outside. Broken ceramic tile is sharp, heavy, and awkward in trash bags. You will work faster if you do not need to step around chairs, rugs, pet bowls, or storage bins.
When planning how to remove kitchen tile countertop, treat cleanup as part of the job from the beginning. A clean work zone helps prevent slips, cuts, and damaged finishes.
Step 3 – Protect Cabinets, Floors, and Adjacent Surfaces
Cover the floor with a drop cloth, cardboard, or plastic sheeting. Tape protection along cabinet faces, nearby appliances, and wall edges. The goal is not to make the area pretty; it is to absorb chips and scratches before they reach finished surfaces.
Pay close attention to cabinet frames. A pry bar can dent wood quickly if it slips. Place a scrap board between the tool and cabinet whenever you need leverage.
Seal doorways with plastic if dust control matters in the rest of the home. Tile and thinset mortar create a gritty powder that feels rough under your shoes and spreads fast.
Step 4 – Cut Caulk, Trim, and Backsplash Seams
Use a sharp utility knife to cut through caulk where the countertop meets the wall, backsplash, sink rim, or side panels. Go slowly and make more than one pass if the bead is thick. You may feel the blade drag through rubbery silicone or dry, brittle caulk.
Remove edge trim, wood molding, or metal strips next. An oscillating tool works well for stubborn seams and tight corners. If there is a tile backsplash, score the grout lines where the backsplash meets the counter.
This step reduces the chance of tearing drywall, splintering trim, or cracking wall tile you plan to keep.
Step 5 – Break the First Tiles and Open a Starting Point
Put on safety glasses and gloves before breaking tile. Start near an edge, sink cutout, or already cracked tile if possible. Place a chisel on a grout line, then tap it with a hammer until the tile loosens.
The first few pieces are usually the hardest. Once you expose an edge, you can slide the chisel or pry bar under nearby tiles and lift them with less force. Expect sharp cracking sounds, gritty dust, and small shards.
Do not swing wildly. Controlled taps protect the cabinet frames and help you understand how firmly the tile is bonded.
Step 6 – Lift Tile and Remove Thinset Mortar
Work across the countertop in small sections. Follow grout lines when you can, since they often break easier than the tile face. Some tiles will pop off cleanly, while others will come up with chunks of thinset mortar or backer board attached.
Use the pry bar at a low angle. If you push straight down, you can gouge the plywood substrate or transfer force into the cabinets below.
As you continue how to remove kitchen tile countertop, pause often to vacuum loose dust and chips. A shop vacuum keeps your view clear and lowers the amount of grit you track through the room.
Step 7 – Detach the Countertop Substrate From the Cabinets
After the tile surface and most mortar are gone, inspect the layer underneath. Many tile counters sit on cement backer board over plywood substrate. Others use mortar over plywood or an older countertop base.
Look inside the cabinets for screws driven up through corner braces or mounting rails. Remove them with a drill or screwdriver. If the substrate is glued down, use a pry bar carefully and work in small sections.
Large pieces can be heavy. Cut the base into manageable sections if needed, but check for plumbing, wiring, and cabinet supports before using any saw.
Step 8 – Remove Backsplash Edges and Prep for Replacement
If the backsplash is part of the old tile countertop, remove it last. Start at an exposed edge and use a chisel or oscillating tool to loosen tiles from the wall. Drywall damage is common, so move slowly if you plan to patch rather than replace the wall surface.

Carry out debris in small loads. Broken tile and mortar can tear thin bags, so use contractor bags or buckets.
Finish by scraping leftover adhesive, vacuuming dust, and wiping cabinet tops. Check that cabinet frames are level, solid, and dry. A clean, stable base makes the next countertop installation safer and better looking.
Common Mistakes When Removing a Kitchen Tile Countertop
One common mistake is starting demolition before checking utilities. Water lines, electrical outlets, cooktop wiring, and disposal switches may sit close to the countertop. If you skip this step, you risk leaks, shock, or damage that costs more than the countertop project itself.
Another mistake is using too much force too early. Tile feels tough, but cabinets, drywall, and sink edges can damage easily. Strong hammer blows may crack tiles faster, but they can also split cabinet rails or tear a backsplash wall.
Many beginners also forget dust control. Thinset mortar and old grout create fine powder that spreads into nearby rooms. A drop cloth, plastic sheeting, closed doors, and a shop vacuum make the job much cleaner.
A fourth mistake is prying against finished cabinet faces without protection. Always use a scrap board when applying leverage near wood surfaces.
Finally, do not assume the countertop will lift out in one piece. Tile, mortar, cement backer board, and plywood can be very heavy. Smaller sections are safer to carry and easier to control.
Expert Tips
Work from the weakest point, not the most visible point. A cracked tile, open edge, sink cutout, or loose grout line gives you a better starting place than the middle of a solid counter.
Keep your chisel angle low. This helps lift tile instead of driving force down into the substrate and cabinets. If the tool bounces or squeals against mortar, adjust your angle and use lighter taps.
Sort debris as you go. Tile shards, screws, trim, and dusty mortar piles become harder to manage when mixed together. Also, stop every 20 to 30 minutes to vacuum. Clean visibility helps you spot hidden fasteners, seams, and damage before they cause trouble.
Frequently Asked Questions
Can I Remove a Tile Countertop Without Damaging the Cabinets?
Yes, but you need patience and protection. Cut all caulk seams, remove visible screws, and pry slowly with a scrap board between the tool and cabinet frame. Avoid heavy blows near cabinet rails. If the substrate is glued down, work in short sections instead of trying to lift the whole countertop at once.
Do I Need to Remove the Sink First?
In most cases, yes, removing the sink makes the job easier and safer. Shut off the water, disconnect supply lines and drain parts, then release sink clips or cut the seal around the rim. Some projects allow you to work around the sink, but it often blocks access and adds weight.
What Is Under a Kitchen Tile Countertop?
Common layers include ceramic or porcelain tile, grout, thinset mortar, cement backer board, and plywood substrate. Older counters may have tile set directly over plywood or over a previous laminate surface. The exact setup affects how easily the tile breaks loose and how much scraping or cutting you need to do.
How Do I Control Dust During Tile Countertop Removal?
Use plastic sheeting to close off the work area, cover floors with drop cloths, and vacuum often with a shop vacuum. Wear a dust mask or respirator, especially when removing mortar or cutting substrate. Lightly misting debris can reduce dust, but do not soak cabinets or electrical areas.
Can I Install a New Countertop Right After Removal?
Sometimes, but only if the cabinets are clean, dry, level, and structurally sound. After demolition, inspect the cabinet frames for loose screws, water damage, swelling, or broken supports. Remove old adhesive and high spots. A flat, stable base is essential before installing laminate, wood, stone, or new tile.
Conclusion
Removing a tile countertop takes planning, but the process becomes much less intimidating when you treat it as a series of simple layers. First, shut off utilities if needed. Then clear the area, protect nearby surfaces, cut caulk and trim, break the tile carefully, remove mortar, detach the substrate, and clean the base for replacement.
The key is control. Use the right tools, wear safety gear, manage dust, and avoid forcing parts that may still be attached by screws, glue, or hidden seams. Slow work protects your cabinets and gives you a better surface for the next countertop.
Once you understand how to remove kitchen tile countertop, you can approach kitchen updates, cabin repairs, RV-style prep spaces, and outdoor cooking projects with more confidence. Take your time, stay organized, and let each layer guide your next move.

About
Nick Hall has spent the last seven years working at the intersection of kitchen design and home repair — first as a design assistant at a residential renovation studio, then as a freelance writer covering everything from cabinet layouts to leaky faucet fixes.
Her approach is simple: kitchens should look good and function well. That means she’s just as comfortable talking about color palettes and counter materials as she is walking readers through how to fix a wobbly cabinet hinge or troubleshoot a garbage disposal.
Nick has worked directly with homeowners on small-space kitchen makeovers, budget-conscious renovations, and the kind of everyday repairs that don’t need a contractor — just the right instructions. She writes from experience, not theory, and tests most of the fixes and tips she shares before publishing them.
When she’s not writing, Nick is usually hunting for mid-century kitchen finds at estate sales or helping friends plan their own renovations. She lives in Columbus, Ohio.