
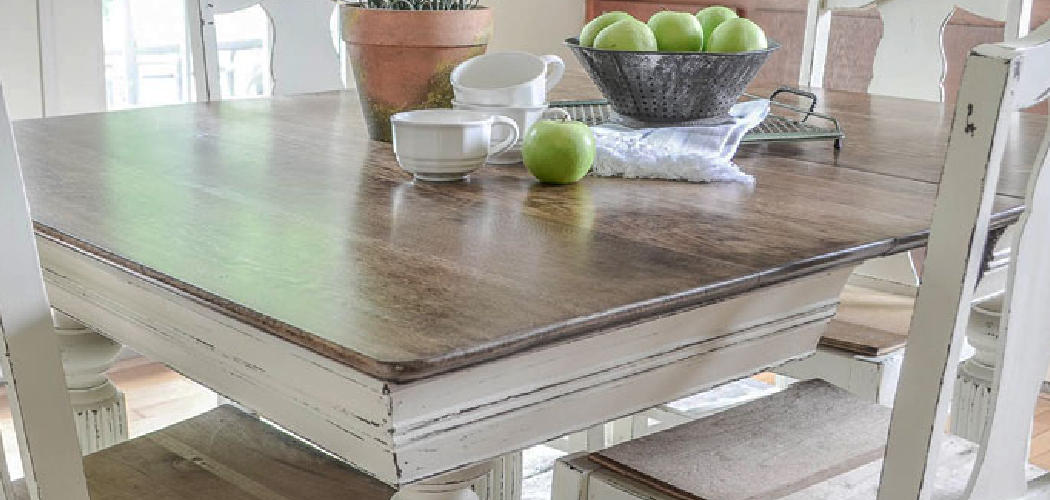

A kitchen table works hard every day. It handles hot plates, coffee mugs, homework, craft projects, family meals, and the occasional spill that no one notices until later. Over time, the finish can look dull, scratched, stained, or dated, even if the table itself is still solid.
Learning how to paint kitchen table is a practical way to refresh your space without buying new furniture. With the right prep, paint, and protective topcoat, you can turn a worn table into a clean, durable surface that fits your home, cabin, RV, or outdoor dining setup.
This guide walks you through the full beginner-friendly process, from cleaning and sanding to painting, sealing, and curing.
Why Painting a Kitchen Table Matters
Painting a kitchen table matters because it saves money, reduces waste, and gives you control over the look and feel of your space. A solid table with scratches or an outdated stain may only need a careful furniture refresh, not replacement.
This skill is especially useful for campers and outdoor beginners. Cabins, RV dining setups, folding tables, and outdoor meal prep surfaces often take extra wear from moisture, sunlight, dirt, and frequent packing. A fresh painted finish can make these pieces easier to wipe down and more pleasant to use.
For small homes, apartments, and mobile spaces, one refreshed table can serve many roles. It can be a dining spot, prep station, desk, and game table, all with better durability and easy upkeep.
Tools and Materials You’ll Need
Gather everything before you start so the project moves smoothly. Choose products that match your table material, the look you want, and how much daily use the surface gets.
- Degreaser or mild dish soap
- Clean rags or microfiber cloths
- Screwdriver for removing hardware or table legs
- Painter’s tape
- Drop cloth or plastic sheeting
- Sandpaper in medium and fine grits
- Sanding block or orbital sander
- Tack cloth
- Bonding primer
- Chalk paint, latex paint, or enamel paint
- Quality angled brush
- Small foam roller
- Paint tray
- Polyurethane or clear protective topcoat
- Optional convenience item: paint pyramids or small blocks to lift removable parts while painting
Step-by-Step Guide on How to Paint Kitchen Table
Step 1 – Choose the Right Workspace
Pick a clean, dry, well-ventilated area before you open any paint. A garage with the door cracked, a covered porch, or a room with open windows can work well. You want fresh air, steady light, and enough space to move around the table without brushing against wet edges.
If you are learning how to paint kitchen table for the first time, do not rush this setup. Lay down a drop cloth, move nearby items away, and check the temperature on the paint label. Paint behaves best when the air is not too cold, hot, or damp.
Good lighting helps you see brush marks, drips, and missed spots before they dry.
Step 2 – Clean Away Grease and Grime

A kitchen table may look clean, but it often holds invisible grease, wax, fingerprints, and food residue. Paint will not stick well to that layer. Wash the table with degreaser or warm water and mild dish soap, then wipe it with a clean damp cloth.
Pay close attention to corners, edges, carved details, and the area where hands often rest. These spots collect oils that can cause primer to peel later. Let the table dry fully before sanding.
Run your hand over the surface after cleaning. It should feel smooth, dry, and free of sticky patches.
Step 3 – Sand the Surface for Better Grip
Sanding helps primer grab the old finish. You do not always need to remove every bit of stain or paint, but you do need to dull any shiny surface. Use medium-grit sandpaper first, then follow with fine-grit paper for a smoother feel.
Sand with the wood grain when possible. This keeps scratches less visible and helps the final finish look cleaner. If your table has rounded legs or detailed trim, fold the sandpaper and work slowly by hand.
After sanding, the surface should feel slightly rough, not glossy. Wipe away dust with a vacuum, clean rag, and tack cloth.
Step 4 – Repair Small Flaws Before Priming
Now look for dents, deep scratches, loose joints, or chipped corners. Small flaws may show more after painting, especially with a satin finish or darker color. Fill holes or gouges with wood filler, then let it dry as directed.

Sand the repaired spots until they blend into the surrounding surface. Close your eyes and run your fingers across the repair. If you can feel a ridge, you may see it under paint.
This is also a good time to tighten screws or remove wobbly hardware. A fresh finish looks better on a stable table.
Step 5 – Apply a Primer That Matches the Table
Primer creates the bridge between the old surface and the new paint. Use a bonding primer for glossy, stained, laminate, or previously sealed tables. If the wood has knots or dark stain, choose a stain-blocking primer to reduce bleed-through.
Apply a thin, even coat with a brush on corners and a small roller on flat areas. Avoid thick primer because it can leave ridges and slow the drying process. Let it dry fully before adding another coat or sanding lightly.
A properly primed table may look uneven at first. That is normal. Primer is for grip, not beauty.
Step 6 – Paint Thin Coats for a Smooth Finish
Thin coats create a stronger and smoother result than one heavy coat. Use an angled brush for edges and legs, then roll the tabletop with a small foam roller. This helps reduce brush marks across the wide flat surface.
A key part of how to paint kitchen table is patience between coats. Let each layer dry as directed, then inspect the surface in angled light. If you feel tiny bumps, sand very lightly with fine-grit paper and wipe with a tack cloth.
Chalk paint gives a soft matte finish, latex paint offers easy cleanup, and enamel creates a harder painted surface.
Step 7 – Add Style With Color and Finish Choices
Your paint color changes the whole mood of the room. White, cream, soft gray, sage, navy, and black are popular because they pair well with many kitchens. For cabins and RV spaces, earthy colors hide dust better and feel warm against wood, canvas, and metal.
You can also create a distressed finish by lightly sanding edges after the paint dries. This works well on farmhouse tables or outdoor-style dining setups. If you prefer a clean modern look, keep the finish even and smooth.
Choose matte finish for a soft look, satin finish for gentle sheen, or semi-gloss for easier wiping.
Step 8 – Seal and Cure the Table Properly
A kitchen table needs protection because it sees daily contact. Once the paint dries, apply a clear topcoat such as water-based polyurethane. Use thin coats, follow the wood grain, and avoid overworking the surface once the sealer starts to set.
Let each coat dry before adding the next one. Two to three coats usually give better durability for meals, crafts, and outdoor meal prep. The table may feel dry quickly, but curing time takes longer.
Treat the surface gently for the first few weeks. Use placemats, avoid heavy objects, and wipe spills fast while the finish hardens.
Common Mistakes When Painting a Kitchen Table
One common mistake is skipping the cleaning step. Grease and old polish can sit on the surface even when the table looks fine. If you paint over that residue, the finish may chip, peel, or feel tacky. Always clean before sanding and priming.
Another mistake is sanding too little or too aggressively. A glossy finish needs enough scuffing for primer to stick, but deep sanding scratches can show through paint. Use steady pressure and work with the wood grain whenever possible.
Many beginners also apply paint too thick. Thick coats can trap moisture, create brush marks, and extend drying time. Several thin coats look smoother and last longer.
Poor topcoat choices cause problems too. A table that handles meals, cups, and cleaning needs a protective finish. Paint alone may not hold up to daily wiping.
Finally, people often use the table too soon. Dry paint is not the same as cured paint. Give the finish time to harden before full use.
Expert Tips
Test your paint and topcoat on the underside of the table or a hidden area before committing. This helps you see color, sheen, adhesion, and texture before the main surface is covered.
Use long, even strokes on the tabletop and keep a wet edge as you work. This reduces lap marks and gives the finish a more professional look. If you see a drip, smooth it right away instead of waiting.
Match your finish to your lifestyle. For busy families, cabins, and RV dining tables, durability matters more than a perfect decorative effect. A satin polyurethane topcoat is often a smart choice because it balances easy cleaning with a soft, natural look.
Frequently Asked Questions
Do I Have to Sand a Kitchen Table Before Painting?
Yes, in most cases you should sand before painting. Sanding removes shine and gives primer a better surface to grip. You do not need to strip the table to bare wood unless the old finish is failing. A light, even scuff with medium and fine sandpaper is usually enough for a sturdy, long-lasting paint job.
What Kind of Paint Works Best on a Kitchen Table?
Enamel paint, high-quality latex paint, and chalk paint can all work, but they need the right prep and sealer. Enamel is often the most durable on its own. Chalk paint gives a soft look but needs a strong topcoat. Latex paint is easy to use and clean up, especially when sealed with polyurethane.
How Long Should a Painted Table Cure Before Use?
A painted table may feel dry within hours, but full curing often takes days or weeks. Follow the paint and topcoat labels for exact timing. During the curing period, use the table gently. Avoid hot dishes, heavy objects, harsh cleaners, and trapped moisture so the finish can harden without dents or marks.
Can I Paint a Laminate Kitchen Table?
Yes, you can paint a laminate table if you use the right prep. Clean it well, sand the shiny surface lightly, and apply a bonding primer made for slick materials. Laminate does not absorb paint like wood, so adhesion matters. Thin coats and a durable topcoat help the finish last longer.
How Do I Keep a Painted Kitchen Table From Chipping?
Prevent chips by cleaning, sanding, priming, and sealing the surface properly. Use thin coats of paint and let each layer dry fully. Add two or three coats of protective topcoat on the tabletop. After curing, clean with mild soap and a soft cloth instead of abrasive pads or strong chemical cleaners.
Conclusion
Painting a kitchen table is a beginner-friendly project when you follow the right order. Clean first, sand carefully, repair small flaws, use a strong primer, apply thin paint coats, and protect the finish with a durable topcoat. Each step helps the surface look better and stand up to real daily use.
Now that you know how to paint kitchen table, start with a simple plan and give yourself enough time. Do not rush drying or curing, because patience is what turns a quick color change into a lasting furniture refresh.
Whether your table sits in a busy kitchen, tiny cabin, RV nook, or covered outdoor eating area, a fresh finish can make it feel useful again. With basic tools and steady work, you can create a clean, sturdy table you enjoy using every day.

About
Nick Hall has spent the last seven years working at the intersection of kitchen design and home repair — first as a design assistant at a residential renovation studio, then as a freelance writer covering everything from cabinet layouts to leaky faucet fixes.
Her approach is simple: kitchens should look good and function well. That means she’s just as comfortable talking about color palettes and counter materials as she is walking readers through how to fix a wobbly cabinet hinge or troubleshoot a garbage disposal.
Nick has worked directly with homeowners on small-space kitchen makeovers, budget-conscious renovations, and the kind of everyday repairs that don’t need a contractor — just the right instructions. She writes from experience, not theory, and tests most of the fixes and tips she shares before publishing them.
When she’s not writing, Nick is usually hunting for mid-century kitchen finds at estate sales or helping friends plan their own renovations. She lives in Columbus, Ohio.