
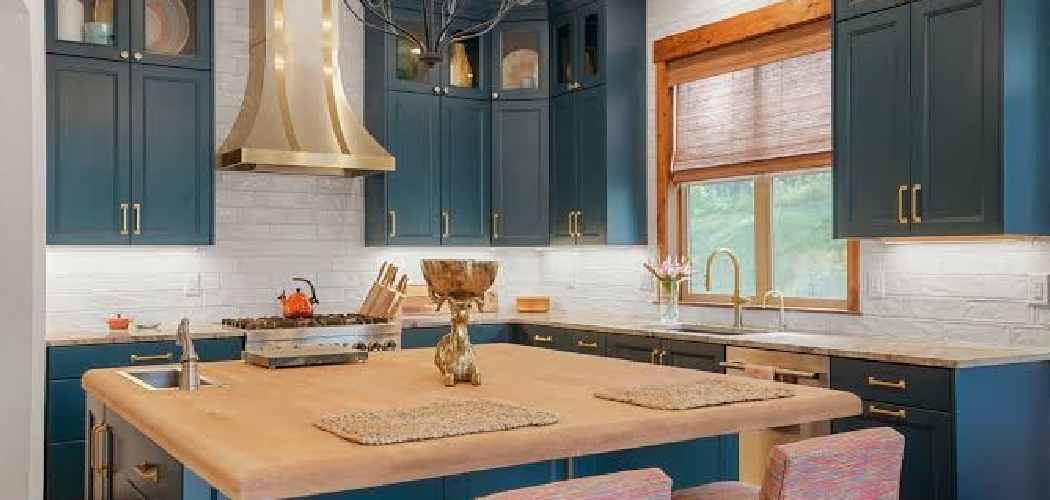

Old countertops can make a kitchen feel tired, even when the cabinets, floors, and appliances still work fine. Replacing them can be expensive, messy, and unrealistic if you rent, travel in an RV, or only need a temporary upgrade. That is where peel-and-stick contact paper can help.
If you want to learn how to put contact paper on kitchen countertops, the process is easier than it looks when you slow down and prep well. The right adhesive film can mimic marble, butcher block, stone, concrete, or solid color laminate without power tools or major renovation work.
This guide walks you through the full beginner-friendly process, from cleaning and measuring to smoothing, trimming, sealing edges, and caring for the finished surface.
Why Contact Paper Is Useful for Kitchen Countertops
Contact paper is useful because it gives you a fast, budget-friendly makeover without replacing the whole countertop surface. It works well for renters, first apartments, older cabins, RV kitchens, trailers, and small-space cooking areas where every surface needs to look clean and function well.
Campers and outdoor beginners often deal with compact prep zones, lightweight laminate counters, and surfaces that see dirt, moisture, coffee spills, and quick meals. A wipe-clean peel-and-stick layer can make these areas feel fresher and easier to maintain.
It is also removable in many cases, which makes it helpful for temporary upgrades. You can improve the look of a worn counter before a trip, a season at the cabin, or a short-term rental without committing to a permanent renovation.
Tools and Materials You’ll Need
Gather your supplies before you start so you are not searching for a blade or towel while the adhesive backing is exposed. Choose contact paper made for countertops when possible, and check whether it is labeled waterproof, heat-resistant, and removable.
- Contact paper or countertop adhesive film
- Measuring tape
- Pencil or washable marker
- Ruler or straight edge
- Scissors
- Sharp utility knife
- Smoothing tool, squeegee, or old credit card wrapped in cloth
- Mild dish soap or degreaser
- Clean microfiber cloths
- Rubbing alcohol for final cleaning
- Cutting mat or cardboard for trimming loose pieces
- Clear silicone caulk for sink or backsplash edges
- Optional convenience item: hair dryer for warming corners and curves
Step-by-Step Guide on How to Put Contact Paper on Kitchen Countertops
Step 1 – Inspect the Countertop Surface
Start by looking closely at the countertop surface. Run your hand across it and feel for raised chips, loose laminate, crumbs in seams, sticky residue, or rough spots near the backsplash edge. Contact paper can hide color and pattern, but it will not hide bumps.
Before you learn how to put contact paper on kitchen countertops, make sure the base is stable. Press on lifted corners or peeling laminate to see if anything moves. If the surface flexes, cracks, or flakes, repair it first so the adhesive film has something firm to grip.
Good prep begins with honest inspection. A smooth, solid counter gives you a cleaner finish and fewer air bubbles later.
Step 2 – Clean Away Grease and Residue

Kitchen counters collect more grease than you can see. Cooking oil, hand lotion, soap film, and old cleaner residue can stop peel-and-stick paper from bonding well. Wash the surface with mild dish soap or a gentle degreaser, then wipe it with a clean damp cloth.
Pay special attention to the area around the stove, sink, coffee maker, and front edge where hands rest. These spots often feel slightly slick, even after a quick wipe. Let the counter dry fully before moving on.
For a final pass, wipe the surface with rubbing alcohol on a microfiber cloth. The counter should feel dry, clean, and almost squeaky under your fingers.
Step 3 – Measure the Counter Carefully
Measure the length and depth of each countertop section before cutting anything. Add extra material on all sides so you have room for overlap, trimming, and small alignment shifts. It is better to cut away a little excess than come up short near a corner.
Write down your measurements and mark the back of the contact paper lightly. Most rolls have a grid on the backing, which helps you keep lines straight. Still, use a measuring tape and straight edge instead of trusting the grid alone.
If your counter has a sink, cooktop, or odd angle, measure those areas separately. Complex shapes become easier when you break them into smaller sections.
Step 4 – Plan the Seams and Pattern Direction

Before peeling the backing, unroll the contact paper across the counter to see how the pattern looks. Marble, wood grain, concrete, and stone designs usually have a direction. If the pattern runs the wrong way, the finished counter may look uneven or distracting.
Plan seams where they will be least visible. Back corners, areas near appliances, or straight runs along a natural break often work best. If you need an overlap, keep it small and consistent so it does not catch crumbs or draw attention.
Let the paper relax for a few minutes if it curls tightly from the roll. The material will feel easier to control when it lies flatter.
Step 5 – Cut the First Piece With Extra Room
Cut your first piece slightly larger than the countertop section. Leave extra material at the front edge, side edge, and backsplash edge. This gives you a safety margin while you place the adhesive film and smooth it into position.
Use scissors for rough cuts and save the utility knife for final trimming. A sharp blade matters because a dull one can tear the paper, drag the pattern, or leave ragged edges. If the contact paper has a glossy finish, work slowly so you do not crease it.
Set the piece on the counter before removing the backing. Check that it covers the full area and lines up with your seam plan.
Step 6 – Peel, Place, and Smooth Slowly
Peel back only a few inches of the backing at first. Line up the exposed adhesive with the back edge or one straight side, then press it down lightly. Keep the rest of the backing attached so the sheet does not grab the counter all at once.
A patient hand is the secret to how to put contact paper on kitchen countertops without wrinkles. Pull the backing away little by little while using a smoothing tool to push air outward. Work from the center toward the edges, using steady strokes.
You may hear a soft scraping sound as the squeegee moves over the paper. That is good. It means you are pressing the film flat instead of trapping air beneath it.
Step 7 – Handle Corners, Edges, and Curves
Corners need extra care because the material must bend without bunching. For a square front edge, smooth the top first, then wrap the paper over the edge and press it underneath. Use your fingers to feel for tight spots before trimming.
For rounded corners, warm the contact paper gently with a hair dryer. The heat makes the adhesive film more flexible, but do not overheat it. It should feel warm and pliable, not hot or stretchy.
Make small relief cuts where needed so the paper can fold neatly. These cuts should stay hidden under the edge or along a corner, not across the main countertop surface.
Step 8 – Trim, Seal, and Let It Set
Once the contact paper is smooth, trim the excess with a sharp utility knife. Hold the blade at a steady angle and use the counter edge, sink rim, or straight edge as a guide. Move slowly, especially near the backsplash edge and corners.
Press all seams and edges again after trimming. If the counter sits near a sink, add a thin bead of clear silicone caulk where water may seep under the paper. This can help protect the removable finish from lifting in damp areas.
Let the surface set before heavy use. Avoid hot pans, standing water, and hard scrubbing while the adhesive settles into place.
Common Mistakes When Using Contact Paper on Kitchen Countertops
One common mistake is skipping the deep clean. Contact paper may stick at first, but grease under the adhesive can cause lifting, bubbles, or curled edges within days. A counter that looks clean can still hold cooking film, so wash it well and finish with rubbing alcohol.
Another mistake is peeling off too much backing at once. When a large sticky sheet touches the counter, it can fold onto itself, wrinkle, or land crooked. Beginners get better results by exposing only a few inches at a time and smoothing as they go.
Poor measuring also creates problems. If you cut the paper to the exact counter size, you leave no room for adjustment, overlap, or trimming. Always add extra material, especially around corners, sink openings, and the front lip.
Many people also ignore seams. A seam placed in the middle of a busy prep area can collect moisture and crumbs. Plan joins carefully and press them flat.
Finally, contact paper is not the same as stone or heatproof laminate. Even heat-resistant products need protection from hot pans, sharp knives, and harsh cleaners.
Expert Tips
Choose a thicker contact paper for busy kitchens, RV counters, and cabin prep surfaces. Thin paper can tear more easily and may show every small bump below it. A slightly textured or matte finish often hides fingerprints, tiny flaws, and light wear better than a high-gloss surface.
Work in good light so you can see air bubbles, crooked seams, and trapped dust before they become permanent. If a bubble appears, lift the paper gently if the adhesive allows it, then smooth it again. For a small trapped bubble, prick it with a fine pin and press the air out.
Keep a cutting blade fresh. Replacing the blade during the project can make your trimmed edges look much cleaner.
Frequently Asked Questions
Can Contact Paper Be Used Near a Sink?
Yes, contact paper can be used near a sink if you choose a waterproof product and seal vulnerable edges. Water can sneak under seams, sink rims, and backsplash edges, so careful trimming matters. Add clear silicone caulk where moisture collects. Wipe up standing water quickly to help prevent lifting, swelling, or adhesive failure.
Is Contact Paper Safe for Kitchen Countertops?
Contact paper is safe for decorative countertop use when you follow the product directions. It works best as a surface cover, not as a cutting board or hot pad. Avoid placing hot pans directly on it, and do not cut food on the paper. Use trivets, cutting boards, and mild cleaners to protect the finish.
How Long Does Contact Paper Last on Countertops?
Contact paper can last several months to a few years, depending on quality, prep, use, and moisture exposure. A counter in a low-use rental kitchen may last longer than one beside a busy sink or stove. Good cleaning, smooth installation, sealed edges, and gentle care all help extend the life of the peel-and-stick surface.
Can I Remove Contact Paper Without Damaging the Counter?
Many contact papers are removable, but results depend on the adhesive and the counter material below. Laminate usually handles removal better than raw wood or damaged surfaces. Warm the paper with a hair dryer, then peel slowly at a low angle. If residue remains, use a gentle adhesive remover that is safe for your countertop.
What Should I Do if I Get Air Bubbles?
Small air bubbles are common, especially on a first project. Try pushing them toward the nearest edge with a smoothing tool. If the bubble is trapped, prick it with a tiny pin, then press the air out with your finger or squeegee. Work slowly and use light pressure so you do not stretch or tear the film.
Conclusion
Contact paper can give a worn countertop a fresh look without a major renovation. The key steps are simple: inspect the surface, clean it well, measure with extra room, plan your seams, apply the paper slowly, smooth out air bubbles, trim carefully, and protect wet edges. Each detail helps the finished counter look cleaner and last longer.
Now that you know how to put contact paper on kitchen countertops, start with a small, straight section if you feel nervous. A bathroom vanity, RV galley counter, or short cabin prep surface can help you build confidence before tackling a larger kitchen.
Take your time, use sharp tools, and treat the new surface with care. With patience and the right prep, you can create a practical, wipe-clean upgrade that feels bright, tidy, and satisfying.

About
Nick Hall has spent the last seven years working at the intersection of kitchen design and home repair — first as a design assistant at a residential renovation studio, then as a freelance writer covering everything from cabinet layouts to leaky faucet fixes.
Her approach is simple: kitchens should look good and function well. That means she’s just as comfortable talking about color palettes and counter materials as she is walking readers through how to fix a wobbly cabinet hinge or troubleshoot a garbage disposal.
Nick has worked directly with homeowners on small-space kitchen makeovers, budget-conscious renovations, and the kind of everyday repairs that don’t need a contractor — just the right instructions. She writes from experience, not theory, and tests most of the fixes and tips she shares before publishing them.
When she’s not writing, Nick is usually hunting for mid-century kitchen finds at estate sales or helping friends plan their own renovations. She lives in Columbus, Ohio.