
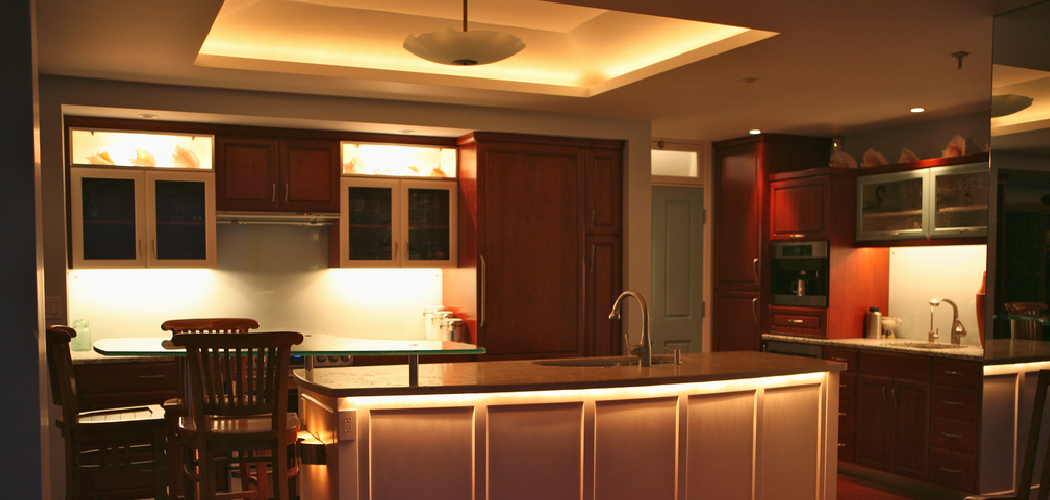
Ever stood at your counter chopping vegetables and noticed your own shadow falling right over the cutting board? That’s poor lighting at work, and it’s more common than you’d think. The right setup does more than brighten a room. It makes cooking safer, your space feel bigger, and your whole kitchen more inviting.
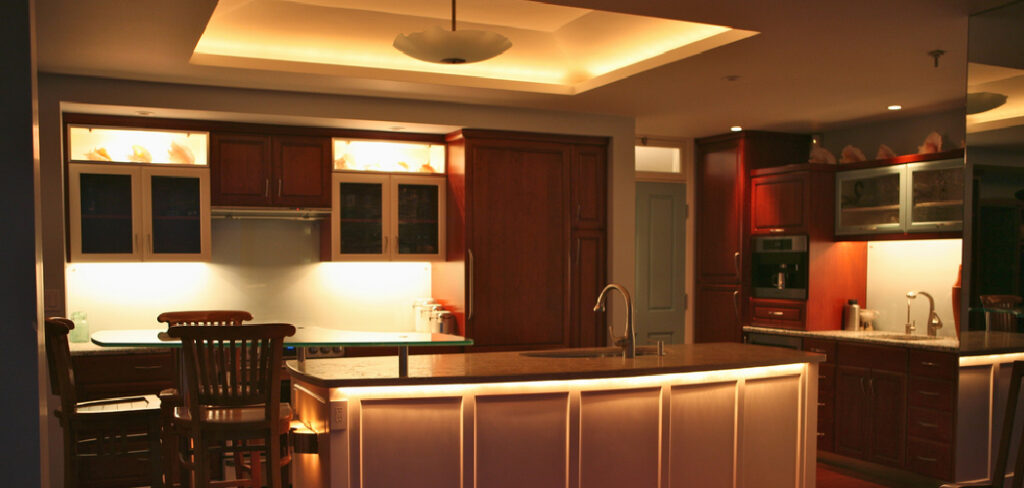
The good news is you don’t need an electrician to get it right. Learning how to choose kitchen lighting comes down to understanding a few simple ideas about brightness, color, and placement. Once those click, you’ll see your kitchen in a completely new way. This guide walks you through every step, from reading your layout to testing the final mood, so you can light your kitchen like a pro.
Why Choosing Kitchen Lighting Matters
Good lighting skills travel far beyond your home kitchen. Once you understand how brightness and color shape a space, you can apply that knowledge anywhere you cook.
This matters most in small setups. RV owners and van lifers work in tight galley kitchens where one badly placed fixture creates harsh glare or deep shadows. Campers and outdoor beginners often rely on a single lantern, then struggle to prep food after sunset. Cabin owners frequently inherit dim, dated fixtures that make evenings gloomy.
Anyone setting up a compact kitchen or an outdoor cooking space benefits from the same principles: layer your light, match the color temperature to the task, and aim for enough lumens without overdoing it. Master these basics once, and you’ll never feel stuck squinting over a stove or counter again, no matter where you’re cooking.
Tools and Materials You’ll Need
Before you start planning, gather a few simple things so you can measure, test, and decide with confidence. None of these cost much, and most you probably own already.
- A tape measure for checking ceiling height, counter length, and fixture spacing
- A notepad or phone to sketch your layout and mark task zones
- LED bulbs in a few different color temperatures for testing
- A sample under-cabinet light strip to preview the effect
- Painter’s tape to mark where fixtures might go
- A step stool for reaching ceilings and upper cabinets
- A smartphone light meter app to gauge brightness and natural daylight
- A dimmer switch sample if you want to test adjustable mood lighting
One optional convenience item worth grabbing is a color temperature testing card or a smart bulb you can adjust from your phone. It lets you flip between warm white and cool white instantly, so you can compare moods without swapping bulbs over and over.
Step-by-Step Guide on How to Choose Kitchen Lighting
Step 1 – Assess Your Kitchen Layout
Start by standing in the doorway and really looking at your kitchen. Notice the shape, the ceiling height, and how the counters, island, and cabinets are arranged. Every layout lights differently, so this first read tells you a lot.
Grab your tape measure and note the room’s dimensions, plus the height from floor to ceiling. Low ceilings call for flush fixtures, while tall ones leave room for hanging pendant lights.

Walk through your usual cooking route, too. Where do you stand most? Which corners feel dark even at midday? Mark those gloomy spots on your sketch. Knowing how to choose kitchen lighting begins with understanding the space you actually move through, not some ideal floor plan. This honest assessment shapes every decision that follows.
Step 2 – Identify Your Task Zones
Now pinpoint where the real work happens. Your stove, sink, and main countertop prep area all need bright, focused light so you can see clearly while chopping, reading recipes, or scrubbing pans.
Walk to each zone and imagine yourself working there at night. Picture cutting onions at the counter with only a dim ceiling bulb overhead. Your body blocks the light, and a shadow falls right where your knife lands. That’s exactly what task lighting solves.
Mark these busy spots on your sketch with a bright color. These are the areas where you’ll later add under-cabinet lights or focused fixtures. Getting your task zones right keeps cooking safe and comfortable, and it’s the foundation of a kitchen that genuinely works for you.
Step 3 – Measure Your Natural Light
Before adding any fixtures, study the daylight you already have. Spend a full day noticing how sunlight moves through your kitchen. Morning light might flood the sink, while the pantry corner stays dim until noon.
Open your smartphone light meter app and take readings at different times near windows, counters, and shadowy corners. You’ll quickly see which areas get plenty of natural daylight and which ones need help all day long.
This step saves you money and frustration. A counter bathed in afternoon sun needs far less artificial light than a windowless corner. By mapping your natural light first, you avoid over-lighting bright spots and under-lighting dark ones. The goal is balance, so your kitchen feels even and comfortable from dawn until well after dark.
Step 4 – Choose the Right Color Temperature
Color temperature changes the entire feel of your kitchen, and it’s measured in Kelvin. Warm white, around 2700K to 3000K, glows soft and cozy, perfect for a relaxed dining mood. Cool white, around 4000K to 5000K, looks crisp and energizing, ideal for detailed prep work.
Test this yourself. Pop a warm bulb into a fixture, then swap in a cool one and notice how your countertops and walls shift. Warm tones make wood and cream cabinets feel inviting, while cooler light sharpens whites and grays.
Many cooks land on a middle ground near 3500K, blending comfort with clarity. If you can’t decide, an adjustable smart bulb lets you shift the tone for cooking versus dining, giving you the best of both worlds in one fixture.
Step 5 – Select Your Fixture Types
With your zones and color choices set, it’s time to match fixtures to needs. Recessed lights tuck neatly into the ceiling and spread even ambient lighting across the whole room without taking up visual space.
Pendant lights hang beautifully over an island or breakfast bar, adding both task light and a touch of style. Picture warm island lighting glowing over a butcher block while you knead dough. Under-cabinet lights, meanwhile, slip beneath your upper cabinets and wash the counter with shadow-free brightness exactly where you prep.
For a finishing touch, accent lighting inside glass cabinets or above the toe-kick adds gentle depth and charm. Mix and match these types based on what each area actually does. The right combination turns a flat, evenly lit box into a layered, welcoming space.
Step 6 – Plan Your Layered Lighting
Great kitchens never rely on a single light source. They layer three types: ambient lighting for overall brightness, task lighting for work zones, and accent lighting for mood and style. Together they remove harsh shadows and flat, lifeless glare.
Sketch how these layers overlap in your space. Maybe recessed lights handle the ambient base, under-cabinet strips cover task duty, and a pendant or cabinet light adds accent sparkle. Each layer plays its own role.
Think about controls, too. Putting layers on separate switches, ideally with a dimmer switch, lets you brighten everything for cooking, then soften it for a quiet evening. This flexibility is what separates a kitchen that merely functions from one that feels genuinely good to spend time in, morning, noon, and night.
Step 7 – Check Brightness and Wattage Equivalents
Now make sure you’ll have enough light without going overboard. Modern bulbs measure brightness in lumens, not the old watts you grew up with. As a rough guide, a kitchen needs roughly 30 to 40 lumens per square foot for general lighting, and more over task zones.
Since most LED bulbs list both lumens and a wattage equivalent, you can shop with confidence. A “60-watt equivalent” LED might sip only 9 actual watts while delivering plenty of light.
Add up the lumens your fixtures provide and compare them to your room’s square footage. Too few, and corners stay murky. Too many, and the space feels like an operating room. Aim for that comfortable middle, then lean on your dimmer to fine-tune brightness whenever the moment calls for it.
Step 8 – Test Placement and Mood
Before drilling a single hole, test everything. Use painter’s tape to mark where fixtures will sit on the ceiling, and hold sample lights in place to preview the effect. This simple trick saves you from costly mistakes.
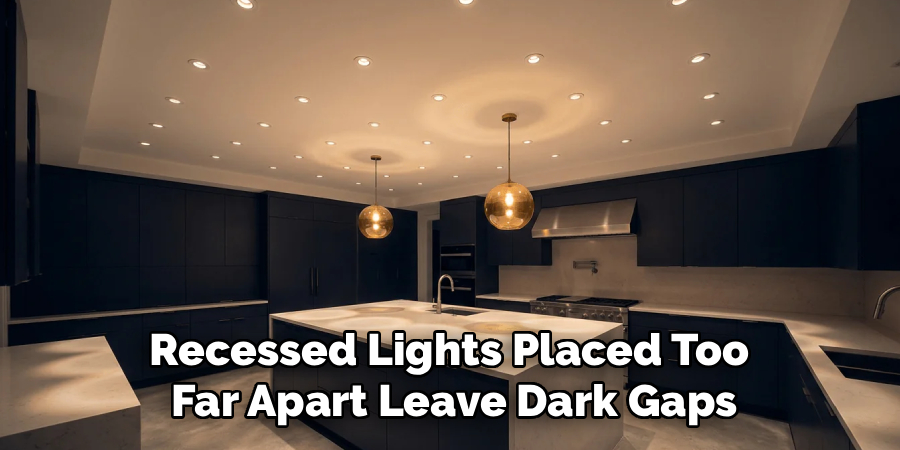
Pay close attention to fixture spacing. Recessed lights placed too far apart leave dark gaps, while pendants hung too low create glare in your eyes. Stand at each counter and check for shadows falling across your work surface.
Then dim the lights, switch them on at night, and simply feel the room. Does it glow warmly for dinner? Does the prep area stay crisp and clear? Adjust until it feels right. This final test turns all your planning into a kitchen that looks and feels exactly the way you imagined.
Critical Mistakes When Choosing Kitchen Lighting
The most common mistake is relying on a single ceiling fixture to do everything. One central light leaves your counters in shadow, since your own body blocks the beam while you work. Without layered light, the room feels flat and corners stay gloomy no matter how bright that one bulb is.
Another frequent error is ignoring color temperature. Mixing warm white and cool white bulbs in the same room creates a jarring, mismatched glow that never quite looks right. Pick a consistent tone, or use adjustable bulbs throughout for harmony.
Many people also forget task lighting entirely. They light the room beautifully overall, then wonder why chopping vegetables feels so awkward. Under-cabinet lights fix this instantly, yet they’re often overlooked until it’s too late.
Skipping a dimmer switch is another regret. Without one, you’re stuck at full brightness, unable to soften the mood for dinner or a quiet morning coffee.
Finally, poor fixture spacing causes trouble. Lights placed too far apart leave dark gaps, while pendants hung too low blind you with glare. A little planning prevents all of these headaches.
Expert Tips
Always test your bulbs in the actual room before committing, since paint colors, cabinet finishes, and countertops all change how light looks. A bulb that glows perfectly in the store can feel completely different at home.
Put your lights on separate switches whenever you can. Controlling ambient, task, and accent layers independently gives you total flexibility for cooking, dining, and relaxing.
Don’t underestimate under-cabinet lighting; it’s the single biggest upgrade most kitchens can make for the money. The shadow-free glow it casts on your prep area feels almost luxurious.
Finally, buy one of each bulb you’re considering and live with them for a few days. Lighting is personal, and what looks great on paper might feel too cool or too dim once you’re actually cooking dinner under it.
Frequently Asked Questions
How Many Lumens Do I Need in My Kitchen?
For general lighting, aim for roughly 30 to 40 lumens per square foot. A 100-square-foot kitchen needs around 3,000 to 4,000 lumens of ambient light. Task zones like your countertop prep area need extra, so add focused fixtures there. Remember:
- Total ambient lumens depend on room size
- Task areas need brighter, focused light
- A dimmer lets you adjust down when needed
Start with this guide, then fine-tune based on how the room feels.
What Color Temperature Is Best for a Kitchen?
Most kitchens look great between 3000K and 4000K. Warm white near 3000K feels cozy and flatters wood and cream tones, while cooler light around 4000K sharpens detail for prep work. Many cooks split the difference around 3500K for a balanced glow. If you can’t decide, adjustable smart bulbs let you shift the tone for cooking versus dining, giving you flexibility without rewiring anything.
Can I Install Kitchen Lighting Myself?
Many lighting upgrades are beginner-friendly. Plug-in or battery under-cabinet lights, smart bulbs, and swapping fixtures often need no electrician at all. However, anything involving new wiring, your electrical panel, or hardwired fixtures may require a professional or a permit, depending on your local rules. When in doubt, stick to plug-in and screw-in options. They deliver dramatic results safely, and you can install them in an afternoon.
Do I Really Need Under-Cabinet Lighting?
If you cook regularly, yes. Under-cabinet lights solve the most common kitchen lighting problem: shadows falling across your counter while you work. Overhead fixtures sit behind you, so your body blocks the light right where you chop and slice. A simple LED strip or puck lights beneath your upper cabinets wash the surface with bright, shadow-free light. It’s one of the easiest, most rewarding upgrades you can make.
How Do I Light a Kitchen Island?
Islands shine with dedicated fixtures hung overhead. For most islands, use two or three pendant lights spaced evenly along the length, hung about 30 to 36 inches above the surface. This delivers focused task light without blocking sightlines or causing glare. For a larger island, a linear fixture or a row of recessed lights works well too. Add a dimmer so you can soften the mood for casual dining.
Conclusion
Lighting your kitchen well really does come down to a handful of clear steps. Start by assessing your layout and mapping your task zones, then measure the natural daylight you already enjoy. Pick a color temperature that suits your style, choose fixtures that match each area’s job, and layer ambient, task, and accent light for depth. Check your lumens so the room feels balanced, add a dimmer for flexibility, and always test placement before you commit.
Do this, and your kitchen transforms from a dim, shadowy space into one that’s bright, welcoming, and genuinely a joy to cook in. Better still, you’ll carry these skills with you, ready to brighten an RV galley, a cabin, or any compact kitchen you set up down the road.
So don’t feel intimidated by all the choices out there. Now that you understand how to choose kitchen lighting the smart way, grab your tape measure, test a few bulbs, and trust your own eyes. You’ll be amazed at the difference a well-lit kitchen makes.

About
Nick Hall has spent the last seven years working at the intersection of kitchen design and home repair — first as a design assistant at a residential renovation studio, then as a freelance writer covering everything from cabinet layouts to leaky faucet fixes.
Her approach is simple: kitchens should look good and function well. That means she’s just as comfortable talking about color palettes and counter materials as she is walking readers through how to fix a wobbly cabinet hinge or troubleshoot a garbage disposal.
Nick has worked directly with homeowners on small-space kitchen makeovers, budget-conscious renovations, and the kind of everyday repairs that don’t need a contractor — just the right instructions. She writes from experience, not theory, and tests most of the fixes and tips she shares before publishing them.
When she’s not writing, Nick is usually hunting for mid-century kitchen finds at estate sales or helping friends plan their own renovations. She lives in Columbus, Ohio.