
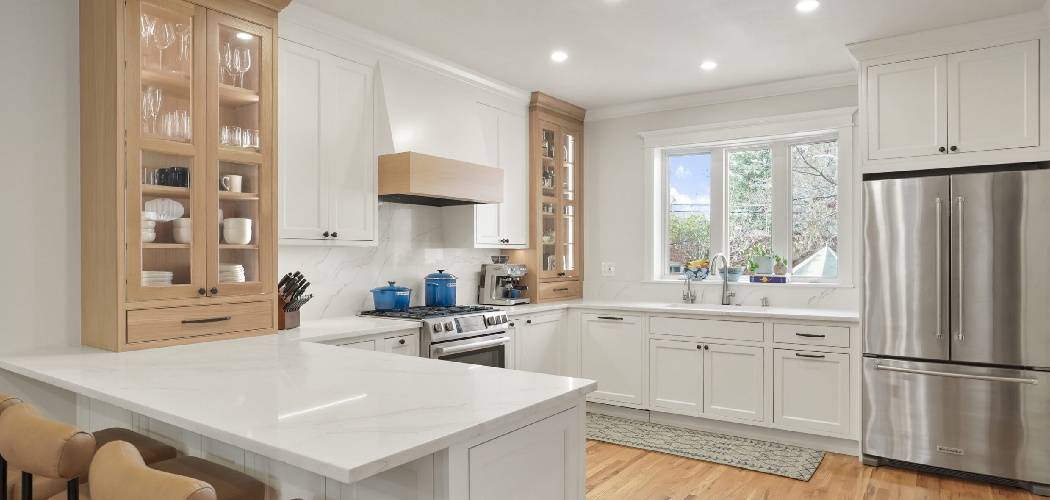
Good recessed lighting can make a kitchen feel bigger, brighter, and easier to work in. Bad placement can leave dark counters, harsh glare, and a room that feels uneven no matter how nice the fixtures look. If you are learning how to layout recessed lighting in a kitchen for the first time, the goal is not just to add light. It is to place each can light where it supports prep, cooking, cleanup, and the room’s overall balance.

This guide will help you plan spacing, choose placement zones, avoid common layout problems, and build a simple lighting plan you can trust before installation.
Why This Matters
A kitchen needs more than general brightness. You also need useful task lighting over counters, the sink, and main work paths. When recessed lights are laid out well, the room feels clean and comfortable. Shadows shrink, surfaces look more even, and the whole kitchen becomes easier to use.
This matters even more for first-time DIYers because lighting mistakes are hard to ignore once the ceiling is cut. A thoughtful plan helps you avoid wasted fixtures, patch jobs, and awkward dark spots. It also helps your kitchen look more polished without relying on one bright center fixture. When you understand layout basics, you make smarter choices about beam spread, spacing, trim style, and switch zones from the start.
Tools & Materials
Before you start, gather everything you need so the planning process goes smoothly.
- Tape measure
- Pencil
- Painter’s tape
- Step ladder
- Graph paper or printed kitchen sketch
- Laser measure or standard ruler
- Ceiling fixture specs from the manufacturer
- Recessed light housings or wafer lights
- Compatible LED bulbs or integrated LED fixtures
- Dimmer switch
- Stud finder
- Electrical tape
- Notebook for measurements
- Optional: laser level for easier ceiling alignment
Step-by-Step Guide on How to Layout Recessed Lighting in a Kitchen
Step 1 – Measure the Kitchen Carefully
Start with the room itself before you think about fixtures. Measure the full length and width of the kitchen, then mark the location of cabinets, island edges, the sink, appliances, windows, and doorways. Include ceiling height too, because that affects spacing and beam spread.
As you write down numbers, picture how you move through the room. Notice where you chop vegetables, where you stand at the sink, and where shadows already fall. A kitchen is not one open box. It is a working room with zones.

Put your measurements on a simple sketch. It does not need to look perfect. It just needs to show where the real obstacles and work surfaces sit. That sketch will keep you from centering lights based only on the room outline while ignoring the cabinets and counters that actually shape the light.
Step 2 – Identify Your Main Lighting Zones
Now divide the kitchen into lighting zones. Most kitchens need ambient lighting for overall brightness, task lighting for work areas, and accent lighting only if you want to highlight design features. Recessed lights usually handle the first two jobs best.
Look at your countertops first. These areas matter more than empty floor space because this is where you prep food, read labels, and handle sharp tools. Then consider the sink, island, and any dark walkway between cabinets.
This is the point where many homeowners begin to understand how to layout recessed lighting in a kitchen in a practical way. You are not just spacing lights evenly across a ceiling. You are matching light to activity. A smart layout serves the room you use, not the room shape on paper.
Step 3 – Choose Fixture Size and Beam Spread
Fixture size changes how the layout will work. In most kitchens, 4-inch and 6-inch recessed lights are the most common choices. Smaller fixtures often look cleaner and more modern, while larger ones can spread more light with fewer units depending on the product.
Check the beam angle and lumen output listed by the manufacturer. A wide beam gives broad coverage, while a narrow beam creates a tighter pool of light. For general kitchen use, you usually want a balanced spread that avoids both spotlight effects and dim gaps.
Also think about trim style and glare. A bright exposed light source can feel sharp when you look up from the sink or island. A regressed trim or well-designed LED module often feels softer on the eyes. That small detail can make the kitchen feel calm instead of harsh.
Step 4 – Plan Countertop Lighting First
Countertops should guide your placement more than the center of the room. If lights sit too close to the wall, you may create scallops of light and highlight every backsplash texture. If they sit too far out, your body will block the light and cast shadows onto the counter while you work.
A common starting point is to place recessed fixtures about 24 to 36 inches out from the wall, depending on ceiling height and cabinet depth. This usually puts the light over the front work area rather than behind your head. The result feels much more useful when you slice, mix, or clean.
Stand where you would normally prep food and imagine the light falling over your hands. That physical test matters. Good kitchen lighting should feel supportive and natural, not simply symmetrical from across the room.
Step 5 – Space the Fixtures Evenly and Adjust for Ceiling Height
Once your task zones are marked, begin spacing the lights. A common rule is to place fixtures about half the ceiling height apart for general lighting. In an 8-foot ceiling, that often means around 4 feet between lights as a starting point. This is not a strict law, but it helps create even coverage.

As you refine the layout, avoid making every row perfectly rigid if the room does not call for it. Cabinets, islands, and soffits may require slight shifts. What matters most is that the light feels balanced on the surfaces below.
When homeowners ask how to layout recessed lighting in a kitchen, they often focus on fixture count first. Spacing matters more. Too many lights can make the ceiling busy and the room overlit. Too few can leave dull pockets that no bulb upgrade will fully fix later.
Step 6 – Align Lights With Key Features
A strong layout usually looks intentional because it lines up with something important. That may be the island, the sink window, the edge of upper cabinets, or the center line of a main walkway. Alignment gives the ceiling a clean rhythm that the eye notices even if you cannot explain why it looks right.
For example, two or three lights over an island should usually center with the island itself, not with the whole kitchen. A sink light should center over the sink bowl or the sink window, depending on the view and ceiling plan. These choices make the room feel organized.
Use painter’s tape on the ceiling or floor to mark proposed locations. Then step back and study the pattern from several angles. A few inches of adjustment now can save you from a layout that always feels slightly off.
Step 7 – Check for Joists, Vents, and Obstacles
A beautiful plan on paper still has to fit inside a real ceiling. Before you commit, find the joists, HVAC runs, plumbing, and any wiring paths that could affect placement. A stud finder with deep scan can help, and attic access makes this step even easier if you have it.
This is where flexibility matters. You may need to shift a fixture a few inches to clear a joist or duct. In most kitchens, small changes will not ruin the lighting effect as long as you protect the key work zones and keep the overall pattern consistent.
If you are using remodel housings or slim wafer lights, you may have more freedom in tight spaces. Even so, always confirm installation clearance and follow electrical code requirements. A safe, workable layout is better than forcing a perfect drawing into an imperfect ceiling.
Step 8 – Test the Layout Before You Cut
Do not rush to cut holes. Tape your fixture positions onto the ceiling, floor, or both, then stand in the kitchen during the day and at night. Look at the sink, corners, island, and stove area. Notice where light is needed most and where a fixture might shine straight into your eyes.
If possible, simulate the pattern with clamp lights or portable work lights. The effect will not be exact, but it helps you sense coverage and shadow lines. This simple test often reveals whether one row needs to move a little closer to the counters or farther from a tall cabinet run.
Take your time here. Layout planning is cheap. Ceiling repairs are not. A final walk-through with your sketch and measurements can give you confidence before the first cut is made.
Common Mistakes
One common mistake is centering the recessed lights in the room instead of centering them over the working parts of the kitchen. That often leaves counters too dark while the open floor gets all the brightness. In a kitchen, useful light should land where your hands actually work.
Another mistake is placing lights too close to upper cabinets or walls. When that happens, the beam can skim the cabinet face or backsplash and create glare, hot spots, and hard shadows. The fix is usually simple: move the fixture line out far enough to light the counter surface instead of the vertical surfaces.
Many beginners also overlight the space. More fixtures do not always mean better results. Too many recessed lights can make the ceiling look crowded and flatten the room with harsh, overly uniform brightness. A better plan uses the right number of lights, proper spacing, and a dimmer for control.
A final issue is ignoring color temperature and fixture quality. Cool, bluish light can make a kitchen feel sterile, while poor trim design can create uncomfortable glare. For most homes, a warm-to-neutral LED in the 2700K to 3000K range feels inviting and still bright enough for daily tasks.
Expert Tips
Start your layout from the countertops and island, then let the rest of the ceiling follow. That one habit improves most kitchen lighting plans right away. It keeps the design practical instead of purely decorative.
Use dimmers whenever possible. Morning coffee, food prep, late-night cleanup, and entertaining all need different light levels. A dimmer gives you control that fixture placement alone cannot.
If your kitchen has pendants over the island, treat them as part of the full lighting plan. Recessed lights should support them, not compete with them. Also, buy one extra matching fixture if possible. Having a spare on hand can help years later if a model is discontinued.
Frequently Asked Questions
How many recessed lights do I need in a kitchen?
The number depends on kitchen size, ceiling height, fixture output, and how much other lighting you have. A small kitchen may need only four to six recessed lights, while a larger one may need eight or more. Focus on coverage over counters and walkways instead of chasing a fixed number.
How far should recessed lights be from kitchen walls?
A common starting range is 24 to 36 inches from the wall. This often places the beam where it helps light the countertop instead of washing the cabinet face. The exact distance depends on cabinet depth, ceiling height, and fixture beam angle, so always test your spacing on a sketch first.
Should recessed lights be centered in the room or over counters?
In most kitchens, they should be planned around counters and task areas, not just the room center. Centering everything by room dimensions alone can create shadows where you prep food. A kitchen works best when light follows use, so counter placement usually matters more than perfect room symmetry.
What size recessed lights work best in a kitchen?
Many homeowners choose 4-inch fixtures for a clean, modern look and good control. Six-inch fixtures still work well, especially in larger kitchens or older homes. The best size depends on ceiling scale, desired style, and fixture performance, so compare lumen output and beam spread before deciding.
What color temperature is best for kitchen recessed lighting?
For most kitchens, 2700K to 3000K works well. That range feels warm, clear, and comfortable without looking too yellow. If you want a slightly brighter, crisper feel, 3000K is a safe choice. Avoid going too cool unless you specifically want a sharper, more commercial look.
Conclusion
Planning recessed lighting is really about supporting how your kitchen works every day. Measure the room carefully, map the work zones, choose the right fixture size, and place lights where they help your counters, sink, and island most. Then check spacing, align with major features, and test the pattern before you cut into the ceiling.
If you remember one thing, let it be this: a good layout is built around people and tasks, not just empty ceiling space. That mindset will help you avoid glare, reduce shadows, and create a kitchen that feels comfortable from morning to night.
Now that you understand how to layout recessed lighting in a kitchen, take your sketch, mark your zones, and build a draft plan before buying fixtures. A careful hour of planning today can save you a lot of frustration later and give your kitchen a brighter, more polished finish.

About
Nick Hall has spent the last seven years working at the intersection of kitchen design and home repair — first as a design assistant at a residential renovation studio, then as a freelance writer covering everything from cabinet layouts to leaky faucet fixes.
Her approach is simple: kitchens should look good and function well. That means she’s just as comfortable talking about color palettes and counter materials as she is walking readers through how to fix a wobbly cabinet hinge or troubleshoot a garbage disposal.
Nick has worked directly with homeowners on small-space kitchen makeovers, budget-conscious renovations, and the kind of everyday repairs that don’t need a contractor — just the right instructions. She writes from experience, not theory, and tests most of the fixes and tips she shares before publishing them.
When she’s not writing, Nick is usually hunting for mid-century kitchen finds at estate sales or helping friends plan their own renovations. She lives in Columbus, Ohio.