
Your porcelain stove takes a beating every single day. Spaghetti sauce bubbles over, eggs splatter, and grease quietly settles into a dull film while you’re busy enjoying the meal you just made. It’s no wonder that glossy surface starts looking tired.
Here’s the comforting part. Bringing back that shine is simpler than you’d guess. With a handful of gentle supplies and a little patience, you can lift stuck-on messes without scratching or scrubbing yourself silly.
Knowing how to clean porcelain stove surfaces protects your finish, keeps your kitchen hygienic, and saves you real money on early replacements.
This guide walks you through each step so you can keep your stove gleaming, fresh, and ready for whatever you cook up next.
Why Learning to Clean a Porcelain Stove Matters
A clean cooktop is more than a pretty sight. Leftover grease and cooked-on food attract bacteria and create stubborn buildup that’s far harder to remove later. Regular cleaning keeps your kitchen sanitary and your meals safe.
Good porcelain stovetop care also protects that smooth enamel surface. Gentle, consistent cleaning prevents baked-on grease, fights stains, and keeps the finish looking new for years. That care saves you money, since a well-maintained stove lasts much longer.
This skill follows you anywhere, too. If you cook in an RV, a camper kitchen, or a cozy cabin with a porcelain-coated cooktop, the same methods keep things tidy in tight spaces. Even outdoor cooking setups with enamel surfaces benefit from a quick, careful wipe-down, so you enjoy clean, reliable cooking wherever your adventures take you.
Tools and Materials You’ll Need
You don’t need a cabinet full of specialty products for this job, just a few gentle basics you probably already own. Start with a couple of soft microfiber cloths and a non-abrasive sponge, since both lift grime without scratching that glossy finish. Pair them with mild dish soap and warm water for your everyday wipe-downs.
For tougher messes, keep baking soda on hand. It works as a gentle, non-abrasive cleaner that tackles crusted sauce and grease without harming the porcelain. A spray bottle filled with soapy water makes application easy, and a soft-bristle toothbrush reaches into burner rings and around sticky knobs. Use a plastic scraper or silicone spatula to coax up loosened residue, then dry everything with paper towels or a clean towel.
As an optional convenience, a degreasing stovetop mat or protective liner catches future spills before they set.
Step-by-Step Guide on How To Clean Porcelain Stove
Step 1 – Turn Off and Cool the Stove
Safety comes first, always. Before you touch a single drop of cleaner, make sure every burner is switched off and the surface is fully cool to the touch.
A hot stove can burn you and cause cleaning products to evaporate or streak the moment they land. Give it plenty of time to cool down, especially after a big cooking session.
Take a quick look at what you’re dealing with while you wait. You’ll likely spot greasy splatter near the burners, a dull film across the surface, and maybe some crusted sauce that boiled over earlier.
Noticing these trouble spots now helps you plan your attack. A cool, dry starting point sets you up for safe, easy cleaning ahead.
Step 2 – Remove Grates and Knobs
Clear the deck so you can reach every inch of the stove. Lift off the grates, burner caps, and any removable knobs, then set them aside in your sink.
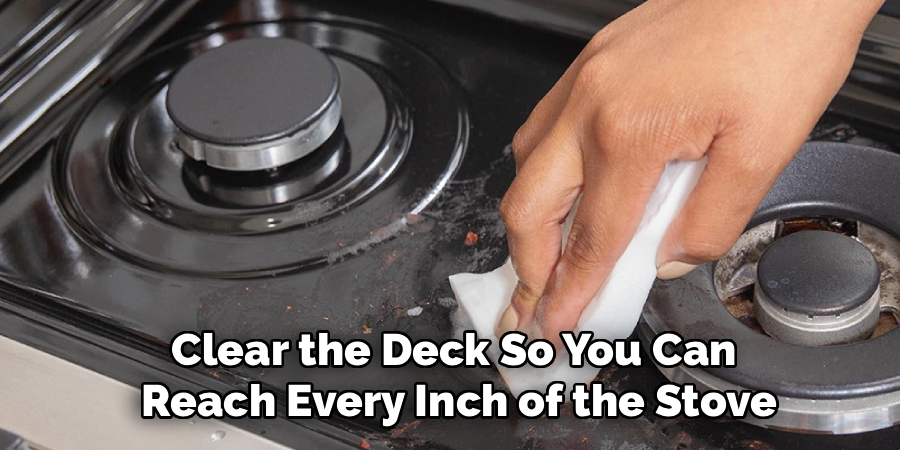
These pieces collect their own grime, from greasy fingerprints on sticky knobs to cooked-on food stuck around the grates. Soaking them in warm, soapy water while you work the main surface saves you time.
Pull the knobs straight off gently, since most simply slide free without force. Avoid yanking or twisting hard, which can damage the connectors underneath.
With everything removed, you’ll see the full cooktop and any hidden drips beneath the grates. This clear access makes the rest of your cleaning faster, more thorough, and far less frustrating.
Step 3 – Wipe Away Loose Debris
Before adding any cleaner, clear off the loose stuff first. Grab a dry paper towel or cloth and sweep away crumbs, food bits, and dried flecks scattered across the surface.
This simple step stops you from smearing dry debris into a muddy mess once things get wet. You’ll be surprised how much comes off with just a quick dry wipe.
Pay attention to the corners and the spaces around the burner rings, where crumbs love to hide. A soft-bristle toothbrush helps loosen anything wedged tight.
Knowing how to clean porcelain stove surfaces starts with this easy prep work. Clearing the loose layer first means your cleaner can focus on the grease and stains that really matter.
Step 4 – Apply Soapy Water
Fill your spray bottle with warm water and a squirt of mild dish soap, then mist the entire cooktop. The light spray clings to grease and starts breaking it down right away.
Let the soapy water sit for a few minutes so it can soften greasy splatter and loosen that dull film. This soak does much of the hard work for you.
Then wipe in gentle circles with your non-abrasive sponge. You’ll feel the surface go slick as the grease lifts and the porcelain starts to shine through again.
Mild soap is perfect for daily wipe-downs because it cuts through mess without harming the enamel surface. Cover every inch, including the edges where splatter tends to collect.
Step 5 – Tackle Cooked-On Food with Baking Soda
For crusted sauce and stubborn cooked-on food that soap alone won’t budge, baking soda is your gentle hero. Sprinkle a little over the spot or mix it with water to form a soft paste.
Spread the paste over the tough areas and let it sit for ten to fifteen minutes. The baking soda works quietly, loosening the grime without any harsh scrubbing.
Then rub gently with your damp sponge using light, circular motions. For really stubborn bits, a plastic scraper or silicone spatula lifts the loosened residue without scratching.
Baking soda is a true non-abrasive cleaner, so it’s safe for grease removal and stains on porcelain. Just let it do the heavy lifting and avoid pressing too hard.
Step 6 – Clean Knobs, Grates, and Drip Pans
Now turn to the parts soaking in your sink. Scrub the grates, knobs, and burner drip pans with your sponge and that soft-bristle toothbrush.
The toothbrush slips into tight grooves and around the burner rings where grease hides. You’ll dislodge sticky buildup that’s been collecting for weeks.
For drip pans coated in baked-on grease, a baking soda paste works wonders. Let it sit, then scrub gently until the gunk lifts away.
Rinse each piece thoroughly under warm water and check that no soap or grit remains. Set them on a towel to dry completely before reattaching.
Keeping these pieces clean is a key part of solid stove maintenance, and it keeps your whole cooktop working and looking its best.
Step 7 – Rinse and Wipe the Surface
Once the cooktop is scrubbed and treated, it’s time to clear away every trace of cleaner. Dampen a fresh microfiber cloth with clean warm water and wipe the entire surface.
Leftover soap or baking soda can dry into a new dull film, so be thorough here. Rinse your cloth often as you go, working from one side to the other.
Run the cloth around the burner rings, along the edges, and into the corners where residue likes to linger. The surface should feel smooth and clean, not gritty or slippery.
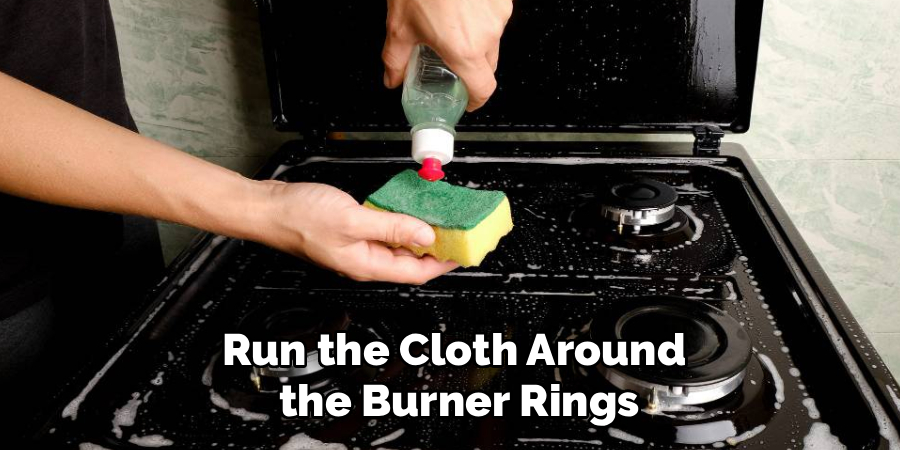
Avoid soaking any electrical components or letting water pool near the burner openings. A careful wipe rather than a flood keeps your stove safe and your cleaning effective.
Step 8 – Dry and Reassemble
Drying is the step that brings everything together. Grab a clean, dry microfiber cloth and buff the whole surface until it gleams.
This final wipe prevents water spots and streaks, leaving you with that smooth, glossy finish that makes the effort worth it. You’ll feel the surface go from damp to silky under your hand.
Once the cooktop is dry, replace the fully dried grates, burner caps, and knobs. Press the knobs back gently until they click into place.
Give everything one last look to make sure it’s clean, dry, and properly seated. Building this drying habit into your protective cleaning routine keeps your porcelain looking fresh and ready for the next meal.
Critical Mistakes When Cleaning a Porcelain Stove
Even careful cooks slip up sometimes, so let’s clear away the most common errors before they cost you that beautiful finish.
The biggest mistake is reaching for abrasive tools. Steel wool, scouring pads, and gritty powders feel like they’ll power through crusted sauce, but they leave permanent scratches that dull the porcelain forever. Always stick with a non-abrasive sponge and gentle motions instead.
Another serious error is using harsh chemicals. Bleach and strong oven cleaners can discolor or etch the enamel surface, so avoid them unless your manufacturer specifically approves a product. These aggressive cleaners do more harm than good on delicate porcelain.
Many people also clean while the stove is still hot. A warm surface makes cleaners evaporate, streak, and even burn your hands. Always let the cooktop cool fully before you begin, unless you’re only loosening residue on a barely warm surface.
Soaking electrical components is another costly slip. Flooding the burner openings or control areas with water can cause damage and safety hazards. Wipe gently rather than drench. Finally, skipping daily wipe-downs lets grease and cooked-on food pile up, turning a quick clean into a real chore.
Expert Tips
Want your porcelain stove to stay gleaming with hardly any effort? A few smart habits make all the difference.
Wipe the cooktop down after every use, even if it’s just a quick swipe with a damp cloth. Catching greasy splatter while it’s fresh stops it from baking into a stubborn mess later.
Tackle spills the moment the surface cools. Fresh messes lift in seconds, while old ones demand serious scrubbing.
Keep a spray bottle of soapy water nearby for fast cleanups during busy cooking days. Quick action is the secret to easy maintenance.
Use a degreasing stovetop mat or protective liner to catch drips before they reach the porcelain. It’s a small step that saves you plenty of scrubbing and keeps your enamel surface looking showroom-fresh year after year.
Frequently Asked Questions
How often should I clean my porcelain stove?
For best results, give your stove a quick clean after each use and a deeper clean weekly. A simple routine looks like this:
- A daily wipe-down to catch fresh greasy splatter
- A weekly scrub with soap and baking soda for stuck-on messes
- A monthly deep clean of grates, knobs, and burner drip pans
Staying consistent keeps grime from building up, making every cleaning faster and protecting your glossy finish.
Can I use oven cleaner on a porcelain stovetop?
Be very cautious here. Most oven cleaners are far too harsh for porcelain and can discolor or etch the enamel surface. Only use one if your stove’s manufacturer specifically approves it. For everyday messes, mild dish soap and baking soda handle grease and cooked-on food safely and effectively. Gentle, consistent care always beats aggressive products that risk ruining your finish.
What removes baked-on grease from porcelain?
A baking soda paste is your safest and most effective option. Mix baking soda with a little water, spread it over the greasy spots, and let it sit for ten to fifteen minutes. Then rub gently with a damp, non-abrasive sponge. For really stubborn bits, a plastic scraper lifts the loosened residue without scratching. Always rinse well and dry the surface afterward for a clean, streak-free shine.
Is it safe to clean a porcelain stove while it’s warm?
Mostly, no. You should let the stove cool fully before cleaning, since a hot surface can burn you and cause cleaners to streak or evaporate. The only exception is a barely warm surface, which can sometimes help loosen stubborn residue. Even then, work carefully and gently. When in doubt, wait until the cooktop is completely cool for safe, easy cleaning.
How do I prevent scratches on my porcelain stove?
Prevention comes down to a few easy habits. Skip steel wool, scouring pads, and gritty powders, since they cause tiny scratches that dull the finish permanently. Always clean with a soft microfiber cloth or non-abrasive sponge. Use a plastic scraper instead of a metal one for stuck-on food, and add a protective mat to catch spills. Gentle tools keep your glossy surface smooth for years.
Conclusion
Keeping your porcelain stove spotless doesn’t have to feel like a battle. With a soft sponge, mild soap, a little baking soda, and a gentle touch, you can handle everyday splatter and stubborn cooked-on messes all on your own.
Remember the simple rhythm: cool the stove, remove the grates and knobs, clear loose debris, apply soapy water, treat tough spots with baking soda, clean the removable parts, rinse the surface, then dry and reassemble. Each step protects your finish, keeps your kitchen hygienic, and helps that lovely enamel last for years.
The secret is gentleness. Skip the steel wool, harsh oven cleaners, and bleach, and never soak electrical components. Your stove will reward you with a fresh, glossy shine after every clean.
Now that you know how to clean porcelain stove surfaces the smart way, you’ve got everything you need to keep yours looking brand new. So grab your cloth, build a quick daily habit, and give your hardworking stove the care it truly deserves.

About
Nick Hall has spent the last seven years working at the intersection of kitchen design and home repair — first as a design assistant at a residential renovation studio, then as a freelance writer covering everything from cabinet layouts to leaky faucet fixes.
Her approach is simple: kitchens should look good and function well. That means she’s just as comfortable talking about color palettes and counter materials as she is walking readers through how to fix a wobbly cabinet hinge or troubleshoot a garbage disposal.
Nick has worked directly with homeowners on small-space kitchen makeovers, budget-conscious renovations, and the kind of everyday repairs that don’t need a contractor — just the right instructions. She writes from experience, not theory, and tests most of the fixes and tips she shares before publishing them.
When she’s not writing, Nick is usually hunting for mid-century kitchen finds at estate sales or helping friends plan their own renovations. She lives in Columbus, Ohio.