
Spills happen. A pot boils over, sauce splatters, and before you know it, your once-glossy cooktop wears a crust of dried-on mess. It’s frustrating, especially when scrubbing seems to leave dull marks behind.
Here’s the good news. Enamel surfaces are tough and beautiful, but they ask for a gentle touch rather than brute force. Once you know the right approach, cleaning becomes quick and even a little satisfying.
Knowing how to clean enamel stove top surfaces the smart way protects that smooth shine, lifts baked-on grease without scratches, and keeps your kitchen looking cared for.
In this guide, I’ll walk you through every step, from cooling the stove safely to tackling stubborn stains, so you can restore your cooktop’s glow with confidence.
Why Learning to Clean an Enamel Stove Top Matters
A clean cooktop does more than look nice. Baked-on grease and food splatter can smoke, smell, and even affect how evenly your burners heat.
Caring for porcelain enamel the right way also protects your investment. The wrong scrubber can leave fine scratches that dull the surface forever, while gentle habits keep that glossy finish for years.
This skill travels well too. Many campers, RVs, cabins, and camp kitchens use enamel-coated cooktops because they’re sturdy and easy to wipe down on the go. The same gentle techniques work whether you’re at home or cooking under the stars.
For home users and DIY beginners, mastering this simple task means a fresher kitchen, safer cooking, and no need to call anyone for help. A few minutes of care keeps your enamel surface bright and ready for the next meal.
Tools and Materials You’ll Need
You won’t need anything fancy here. Most of these items are likely already under your sink.
- Mild dish soap and warm water
- A soft, non-abrasive sponge or microfiber cloth
- Baking soda for a gentle cleaning paste
- A spray bottle or small bowl for mixing
- A dry towel for buffing away streaks
- A soft-bristled brush or old toothbrush for seams and edges
- A plastic scraper or old credit card for lifting baked-on spots
- White vinegar for cutting grease and adding shine
One optional convenience item: a dedicated cooktop degreaser made for enamel surfaces. It speeds up heavy jobs, though warm soapy water handles most everyday messes just fine.
Gather these before you start, and the whole job feels calm and easy.
Step-by-Step Guide on How to Clean Enamel Stove Top
Step 1 – Let the stove cool completely
Never start cleaning a warm cooktop. A hot enamel surface can burn your hands and cause cleaning sprays to evaporate before they work.
Turn off every burner and give the stove plenty of time to cool. Depending on how long you cooked, this can take fifteen to thirty minutes.
Rest the back of your hand a few inches above the surface to feel for lingering heat. The enamel should feel cool to the touch before you go further.
This pause matters for safety and results. Cool enamel lets your soapy water and baking soda paste sit and soften grease properly. Learning how to clean enamel stove top surfaces always begins with patience, so resist the urge to rush in while things are still warm.
Step 2 – Remove grates, burner caps, and drip trays
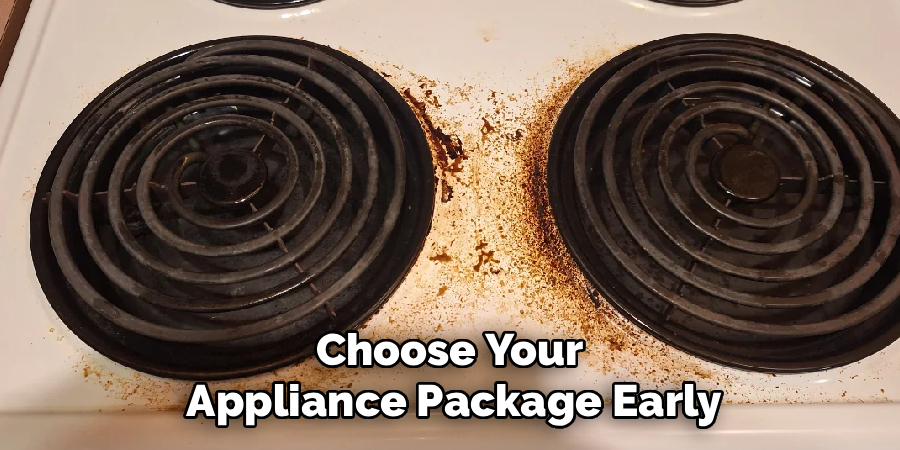
Clear the surface so you can reach every spot. On a gas stove, lift off the grates and burner caps. On an electric model, remove any drip pans tucked beneath the coils.
Set these parts in your sink to soak in warm, soapy water while you work. The soak loosens stuck-on food and grease, making them far easier to clean later.
Handle burner caps gently and remember exactly how they sit, since they need to return to the right position. Snap a quick phone photo if you’re unsure.
With the parts out of the way, you’ll see the full enamel surface and any hidden splatter around the burner openings. This clear view makes the rest of the job simple and thorough.
Step 3 – Shake out loose crumbs and debris
Before anything wet touches the cooktop, deal with the dry mess. Crumbs, salt, and bits of food can smear into muddy streaks if you skip this.
Tip the grates aside if you haven’t already, then gently brush loose debris toward the center with a dry cloth or soft brush. Sweep it into your hand or a small bowl.
Pay attention to the burner openings and the edges where crumbs love to hide. A soft brush flicks them out without scratching the enamel.
Give the whole surface a quick once-over. Removing this dry layer first means your soapy water lifts grease instead of pushing crumbs around. It’s a small step, but it keeps the deeper cleaning smooth and streak-free.
Step 4 – Soften grease with warm soapy water
Now for the satisfying part. Mix a few drops of mild dish soap into warm water until it’s lightly sudsy.
Dip your non-abrasive sponge or microfiber cloth into the mix, wring it so it’s damp but not dripping, and lay it across the greasy areas. Let it rest for a minute or two.
You’ll notice the baked-on grease start to loosen and lift as the warmth and soap do their work. A gentle smell of clean dish soap replaces the cooked-on odor.
Wipe in slow, circular motions, rinsing your cloth often. Avoid soaking the surface, especially near gas burners or electric components, where too much water can seep in. Damp and gentle beats wet and forceful every time.
Step 5 – Treat baked-on spots with baking soda paste
Some spots won’t budge with soap alone. That’s where a baking soda paste shines on tough, baked-on grease.
Mix three parts baking soda with one part warm water until it forms a soft, spreadable paste. Dab it directly onto the stubborn stains.
Let it sit for ten to fifteen minutes. The paste gently breaks down the crust without the scratches a harsh scrubber would leave. You’ll see the dark spots start to soften and pale.
Wipe the paste away with your damp microfiber cloth, using light pressure. For really stubborn marks, add a splash of white vinegar over the paste and watch it fizz, which helps lift the residue. This gentle combo restores the enamel surface without dulling its shine.
Step 6 – Work carefully around burner openings, seams, and edges
The trickiest mess hides in the corners. Grease and food collect around burner openings, along seams, and at the cooktop edges.
Reach for your soft-bristled brush or old toothbrush here. Dip it in soapy water and work gently into the grooves where a sponge can’t fit.
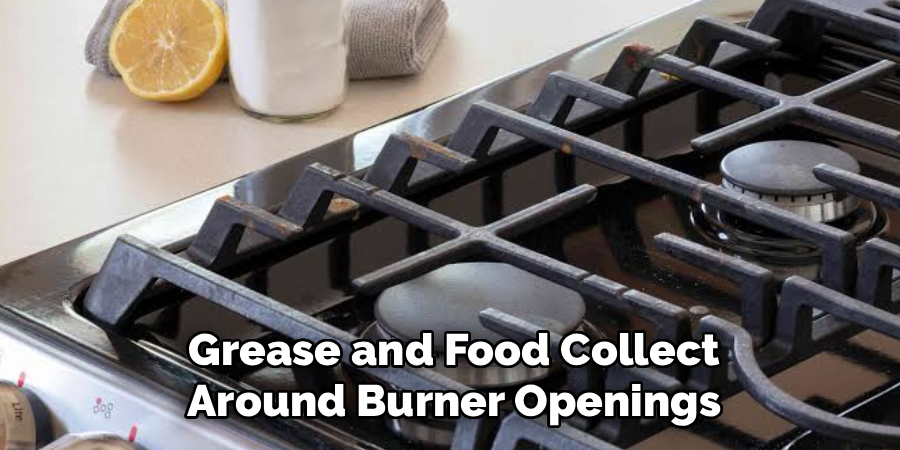
Take your time around the burner openings so no water drips inside. Keep your cloth handy to catch any loosened grime right away.
Run the brush along the seams where the enamel surface meets metal trim. These spots often hold a thin line of baked-on grease you’d otherwise miss. A patient pass here makes the whole cooktop look properly clean, not just the easy flat areas in the middle.
Step 7 – Wipe away residue and dry to prevent streaks
Almost done. Now clear off every bit of loosened grime and leftover cleaning paste.
Rinse your microfiber cloth in clean, warm water, wring it well, and wipe the entire surface. Go over it a second time to catch any soapy residue, since leftover film dries into dull streaks.
For extra shine, mist a little white vinegar over the enamel and wipe again. It cuts any last grease and leaves the surface gleaming.
Finish with a dry towel, buffing in gentle circles until the cooktop feels smooth and looks glossy. This drying step is what gives you that streak-free finish. Knowing how to clean enamel stove top surfaces without streaks really comes down to this final, careful buff.
Step 8 – Reassemble and handle stubborn stains
Bring back the parts you set aside. Scrub the soaking grates, burner caps, or drip pans with your sponge, rinse them, and dry them fully before placing them back exactly where they belong.
Now check the cooktop one last time. If a stubborn stain still lingers, don’t reach for steel wool or scrub harder. Aggressive scrubbing scratches the porcelain enamel and leaves permanent dull spots.
Instead, simply repeat the baking soda paste treatment and give it more sitting time. Patience lifts what force cannot.
For very tough marks, a dedicated enamel-safe degreaser can help, used sparingly per its label. Once everything’s dry and back in place, step back and enjoy your bright, clean stove.
Critical Mistakes When Cleaning an Enamel Stove Top
A few common slip-ups can turn a quick clean into lasting damage, so let’s cover the ones that trip people up most.
The biggest mistake is using steel wool or harsh scouring powders. These feel powerful, but they carve tiny scratches into the porcelain enamel that dull the shine forever. Once that glossy layer is scratched, there’s no buffing it back. Always choose a non-abrasive sponge or microfiber cloth instead.
Another frequent error is misusing bleach. People assume it’ll whiten stains, but bleach can discolor enamel and corrode nearby metal parts. Stick to dish soap, baking soda, and a little vinegar, which clean just as well without the risk.
Many beginners also use too much water around gas burners or electric coils. Soaking the surface lets moisture seep into the components, which can cause ignition problems or electrical issues. Keep your cloth damp, not dripping.
Cleaning while the stove is still hot is another classic. The heat evaporates your cleaner and risks burns. Finally, scrubbing baked-on spots aggressively instead of letting a paste soak only spreads the grime and scratches the surface. When in doubt, soak longer and repeat gently.
Expert Tips
A little routine care keeps deep cleaning sessions rare. Wipe spills as soon as the surface cools after each meal, so grease never has a chance to bake on.
Keep a spray bottle of warm water mixed with a few drops of dish soap near the stove. A quick mist and wipe handles fresh food splatter in seconds.
For everyday shine, a buff with a dry microfiber cloth removes fingerprints and light haze without any cleaner at all.
When you cook something messy, lay a splatter screen over the pan to protect the cooktop. Prevention beats scrubbing every time.
And remember, gentle and repeated always wins over harsh and rushed. If a stain resists, let your baking soda paste sit longer rather than pressing harder. Your enamel surface will thank you with years of glossy good looks.
Frequently Asked Questions
Can I use vinegar on an enamel stove top?
Yes, white vinegar is a great helper for enamel surfaces. It cuts through grease and leaves a streak-free shine. Use it diluted with water or misted over a baking soda paste to lift stubborn stains. Just avoid leaving strong vinegar on the surface for long stretches, and always wipe it clean and dry afterward to keep that glossy finish looking its best.
How do I remove baked-on grease without scratching?
Patience is your best tool here. Try these gentle steps:
- Soften the grease first with warm, soapy water
- Apply a baking soda paste and let it sit ten to fifteen minutes
- Wipe with a non-abrasive sponge or microfiber cloth
- Repeat the soak instead of scrubbing harder
This approach lifts baked-on grease while protecting the enamel from scratches and dull spots.
What should I never use on porcelain enamel?
Skip anything harsh or abrasive. Steel wool, scouring powders, and stiff metal scrapers all leave permanent scratches in the glossy surface. Avoid bleach too, since it can discolor enamel and corrode nearby metal parts. Strong, undiluted chemicals aren’t necessary either. Gentle dish soap, baking soda, and a soft cloth clean beautifully without any of the risk that harsh products bring.
How often should I clean my enamel cooktop?
For best results, do a quick wipe after each cooking session once the surface cools. This stops food splatter from baking on and becoming a chore later. Plan a deeper clean, removing grates and burner caps, about once a week or whenever you notice buildup. Regular light care keeps the enamel surface bright and makes those bigger cleaning jobs far easier.
Is it safe to get water near gas burners or electric coils?
Use water carefully around these parts. A little dampness is fine, but soaking can cause real problems. Keep your sponge or cloth damp rather than dripping, and avoid letting water pool near burner openings or coils. Excess moisture can interfere with gas ignition or electrical components. Always dry the area fully so nothing seeps in where it shouldn’t.
Conclusion
Cleaning your cooktop the right way really comes down to a few calm, gentle steps, and now you’ve got every one of them.
Let’s recap the main takeaways. Always let the stove cool fully before you begin, then remove the grates, burner caps, or drip pans and shake out loose crumbs. Soften grease with warm soapy water, treat baked-on spots with a baking soda paste, and work carefully around burner openings, seams, and edges. Wipe away residue and buff dry for that streak-free shine.
Above all, stay gentle. Skip the steel wool, harsh powders, and bleach, and never soak the surface near gas or electric parts. When a stain resists, soak and repeat rather than scrubbing hard.
Now that you know how to clean enamel stove top surfaces with care, you can keep your kitchen glowing without scratches or a single service call. That’s one more handy skill firmly in your hands.
So roll up your sleeves, work gently, and enjoy the shine. Your sparkling cooktop is just a few minutes away.

About
Nick Hall has spent the last seven years working at the intersection of kitchen design and home repair — first as a design assistant at a residential renovation studio, then as a freelance writer covering everything from cabinet layouts to leaky faucet fixes.
Her approach is simple: kitchens should look good and function well. That means she’s just as comfortable talking about color palettes and counter materials as she is walking readers through how to fix a wobbly cabinet hinge or troubleshoot a garbage disposal.
Nick has worked directly with homeowners on small-space kitchen makeovers, budget-conscious renovations, and the kind of everyday repairs that don’t need a contractor — just the right instructions. She writes from experience, not theory, and tests most of the fixes and tips she shares before publishing them.
When she’s not writing, Nick is usually hunting for mid-century kitchen finds at estate sales or helping friends plan their own renovations. She lives in Columbus, Ohio.