
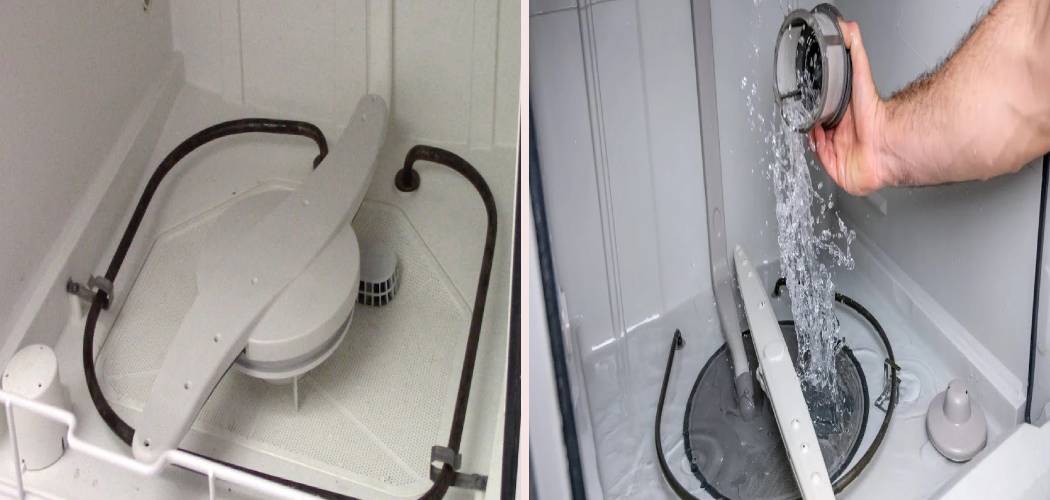
You open the dishwasher door, ready to unload sparkling plates, and instead you spot a shallow pool of cloudy water sitting at the bottom. That musty smell drifts up, and your stomach drops a little. Don’t panic. This is one of the most common kitchen hiccups, and you can usually fix it yourself.
Most of the time, the cause is a clogged filter, a kinked hose, or a blocked sump. None of those require a pricey service call. With a few household items and a calm approach, you can clear the water and get things flowing again in under an hour.

Learning how to drain a ge dishwasher gives you real confidence and saves you money. This guide walks you through every safe step, from clearing standing water to running a fresh test cycle.
Why Learning to Drain a GE Dishwasher Matters
This skill puts you in charge of your own kitchen. Instead of waiting days for a technician, you handle the problem on your schedule and keep your routine running smoothly.
The know-how travels well, too. Campers and outdoor beginners often use portable dishwashers, RV units, and compact sinks that drain by hand or through similar hose setups. The same patient steps, clearing water, hunting for a clog, and checking the drain path, work almost anywhere water needs to move out.
For home cooks and DIY appliance owners, the reward runs even deeper. You’ll understand how your machine moves water, where backups form, and how to catch trouble early. That awareness protects your kitchen floor from leaks, trims your repair bills, and helps your dishwasher serve you reliably for years.
Tools and Materials You’ll Need
You won’t need a fancy toolkit for this job. Most of these items already live somewhere in your kitchen or garage.
- Old towels or rags to protect the kitchen floor and mop up drips
- A plastic cup or small container for scooping out standing water
- A sponge to absorb the last shallow puddle in the tub
- A soft brush or old toothbrush for scrubbing the filter clean
- Rubber gloves to keep your hands protected from sharp debris
- A flashlight to peer into the dark sump and drain areas
- A screwdriver in case you need to remove a cover or clamp
- A small bowl to hold loose parts so nothing wanders off
For one optional convenience item, grab a turkey baster or a wet/dry vacuum. Either tool sucks up standing water fast and spares you a lot of slow scooping.
Step-by-Step Guide on How To Drain A GE Dishwasher
Step 1 – Cut the Power First
Safety leads every repair, so kill the power before your hands go anywhere near the inside. Switch the dishwasher off at the wall outlet, or flip its breaker in your electrical panel.
You never want to work on a powered appliance surrounded by water. Even a small splash on live parts can shock you, so treat this step as non-negotiable.
With the power off, open the door fully and let it rest there. The interior may still feel warm and damp, which is perfectly normal after a cycle.
Shine your flashlight inside and gauge how much standing water you’re facing. Knowing the scope helps you plan your next moves calmly instead of scrambling halfway through.

Step 2 – Protect Your Kitchen Floor
Before you scoop a single drop, spread a thick layer of old towels across the kitchen floor in front of the machine. Water always finds a way to drip, and you’ll be glad you prepared.
Lay them down generously, covering the spot where you’ll kneel and where you’ll set wet parts. Keep a spare towel nearby as a landing pad for the filter and other pieces you remove.
The bottom of the tub often holds soggy food bits and that sour, lingering smell. Set a trash bag within reach so you can toss debris the moment you find it. Starting clean and dry keeps a small puddle from spreading into a slippery, frustrating mess across your floor.
Step 3 – Scoop Out the Standing Water
Now face that pool head on. Grab your plastic cup and start scooping, emptying each cupful into a bucket or the sink as you work your way down.
Move slowly so you don’t slosh water over the sides and onto your fresh towels. As the level drops, switch to your sponge to soak up what the cup can’t reach. If you brought a turkey baster or wet/dry vacuum, this is its moment to shine.
You’ll feel the bottom of the tub grow clear and reachable. Keep wiping until the surface is nearly dry. Clearing the standing water first lets you see the filter and sump plainly, and it stops water from spilling out when you remove parts next.
Step 4 – Clean the Dishwasher Filter
With the water gone, locate the filter at the bottom of the tub. On most GE models, you twist it counterclockwise to release it, then lift it straight up. Rest it on your towel.
Look it over under the flashlight. You’ll often find trapped food, grease, and slimy buildup clogging the fine mesh. This gunk is one of the top reasons a dishwasher won’t drain.
Rinse the filter under warm running water and scrub it gently with your soft brush. Work the bristles through the mesh until water passes cleanly. Don’t bend or force it, since the plastic can crack under pressure. A clean filter alone often fixes the whole draining problem in one go.
Step 5 – Inspect the Drain Basket and Sump
With the filter out, peer down into the sump, that little well at the bottom where water gathers before it leaves. Clogs love to hide in this exact spot.
Shine your flashlight inside and scan for debris like broken glass, fruit pits, label scraps, or stringy food waste. These small items block the path to the drain pump and trigger a backup.
Reach in carefully with gloved fingers and pull out whatever you find. Go gently, since sharp pieces can lurk in the shadows. Never jam a tool into the pump opening, or you could damage the impeller.
Clearing this hidden well often restores draining instantly. Knowing how to drain a ge dishwasher really comes down to keeping these tight passages open and free.
Step 6 – Check the Drain Hose
The drain hose carries water out to your sink or garbage disposal, so a kink or clog here stalls everything. Trace it from the back of the dishwasher to its connection under the sink.
Hunt for sharp bends or pinched spots, which often appear when someone shoves the machine too far back against the wall. Straighten any kinks gently with your hands.

If the hose feels firm and full when you squeeze it, a clog may sit inside. Disconnect it carefully, keep a bowl ready for trapped water, and flush it with warm water until it runs clear. Stop right away if the hose looks cracked, brittle, or split. A damaged hose needs replacing before you continue the repair.
Step 7 – Examine the Garbage Disposal and Air Gap
If your dishwasher empties through a garbage disposal, a sneaky problem may hide there. New disposals arrive with a knockout plug inside, and if nobody removed it, water has nowhere to go.
Look under the sink at the disposal inlet where the hose connects. Tap it, listen, and clear any blockage you can reach inside.
Next, check the air gap, that small chrome cylinder sitting on top of your sink, if your setup includes one. Twist off the cap and look for trapped food or sludge. Scrub it out with your brush and rinse it well.
Both of these spots cause draining trouble that has nothing to do with the dishwasher itself, so a quick look pays off every time.
Step 8 – Reassemble and Run a Test Cycle
Time to put it all back together. Lower the filter into place and twist it clockwise until it locks firmly. Reconnect the drain hose snugly if you removed it, and confirm nothing sits kinked behind the machine.
Wipe the bottom of the tub one last time, then restore power at the breaker or wall switch. Close the door and start a short drain or rinse cycle to check your work.
Listen for the steady hum of the drain pump and watch the water disappear down the drain. When the cycle finishes, open the door and inspect the bottom. A dry tub means success. If a little water lingers, recheck the filter and hose before you call a technician.
Critical Mistakes When Draining a GE Dishwasher
A few simple slip-ups can turn a quick cleanup into a frustrating afternoon, so let’s steer you clear of them. The biggest mistake is working with the power still on. Water and electricity make a dangerous pair, and reaching into a live appliance puts you at real risk. Always cut the power at the breaker or wall switch before you begin, without exception.
Another frequent error is skipping the standing water and diving straight for the filter. People do this and then watch dirty water gush over the kitchen floor and into the cabinet below. Scoop and sponge out the water first, and keep towels down to catch every drip.
Many folks also force stubborn parts. Cranking on a stuck filter or jamming a tool into the sump can crack plastic or bend the pump impeller, turning a free fix into a costly one. If something resists, pause and look closer instead of muscling through it.
Finally, plenty of people ignore the drain hose and disposal entirely. They clean a spotless filter, assume the machine is broken, and miss the real clog hiding in a kinked hose or an uncleared disposal plug. Always check the full drain path before giving up.
Expert Tips
Want your dishwasher to drain smoothly for the long haul? Scrape plates well before loading, since loose food is the number one cause of clogs and slow drains. A few seconds of scraping spares your filter from heavy buildup.
Clean the filter once a month as a routine, not just when trouble appears. A two-minute rinse keeps water flowing freely and chases away that sour, standing-water smell.
Run hot water at your sink for a moment before you start a cycle. This warms the drain line so your dishwasher empties into an open, ready path instead of a cold, sluggish one.
Go easy on detergent, since too much leaves residue that gums up the works over time. And if you ever spot cracked hoses, leaking water, or a pump that grinds instead of hums, stop and call a technician before the damage grows.
Frequently Asked Questions
Why is my GE dishwasher not draining at all?
A total drainage failure usually points to a blocked filter, a clogged sump, or a kinked drain hose. Clear the standing water first, then check those three spots in order. If they’re all clean, the trouble may sit in the drain pump itself or a disposal knockout plug that was never removed. Those last two often need a closer look before you call for help.
How much standing water is normal in a dishwasher?
A small amount, usually less than a cup, often rests near the filter even after a finished cycle. That’s completely normal and keeps the seals from drying out. Start worrying only when deeper water covers the whole tub floor. That signals a genuine draining problem, which means it’s time to inspect your filter, sump, and hose for a hidden clog.
Can I drain my dishwasher without removing the filter?
Yes, you can clear the standing water first without touching the filter. Just follow these quick steps:
- Scoop out as much water as you can with a cup
- Soak up the rest with a sponge or towel
- Then remove the filter to find the real cause
Draining the water is only the first move, though. You’ll still want to clean the filter to fix the root problem properly.
Will vinegar help my dishwasher drain better?
Vinegar won’t clear a solid clog, but it does fight buildup and odor. Once your dishwasher drains properly again, pour a cup of white vinegar into the bottom and run a short hot cycle. This loosens grease and mineral deposits that slow drainage over time. Treat it as upkeep rather than a repair, and pair it with regular filter cleaning for the best results.
When should I stop and call a technician?
Stop your DIY work if you find cracked hoses, exposed or frayed wiring, or a drain pump that grinds, hums loudly, or won’t run. Those signs point to parts that need professional replacement. Also reach out if you’ve cleaned the filter, sump, hose, and disposal yet the water still won’t move. At that point, the issue likely sits deeper inside the machine.
Conclusion
Clearing a backed-up dishwasher feels far less stressful once you understand the safe, simple steps. With a few towels, a cup, and a little patience, you can solve most draining problems yourself and skip the service call entirely.
Always begin by cutting the power and protecting your kitchen floor. Scoop out the standing water, then clean the filter, check the sump, and inspect the drain hose for kinks or clogs. Don’t overlook the garbage disposal and air gap, since hidden blockages there cause plenty of grief. Reassemble carefully, restore power, and run a short rinse cycle to confirm everything flows freely again.
The real secret is to work gently, never force a stuck part, and stop the moment you spot damaged hoses, wiring, or pump components. Knowing when to step back keeps both you and your appliance safe.
This skill saves you money, protects your kitchen, and builds genuine confidence in your own hands. Now that you know how to drain a ge dishwasher, gather your supplies, take your time, and give your machine the care it deserves.

About
Nick Hall has spent the last seven years working at the intersection of kitchen design and home repair — first as a design assistant at a residential renovation studio, then as a freelance writer covering everything from cabinet layouts to leaky faucet fixes.
Her approach is simple: kitchens should look good and function well. That means she’s just as comfortable talking about color palettes and counter materials as she is walking readers through how to fix a wobbly cabinet hinge or troubleshoot a garbage disposal.
Nick has worked directly with homeowners on small-space kitchen makeovers, budget-conscious renovations, and the kind of everyday repairs that don’t need a contractor — just the right instructions. She writes from experience, not theory, and tests most of the fixes and tips she shares before publishing them.
When she’s not writing, Nick is usually hunting for mid-century kitchen finds at estate sales or helping friends plan their own renovations. She lives in Columbus, Ohio.