
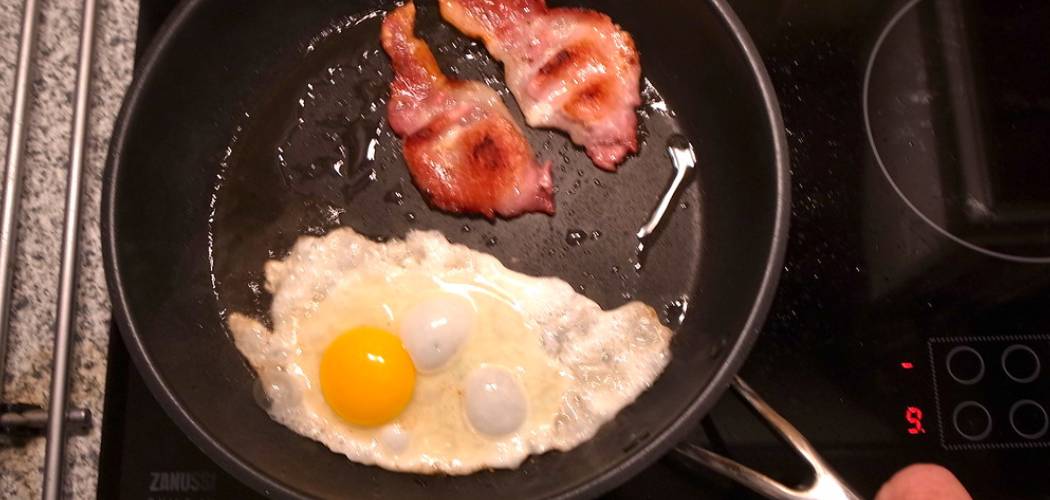
That perfect, golden omelet sliding right onto your plate without a fight? It starts with treating your cookware the right way. Many beginners think a non-stick pan does all the work on its own, then wonder why food sticks or the coating wears out fast.
The truth is gentler than you’d expect. Learning how to use non stick pan basics, from heat control to soft utensils, makes cooking easier and keeps your pan smooth for years.

You don’t need fancy gear or special skills. With a little know-how, you’ll get clean food release, quick cleanup, and meals that practically cook themselves.
This guide walks you through everything step by step, so you can cook with confidence and protect your favorite pan at the same time.
Why Learning to Use a Non-Stick Pan Matters
If you cook outdoors, this skill is pure gold. A non-stick pan shines on portable stoves, in camp kitchens, and inside cozy cabins where space and supplies stay limited.
Think about it. When you’re cooking on a small burner in your RV, you want food that lifts away cleanly and a pan you can wipe down with barely any water. That easy cleanup matters when fresh water is precious and you’re miles from a sink.
Non-stick cookware also helps with fuel efficiency. Because food releases easily, you cook over low to medium heat instead of cranking the flame, saving precious propane.
For quick meal prep at a campsite or cabin, nothing beats a reliable non-stick surface. Master it once, and outdoor cooking gets simpler everywhere you go.
Tools and Materials You’ll Need
Before you start, gather a few simple items. None of them cost much, and most you probably already own. Having everything close keeps your cooking smooth and protects that delicate pan coating from harm.
Here’s what to grab:
- Your non-stick pan, clean and dry
- A wooden spatula or silicone utensils that won’t scratch the surface
- A small amount of cooking oil or cooking spray
- A soft cloth or paper towel for spreading oil evenly
- Mild dish soap and a non-abrasive sponge for gentle cleaning
- A heat-safe trivet to rest the hot pan on
- A burner that matches your pan size for even heating
- Optional: A splatter screen, which keeps your stovetop tidy and cuts down on cleanup
Set these out before you turn on the stove. A little prep now saves scrambling later.
Step-by-Step Guide on How to Use Non Stick Pan
Step 1 – Inspect the Pan Before You Cook
Start by giving your pan a quick look. Run your fingers across the surface and check for scratches, peeling, or flaking in the coating.
A smooth, intact surface means great food release. If you spot deep scratches or bubbling, it’s safer to retire that pan, since damaged coatings don’t perform well.
Make sure the pan is clean and completely dry, too. Leftover residue from last time can cause sticking and uneven heating.

Check that the handle feels solid and isn’t loose. A wobbly handle makes cooking risky, especially when the pan heats up.
This quick once-over takes seconds but sets you up for success. Knowing your cookware is in good shape lets you cook with confidence from the very first crack of an egg.
Step 2 – Match the Pan to Your Burner
Place your pan on a burner that fits its size. A small pan on a huge flame wastes heat and scorches the edges, while a big pan on a tiny burner heats unevenly in the center.
Good stove compatibility keeps your cooking smooth and your coating safe. The flame or element should sit right under the pan’s base, not creep up the sides.
This matters even more on portable stoves and camp burners, where heat zones can be narrow. Center the pan carefully so it sits flat and stable.
Take a moment to make sure nothing wobbles. A steady, well-matched pan heats evenly, cooks food consistently, and protects that smooth surface from hot spots that wear it down over time.
Step 3 – Heat the Pan Gently
Here’s where most folks go wrong. Resist the urge to blast the heat. Non-stick pans perform best over low to medium heat, so set your burner there and let the pan warm slowly.
Never preheat an empty non-stick pan for long. High, dry heat damages the coating fast and can release fumes you don’t want around.
Give it just a minute or two. Hold your hand a few inches above the surface, and you’ll feel a gentle, even warmth rising.
That slow start protects your pan and gives you better cooking control. Learning how to use non stick pan cookware well really comes down to patience here. Low and steady wins, keeping your surface smooth for years of meals.
Step 4 – Add Oil or Cooking Spray
Once the pan feels warm, add a small amount of oil or a quick spritz of cooking spray. You don’t need much, since the surface already resists sticking.
Tilt the pan gently to spread the oil across the whole base. Good oil distribution creates a thin, even layer that helps food release and adds flavor.
Watch for the oil to shimmer slightly. That gentle ripple tells you the pan’s ready for food. If it smokes, you’ve gone too hot, so pull back the heat right away.
A soft cloth or paper towel works great for wiping oil into the corners. This little step makes a big difference, giving you that satisfying, clean slide when your food is done cooking.
Step 5 – Add Your Food at the Right Moment
Timing is everything. Lay your food in once the oil shimmers and the pan feels evenly warm. You’ll hear a soft, pleasant sizzle, which means the surface is ready.
For scrambled eggs or delicate foods like fish and pancakes, this gentle heat is perfect. They cook through without sticking or tearing.
Don’t crowd the pan. Leave a little space between pieces so everything cooks evenly and browns nicely. Too much food at once drops the temperature and leads to steaming instead of searing.
Listen and watch as your food cooks. The steady sizzle and rising aroma guide you better than any timer. With the right heat and timing, your meal practically takes care of itself.
Step 6 – Stir With Soft Utensils
Reach for a wooden spatula or silicone utensils every time. Metal tools scratch and gouge the coating, ruining that smooth, non-stick magic.
Stir and flip gently, letting the surface do its job. You’ll notice food lifts away with barely any effort, sliding across the pan like it’s on ice.
Keep your movements smooth and unhurried. There’s no need to scrape hard or press down, since the coating handles food release for you.

Soft utensils protect your investment and keep cooking pleasant. They glide quietly instead of clanking against metal.
This habit alone can double the life of your pan. Treat that surface kindly, and it’ll reward you with clean, easy meals for a long, long time.
Step 7 – Adjust Heat as You Cook
Stay attentive and tweak the heat as needed. If food browns too fast or the oil starts to smoke, lower the flame right away.
Non-stick coatings hate overheating, so keep things in that comfortable low-to-medium zone. A steady, moderate heat cooks food evenly and keeps your surface safe.
Notice how the pan responds. A gentle, consistent sizzle means you’re in the sweet spot. A harsh, spitting sound usually means it’s too hot.
On portable stoves, flames can flare unexpectedly, so check often. Small adjustments keep everything cooking beautifully.
Trust your senses here. The sound, the smell, and the color of your food all tell you when to nudge the heat up or down for perfect results.
Step 8 – Cool Down and Clean Gently
When your meal’s ready, slide it onto a plate and turn off the heat. Set the pan on a heat-safe trivet and let it cool naturally.
Never plunge a hot pan into cold water. That sudden shock can warp the metal and crack the coating.
Once it’s cool, wash by hand with mild dish soap and a non-abrasive sponge. Gentle hand washing protects the surface far better than the dishwasher.
Wipe away food softly, since most residue lifts right off with little effort. That easy cleanup is one of the best perks of cooking this way.
Dry the pan completely before storing it. A little surface care after every meal keeps your cookware smooth, reliable, and ready for the next dish.
Read More: How to Increase Kitchen Sink Water Pressure.
Critical Mistakes When Using a Non-Stick Pan
Even simple cooking can trip you up, so let’s cover the slip-ups that wear out pans fast. The biggest one is cooking on high heat. Non-stick coatings simply aren’t built for it. Crank the burner too high and you’ll damage the surface, scorch your food, and even release unwanted fumes. Stick to low to medium heat, and your pan stays happy for years.
Another common error is preheating an empty pan for too long. Without oil or food to absorb the heat, the coating bakes and breaks down quickly. Add a little oil early, or heat only briefly before food goes in.
Many people also reach for metal utensils out of habit. Those sharp edges scratch and peel the coating, creating spots where food starts to stick. Switch to a wooden spatula or silicone utensils instead.
Harsh cleaning causes trouble, too. Steel wool and abrasive scrubbers strip the surface, so always use a non-abrasive sponge and gentle hand washing.
Finally, shocking a hot pan with cold water warps it. Let your cookware cool fully before you wash it.
Expert Tips
Want your pan to last even longer? Store it carefully. Stack a paper towel or soft cloth between pans so nothing rubs against the coating.
Skip the cooking spray for everyday use if you can. Some sprays leave a sticky residue that builds up over time. A small splash of oil works better and keeps the surface clean.
Forget the seasoning myths, too. Unlike cast iron, non-stick pans don’t need seasoning to work. The coating does all the heavy lifting on its own.
When cooking outdoors, shield your pan from direct flame flare-ups on portable stoves. Steady, moderate heat protects the surface.
Finally, replace pans showing heavy wear. A flaking coating won’t release food well and isn’t worth the frustration. A fresh pan brings back that effortless cooking joy.
Frequently Asked Questions
What heat setting is best for a non-stick pan?
Low to medium heat works best, almost always. Non-stick coatings aren’t designed for high temperatures, which can damage the surface and release fumes. Most foods, from scrambled eggs to delicate fish, cook beautifully at moderate heat. Start low, let the pan warm gently, and only nudge the temperature up if you truly need to. Your pan will thank you with years of clean food release.
Do I need oil if the pan is already non-stick?
A little oil still helps, even on a non-stick surface. It improves food release, adds flavor, and protects the coating. You don’t need much, though. Use just enough to create a thin, even layer across the base. Here’s when oil matters most:
- Cooking delicate foods like eggs or fish
- Browning meat or vegetables
- Adding flavor to your dish
A light touch is all it takes.
Can I use metal utensils in my non-stick pan?
It’s best not to. Metal utensils scratch and gouge the coating, creating spots where food starts sticking. Once the surface is damaged, food release gets worse and the pan wears out faster. Reach for a wooden spatula or silicone utensils instead. They glide gently across the surface, protect the coating, and can easily double the life of your favorite cookware.
How do I clean a non-stick pan without ruining it?
Gentle is the golden rule. Let the pan cool fully first, since cold water on a hot pan causes warping. Then wash by hand with mild dish soap and a non-abrasive sponge. Most food lifts off with barely any scrubbing. Skip steel wool, harsh scrubbers, and the dishwasher when you can. Dry the pan completely before storing it to keep the surface smooth.
Do non-stick pans need seasoning like cast iron?
No, and this is a common mix-up. Seasoning myths often lead beginners astray here. Non-stick coatings already provide the slick, food-releasing surface you need, so they don’t require seasoning like cast iron does. Just cook gently, use soft utensils, and clean by hand. That simple surface care keeps your pan performing well without any extra steps or special treatment.
Conclusion
Cooking with a non-stick pan really comes down to a few gentle habits. Keep the heat low to medium, add a little oil, use soft utensils, and clean by hand. Do that, and your meals slide off easily while your pan stays smooth for years.
Remember the key takeaways:
- Cook over low to medium heat and never overheat an empty pan
- Stir with a wooden spatula or silicone utensils to protect the coating
- Wash gently with a non-abrasive sponge and let the pan cool first
- Match the pan to your burner for even, reliable heating
These small steps make a big difference, whether you’re cooking scrambled eggs at home or whipping up a quick meal at the campsite.
Now that you know how to use non stick pan cookware the right way, give it a try with your next meal. You’ll enjoy effortless food release, quick cleanup, and the quiet satisfaction of caring for your gear yourself. Happy cooking, and treat that pan kindly!

About
Nick Hall has spent the last seven years working at the intersection of kitchen design and home repair — first as a design assistant at a residential renovation studio, then as a freelance writer covering everything from cabinet layouts to leaky faucet fixes.
Her approach is simple: kitchens should look good and function well. That means she’s just as comfortable talking about color palettes and counter materials as she is walking readers through how to fix a wobbly cabinet hinge or troubleshoot a garbage disposal.
Nick has worked directly with homeowners on small-space kitchen makeovers, budget-conscious renovations, and the kind of everyday repairs that don’t need a contractor — just the right instructions. She writes from experience, not theory, and tests most of the fixes and tips she shares before publishing them.
When she’s not writing, Nick is usually hunting for mid-century kitchen finds at estate sales or helping friends plan their own renovations. She lives in Columbus, Ohio.