
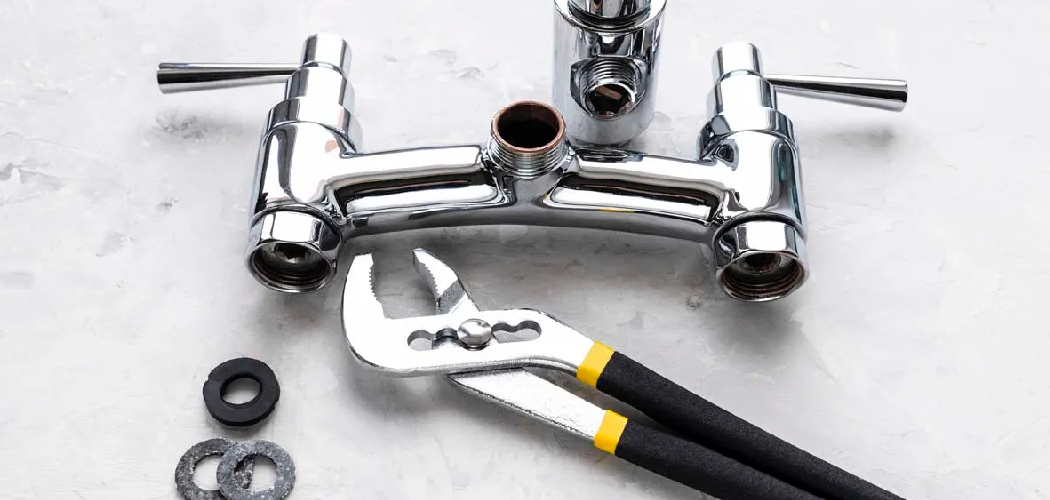
A dripping faucet at midnight, a handle that wobbles, or water sneaking under your sink—these little problems have a way of nagging at you. The good news? Most Delta faucet issues are surprisingly simple to solve, and you don’t need a plumber to handle them.
Delta builds reliable faucets, but even the best ones wear down over time. Worn O-rings, a tired cartridge, or stubborn mineral buildup can throw things off. The fixes, though, are well within your reach.

Learning how to fix delta kitchen faucet troubles saves you money, time, and the hassle of waiting around for help. With a few basic tools and a calm approach, you can tackle this yourself. This guide walks you through the whole repair, step by step, so you can get your faucet running smoothly again.
Why Fixing a Delta Kitchen Faucet Matters
Knowing how to repair your own faucet pays off far beyond the kitchen sink. A dripping tap wastes gallons of water and quietly inflates your bill, while a small leak under the sink can warp cabinets and breed mold if you ignore it.
This skill travels well, too. If you love weekend trips, an RV sink runs on the same basic principles, and a quick handle repair keeps your camp prep station working when you’re miles from a hardware store. Cabin kitchens often rely on simple faucets that you’ll need to maintain yourself.
Even a temporary outdoor washing setup benefits when you understand cartridges, seals, and water shutoff basics. Once you grasp how these parts fit together, you gain confidence to troubleshoot almost any faucet, anywhere. That kind of independence feels good and keeps your household running smoothly.
Tools and Materials You’ll Need
Gather everything before you start, because hunting for a tool with the water off and parts scattered around is no fun. Begin with an adjustable wrench and a set of Allen wrenches, since Delta handles often use a small hex screw. A pair of needle-nose pliers helps you grip the retaining clip and lift small parts free.
You’ll also want a Phillips screwdriver, a flashlight for peering into the sink cabinet, and a clean rag to catch drips. Keep some plumber’s grease handy for lubricating O-rings, and pick up the right replacement parts—usually a faucet cartridge, fresh seals, or a new aerator.
One optional convenience item worth grabbing is a small basin or bucket to catch leftover water in the supply lines. It keeps your work area dry and tidy.
Step-by-Step Guide on How to Fix Delta Kitchen Faucet
Take this repair one stage at a time and you’ll find it far less intimidating than it looks. Knowing how to fix delta kitchen faucet problems comes down to patience, the right replacement parts, and careful reassembly.
Step 1 – Shut Off the Water Supply
Before you touch anything, kill the water. Reach into the sink cabinet and find the two shutoff valves on the supply lines—one for hot, one for cold. Turn both clockwise until they stop firmly.
Now open the faucet handle to release any trapped pressure. You’ll hear a soft hiss, then a final trickle as the lines drain. This step protects you from a sudden spray once you start loosening parts.
Place your rag or a small basin beneath the connections to catch leftover water. Test the faucet again to confirm nothing flows. Skipping this simple move is how DIY repairs turn into soaked cabinets, so take the extra minute to be sure the water is truly off before moving on.

Step 2 – Identify Your Faucet Type and Problem
Delta makes several styles, and knowing yours saves time. Look at your handle. A single-handle model usually hides a ball or cartridge inside, while a two-handle version uses separate seats and springs or individual cartridges.
Notice the exact symptom, too. A drip from the spout points to a worn cartridge or valve seat, while water pooling at the spout base often means tired O-rings. A loose, wobbly handle suggests a simple screw fix.
Snap a quick photo of your faucet before you begin. This gives you a handy reference for reassembly and helps you match the correct replacement parts at the store. Matching the right cartridge to your model number matters, so check the packaging carefully.
Step 3 – Remove the Handle
With the water off, it’s time to open things up. Most Delta handles hold on with a single set screw tucked beneath a small cap or right at the base. Pry off any decorative cap gently, then reach for your Allen wrench.
Loosen the hex screw, turning it counterclockwise. You’ll feel it give as the threads release. Set that tiny screw somewhere safe—dropping it down the drain is a classic beginner heartbreak.
Now lift the handle straight up and off. It may resist slightly if mineral buildup has formed around the base. Wiggle it gently rather than yanking. Once free, you’ll see the inner workings of the faucet, ready for the next stage of your repair.
Step 4 – Take Out the Retaining Clip and Bonnet Nut
Look closely and you’ll spot a retaining clip or a bonnet nut holding the cartridge in place. On many Delta models, a small horseshoe-shaped clip slides out from the side. Use your needle-nose pliers to grip and pull it free, then tuck it with your other parts.
If your faucet uses a bonnet nut instead, fit your adjustable wrench around it and turn counterclockwise. You might feel some resistance from corrosion or hard water deposits.
Go slowly so you don’t strip the threads or crack anything. The nut should loosen with steady pressure, then spin off by hand. Keep these pieces organized in the order you removed them—future you will be grateful during reassembly.
Step 5 – Pull and Inspect the Cartridge
Now grip the faucet cartridge and pull it straight up and out. It may cling slightly thanks to old O-rings and grime. A gentle twist-and-lift usually frees it.
Hold the cartridge up to your flashlight and inspect it. Look for cracked or flattened O-rings, white crusty mineral buildup, or worn seals that no longer seat properly. These are the usual culprits behind a persistent drip.
Run your finger along the surfaces. Smooth, intact rubber should feel springy, while worn seals feel hard and brittle. If you spot corrosion or damage, replacement is your best bet. Sometimes a thorough cleaning and fresh O-rings revive a cartridge, but a worn unit almost always needs swapping out entirely.
Step 6 – Clean Away Mineral Buildup
Before installing anything new, clean the faucet body. Hard water deposits love to collect inside the valve seat and around the cartridge housing, and they’ll sabotage even a brand-new part if you leave them.
Soak a rag in white vinegar and wrap it around the affected areas. Let it sit for ten minutes to dissolve the crusty buildup. Then scrub gently with an old toothbrush.
Wipe everything clean and check the valve seat for pitting or rough spots. A smooth seat helps the new cartridge seal tightly. Rinse away any vinegar residue and dry the area. This small effort makes a big difference, ensuring your repair lasts months or years instead of failing again within weeks.
Step 7 – Install the New Cartridge and Reassemble
Time to put it all back together. Coat the new O-rings lightly with plumber’s grease—this helps them seat smoothly and extends their life. Slide the fresh cartridge straight down into the housing, lining up any notches or tabs.
Press until you feel it settle firmly into place. Replace the retaining clip or thread the bonnet nut back on, snugging it without overtightening.
Slip the handle back over the stem, then secure the set screw with your Allen wrench. Snap on any decorative cap you removed earlier. Everything should feel solid, with no wobble in the handle. Work in the reverse order of disassembly, and that photo you took earlier will guide you if anything looks unfamiliar.
Step 8 – Restore Water and Check for Leaks
Reach back under the sink and slowly turn both shutoff valves counterclockwise to restore the water supply. Open them gradually so the lines refill without a jarring rush.
Now turn on the faucet and watch closely. Let it run hot and cold, checking for steady water pressure and a smooth flow. Move the handle through its full range to confirm it feels firm and responsive.
Inspect the spout base and the supply lines under the sink for any drips. Run your fingers along the connections—a tiny bead of water signals a loose fitting that needs a slight turn. If everything stays dry and the drip is gone, congratulations. Your drip repair is complete and your faucet works like new.
Critical Mistakes When Fixing a Delta Kitchen Faucet
A few common slip-ups trip up beginners, so let’s clear them up before you grab your wrench. The biggest mistake is forgetting to shut off the water supply. It sounds obvious, yet plenty of eager DIYers loosen a part only to get blasted with water and a flooded cabinet. Always close both shutoff valves and release the pressure first.
Another frequent error is overtightening parts during reassembly. Cranking the bonnet nut or set screw too hard can crack the cartridge, strip threads, or damage the handle. Snug is enough—these connections seal through proper seating, not brute force.
Many people also install the wrong replacement parts. Delta makes numerous models, and a cartridge that looks close but isn’t an exact match will leak or refuse to fit. Check your model number and bring your old part to compare.
Skipping the cleaning step causes trouble, too. Reinstalling a fresh cartridge over old mineral buildup means your new part wears out fast. Finally, folks lose tiny screws and clips down the open drain. Plug it with a rag before you start, and keep your small parts organized in order.

Expert Tips
Want your repair to go smoothly and last? Lean on a few tricks the pros rely on. Always take photos at each stage of disassembly, since reassembly becomes effortless when you have a visual reference for every part.
Keep your removed pieces lined up in order on a clean towel. This simple habit prevents that frustrating moment when you’re left with a mystery screw and no idea where it belongs.
Buy a small repair kit specific to your Delta model rather than guessing on individual parts. The matched O-rings, springs, and seals save you a second trip to the store. A dab of plumber’s grease on every rubber part extends its life and makes future repairs easier. And test your work patiently—run the water a full minute and check twice before you call it done.
Frequently Asked Questions
Why does my Delta faucet keep dripping after I replaced the cartridge?
A persistent drip usually means one of a few things:
- The new cartridge isn’t seated fully, so press it firmly until it settles.
- Mineral buildup or a pitted valve seat is blocking a tight seal—clean it thoroughly.
- The replacement part doesn’t exactly match your model.
Double-check your model number, reseat the cartridge, and make sure no debris sits in the housing before reassembling.
Do I need to turn off the main water to fix my faucet?
Usually not. Most kitchen sinks have two local shutoff valves on the supply lines inside the cabinet. Turn both clockwise to stop the flow, then open the faucet to release pressure. If those valves are stuck, corroded, or missing, then shut off your home’s main water supply as a backup before starting your repair.
How do I know if I need a new cartridge or just new O-rings?
Inspect the parts closely. If only the rubber O-rings look flat, cracked, or brittle while the cartridge body stays smooth and intact, fresh O-rings and plumber’s grease may fix it. But if the cartridge shows corrosion, splits, or heavy mineral buildup, replace the whole unit. When in doubt, swapping the cartridge is the most reliable, lasting solution.
My faucet handle feels loose. Is that hard to fix?
Not at all—it’s one of the easiest repairs. A loose handle almost always means the set screw underneath has worked itself loose. Pry off the decorative cap, grab your Allen wrench, and tighten the hex screw snugly. Avoid overtightening, which can strip it. If tightening doesn’t help, the handle adapter beneath may be worn and need a quick replacement.
How long should a Delta faucet repair take?
For a beginner, plan on roughly 30 to 60 minutes. Gathering tools, shutting off water, and inspecting parts takes the most time up front. The actual cartridge swap goes quickly once you understand the layout. If corrosion or stubborn mineral buildup slows you down, allow extra time for soaking and cleaning. Working carefully beats rushing every time.
Conclusion
You’ve now walked through the entire repair, from shutting off the water to checking your final connections for leaks. The secret really comes down to a few steady habits: cut the water first, work methodically, and keep your parts organized so reassembly feels easy.
Remember the details that make all the difference. Match your replacement parts to the exact Delta model, clean away every trace of mineral buildup, and snug your fittings without overtightening. A dab of plumber’s grease on each O-ring keeps things sealing smoothly for years.
Understanding how to fix delta kitchen faucet problems hands you real independence and saves you money you’d otherwise spend on a plumber. You’ll stop that wasteful drip, protect your cabinet from water damage, and gain confidence to tackle the next repair that comes along—whether at home, in an RV, or out at a cabin sink.
So gather your tools, grab the right cartridge, and get to work. Your smooth-running faucet is just a half hour away.

About
Nick Hall has spent the last seven years working at the intersection of kitchen design and home repair — first as a design assistant at a residential renovation studio, then as a freelance writer covering everything from cabinet layouts to leaky faucet fixes.
Her approach is simple: kitchens should look good and function well. That means she’s just as comfortable talking about color palettes and counter materials as she is walking readers through how to fix a wobbly cabinet hinge or troubleshoot a garbage disposal.
Nick has worked directly with homeowners on small-space kitchen makeovers, budget-conscious renovations, and the kind of everyday repairs that don’t need a contractor — just the right instructions. She writes from experience, not theory, and tests most of the fixes and tips she shares before publishing them.
When she’s not writing, Nick is usually hunting for mid-century kitchen finds at estate sales or helping friends plan their own renovations. She lives in Columbus, Ohio.