
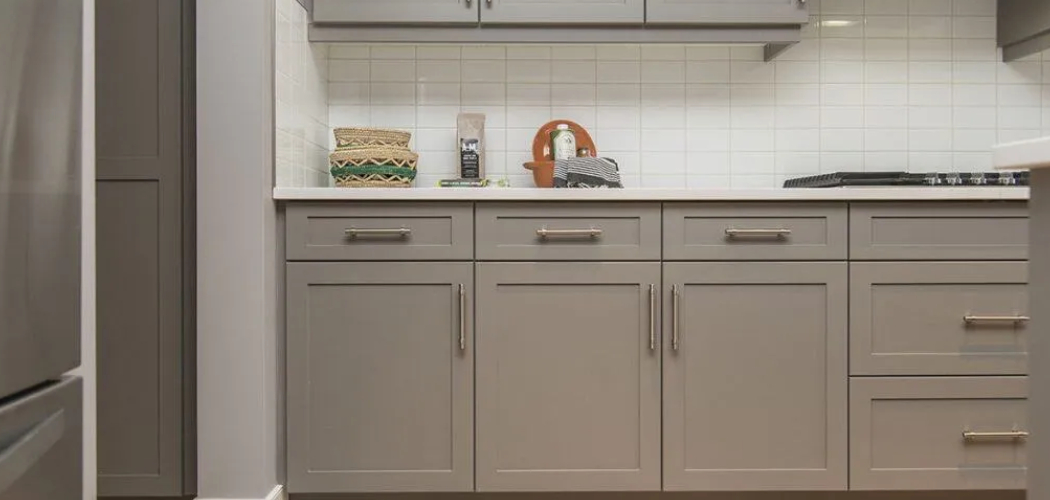
If you want replacement doors that fit well, look tidy, and open without rubbing, accurate measuring is the whole job. A few millimeters can mean the difference between a smooth upgrade and a frustrating return. That is why learning how to measure kitchen cupboard doors matters before you order anything, whether you are refreshing old units, changing the style, or replacing damaged fronts.
The good news is that you do not need specialist training to get this right. You just need a steady process, the right tools, and a little patience. This guide will show you exactly how to measure your cupboard doors with confidence.

Why Knowing How to Measure Kitchen Cupboard Doors Matters
Kitchen doors are not one-size-fits-all. Even cabinets that look similar can have different widths, heights, hinge positions, and overlay styles. If your measurements are off, the new door may sit unevenly, leave gaps, catch on nearby panels, or fail to cover the cabinet opening correctly.
Knowing how to measure properly helps you save time, money, and stress. You can order replacement cupboard doors with more confidence, avoid costly mistakes, and get a cleaner final look. It also helps if you are comparing custom-made doors, ready-made options, or made-to-order shaker and slab fronts. Once you understand the basics, the whole project feels much more manageable. Next, you’ll want to gather a few simple tools before you start measuring.
Tools and Materials
Before you begin, set yourself up with tools that make the job easier and more accurate. You do not need much, but each item helps reduce mistakes.
- A metal tape measure with clear millimeter markings
- A pencil for jotting down sizes
- A notepad or printed measuring sheet
- A straight edge or ruler for checking flat lines
- A screwdriver if you plan to remove a door for easier measuring
- Masking tape for labeling each door and cabinet
- A phone camera to photograph each unit and hinge position
- A spirit level if you want to check whether cabinets are sitting evenly
- Optional: a second person to hold the tape steady on wider doors
Once your tools are ready, you can move through the measuring process in a clear, repeatable way.
Step-by-Step Guide on How to Measure Kitchen Cupboard Doors
Step 1 – Identify what you are measuring
Start by deciding whether you are measuring an existing door, the cabinet opening, or both. In most cases, the safest option is to measure the current door if it already fits well. Place your hand on the surface and notice whether it sits flush, overlaps the cabinet neatly, and swings open without scraping nearby panels or handles.
If the old door is warped, chipped, or clearly the wrong size, measure the cabinet itself as well. This gives you a second reference point. Write down each cabinet location as you go, such as “sink base left” or “wall unit above hob.” A simple label system stops confusion later when several similar sizes start to blur together. Next, you’ll record each door separately so nothing gets mixed up.
Step 2 – Label every door and cabinet
Before you take a single number, create a system that links each door to its cabinet. Put a small piece of masking tape on the inside edge of the door and mark it with a code. Then use the same code on your notes. This sounds basic, but it prevents one of the most common measuring mistakes: having the right size attached to the wrong unit.
Take a quick photo of each cabinet front too. Include handles, hinge side, and any nearby panels in the frame. Those small details help later when you order replacements or reinstall everything. If two wall cupboards look identical, your notes may not be enough on their own. A clear photo gives you visual backup. With labeling done, you are ready to measure the width with more confidence and less guesswork.
Step 3 – Measure the door width carefully
To begin how to measure kitchen cupboard doors properly, measure the width of the existing door from one outer edge to the other outer edge. Hold the tape measure straight across the widest points and read the number in millimeters. Avoid using inches if the supplier works in metric, since conversions can introduce errors.
Take the measurement twice. The tape should sit flat against the door face, not sag across the surface. If the door has a rounded edge or decorative profile, measure the full slab size, not just the flat center panel. Write the width down immediately before moving on. It helps to say the number out loud as you record it, especially if you are measuring several doors in one session. Once width is logged, move straight to height using the same careful method.
Step 4 – Measure the door height from top to bottom
Stand the tape measure vertically and measure from the top outer edge of the door to the bottom outer edge. Keep the tape straight and snug so it does not drift off line. If the door is still attached, open it slightly so you can line up the tape more easily without the handle getting in your way.
Look closely at the corners while measuring. Older kitchen doors sometimes swell, chip, or bow, especially near sinks and dishwashers where moisture is common. If one edge looks damaged, measure along the cleaner side and compare both readings. A badly worn door should not be your only guide. When in doubt, compare it with the cabinet opening and neighboring doors. At this stage, you should now have a clear width and height for each unit, which forms the core of your order details.

Step 5 – Check overlay and gaps around the door
Door size is only part of the picture. You also need to understand how much the door overlaps the cabinet frame or carcass. This is known as the overlay. Close the door and look at the small gaps around it. Notice whether the door covers the cabinet edge fully or leaves some frame visible.
Measure the opening behind the door if you can, then compare it with the door size. The difference helps you estimate the overlay on each side. For example, if the cabinet opening is smaller than the door, the extra size is what creates the overlap. This step matters when replacing doors on older kitchens where spacing is tight. A door that is technically the same size can still fit badly if the overlay style changes. Next, you’ll check hinge details, which affect drilling and installation.
Step 6 – Measure hinge hole positions if needed
If you are ordering pre-drilled doors, hinge measurements matter just as much as door size. Remove one door if needed and place it on a flat surface. Measure the distance from the top of the door to the top of the hinge hole, then from the bottom of the door to the bottom hinge hole. Also record the diameter of the hinge cup if your supplier asks for it.
Most concealed kitchen hinges use a standard cup size, but the position can vary. Some doors also have three hinges instead of two, especially taller pantry or larder units. Be careful here, because one wrong drilling position can make fitting awkward. If your new supplier offers hinge drilling templates, compare your numbers against their format. With those details recorded, you can now double-check all measurements before you place an order.
Step 7 – Confirm each measurement twice
This is the stage where you slow down and verify everything. Read through your list and compare each width, height, cabinet label, and hinge detail. Then go back to the kitchen and remeasure at least a few key doors, especially larger ones, corner units, and any cabinets near appliances where spacing may be tighter.
This review step is where many successful orders are saved. When people rush, they often transpose numbers, write 496 instead of 469, or copy the right size onto the wrong cabinet. In a quiet kitchen, with the tape clicking softly back into place and cabinet doors opening one by one, it is easier to spot those small mistakes. If a number looks odd, trust that instinct and check it again. After that, you can organize your final list in a clean order sheet.
Step 8 – Record your final order details clearly
The last part of how to measure kitchen cupboard doors is turning rough notes into a format you can actually use. Create a simple chart with cabinet location, door width, door height, hinge side, hinge hole details, and any special notes. Include whether the door is left-hand or right-hand opening when viewed from the front.
Keep all measurements in millimeters and keep the format consistent. Do not mix shorthand, half-finished notes, and phone screenshots if you can avoid it. A clear final record makes ordering easier and gives you something to check when the new doors arrive. If a supplier calls to confirm one size, you will have the answer in seconds. With your list complete, the next step is knowing which errors to avoid before you submit the order.

Common Mistakes
One common mistake is measuring the cabinet opening only and assuming the new door should match that size. In many kitchens, the door is larger than the opening because it overlaps the cabinet edges. If you ignore overlay, the replacement may look too small and leave awkward gaps.
Another mistake is measuring in inches when the supplier works in millimeters. Even a small conversion error can throw off the fit, especially on narrow doors or units that sit side by side. It is much safer to measure in millimeters from the start and keep every note in the same unit.
People also forget to label doors clearly. That creates confusion later, especially in kitchens with several similar wall units. A correct measurement attached to the wrong cabinet is still a costly mistake.
A fourth issue is trusting a damaged or warped door without checking the cabinet behind it. Heat, steam, and age can distort old cupboard fronts. If a door looks swollen or bowed, use it as one reference, not the only one.
Finally, many beginners skip the second check. That is where simple writing mistakes, swapped numbers, and missed hinge details usually slip through. A short review at the end often prevents the biggest problems.
Expert Tips
Measure when the kitchen is quiet and well lit. It sounds simple, but distractions lead to mixed numbers and rushed notes. Morning light or bright overhead lighting makes it easier to read the tape and spot edge damage.
Always measure each door individually, even if two cabinets look the same. Older kitchens can vary more than you expect, especially after years of use, repairs, or settling. It also helps to remove one sample door if the layout is awkward or the handles get in the way.
If you are ordering painted or custom-made doors, check the supplier’s measuring guide before you buy. Some ask for finished door size, while others want opening size and overlay details. Matching your notes to their system helps avoid confusion and delays.
Frequently Asked Questions
Do I measure the door or the cabinet opening?
If the existing door fits properly, measure the door first. That gives you the finished size you need to replace. If the old door is warped, damaged, or clearly wrong, measure the cabinet opening too and compare both sets of numbers before ordering.
Should I remove the cupboard door before measuring?
You do not always need to remove it, but it can make the job easier. A flat door on a worktop is simpler to measure accurately, especially for height, width, and hinge hole positions. If you leave it attached, open it slightly so the tape can sit straight.
What unit should I use when measuring kitchen doors?
Use millimeters. Most kitchen door suppliers and manufacturers list sizes in metric, and millimeters give you more precise results. Using inches and converting later increases the risk of rounding errors, which can affect the final fit.
How do I know if I need hinge hole measurements?
You need hinge hole measurements if you are ordering pre-drilled replacement doors. In that case, the hinge cup size and the distance from the top and bottom edges matter. If the doors will arrive undrilled, you may only need the finished width and height.
What if two doors look the same size?
Measure both anyway. Similar-looking doors can still differ by a few millimeters, and that matters in a fitted kitchen. Older units may also have small variations caused by wear, moisture, or previous adjustments, so it is better to confirm than assume.
Conclusion
Getting accurate cupboard door measurements is less about special skill and more about using a careful method. When you label each unit, measure width and height in millimeters, check overlay, and confirm hinge positions, you give yourself a much better chance of ordering doors that fit cleanly the first time. That saves money, reduces delays, and makes installation far less stressful.
If you feel unsure, take your time and check every number twice. A calm, organized approach will usually beat a fast one. Once you understand how to measure kitchen cupboard doors, the task becomes straightforward, even if it is your first time. Start with one cabinet, follow the same process across the kitchen, and you will end up with a clear, reliable set of measurements you can trust.

About
Nick Hall has spent the last seven years working at the intersection of kitchen design and home repair — first as a design assistant at a residential renovation studio, then as a freelance writer covering everything from cabinet layouts to leaky faucet fixes.
Her approach is simple: kitchens should look good and function well. That means she’s just as comfortable talking about color palettes and counter materials as she is walking readers through how to fix a wobbly cabinet hinge or troubleshoot a garbage disposal.
Nick has worked directly with homeowners on small-space kitchen makeovers, budget-conscious renovations, and the kind of everyday repairs that don’t need a contractor — just the right instructions. She writes from experience, not theory, and tests most of the fixes and tips she shares before publishing them.
When she’s not writing, Nick is usually hunting for mid-century kitchen finds at estate sales or helping friends plan their own renovations. She lives in Columbus, Ohio.