
Removing an oven door can make cleaning, moving, or repairing an appliance much easier, but reattaching it can feel confusing the first time. The door is heavy, the hinge arms may snap with spring tension, and the glass panel needs careful handling. Still, most lift-off door designs go back into place with a steady grip and the right angle.
Learning how to put an oven door back on helps you avoid bent hinges, uneven door alignment, and damage to the oven frame. You do not need advanced repair skills, but you do need patience, safety awareness, and a clear process.
This guide explains the safe, beginner-friendly steps for reattaching an oven door so it closes smoothly and seals correctly.
Why Learning to Reattach an Oven Door Matters
Knowing how an oven door fits back onto its hinges is useful for homeowners, campers, outdoor beginners, and practical DIY users. In a cabin, RV, camp kitchen, or home setup, basic appliance maintenance saves time and helps you handle small issues without panic.
An oven door affects heat retention, cooking results, and safety. If the door seal does not sit flat, heat can escape. If the hinge arms do not seat inside the hinge slots, the door may hang unevenly or refuse to close.
This skill also builds confidence. Once you understand hinge receivers, locking tabs, and door balance, you can clean the oven, check the gasket, and handle simple reinstallation tasks with more control.
Tools and Materials You’ll Need
You do not need many tools for most oven door reinstallation jobs. The main “tool” is a careful approach, because the door can be bulky and awkward even when it is not very wide. Keep the appliance manual nearby if you have it, since hinge styles can vary by brand and model.
- Work gloves for a safe grip
- Clean towel or padded surface
- Flashlight or headlamp
- Appliance manual
- Mild cleaner and soft cloth
- Small screwdriver, if your locking tabs need gentle movement
- Closed-toe shoes for foot protection
- Optional convenience item: a second person to help guide and balance the door
Step-by-Step Guide on How to Put an Oven Door Back On
Step 1 – Let the Oven Cool Completely
Start with a cooling oven before you touch the door, hinge arms, or oven frame. Even a slightly warm appliance can surprise you, especially near the lower edge where heat lingers. The metal may feel dull and smooth, but it can still hold enough warmth to hurt your hands.
Give the oven plenty of time to cool after use. Open nearby windows if the kitchen feels hot, and keep pets or children away from the work area.
If you are learning how to put an oven door back on for the first time, this step sets the tone. Slow, safe work matters more than speed.
Step 2 – Inspect the Hinges and Locking Tabs
Look closely at both hinge arms on the door. They should move evenly and point in the same direction. Many lift-off door models have locking tabs that hold the hinges open during removal and reinstallation.
Use a flashlight to check for bent metal, stuck parts, or food debris. The hinge arms may feel firm because they carry spring tension, so do not force them with your fingers. If one side looks different from the other, stop and compare it with the appliance manual.
Clean around the hinge area with a soft cloth. Grease, crumbs, or grit can make the door feel rough when you slide it back into place.

Step 3 – Position the Door at the Correct Angle
Stand in front of the oven with your feet steady and shoulder-width apart. Hold the door by both sides, not by the handle alone. The handle may feel natural, but it does not give you enough control over the weight and angle.
Tilt the door so the hinge arms point toward the hinge slots in the oven frame. On many models, the door sits at a partly open angle during reinstallation, often around the broil-stop position.
Move slowly and keep the glass panel facing you. The door should feel balanced in your hands, not twisted or leaning toward one side.
Step 4 – Line Up the Hinge Arms With the Hinge Slots
Guide each hinge arm toward its matching hinge slot. The metal-on-metal contact may make a light scraping sound, which is normal if you move gently. What you want to avoid is a hard jam or a sharp clank.
Check both sides at the same time. If one hinge enters before the other, pull back slightly and correct the angle. Uneven entry can cause poor door alignment or make the hinge receiver bind.
This is the point where how to put an oven door back on becomes more about feel than force. The parts should slide together with steady pressure.
Step 5 – Seat the Hinges Fully Into the Receivers
Once the hinge arms enter the slots, push the door inward until both hinges sit fully inside the hinge receivers. You may feel a small drop or click as the hinge settles into place. That feeling tells you the hinge has reached its seat.
Keep your grip firm while you do this. The door may shift as the spring tension transfers back into the frame. If it feels loose, uneven, or stuck, do not push harder.
Pull the door back out and inspect the hinge arms. A properly seated hinge should look even on both sides and should not sit halfway out of the slot.
Step 6 – Release the Locking Tabs
With the door supported, move the locking tabs back to their normal position. Some tabs flip down by hand, while others need a small screwdriver for gentle help. Use light pressure only, because these pieces can bend if you pry too hard.
Listen for a soft click or feel the tab settle flat against the hinge. Both locking tabs should match. If one remains raised, the door may not close smoothly.
When people search for how to put an oven door back on, this is the step they often miss. The hinges may look installed, but unlocked tabs can stop the door from working correctly.
Step 7 – Test the Door Movement Slowly
Open and close the door a few inches at a time. The movement should feel smooth and even. You should not hear grinding, popping, or a sudden snap from either hinge.
Watch the gap between the door and the oven frame. It should stay even from side to side. If the top corner sticks out or the bottom edge rubs, one hinge may not be fully seated.
Do not slam the door to test it. A gentle motion tells you more. Smooth closing depends on proper hinge position, spring balance, and an even door seal.
Step 8 – Check the Seal and Final Alignment
Close the door fully and inspect the door seal around the oven opening. The gasket should touch the frame evenly without folding, pinching, or leaving a visible gap. A poor seal can let heat escape and affect baking results.
Look across the front of the oven from a few steps back. The door should sit straight, with the handle level and the glass panel aligned with the control area or trim.
If everything looks right, wipe fingerprints from the glass and handle. Then open and close the door one more time. A quiet, steady close means the reinstallation was successful.
Common Mistakes When Reattaching an Oven Door
One common mistake is holding the oven door by the handle only. The handle may feel strong, but it does not give you enough control over the door’s weight. Always support both sides so the hinges stay even as you guide them into place.
Another mistake is forcing the hinge arms into the slots. If the parts do not line up, pressure can bend the hinge or damage the hinge receiver. Pull the door back, adjust the angle, and try again with slower movement.
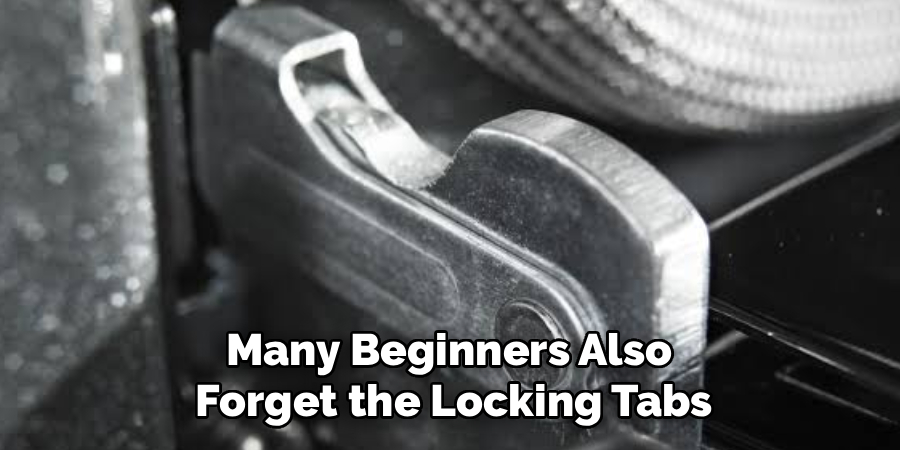
Many beginners also forget the locking tabs. These tabs help control spring tension and keep the hinges in the right position. If they stay in the wrong place, the door may not close fully or may feel unstable.
A fourth mistake is ignoring the door seal after installation. Even when the door seems attached, a folded gasket or uneven gap can affect heat control.
Finally, do not skip the appliance manual if the design looks unfamiliar. Some brands use slightly different hinge systems, and the correct method may depend on your model.
Expert Tips
Take a photo of the hinges before removing the door next time. A simple picture can show the correct hinge angle, tab position, and door orientation when you reinstall it later.
Work at a comfortable height and keep the floor clear. Oven doors are heavier than they look, and a cluttered area can make you twist your wrists or lose your balance.
If the hinge snaps shut while the door is off, do not fight it with bare hands. Spring tension can be strong. Use the manual’s instructions or call an appliance technician if the hinge will not reset safely.
After reinstallation, run a short low-heat test and check for heat leaks around the door.
Frequently Asked Questions
Why Won’t My Oven Door Slide Back Into Place?
The hinge arms may not be lined up with the hinge slots, or one locking tab may be in the wrong position. Pull the door away and inspect both sides. Make sure the hinges match each other and enter the oven frame at the same angle. If the door binds, stop before forcing it.
Is It Safe to Reattach an Oven Door by Myself?
You can often do it alone if the door is light enough and you can hold it with a steady grip. However, many oven doors are heavy because of the glass panel and metal frame. If you feel unsure, ask another person to help guide one side while you control the weight.
What Should I Do If a Hinge Snaps Shut?
Keep your fingers away from the hinge and do not try to force it open with your hands. Oven door hinges hold spring tension and can pinch hard. Check the appliance manual for the reset method. If the hinge feels stuck, bent, or unsafe, contact a qualified appliance repair technician.
How Do I Know the Door Is Installed Correctly?
The door should open and close smoothly without grinding, rubbing, or popping. The gaps around the oven frame should look even, and the door seal should touch the frame without folds. The handle should sit level. If the door feels loose or crooked, remove it and reseat the hinges.
Can a Bad Door Seal Affect Cooking?
Yes, a damaged or uneven door seal can let heat escape. That may cause longer cooking times, uneven baking, or extra heat around the front of the oven. After reattaching the door, inspect the gasket carefully. If it is torn, brittle, or flattened, replace it with the correct part.
Conclusion
Reattaching an oven door becomes much easier when you understand the basic parts and move with care. Start with a fully cool appliance, inspect the hinge arms, check the locking tabs, and hold the door with both hands. Then line up the hinges, seat them fully, release the tabs, and test the movement slowly.
The best results come from patience, not force. A properly installed door should feel stable, close smoothly, and seal evenly against the oven frame. If something feels crooked, stuck, or unsafe, pause and inspect the hinge system before trying again.
Now that you know how to put an oven door back on, you can handle cleaning, maintenance, and simple reinstallation with more confidence. Work slowly, protect the glass, respect the spring tension, and let the door guide you into the correct fit.

About
Nick Hall has spent the last seven years working at the intersection of kitchen design and home repair — first as a design assistant at a residential renovation studio, then as a freelance writer covering everything from cabinet layouts to leaky faucet fixes.
Her approach is simple: kitchens should look good and function well. That means she’s just as comfortable talking about color palettes and counter materials as she is walking readers through how to fix a wobbly cabinet hinge or troubleshoot a garbage disposal.
Nick has worked directly with homeowners on small-space kitchen makeovers, budget-conscious renovations, and the kind of everyday repairs that don’t need a contractor — just the right instructions. She writes from experience, not theory, and tests most of the fixes and tips she shares before publishing them.
When she’s not writing, Nick is usually hunting for mid-century kitchen finds at estate sales or helping friends plan their own renovations. She lives in Columbus, Ohio.