
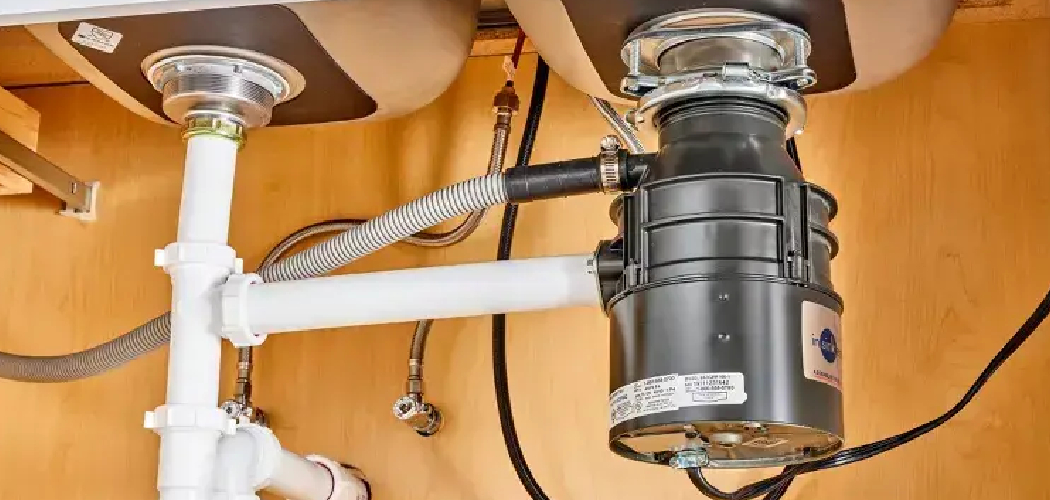
That collection of pipes under your sink can look like a puzzle when you first peer into the cabinet. A tailpiece here, a curved trap there, a few plastic nuts holding it all together. But here’s a secret most plumbers won’t tell you: connecting a kitchen sink drain is one of the friendliest DIY plumbing jobs you can take on.
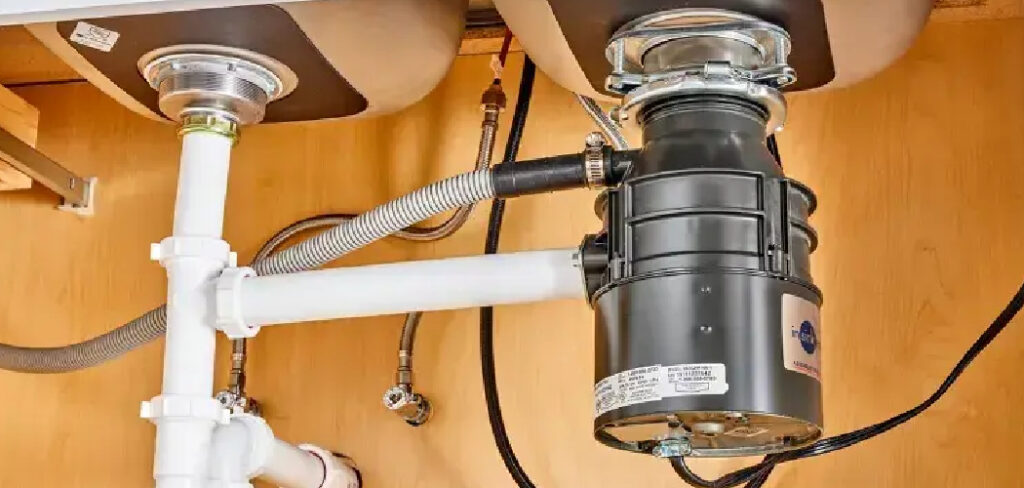
You don’t need special training or a truck full of tools. You need a bucket, a little patience, and a clear set of steps. Once you understand how the pieces fit, the whole assembly clicks into place in under an hour. Learning how to connect a kitchen sink drain saves you a service call and gives you real confidence with home repairs. This guide walks you through every connection, from the strainer to the wall drain, so you can finish with a leak-free result.
Why Learning to Connect a Kitchen Sink Drain Matters
A leaking or disconnected drain is more than an annoyance. It rots cabinet floors, breeds mildew, and wastes water with every slow drip. Knowing how to assemble it yourself means you fix small problems before they turn into expensive ones.
This skill travels with you, too. If you own an RV, the same slip-joint connections handle the galley sink. Setting up a cabin kitchen, an outdoor wash station, or a camp kitchen setup? You’ll reuse these exact techniques. Even a basement utility sink relies on the same tailpiece-and-trap logic.
Once you understand how wastewater moves from the basin to the wall drain, you can troubleshoot almost any sink. That knowledge frees you from waiting on a technician and pays you back every time something needs a quick fix.
Tools and Materials You’ll Need
Gather your supplies first so you’re not crawling out from under the cabinet halfway through. Most of these cost just a few dollars at any hardware store:
- Drain assembly kit – includes the tailpiece, P-trap, and slip-joint nuts
- Sink strainer or basket – seals the drain hole in the basin
- Plumber’s putty – creates a watertight seal under the strainer
- Channel-lock pliers – for that final snug turn on stubborn nuts
- Beveled washers – ensure tight, angled connections at each joint
- A small bucket – catches leftover wastewater during the work
- Old towels or rags – for spills and wiping threads clean
- A flashlight or headlamp – lights up the dark cabinet corners
- Optional: a basin wrench – makes tight overhead nuts far easier to reach
Lay everything out on a towel before you begin. A quick inventory now keeps frustration low later.
Step-by-Step Guide on How to Connect a Kitchen Sink Drain
Take your time with each connection and you’ll avoid the leaks that trip up beginners. The whole point of learning how to connect a kitchen sink drain is building a system that stays dry under daily use.
Step 1 – Clear the Cabinet and Set Up Your Space
Start by emptying everything from under the sink. Cleaning supplies, that random vase, the spare sponges. You need room to work and a clear view of the existing pipes.
Slide a bucket beneath the drain area to catch any water still sitting in the trap. Spread a towel down too, since old pipes often hold a surprising amount of stale wastewater. You’ll smell it the moment you loosen the first nut.
Aim your flashlight at the wall drain stub-out and trace where the pipes connect. Getting familiar with the layout now saves confusion later. Take a quick photo with your phone if the old setup looks correct, so you have a reference for how the new drain assembly should sit.
Step 2 – Install the Sink Strainer
The strainer seals the drain hole in your basin, so it has to sit tight. Roll a rope of plumber’s putty between your palms until it’s about pencil-thick, then press it around the underside lip of the strainer.
Push the strainer down into the drain opening from above. You’ll feel the putty squish out slightly, which means you have a good seal. Wipe away the excess ring of putty with your finger.
From below, slide on the rubber gasket and friction washer, then thread the large locknut up by hand. Tighten it with your pliers until the strainer feels solid and won’t spin. That snug grip is what stops slow leaks around the basin later.
Step 3 – Attach the Tailpiece
The tailpiece is the straight pipe that drops down from the strainer. It carries water from the basin into the rest of the drain line.
Place a beveled washer onto the top of the tailpiece, beveled edge facing up toward the strainer. Slide the slip joint nut on first, then bring the tailpiece up to meet the strainer threads underneath.
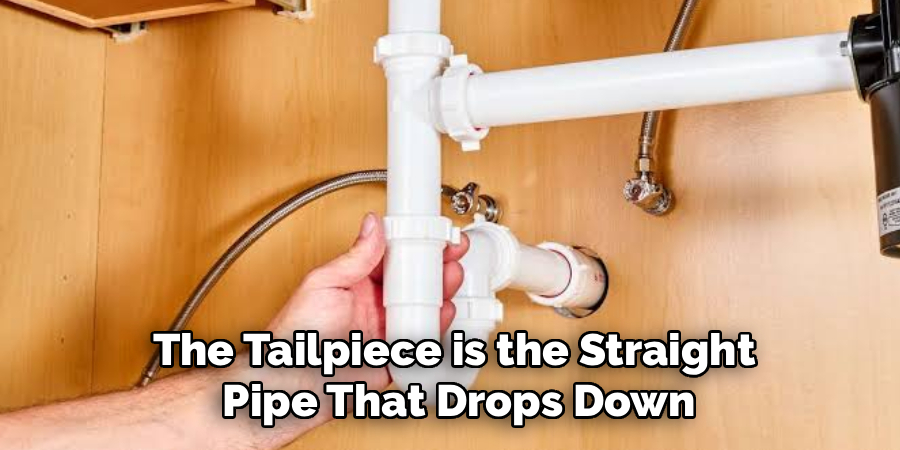
Thread that slip nut on by hand, turning clockwise until it catches. Hand-tighten it firmly, then add just a quarter turn with your pliers. Don’t crank it hard; plastic threads strip easily under too much force. Give the tailpiece a gentle wiggle. It should feel secure but still let you adjust the angle for the next connection.
Step 4 – Position the P-Trap
The P-trap is that curved bend holding a small pool of water to block sewer gas from rising into your kitchen. It’s the heart of the whole drain assembly.
Slide a slip joint nut and a beveled washer onto the bottom of the tailpiece. Then lift the trap bend up so its opening surrounds the tailpiece. The curved section should hang down like the letter J.
Hand-thread the slip nut onto the trap connection, keeping everything loose for now. You want wiggle room to line up the next piece. Look at the angle; the horizontal end of the trap should point toward the wall drain. A little patience here makes the final alignment far smoother.
Step 5 – Connect the Trap Arm to the Wall Drain
The trap arm is the straight pipe that links your P-trap to the drain stub-out in the wall. This connection sends wastewater out of your home.
Slip a nut and beveled washer onto the trap arm, then push the arm into the wall drain opening. Slide the other end into the horizontal port of the P-trap. You may need to twist and adjust until both ends seat properly.
Check that the trap arm slopes slightly downward toward the wall, never uphill. That gentle slope lets gravity carry water away cleanly. Once the alignment looks right, hand-thread the slip nuts at both ends. Keep them snug but adjustable, since you’ll fine-tune everything before the final tightening.
Step 6 – Align and Hand-Tighten Every Joint
Now step back and look at the whole assembly. Every nut should be threaded but only hand-tight at this point. This is your chance to square up the connections before you lock them in.
Gently shift each pipe so the joints sit straight and the washers seat evenly inside the nuts. Crooked joints are the number one cause of drips, so take a moment to nudge things into clean alignment.
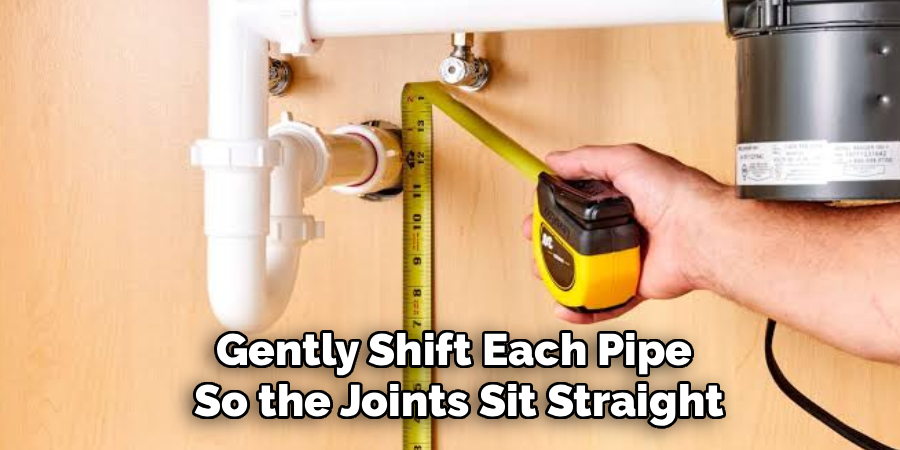
Run your fingers along each connection. The slip joints should meet flush with no gaps or angled pinching. When everything lines up neatly, go around and hand-tighten each slip joint nut as firm as your grip allows. A well-aligned drain practically seals itself before the pliers ever touch it.
Step 7 – Final Tightening with Pliers
With everything aligned and hand-tight, give each connection that final snug turn. Wrap your channel-lock pliers around each slip nut and add roughly a quarter turn past hand-tight.
Resist the urge to muscle them down. Plastic slip nuts only need gentle firmness, and over-tightening cracks the threads or crushes the washers. You’ll feel the right tension: solid, with no further easy movement.
Work your way around methodically, from the strainer locknut down to the wall drain connection. Don’t skip any joint. Each one is a potential leak point if left loose. Once every nut feels secure, wipe the connections dry with a rag so you can spot any moisture clearly during the leak test ahead.
Step 8 – Run a Leak Test
Here’s the moment of truth. Place your dry hand or a fresh paper towel under each joint, then turn on the faucet and let water flow through the new drain line.
Watch and feel for any beading water, slow drips, or damp spots around the slip nuts. Fill the basin halfway, then pull the strainer plug to send a strong rush of wastewater through the trap. This tests the joints under real pressure.
If you spot a drip, dry the area and snug that specific nut another small turn. Recheck after each adjustment. A truly leak-free drain stays bone-dry through several full basins of water. Once everything passes, you’ve successfully completed the connection.
Critical Mistakes When Connecting a Kitchen Sink Drain
Even careful beginners stumble on a few predictable errors, and knowing them ahead of time keeps you dry. The most common mistake is over-tightening the slip joint nuts. People assume tighter means safer, but plastic threads strip and washers crack under heavy force. Hand-tight plus a gentle quarter turn is all you need, and forcing more often causes the very leaks you’re trying to prevent.
Another frequent slip-up is poor alignment. When pipes meet at a slight angle, the beveled washers can’t seat evenly, leaving a tiny gap that drips with every use. Always square up the joints loosely first, then tighten once everything sits straight.
Forgetting the plumber’s putty under the strainer is another classic. Without that seal, water sneaks around the drain opening and pools under the basin unnoticed for weeks. A thin, even rope of putty prevents it entirely.
Many folks also install the trap arm sloping upward, which traps water and slows drainage to a sluggish gurgle. Keep that gentle downward pitch toward the wall. Finally, skipping the leak test leaves problems hidden until water has already damaged your cabinet. Always run water and check every joint before calling the job done.
Expert Tips
Want professional-level results? Keep these habits in mind as you work. Always dry-fit the entire drain assembly before adding putty or fully tightening anything. Seeing how the pieces line up first prevents awkward surprises later.
Buy a complete kit rather than mismatched parts. The tailpiece, trap, and nuts are designed to fit together, which saves you trips back to the store. Keep one or two spare beveled washers on hand, too, since they’re cheap and easy to lose down the drain.
If a nut won’t budge during removal, wrap a rag around it for grip and protection. And when adjusting overhead connections, a basin wrench reaches the tight spots your hands can’t. Finally, snap a photo of the finished setup. It becomes a handy reference if anything ever needs attention down the road.
Frequently Asked Questions
Do I really need plumber’s putty for the strainer?
Yes, in most cases you do. Plumber’s putty creates the watertight seal between the sink strainer and the basin, stopping water from leaking around the drain opening. Some modern strainers come with a rubber gasket instead, which works well too. If yours includes a gasket, you can skip the putty. When in doubt, a thin rope of putty offers reliable, mess-free protection.
Why does my new drain still leak after tightening?
A persistent leak usually points to one of these issues:
- Misaligned joints that keep the washer from seating evenly
- A pinched or twisted washer inside a slip nut
- Over-tightening that cracked the plastic threads
Loosen the leaking connection, check that the washer sits flat and the pipes line up straight, then hand-tighten and add a gentle quarter turn. Recheck under running water.
Can I reuse the old P-trap and washers?
You can reuse a P-trap if it’s clean and crack-free, but replacing the washers is smart. Old washers harden and lose their flexible seal over time, which leads to slow drips you’ll struggle to fix. Washers cost just a few cents, so swapping them during any drain project is an easy insurance policy. When in doubt, start fresh with new parts.
How tight should the slip joint nuts be?
Slip joint nuts should be hand-tight plus about a quarter turn with pliers. That’s it. These plastic nuts seal through compression of the beveled washer, not brute force. Cranking them hard strips the threads or crushes the washer, which actually causes leaks. You want firm and secure, with no easy further movement, but never knuckle-whitening tight.
What if my pipes don’t line up with the wall drain?
Misalignment is common, especially after a sink swap. You can buy a flexible or extendable trap arm, or use an extension tube to bridge the gap. Trim plastic pipes with a hacksaw for a custom fit if needed. Just keep that slight downward slope toward the wall so wastewater drains freely. Dry-fit everything before tightening to confirm a clean, even path.
Conclusion
You’ve just walked through every connection, from sealing the strainer to passing a clean leak test. The job really comes down to a handful of friendly habits: dry-fit first, align your joints carefully, hand-tighten before reaching for pliers, and never over-crank those plastic nuts.
Remember the small details that make the biggest difference. A proper rope of plumber’s putty under the strainer, fresh beveled washers at each slip joint, and a gentle downward slope on your trap arm. Run plenty of water through before you trust the job, and you’ll catch any drip while it’s still an easy fix.
Knowing how to connect a kitchen sink drain puts real control back in your hands. You’ll save money, skip the wait for a technician, and gain a skill you can reuse on RV sinks, utility basins, and outdoor setups for years to come. So clear out that cabinet, lay down a towel, and tackle it with confidence. Your leak-free drain is closer than you think, and the satisfaction of doing it yourself is well worth the effort.

About
Nick Hall has spent the last seven years working at the intersection of kitchen design and home repair — first as a design assistant at a residential renovation studio, then as a freelance writer covering everything from cabinet layouts to leaky faucet fixes.
Her approach is simple: kitchens should look good and function well. That means she’s just as comfortable talking about color palettes and counter materials as she is walking readers through how to fix a wobbly cabinet hinge or troubleshoot a garbage disposal.
Nick has worked directly with homeowners on small-space kitchen makeovers, budget-conscious renovations, and the kind of everyday repairs that don’t need a contractor — just the right instructions. She writes from experience, not theory, and tests most of the fixes and tips she shares before publishing them.
When she’s not writing, Nick is usually hunting for mid-century kitchen finds at estate sales or helping friends plan their own renovations. She lives in Columbus, Ohio.